Orchid Care and Repotting

PDF Version


Phalaenopsis, or moth orchids are an ideal houseplant for beginning orchid growers. In their natural environment, they grow high in the trees above the soil, and collect all their nutrients from the humid, tropical air, the rain, and the debris that lands around the plant. This manner of growth is referred to as epiphytic. The leaves of Phalaenopsis grow from a center grouping that sends roots out from just below the leaf axis.

Phalaenopsis orchid
Phalaenopsis orchid growing in the Bahamas and a cultured specimen. (S. Pelton images)

Containers

Phalaenopsis orchids prefer a porous pot such as unfinished terracotta that would provide for some air flow. Some decorative orchid pots have holes incorporated into their sides for the roots to access more air. Water these plants and pots over a sink as water will readily run out.

Two images of planting orchids

Potting Media

Use a specially formulated orchid bark mix for potting. The mix should contain bark, perlite and horticultural charcoal. Old bark deteriorates over a two-year period and should be refreshed annually when repotting to keep the plants strong.

New orchids are often sold with roots packed in sphagnum moss to keep them moist during the shipping and retail portion of their life. Orchid roots like air and will rot if kept soggy and wet. Once home, plants should be carefully removed from pots and plastic liners along with any moss (image 1). Cut back any rotted or dead roots and follow the repotting instructions below.

Two images of planting orchids

Moth orchids can outgrow their pots in about a year’s time as their wandering roots reach outside and above the edge of the containers. Mature plants usually flower from late winter into spring and their blossoms can last for several months. Repotting is best done right after flowering.

Repotting

  • Remove the plant from its current container including any plastic liner (image 2 above).
  • Remove any moss (image 3 above).
  • Cut back any dead or rotted roots (images 4 & 5 below).
  • Fill the pots half full of bark mix, then set the trimmed root ball onto the bark, spreading out the roots carefully (image 6).
  • Insert a plant stake or chopstick through the bark mix, next to the plant to help anchor the orchid.
  • Gently add more bark mix over the roots to within 1/2 inch of the top edge of the pot.
  • Fill a large cooking pot or bowl with tepid water.
  • Immerse the entire pot containing the bark and plant into the water to soak the bark for about 20 minutes.
  • Lift the terracotta pot containing the plant out of the water and let it drain in the sink.
  • If settling occurs, add more bark.
  • Holes in pots are a must for good drainage.

Three images of planting orchids

Light Requirements

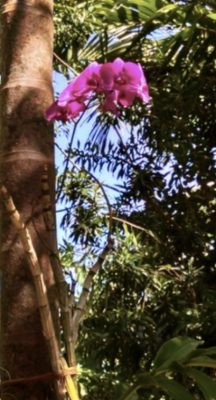
In the wild orchids would be shaded by the tree canopy so moth orchids should be placed in bright but indirect light, preferably from an east window. Use a sheer curtain in front of south or west facing windows to diffuse the sunlight. Move the plant out of the direct rays of sun to avoid leaf scorch which will present itself as red-tinged leaves.

Humidity, Temperature, and Watering

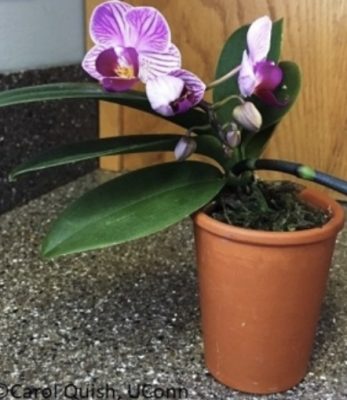
Orchids thrive in locations with high humidity and where temperatures hover around 75°F with a slight drop at night. In the fall, reduced daylight and night temperatures of 55°F will initiate flower bud formation. Large fluctuations in temperature can cause flower buds to fall off prematurely. To provide more humidity, mist with clear water in the morning or set potted plant on a tray of pebbles and shallow water. Do not allow the pot to sit directly in the water. The water will make a cone of evaporation surrounding the plant. Orchids should never be allowed to completely dry out. Keep the bark potting mix moist by soaking and draining weekly or water just the bark mix from above. Do not allow water to sit where the leaves form the crown.

Fertilization

Fertilize every two weeks during spring, summer and fall with a high nitrogen houseplant fertilizer (30-10-10) if the orchid is potted in a bark medium. Switch to a half-strength solution of a high-phosphorus fertilizer (10-30-20) during the winter to promote blooms. Plants that are potted in moss should receive a balanced fertilizer (10-10-10).
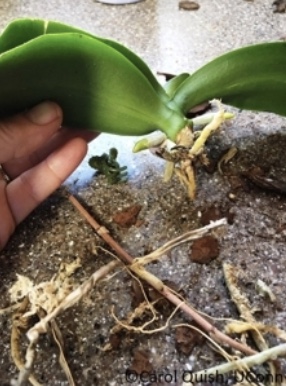
Post-bloom

Once the moth orchid finishes blooming it should be pruned. Cut the flower spike at the first node just below the bottom bloom (image 7). It can also be pruned down to the leaf level but it will take longer to send up a new stem. New flowers are generally produced in 6-9 weeks. Low light levels will prevent an orchid from reblooming.

Orchid post bloom

Diseases and Pests

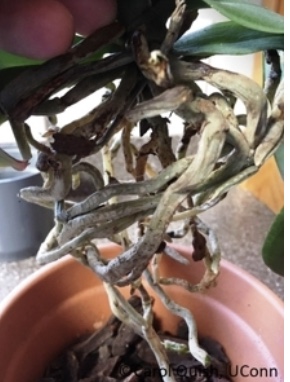
Root, stem, and leaf rots from poorly-drained planting media and over-watering are common issues for orchids. Following watering recommendations, especially allowing plants to drain properly, is very important. Do not fertilize diseased plants.
Spider mites can be an issue in a home environment.

Despite good cultural practices, pests and diseases at times may appear. Chemical control should be used only after all other methods have failed. For pesticide information or other questions please call toll free: 877-486-6271.
UConn Home and Garden Education Center, 2019