By Marie Woodward, UConn Home & Garden Education Center
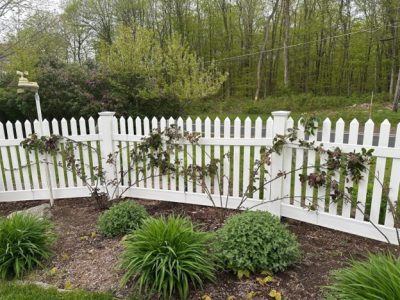
Climbing and rambling roses are a beautiful addition to any garden, adding height and depth to your outdoor space. These types of roses require proper training and tying to ensure that they grow in the desired direction, produce the most blooms and don’t become tangled or unruly. Follow this guide on how to tie climbing and rambling roses to get the best results.
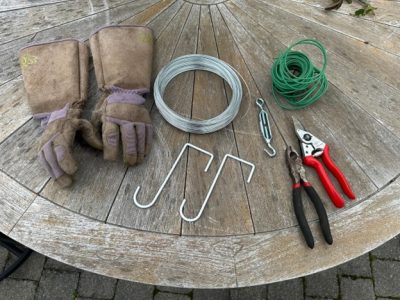
For materials, one would need some twine or soft plant ties, a sharp pair of pruning shears, sturdy long-sleeved, thorn resistant garden gloves. Also, some wire and tools to secure to a trellis, fence or other structure may be necessary.
Climbing roses have two types of canes. Main canes are stems that originate from the base of the rose giving it its structure and support. They are also referred to as leaders. Lateral canes originate from the main cane. It is the lateral canes that produce the flowers and add volume to the shrub. In general, main canes are not pruned unless they are diseased or dead.
Before you start attaching the plant to a trellis, make sure that your rose is properly pruned. Removing any dead or diseased canes will encourage healthy growth. Cut back any wild or overly long shoots to create a manageable framework for tying. Starting with this step will allow for more control as you move through the process of tying.
Supportive wiring, better known as strain wires, helps to promote flowering. They hold the main canes at a 45–90-degree angle. These angles encourage lateral canes to flush and produce more abundant flowers.
If you're training your roses against a wall or fence, attach the horizontal strain wires to the structure, spacing them about 12-18 inches apart vertically and 5 feet apart horizontally.
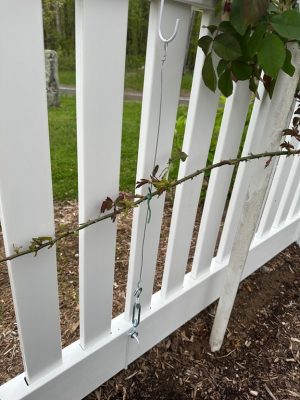
If you have a vinyl fence you can use vinyl safe hooks and secure the wire with a turnbuckle vertically, spacing them about two feet apart to avoid drilling holes in the vinyl material.
Using twine or soft plant ties, attach the rose canes to the support structure at regular intervals, starting about 1.5 feet from the ground. Tie them securely but not too tightly You want to allow room for the canes to grow and expand. Avoid fishing lines or other rigid materials. Using the wrong ties or tying too tightly could lead to cane injury.
As the roses push new growth, continue to tie the new main canes to the support structure. Continue to guide them in the desired direction, with those 45–90-degree angles as a guide.
Regularly check your roses and adjust the ties as needed. Ensure that they remain secure but not too tight. Prune any wild or unruly shoots and remove any dead or diseased wood to keep your roses healthy and under control.
By following these steps and regularly maintaining your climbing rose, you’ll create a stunning vertical display that adds beauty and depth to your garden. While this guide provides good tips on for starting and maintaining younger climbing roses, older roses that have been neglected may need restorative measures. If you need more information on climbing roses or any other gardening questions, feel free to contact us, toll-free, at the UConn Home & Garden Education Center at (877) 486-6271, visit our website at www.homegarden.cahnr.uconn.edu