2026
Tree Burls
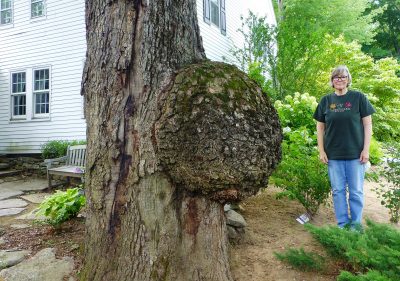
Burls are sound, hard, woody swellings or protrusions that form on the trunks, branches, or roots of trees. They often appear as rounded or ridged masses with normal bark tissue. Burls are benign and are the result of a response in growth to outside stresses. The normal bark texture of the tree will be on the exterior surface of the burl.
The exact cause of burl formation is a mystery, but these growths are formed by abnormal cell proliferation by the xylem. This growth can be triggered by stress factors such as environmental injury, insect feeding damage, or infections from fungal or bacterial pathogens. Some are thought to be the result of genetic factors that trigger abnormal growth without outside influences. Most burls are not causes of concern to the health of otherwise normally growing trees. Removal of burls from trees is not recommended as it will cause more harm than if the burl remains on the tree.
Some tree species seem to have more burls than others. In our area oaks, maples, willows, cherry and elms have more of a tendency to form burls than other tree species. Sometimes small groups of the same tree species in a tight area may all have burls. Whether the cause is environmental, genetic or both would require a good amount of research. Even then, the root cause may be impossible to discover.
Recently, a friend showed me a tree with one of the largest burls I have seen. This tree was located about a mile into the woods and was a good distance from the trail, but easily visible. It was almost five feet high and went almost completely around the trunk of the mature tree it was growing on.
Because of the nature of unique formation and structure of burls, grain formation is unusual, creating swirling patterns that can be very beautiful. A bird’s eye pattern is the result of an aborted adventitious bud. This makes wood galls a highly prized find by woodworkers, who use the wood especially for veneers and bowls.
There are woody galls caused by gall- forming mites, wasps or by fungal pathogens that are sometimes mistaken for burls. These include the black knot galls that form on infected black cherry and other Prunus species and are caused by a fungal pathogen, as well as horned galls on oaks that result from feeding by gall wasps. These types of growths can be harmful to the host tree.
To tell if an abnormal growth on a tree is a burl or a gall, compare the outer surface and texture of the growth. Burls have smooth, rounded surfaces that are fully covered in bark. The tissue is solid wood and will have intricate, swirling grain patterns. Galls typically have a rough texture to their surface, somewhat tumor-like and with vertical or horizontal ridges. The interior is not solid wood, but instead may be papery, pulpy or otherwise somewhat softer than the wood and is usually discolored. If cut open, there may be a wasp larva or a mite inside the gall. While both a gall and a burl result from excessive cell division, the causes are very different.
If you want to learn more, a good article on tree burls can be found on this link from the University of New Hampshire written by forestry field specialist Greg Jordan.
The UConn Home Garden Education Office supports UConn Extension’s mission by providing answers you can trust with research-based information and resources. For gardening questions, contact us toll-free at (877) 486-6271, visit our website at homegarden.cahnr.uconn.edu, or reach out to your local UConn Extension center at extension.uconn.edu/locations.
Something Rotten in Tomato Land?
With the lazy, hazy days of summer in full swing, your vegetable garden is likely in full production mode. Tomatoes should be producing lots of blossoms by now with the earlier varieties offering ripening fruit. While it is true that tomatoes can be challenging to grow in New England, being susceptible to several diseases as well as some abiotic disorders, there are few summer pleasures greater than taking that bite of the first, ripe, sun-kissed tomato. That’s most likely the reason that 86% of food gardeners, according to the National Gardening Association, chose to grow them.
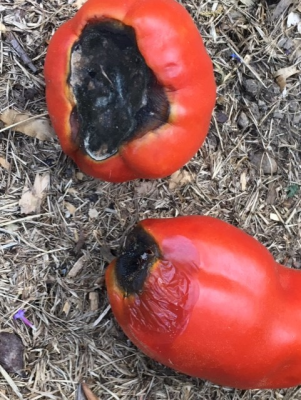 Between summer heat, sporadic rainfall, vacations and inconsistent watering, some of us are noticing black sunken patches on the blossom end (bottoms) of our ripening fruit. This is an abiotic or physiological disorder known as blossom end rot. It starts out with a small water-soaked area that enlarges and darkens as the tomato tries to ripen. The affected tissue has a dark, leathery appearance and may be colonized by a bacteria giving it a black color.
The cause of this disorder is lack of calcium. Most of us know that people require calcium for strong bones and healthy teeth. Plants also have calcium requirements that must be met for good growth and establishment. It is needed for the proper growth and functioning of shoot and root tips and is an integral part of cell walls. As your tomatoes grow in size, more cells with more cell walls are needed.
Plants take up the calcium they need through their roots. Nutrients like calcium, potassium and others are dissolved in the water that is in the soil. When a plant loses moisture on a hot day through the process of transpiration, the roots take up water to replace that loss and keep the plant turgid. The soil water contains nutrients the plants need. Anything that restricts the plant roots’ ability to take up water also reduces the amount of nutrients a plant receives.
Blossom end rot is usually caused by one of two factors. Either there is not enough calcium in the soil or there is not enough water in the soil for the calcium to be able to move into the plant. Sometimes, because of the high humidity, factor number three comes into play. Plants are not transpiring that much because of the high humidity. Since little water is being lost through the leaves, little water (containing calcium and other nutrients as well) is being absorbed by the roots. So even if your soil is loaded with calcium, and your garden is irrigated, plants may not able to transport enough calcium from the soil water into their internal structures.
If blossom end rot is noticed, first take a soil sample and send it to a soil testing laboratory (s.uconn.edu/soil-lab) to determine the soil pH and calcium levels. Often if calcium levels in the soil are too low, plants would also be exhibiting signs of deficiency including stunted growth, curling of leaves and perhaps spotting or scorching on leaves. Follow any recommendations for limestone additions if the pH or calcium levels are too low.
Next, evaluate your watering techniques. Often this disorder occurs when succulent, vigorously growing plants are subjected to drought conditions. It is best to water deeply and less often than to water lightly on a daily basis. After watering, dig a small hole to check if the top 6 inches or so of soil are moistened. Adjust your watering schedule accordingly and if at all possible, just apply water to the base of the plant and avoid getting the foliage wet to discourage diseases. There isn’t much one can do to lower the humidity and increase plant transpiration rates except hope for a bout of dry weather.
To thwart blossom end rot, some gardeners are purchasing blossom set sprays containing calcium to apply to their plants’ foliage. Others are fertilizing and spraying the plant’s foliage with calcium chloride, as directed on the package or making up a calcium solution by mixing gypsum or limestone with water and letting it sit overnight. After 24 hours or so, it can be used to drench the plants and soil. Gypsum can also be applied around the plants at a rate of about 5 pounds per 100 square feet and carefully scratched into the soil. Take care not to injure your tomato plant’s roots and water afterwards. Another option is to search out water soluble fertilizers that contain calcium and can also be used as a foliar spray and apply them to the plant’s leaves.
The UConn Home Garden Education Office supports UConn Extension’s mission by providing answers you can trust with research-based information and resources. For gardening questions, contact us toll-free at (877) 486-6271, visit our website at homegarden.cahnr.uconn.edu, or reach out to your local UConn Extension office at extension.uconn.edu/locations.
Water your CT Garden with Confidence
Watering is an essential skill for gardeners that is often overlooked. “How often should I water and how much?” is a frequent question with new gardens or when establishing new plants.
There’s no magic formula for watering your plants. The soil texture, local climate, and even the metabolism of your plants can affect how often water needs to be replenished. So how do we know what to do? Over time, experienced gardeners form a sense of their soil and their plant’s needs, and perfect their watering practices.
 What plants really need
Most established garden plants require about 1 inch of water per week from rainfall and irrigation combined. When mother nature doesn’t provide this through rainfall, we can supplement by adding about 0.62 gallons of water per square foot in a garden bed. However, actual needs vary with soil type, weather conditions, plant species, and stage of growth.
Knowing your soil texture can help you anticipate what your watering schedule might look like. Sandy soils are known for rapid drainage, which often means they require more frequent watering. Clay soils, on the other hand, hold water for longer periods and generally need less frequent irrigation. Plants also have preferences for different soil types, many of which are related to water availability and drainage. Choosing the right plant for the right site can help ensure it receives adequate moisture.
A plant's water demand may vary depending on its stage of growth. For example, we tend to encourage additional support for plants that are fruiting/flowering, or plants that have just recently been transplanted. Keep a close eye on these plants and their water needs during stressful periods. Newly planted trees, shrubs and perennials need this additional monitoring and support through their first year of establishment in the landscape. You may find that you’re watering them more frequently during this time. This can be totally normal.
Sometimes, soil can appear dark even when it hasn’t been watered, so don’t rely on appearances alone. Your hands are one of the most reliable tools for checking soil moisture. Dig a few inches below the surface and feel the soil. If it feels cool and slightly moist, watering can likely wait. If it feels dry and crumbly, it's time to water. If the soil feels saturated or releases water when squeezed, allow it to dry somewhat before watering again.
Water Deeply
Giving your plants a good soak does more than just help them in the short term. Deep watering provides a slow, thorough soak that reaches the plant’s root zone rather than just the soil surface. This encourages deeper root growth and can improve drought tolerance, often allowing for less frequent watering. For most vegetables and perennials, water should reach at least 6–12 inches into the soil. Trees and shrubs may benefit from moisture penetrating even deeper into the root zone.
Apply water slowly at the dripline so it soaks in without pooling or running off. Use a soaker hose, or a regular hose on a slow trickle over the root zone of your plants. Avoid high-flow sprinklers, since they may cause runoff. Keep in mind that water movement depends on soil type.
Check the soil every so often to ensure that water is penetrating deep enough and set a timer for yourself. After a few watering cycles, you will become familiar with the timing and flow rate for your specific soil and plants.
Stay Consistent
Don’t automatically change your watering habits just because the temperature changes. Hot weather can increase water demand, but it is essential to always check the soil first. During periods of heat and drought stress, plants can close their stomata and reduce water use as a survival mechanism. While this may slow water uptake, plants still need adequate soil moisture. Overwatering, however, may not be helpful. Instead, roots can sit in saturated soil and develop diseases like root rot. Always check the top few inches of soil to ensure water is needed.
When weather starts to cool off in the fall, continue your watering practices. By watering until the ground freezes, you help your plants, survive the winter. The effects of winter burn can be reduced when evergreens enter the winter properly hydrated.
Watering is an essential task in the garden year-round. It is important to know your plants, your soil, and the climate you are growing in to ensure you are giving your plants enough hydration. By watering only when needed, watering deeply, and continuing these practices well into the fall, you will be sure to have healthy plants year round!
The UConn Home Garden Education Office supports UConn Extension’s mission by providing answers you can trust with research-based information and resources. For gardening questions, contact us toll-free at (877) 486-6271, visit our website at homegarden.cahnr.uconn.edu, or reach out to your local UConn Extension center at extension.uconn.edu/locations.
What’s Going Down with Your CT Basil This Summer?
Farming is Taking Flight: Drone Technology in CT

Agricultural drones are becoming more common in Connecticut and can support a wide range of farming activities. They can be used for tasks such as crop scouting and monitoring, field mapping, broadcasting seed, applying fertilizers, and precision pesticide application, where permitted and when conducted by properly licensed operators. One promising capability is the use of drones to seed cover crops.
Cover crops are plants grown to protect the soil and improve soil conditions, typically during periods where the soil would otherwise be bare, such as between cash crop growing seasons. They provide many environmental and agricultural benefits, including reducing soil erosion, capturing excess nutrients, suppressing weed growth, storing carbon in the soil, providing an additional source of livestock forage, and improving overall soil health. Planting cover crops early in the fall allows them more time to establish and grow, leading to greater ground cover and biomass production. These improvements help to maximize their benefits to the soil. In contrast, a late planting date, especially after the first fall frost, can reduce cover crop establishment, winter survival, and biomass production. Cover crops in silage corn systems are typically seeded after corn harvest using seed drills or other land-based equipment. However, in New England, silage corn harvest can extend to late October due to labor constraints, unfavorable soil conditions, and weather variability, which can substantially narrow the window for early cover crop establishment using these conventional drill-seeding methods.
Drones offer a potential alternative cover crop seeding method by enabling interseeding of cover crops, the practice of planting one crop into another crop before harvest. For example, a farmer could use a drone to broadcast cover crop seed in early fall over standing corn while it is still growing, allowing for several additional weeks of fall growth. This approach may extend the cover crop growing season without disrupting cash crop harvest. Drones can also access fields when wet soil conditions prevent ground equipment from operating after cash crop harvest, reducing compaction, and helping farmers take advantage of narrow planting windows.
Successful cover crop establishment using drones also depends on several other factors, including seed size, soil moisture conditions, and available sunlight beneath the corn canopy. Careful consideration of cover crop species selection and drone seeding timing will improve drone seeding success. Further research is needed to better understand how to optimize drone-based cover crop seeding across a range of field conditions and management practices.
While other broadcast seeding methods exist, they are often difficult to use or inaccessible in Connecticut field conditions, such as high-clearance tractor-mounted spreaders, fixed-wing aircrafts, and helicopters. Farmers indicate that it is difficult to seed cover crops into standing corn utilizing these other broadcast methods since Connecticut farmers often do not have high-clearance seeding equipment or the minimum required acreage for seeding by fixed-wing and rotary aircrafts. Farmers in Connecticut can avoid these difficulties with drone technologies, which are better suited for small field sizes.
As this technology continues to advance and adoption grows, it may play an important role in supporting sustainable farming and soil health across the state.
The UConn Home Garden Education Office supports UConn Extension’s mission by providing answers you can trust with research-based information and resources. For gardening questions, contact us toll-free at (877) 486-6271, visit our website at homegarden.cahnr.uconn.edu, or reach out to your local UConn Extension center at extension.uconn.edu/locations.
If Scindapsus is Wrong, I Don’t Want to Be Right
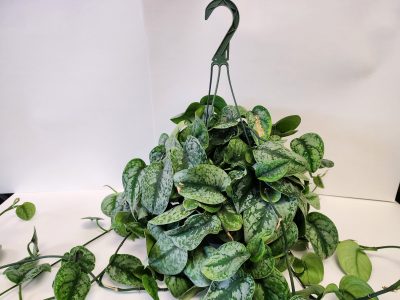
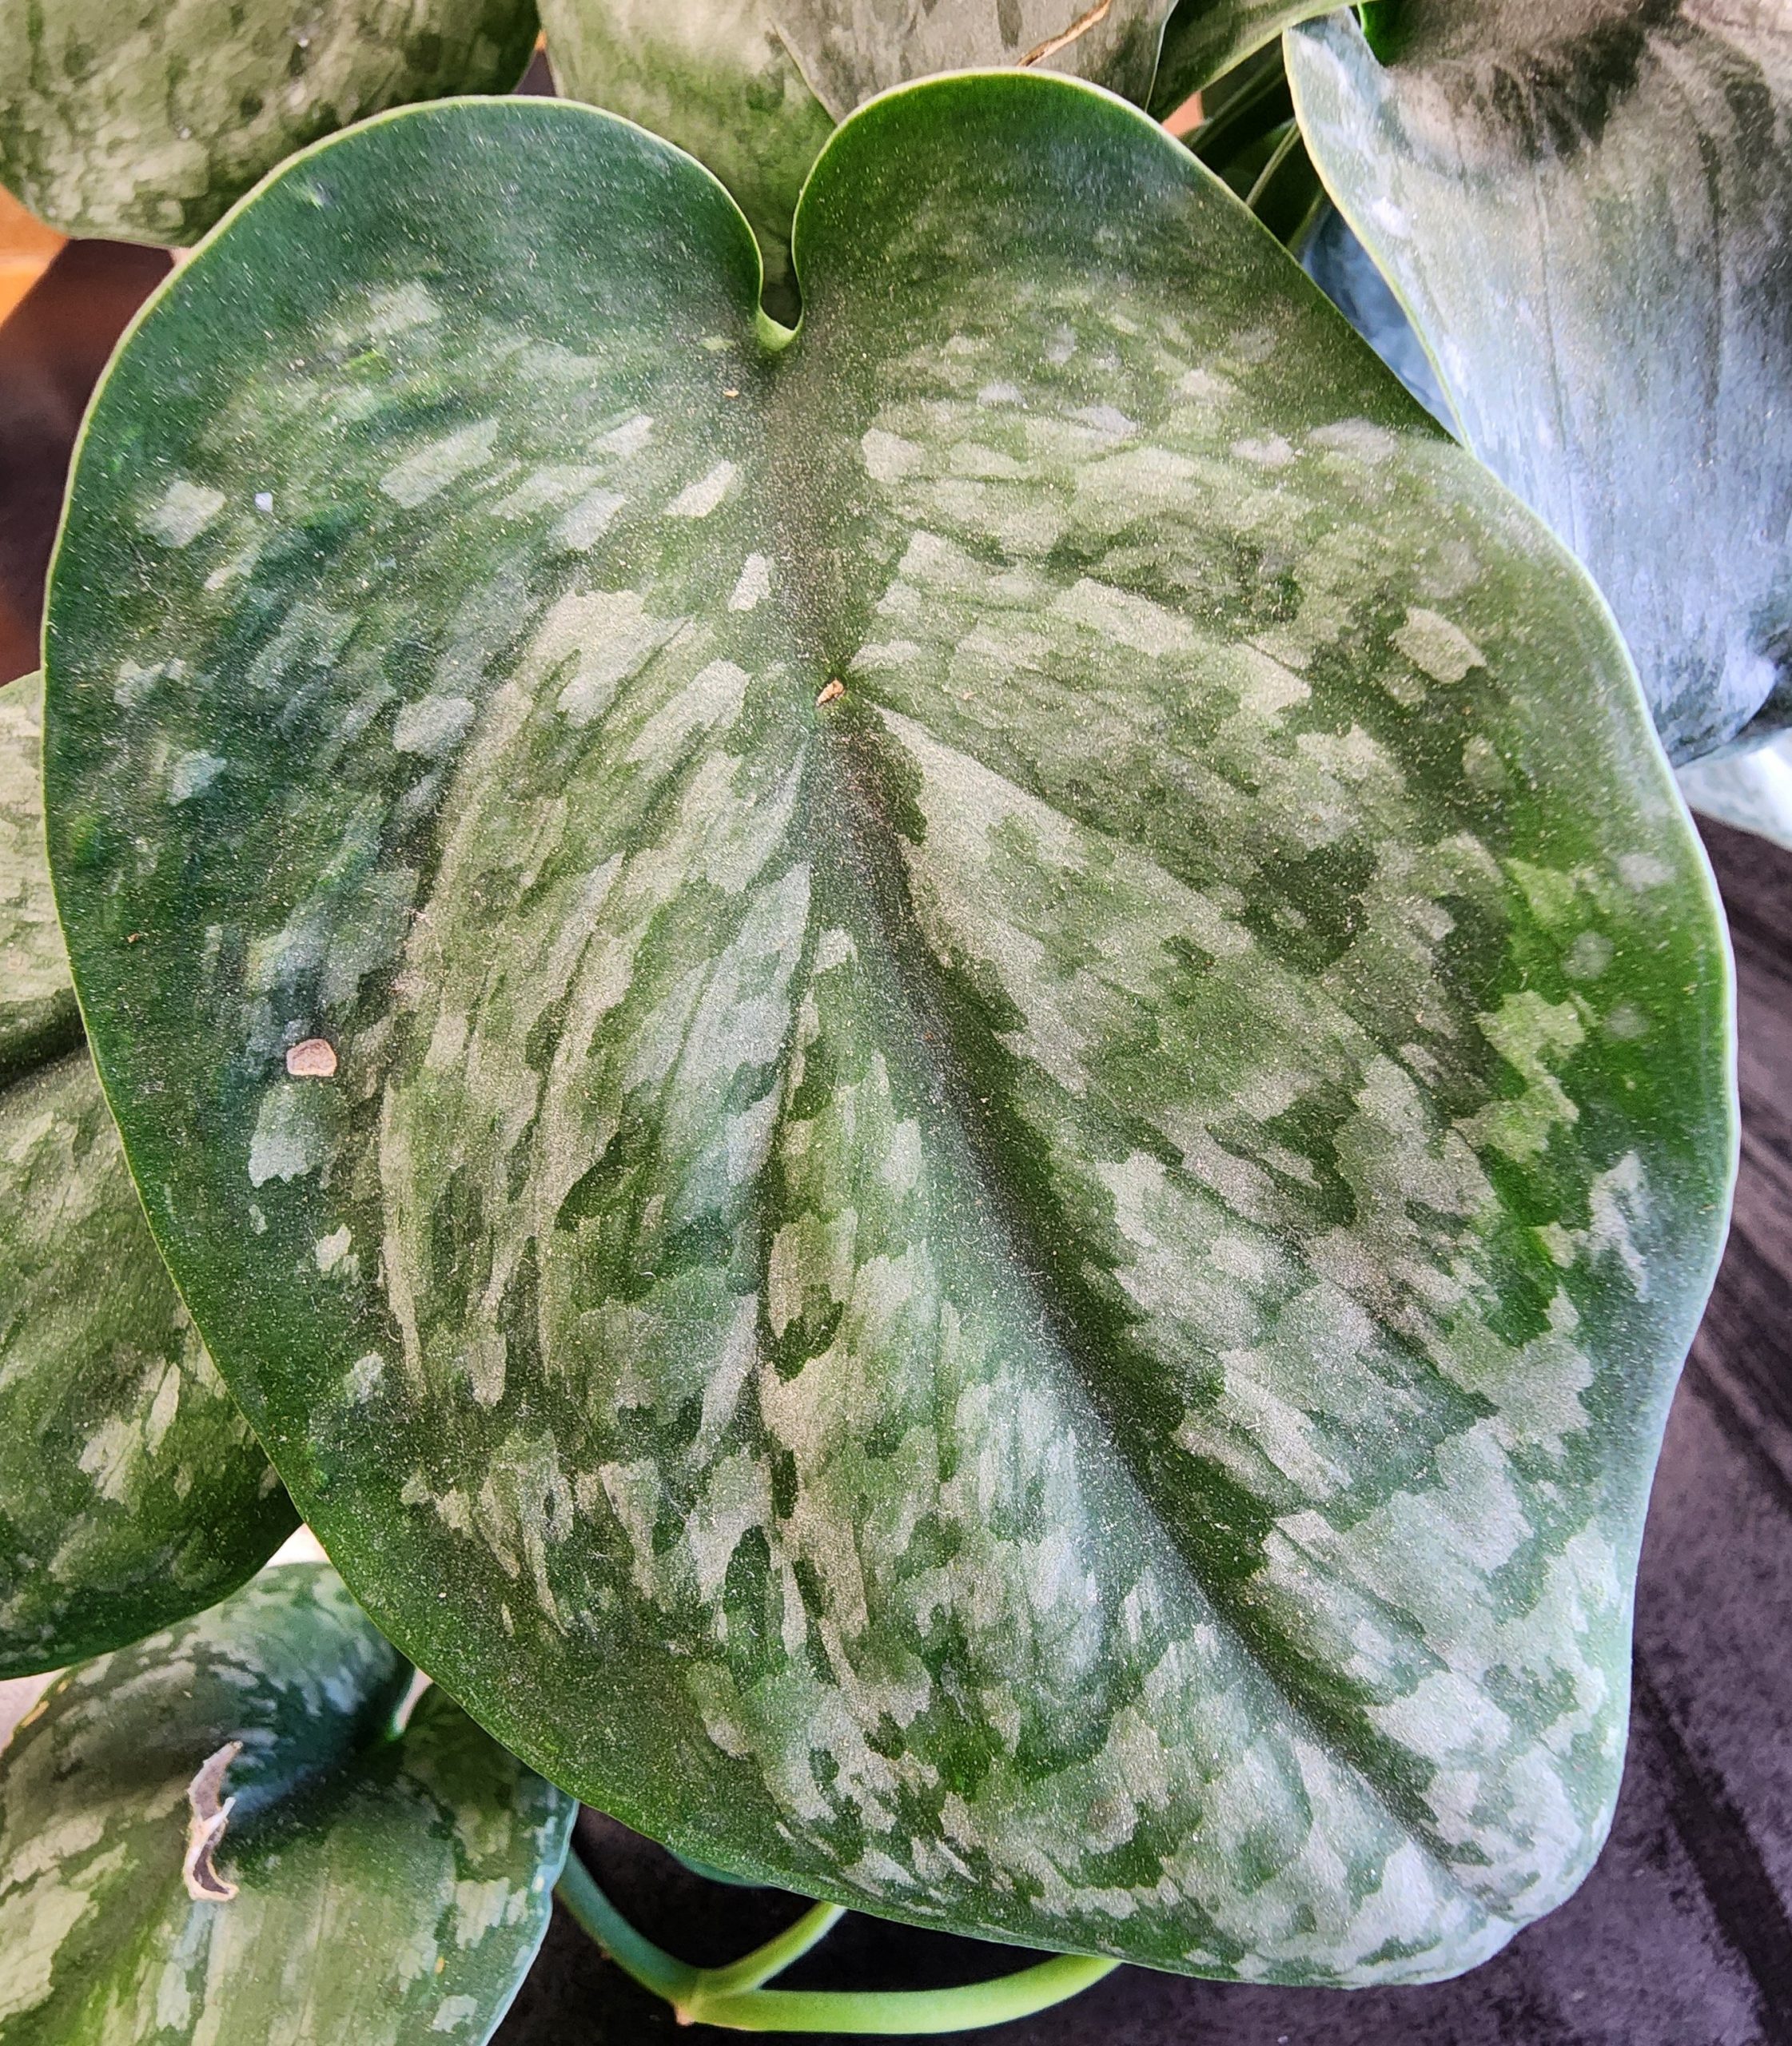
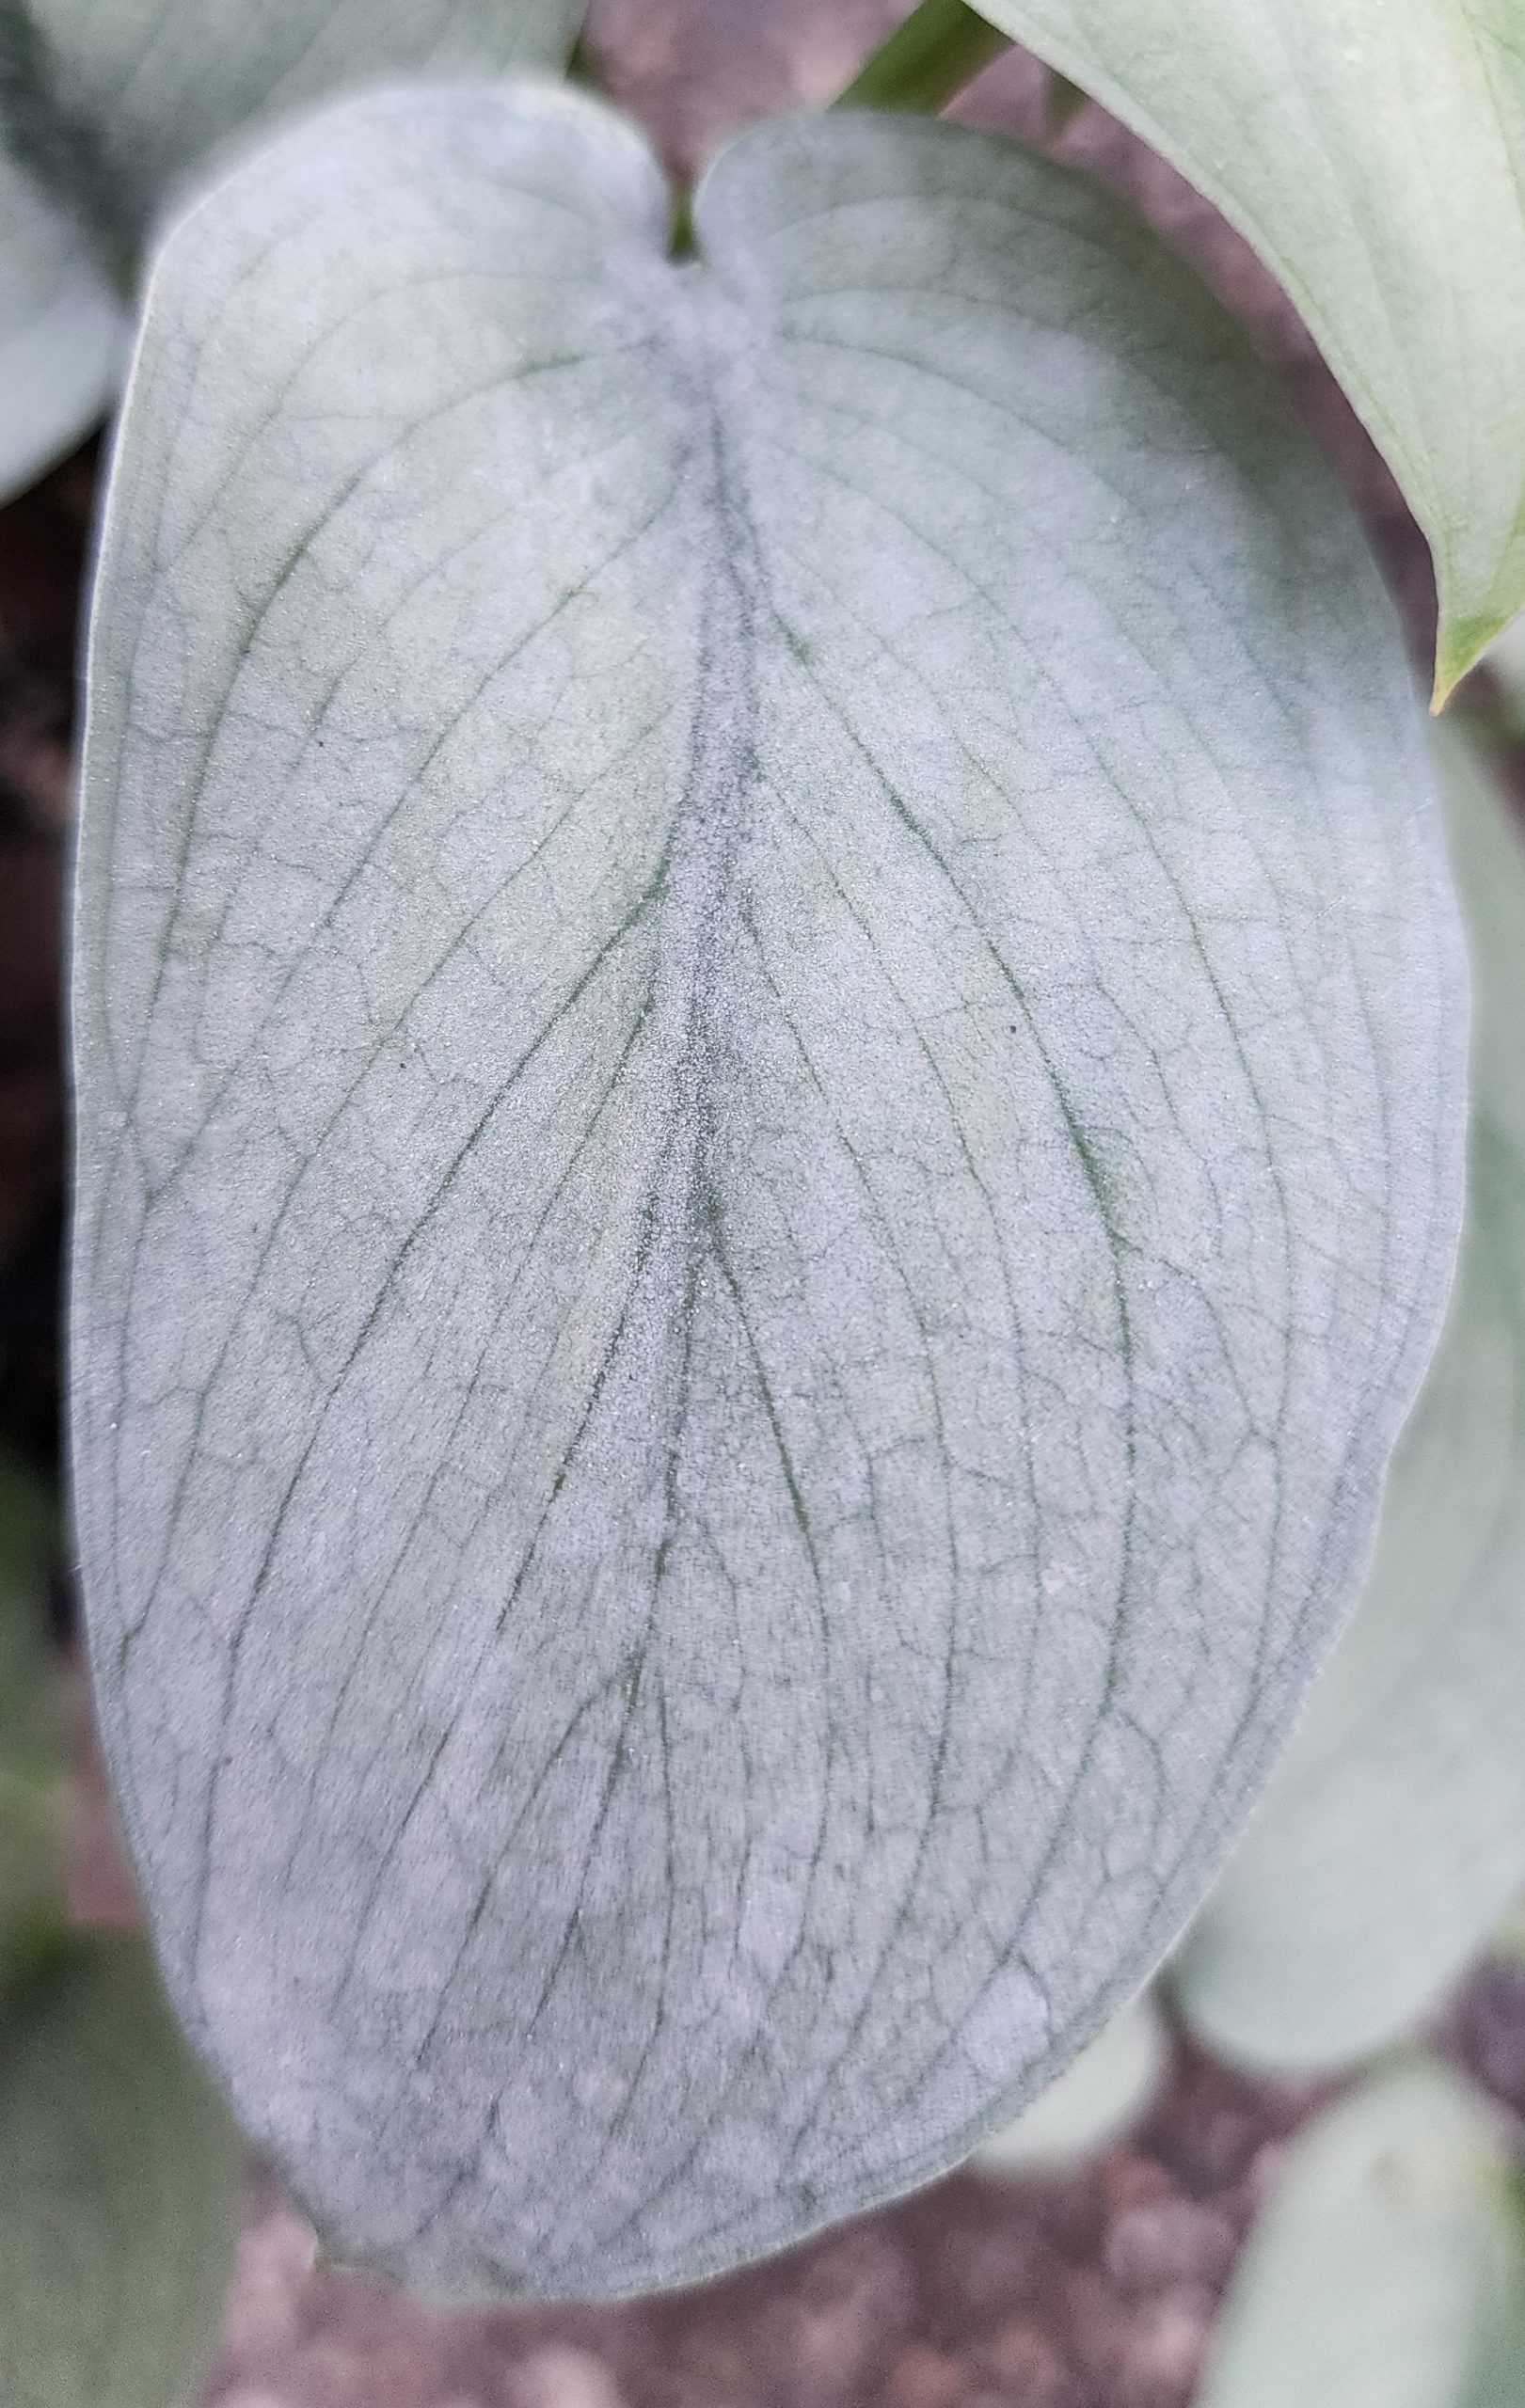
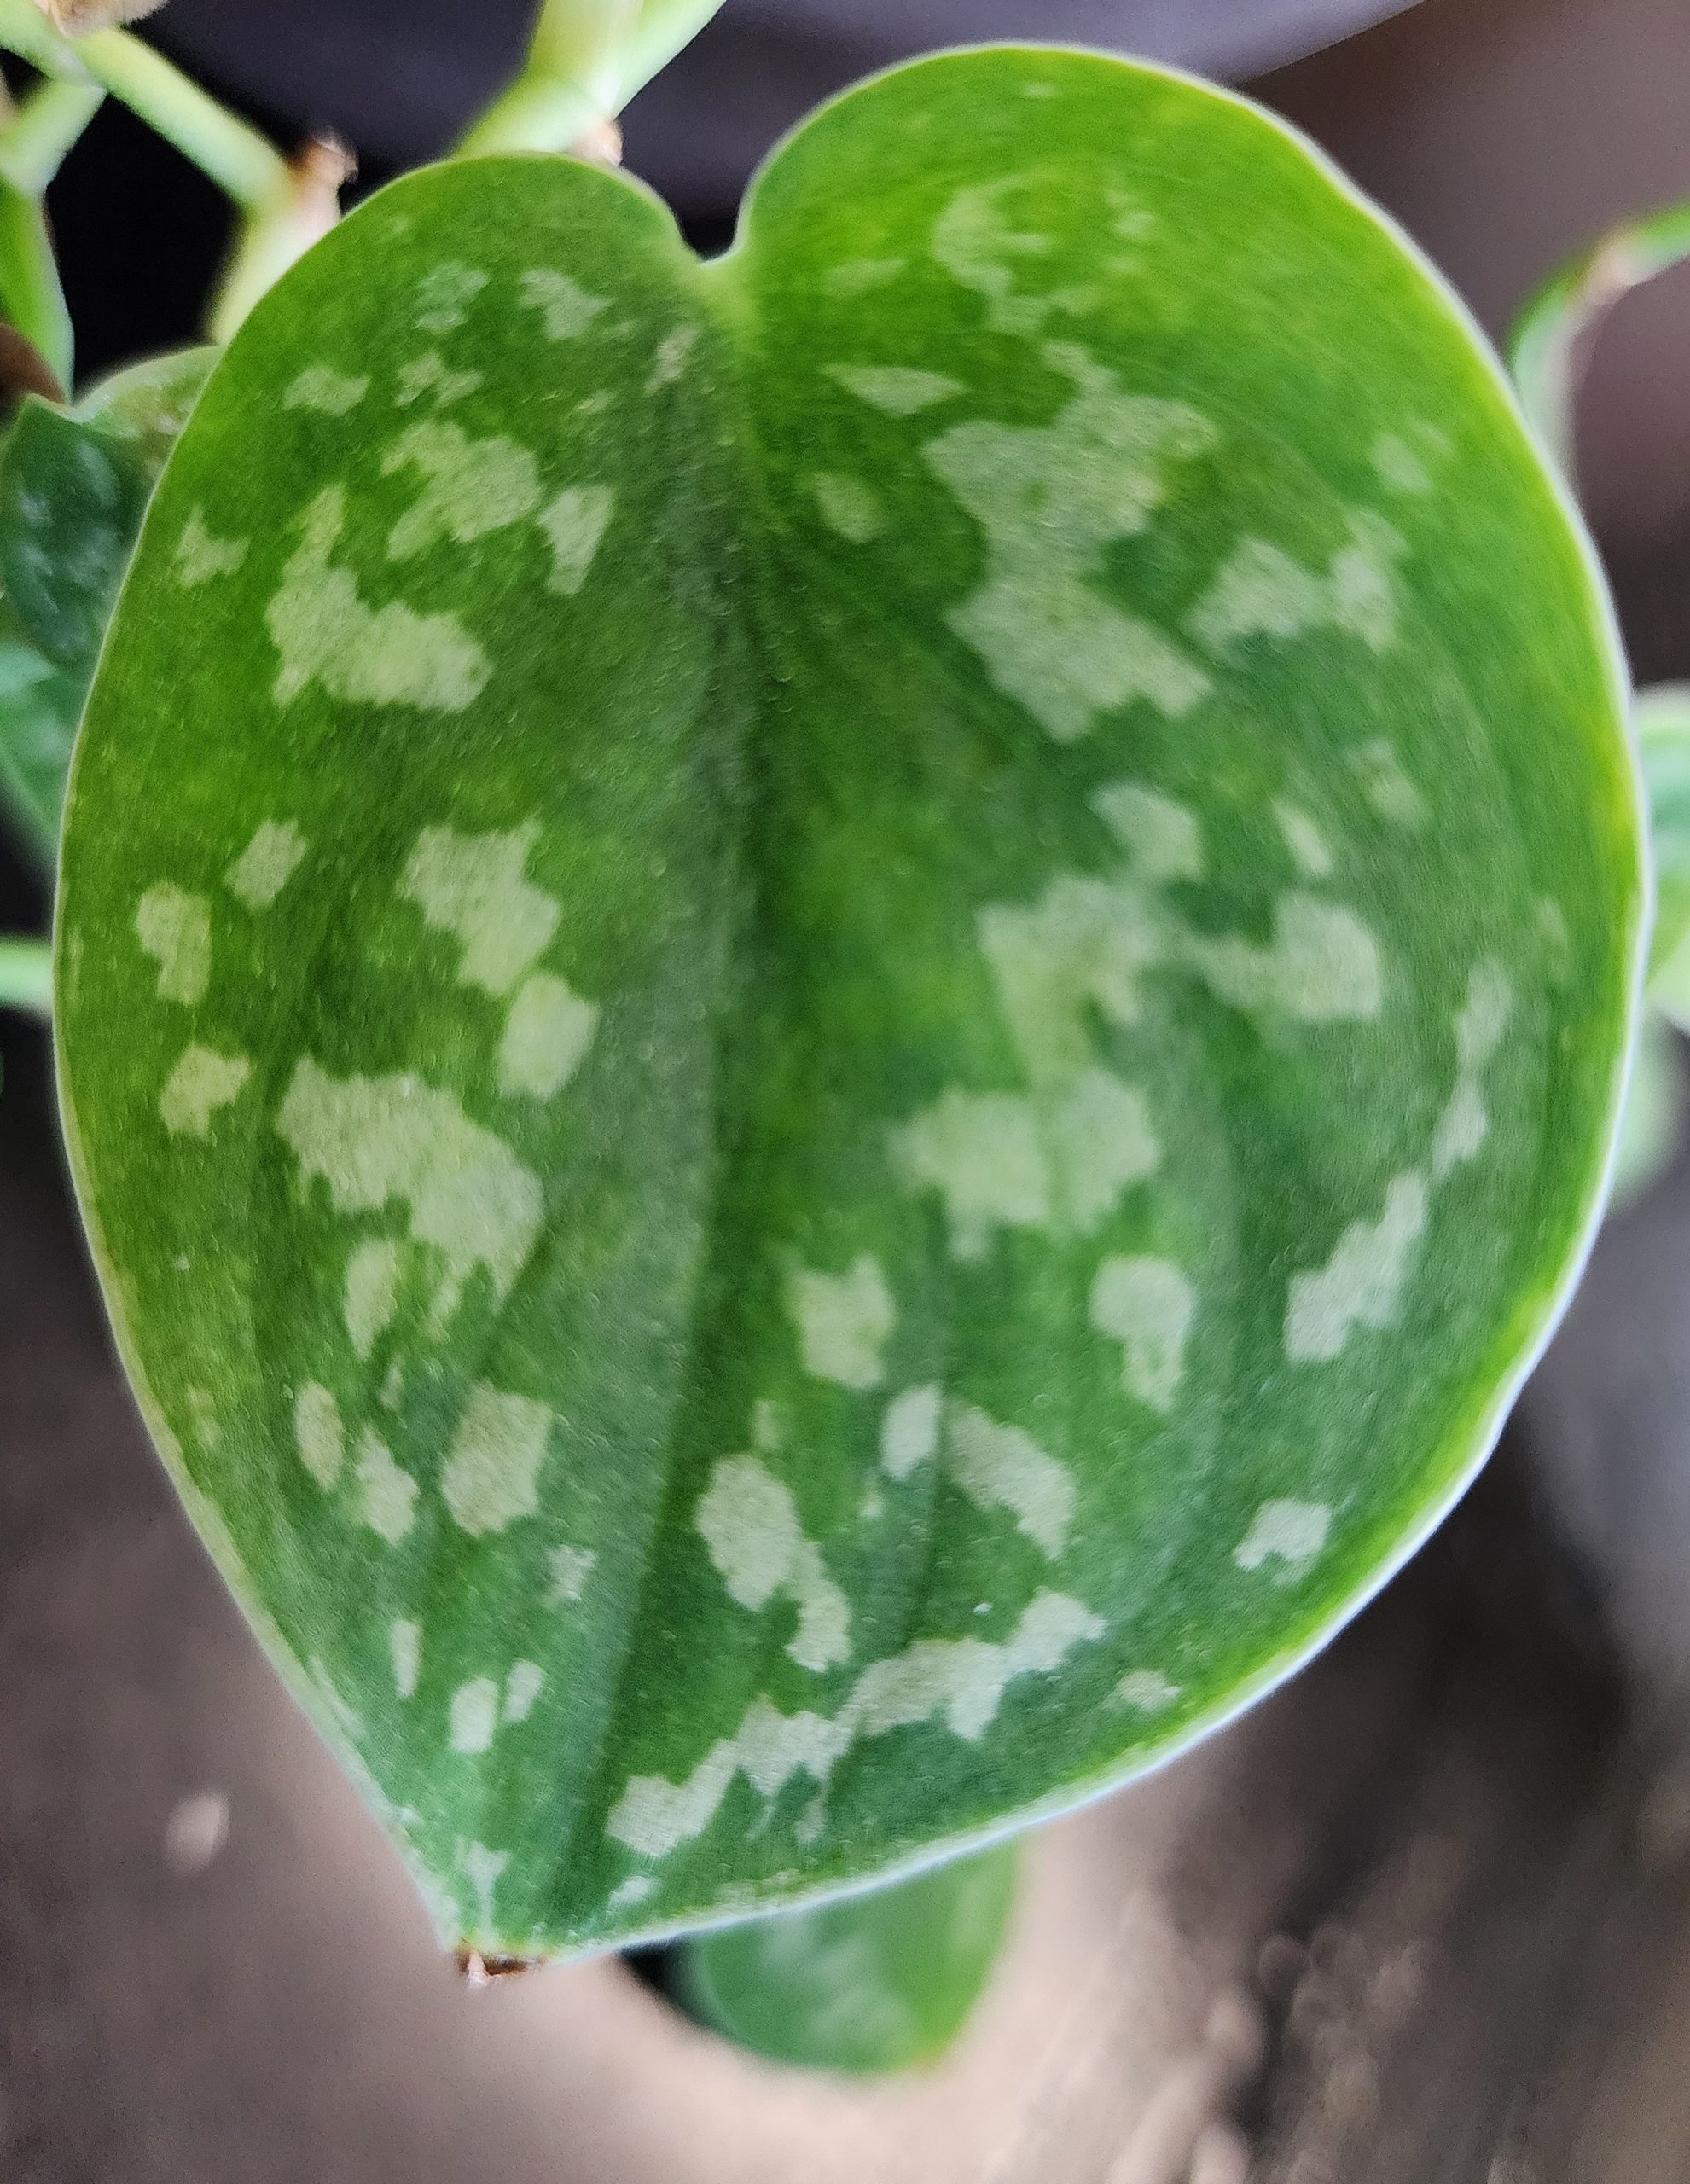
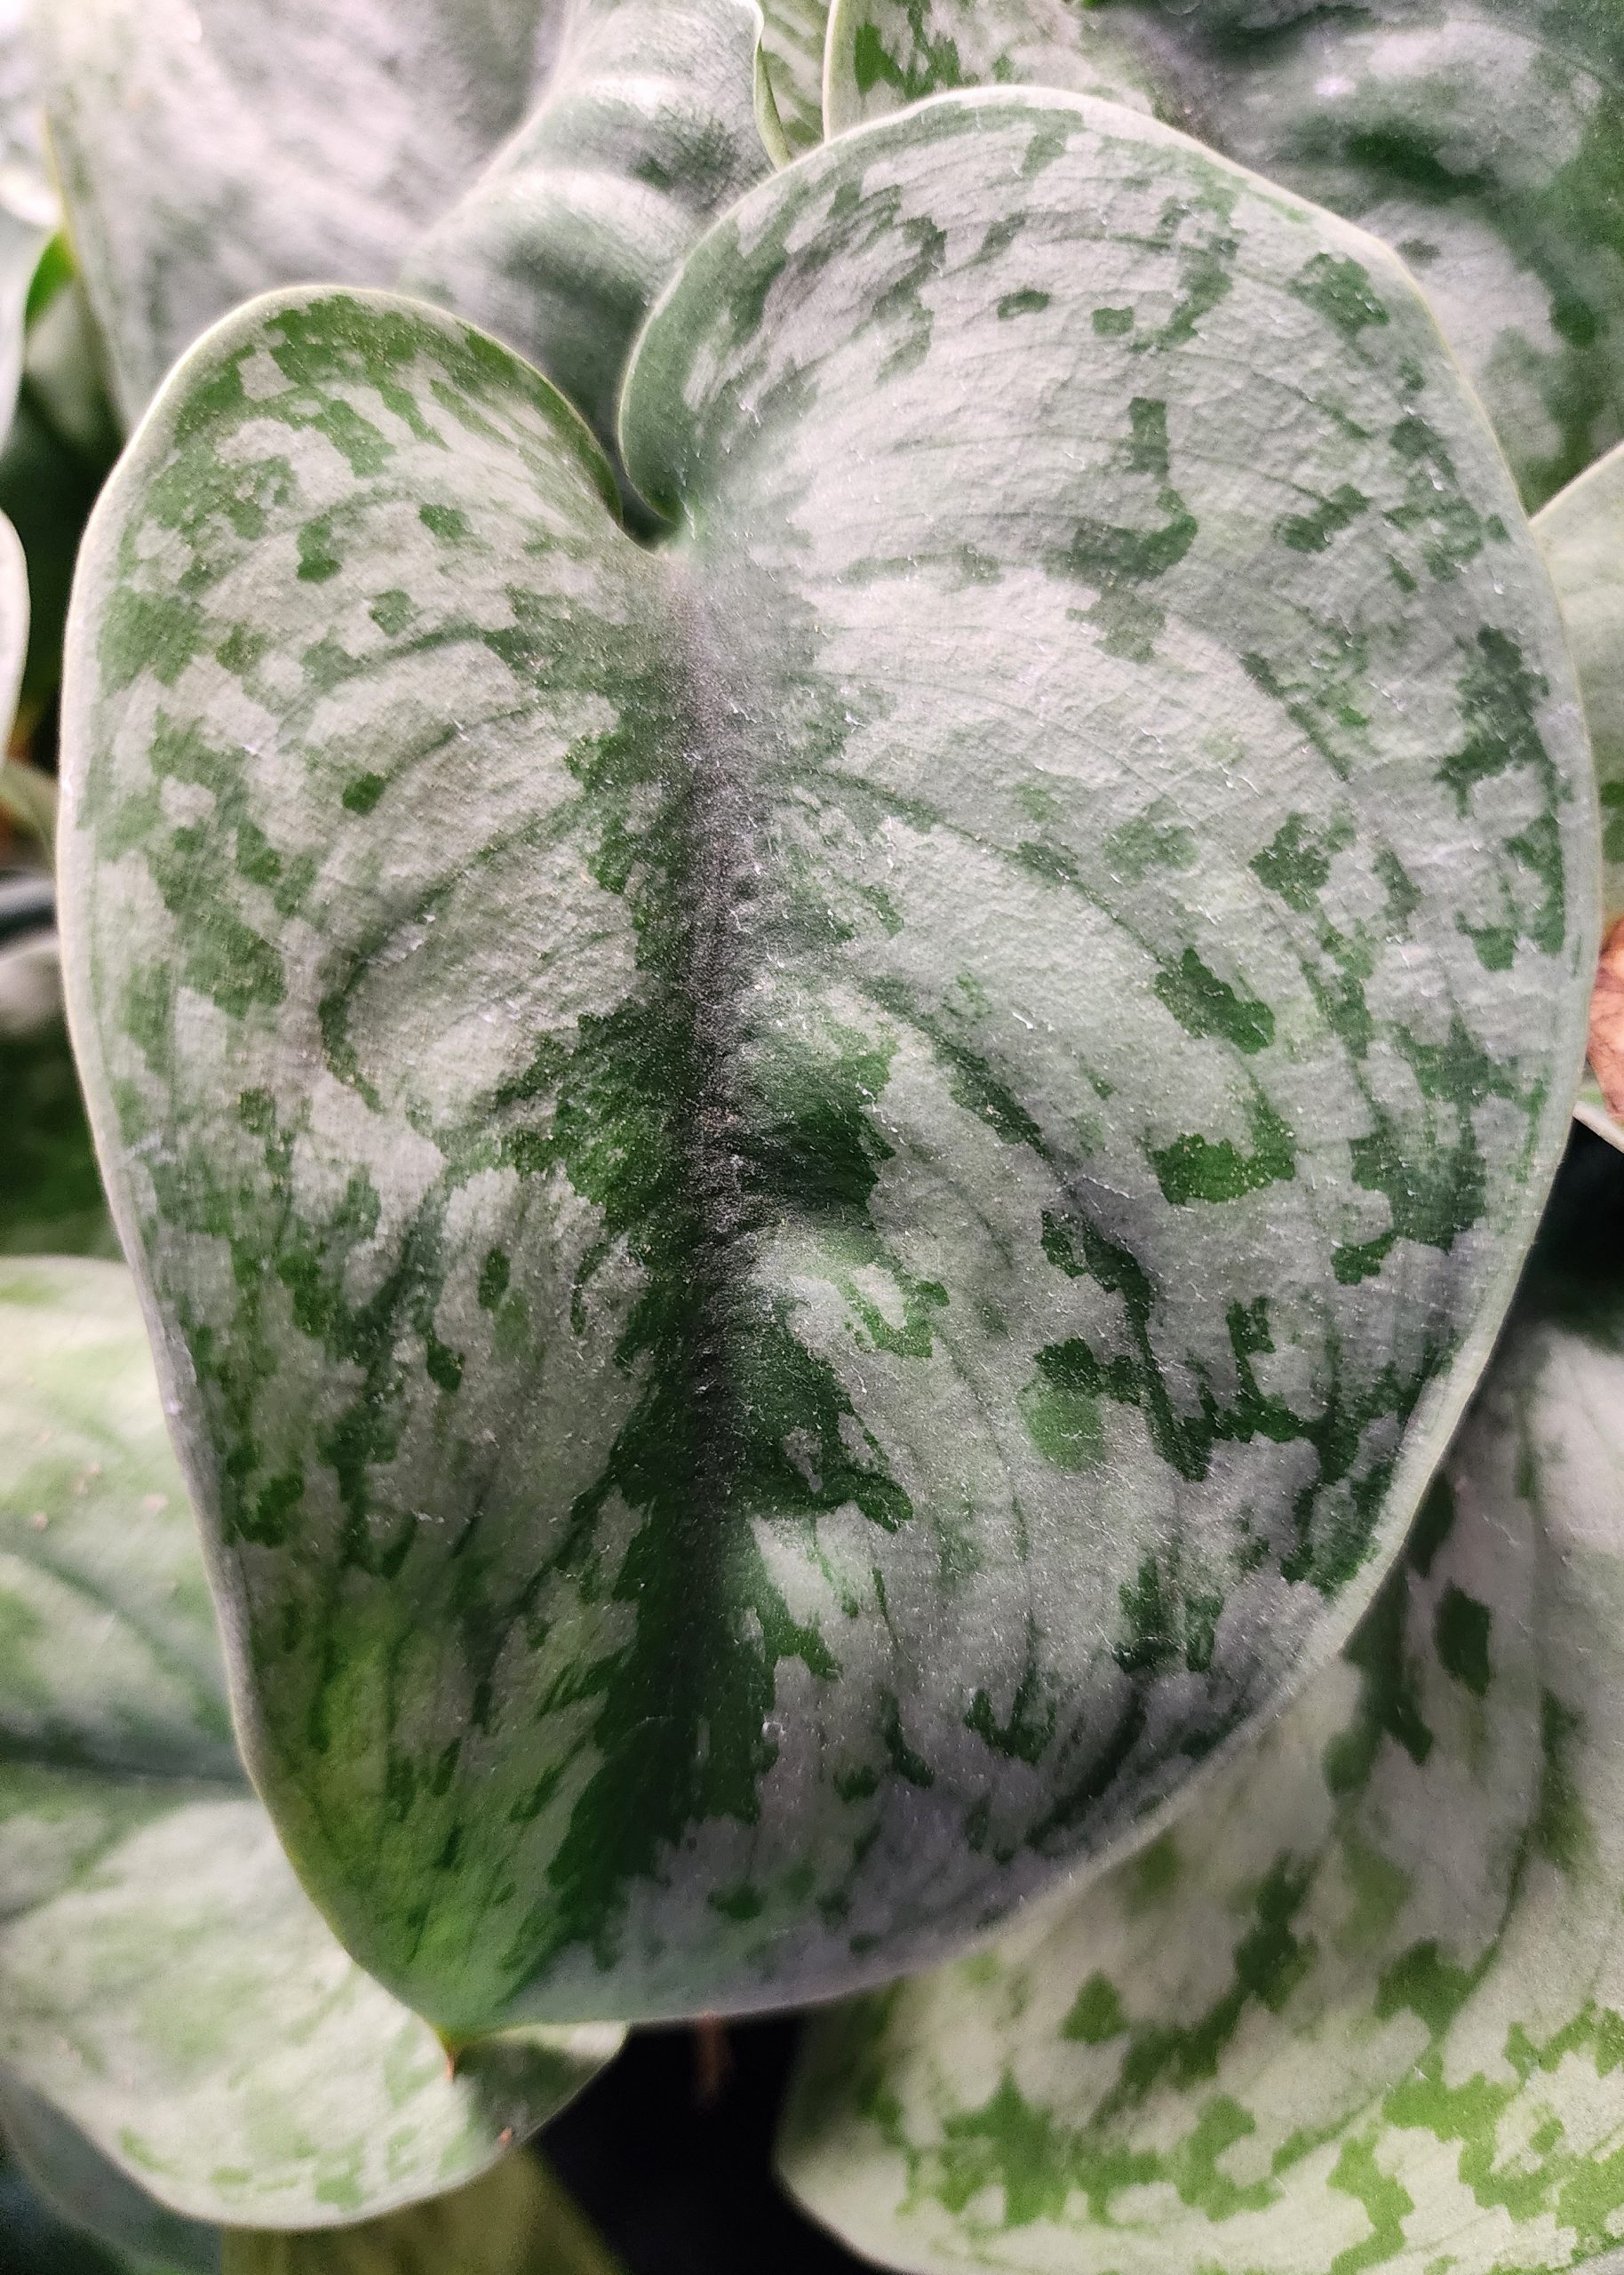
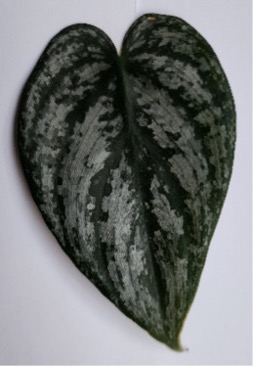
It really is not sinful to like Scindapsus. In fact, it can be very enjoyable to add some to your plant collection. These are a lesser-known houseplant, but are rapidly becoming very popular. They are very similar to the vining Philodendrons, and are most often confused with Pothos (Epipremnum). All of these aforementioned plants belong to the Araceae family. The Scindapsus come from Southeast Asia, Philodendrons from Central/South America, and Pothos from the Tropical Pacific. Although they come from different parts of the world, they all live in rainforest habitats, and therefore will do well when grown together. The thing that most stands out about the Scindapsus species are the unique colors. They are generally a gray or green color. Now that base color has, to more or less degree, some silver colors overlaid, except for some that don’t have any additional color at all.
The nicest part of Scindapsus is that they have very similar care to their look-a-like cousins. They generally like to have the top inch or two of soil dry out between waterings. The soil should be that used for aroids. If using a commercial houseplant soil, add some extra perlite and/or orchid bark to lighten it up a bit. The growth habit could be up a moss pole, or in a hanging basket. I prefer the hanging basket on these as I really like the look of the long vines hanging over the edge of the pot.
They are fairly easy to propagate. Take a cutting between the nodes – the place where the leaves grow out from. Trim this and put it in soil. Keep this in a moist and humid environment. Before long, there will be new growth tips emerging from the node. At that point, start adding some fertilizer to really kick things into gear. These plants adapt well to growing in our typical home environment, but they do not like it super dry. They tend to grow larger leaves in more humid environments, so think about putting one in the bathroom near the shower.
There are some fabulous new varieties of these plants, but because they are not as common yet therefore somewhat tricky to find. It seems there are new varieties coming to market more frequently now. Many of them are variations on the amount of silver in the leaves, or the pattern the silver coloration makes. There are two main species regularly offered so far in the trade. Scindapsus pictus, which has more of a round leaf, and Scindapsus treubii, which has more of an elongated, narrow leaf. There are more species, and I am sure we will see the “house friendly” ones coming to market in the future.
Weed Them and Reap!
By now the vegetables and flower beds should be pretty well planted and plants starting to establish themselves. Despite many of our best efforts, a new crop of weeds is also attempting to get established. These garden pests compete for light, water and nutrients. They also may harbor or attract insects that prey on our plants. If left to their own devices, they can crowd out our desirable specimens reducing the air flow and leading to conditions more conducive to disease.
Weeds are generally sorted into 4 categories: perennial, biennial, winter annuals and summer annuals. There’s a good chance that you removed any winter annuals as you prepared your planting areas. These plants typically germinate in the fall, overwinter, bloom in early spring and set seed. They include weeds such as annual bluegrass, chickweed and shepherd’s purse.
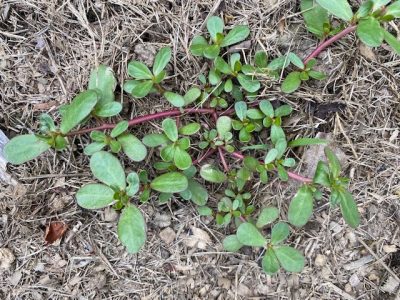
Perennial weeds include dandelions, burdock, thistle and plantains while Queen Anne’s lace and garlic mustard are some biennial ones. Usually, the summer annual weeds are most prevalent in recently planted vegetable and flower beds. Some examples are lambsquarters, galinsoga, purslane, crabgrass and ragweed.
You have probably heard the expression ‘A year’s worth of seeding is worth 7 years weeding’ or something along that line. Weed seeds can last a long time in the soil with purslane and dandelion seeds remaining viable up to 20 years and pigweed up to 40 years. So even letting a few weed plants go to seed will have you pulling up their progeny for quite some time.
What’s a gardener to do? The key to weed control is to stay ahead of them. Take them out when they are small and shallow rooted. For areas that are pretty much bare soil, like around vegetable plants, a small handheld hoe or cobra head weeder works great on patches of newly germinated weeds that are too tiny to pull by hand. For larger gardens, maybe a taller blade or stirrup hoe would be a good tool to have on hand.
I will admit to spending a lot of time on my hands and knees weeding. While this may be not practical for everyone, it gives you a chance to get up close and personal with both the weeds as well as your garden plants so you can see, for example, if any squash vine borers are attacking your squash or pumpkins or if your radishes are ready to be harvested or if that row of bean seeds has yet to germinate.
Mulch can be a gardener’s best friend. The key is to match the mulch to the garden. For vegetable gardens, straw mulches, shredded leaves or untreated grass clippings work well as they degrade over the season adding organic matter to the soil and feeding the bacterial microbes that are most active and essential in agricultural type soils. While many people use plastic, weed fabric or cardboard to keep weeds down, these have been shown to have negative effects on soil health. The benefits may outweigh the costs for commercial growers but for the home gardener, healthy soils mean healthy plants. Plus carboard, especially corrugated pieces often contains contaminants.
For perennial flower beds, I like the look of cocoa shell (if you don’t have dogs that would eat them) or buckwheat hull mulches. They set off your perennial foliage and flowering plants at a better scale than larger bark mulches, nugget mulches or woodchips do. The problem with these being they are not always easy to find or cheap. For trees and shrubs, coarser wood or bark mulches would be appropriate. The bottom line for mulches, is that regardless of which one you chose, it will help to keep weeds down.
In certain situations, the use of an organically certified (OMRI) herbicide might be helpful. There are a number of products on the market that contain essential oils, like clove or citrus, sodium or ammonium derivatives or even acetic acid (vinegar). I find them handy for high populations of just germinating weed seeds before planting or in pathways between rows. The tiny weeds are killed quickly especially on a sunny day.
Two things to consider when purchasing these products are that they typically do not kill the roots of larger established weeds. The top will generally die back but the roots are still alive and will resprout. The other thing is these organic weedkillers are non-selective meaning they can kill any plant they are sprayed on.
However, you choose to remove them, persistence and regular scouting will keep weeds to a minimum. Because the seeds can be in the soil, be transported when purchasing compost or plants, can blow in from the neighbor’s garden or even be moved by animals and people, weeds will always find a way into your gardens and it’s your job to keep them out.
Have a question about plants? The UConn Home Garden Education Office supports UConn Extension’s mission by providing answers you can trust with research-based information and resources. For gardening questions, contact us toll-free at (877) 486-6271, visit our website at homegarden.cahnr.uconn.edu, or reach out to your local UConn Extension Center at extension.uconn.edu/locations.
Start Scouting Now for this Common CT Garden Pest
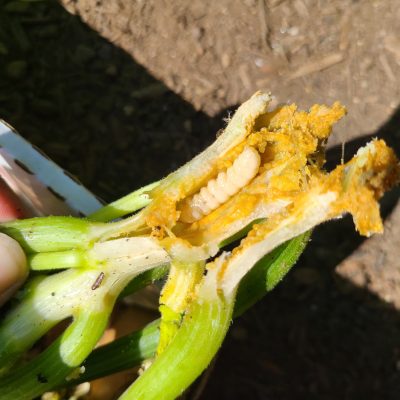
The Squash Vine Borer (SVB) is a red-orange and black winged insect. They emerge in early to mid-summer and lay their eggs at the base of squash stems. When those eggs hatch, larvae emerge and bore their way into the plant stem, continuing to eat your squash plants from the inside out until they are ready to pupate. Gardeners may not even notice their presence until they see squash plants wilting in the summer heat. Upon even closer inspection, a yellow, sawdust like appearance and entry hole at the base of the stem is often found. Once this is observed, it is often too late. While early June may feel too early to start scouting for these guys, it’s the perfect time to start planning defensive strategies to help protect your garden.
The first thing you can do, especially if you have a history with these insects, is select resistant cultivars. Knowing which types of squash are common targets can help you determine whether you will want to keep a closer eye on them this season, or maybe plant something different, altogether.
Cucurbita pepo is highly susceptible to Squash Vine Borer. This species includes Zucchini and summer squash. They have thin, hollow stems, which make it easy for these critters to get into. Pumpkins are also in this category. However, pumpkins are more likely to vine out and lay roots along the stems touching the soil surface. This helps the plant to withstand damage a bit better than its other counterparts.
Cucurbita maxima, which includes winter squash like giant pumpkins, Kabocha and Blue Hubbard varieties, is also susceptible to the SVB. While it is less preferred than C. pepo, it can still be targeted.
Cucurbita moschata is the most resistant plant species. C. moschata includes the butternut, honeynut and crookneck squashes. Their stems are thicker and more succulent, making them least favorable for the SVB to lay eggs on. Therefore, while not impossible, they stand a good chance against this garden pest. These insects are also rarely found in cucumbers and melons.
It is important to rotate your planting sites each year. These insects overwinter as pupae in the soil and emerge as adults in June-July. Planting in the same place each season is like placing a gift on their front doorstep. Moving your planting site and adding a protective row cover as soon as you plant can improve your odds at keeping the SVB away from your plants altogether. Leave the row cover until both male and female flowers begin to emerge. After that it is important to remove the row covers so pollinators can access the flowers.
For gardeners unable to rotate their gardens, preventative measures can still be taken. Do not use row covers as they can trap the pest in with your plants. Some recommend placing aluminum foil around the first couple inches of stem at the soil line to prevent insects from laying eggs and boring through stem tissue. Treating the base of the plants with a preventative pesticide may also be effective.
Chemical management is often tricky with these pests, and home gardeners may not feel it is worth the effort. Importantly, chemical management is no longer effective once the larvae have entered the stems, since they are then protected by the plants. In addition, these products can impact the pollinators visiting your cucurbits, so it’s important to carefully consider the full impact of chemical management. Always read the label in full and follow all instructions as prescribed.
Start scouting for the adults early. In mid to late June, check the base of stems for eggs and early boring damage. You may even see the adult insects flying around. Symptoms, like wilting, often begin in late June and become more common in July.
If you have a strong stomach and sense of adventure, you can carefully slice into the stem to try to find the larvae and extract it. Vining squash species may recover if the pest is removed and portions of vine are then buried in the soil, allowing new roots to take over and support the vine.
Alternatively, removing affected plants entirely and disposing of them in the trash may help to break the life cycle and remove pests from your garden for future seasons.
Since these insects typically only have one generation per year, your hard work does have a finish line. Paying extra attention and working to manage the SVB in early summer will allow your squash to grow healthy for the rest of the season. A second crop of summer squash can be planted in July, once adults are no longer out and laying eggs. This second crop should be unaffected by the SVB and produce healthy squash for your family to enjoy!
The UConn Home Garden Education Office supports UConn Extension’s mission by providing answers you can trust with research-based information and resources. For gardening questions, contact us toll-free at (877) 486-6271, visit our website at homegarden.cahnr.uconn.edu, or reach out to your local UConn Extension Center at extension.uconn.edu/locations.
Wet and Wild: the Complex Lives of Cedar Rust Fungi
We all know that old saying, “April showers bring May fungi!” (No? Just me?). All joking aside, you may have noticed that the recent wet spring weather lead many fungi to break dormancy, release spores, and wind up in new places. While growers and gardeners often find themselves preparing for the season by promoting airflow between plants, increasing soil drainage, and applying preventive fungicides when really needed, it’s hard to deny the spectacle of spring fungi and the beauty they bring to our spring gardens; and few are as spectacular as cedar rusts (Again, only me?)!
Cedar rusts are flashy diseases caused by multiple species of the fungi in the genus Gymnosporangium. In the case of cedar apple rust, a disease we see all the time here in Connecticut, the causal agent is the fungus Gymnosporangium juniper-virginianae. Gymnosporangium is a group of heteroecious fungi, meaning that they require two hosts to complete their life cycles. Species within the Juniperus genus are primary hosts of cedar rusts with plants such as apple, crabapple, hawthorn, or quince usually serving as a secondary host, though close relatives such as pear or chokeberry may occasionally be seen with cedar rust.
Spores – small reproductive structures produced by fungi – are released from fungal structures to infect other hosts. Cedar rusts, attention seekers that they are, utilize multiple types of spores to get to their host plants of choice. Beginning with the secondary hosts in late summer, spores called aeciospores are produced and distributed by wind and rain, traveling to inoculate nearby juniper trees. Wet, mild weather in early fall creates the perfect conditions for these aeciospores to germinate, eventually resulting in the formation of large galls on the primary host.
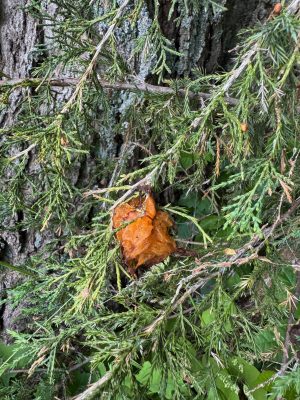
Juniper galls are irregularly shaped structures on the plant and range in color from gray to dark red. Circular indentations are present on the gall’s surface, through which bizarre looking telial horns protrude in the spring the year after the host is first inoculated with the disease. These structures are first colored dark brown and have a dry appearance but later become gelatinous and bright orange as they mature and expand for a brief time during moist spring conditions. The surfaces of telial horns are coated in teliospores which later germinate to form the next important player in the cedar apple rust disease cycle, basidiospores. After releasing spores, the telial horns will dry up and fall off. The basidiospores are then distributed by wind and rain to inoculate secondary hosts such as apples or crabapples. Immature leaves with wet surfaces are the most susceptible targets for infection.
The next stage of the disease cycle kicks off with yellow-orange lesions that appear on the upper surfaces of leaves. A halo of red tissue may surround the edges of these spots, giving a dramatic bullseye appearance. Tiny, raised, fungal structures known as pycnia develop within the leaf lesions and on fruit surfaces. Pycnia produce pycniospores (notice a theme here?), which leads to the development of aecia during mid-summer. Yellow or brown lesions appear on the underside of leaves, from which the tubular aecia and of course, their aeciospore-covered surface, protrudes. During late summer under dry environmental conditions, aeciospores are released and travel to nearby juniper hosts where the disease cycle begins again.
You might be thinking, “enough with the spore-talk! What should I do about cedar rusts if I see signs of them?” Rest easy - although cedar rust fungi are complex and dramatic, they typically don’t cause lasting harm, and there are plenty of management strategies available to mitigate their damage. Pruning can be used to promote airflow and eliminate galls from junipers before telial horns have an opportunity to develop, and appropriate fungicides may be applied to secondary hosts as a preventative measure. And for those thinking of purchasing a new tree, know that many apple and crabapple cultivars are available at the nursery with various levels of resistance to cedar rust.
Have a question about plants? The UConn Home Garden Education Office supports UConn Extension’s mission by providing answers you can trust with research-based information and resources. For gardening questions, contact us toll-free at (877) 486-6271, visit our website at homegarden.cahnr.uconn.edu, or reach out to your local UConn Extension Center at extension.uconn.edu/locations.
Chaos Gardening
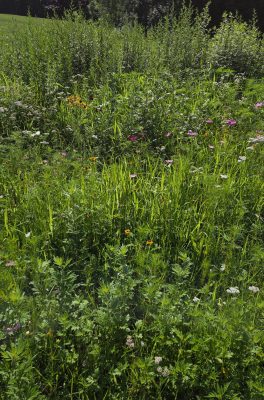
Chaos gardening is a growing social media trend that encourages gardeners to relinquish control, scatter assorted seeds, step back, and see what happens. Instead of carefully spacing plants and planning layouts, chaos gardeners toss seeds and let nature decide what grows where. The results can vary widely, ranging from a surprising assortment of plants to a patch of disappointment.
Unlike traditional gardening, this approach emphasizes spontaneity over structure. For many, the appeal lies in its simplicity. Chaos gardening is easy to start, requires minimal knowledge, and often relies on leftover or inexpensive seed packets. The low-stakes, experimental nature makes it especially attractive to busy people or those new to gardening.
Still, the trend raises valid questions. Without site preparation or ongoing care, how well can seeds establish? And does “letting go” invite weeds into the garden under the guise of wildscaping?
In practice, chaos gardening often produces mixed results. While the concept is appealingly simple, success rates can be low, and plantings may struggle to persist long term. Still, gardeners interested in the trend can improve their chances of success by following a few simple suggestions.
Avoid using this approach in large or prominent spaces. Start small, either in a container or a less visible area of the yard. To maintain a sense of experimentation, while increasing success, consider focusing on a single species at a time or scattering spring bulbs through an existing lawn. Tossing out a packet of “wildflower” seeds may sound charming, but it will not produce an instant, picture-perfect meadow. More often, it results in a steadfast patch of mugwort.
Even with a relaxed approach, a bit of planning goes a long way. Key factors such as sunlight and soil conditions still matter. The principle of “right plant, right place” applies regardless of gardening style. Identifying site conditions, selecting appropriate species, and preparing the planting bed can significantly improve outcomes.
Gardeners should also approach seed mixes labeled “wildflower,” “pollinator-friendly,” or “native” with some caution. While not inherently problematic, these mixes can contain species that are poorly suited to local conditions. A quick review of the species on the list can help inform decisions about whether the plants are suited to the region or growing conditions.
Learning how to recognize seedlings, including common weeds and invasive plants, is another important step. Early identification allows gardeners to remove undesirable species before they establish. Observing which plants succeed can also guide future efforts, gradually transforming a disorderly patch into a more reliable and productive space.
Patience is essential. Many perennials grown from seed take more than one season to flower. Including a mix of annuals and perennials can help maintain visual interest while longer-lived plants establish. As with any gardening method, some trial and error is expected.
Chaos gardening may never replace traditional approaches, but it offers an accessible entry point for beginners and a creative outlet for experienced growers. With a balance of spontaneity and informed decision-making, even an unstructured planting can become a living experiment.
The UConn Home Garden Education Office supports UConn Extension’s mission by providing answers you can trust with research-based information and resources. For gardening questions, contact us toll-free at (877) 486-6271, visit our website at homegarden.cahnr.uconn.edu, or reach out to your local UConn Extension Center at extension.uconn.edu/locations.
What to Know Before You Buy Topsoil
Solitary Wasps Found in the Landscape and Garden
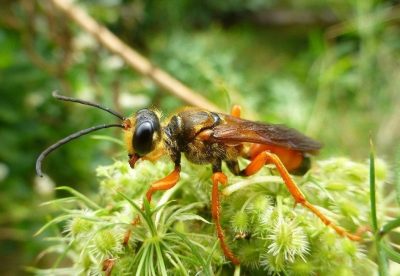
Solitary wasps are primarily hunting wasps which are either digger wasps or thread-waisted wasps. Most are seldom aggressive toward people because they are not defending a social colony. Instead, females are busy hunting other insects or arthropods to stock cells for a single larva to feed upon as they develop. Many solitary wasps dig nesting chambers in sandy soils, like the cicada killer and the great golden digger wasps. Others may use hollow pipes, tubes, window ledges or even sliding door tracks (a favorite site for the grass-carrying wasp).
Many of these wasps are also considered decent pollinators. They are active from June through late summer. The adult wasps die during the year and larvae generally pupate and emerge the following year. Females hunt specific prey such as caterpillars, katydids, cicadas and other insects which they paralyze and stock the nesting chamber with. An egg is laid on or near these future meals, and the larva will feed on them as it develops.
The great golden digger wasp, Sphex icheneumoneus, is a large wasp that sports golden hairs on the head and thorax and has a distinctive half orange half black abdomen. It is harmless to people and is often found on flowers in or near sandy soils where it digs nests for larvae in the ground. Main prey for larvae is katydids.
The Eastern Cicada killer, Sphecius speciosus, is one of the largest wasps in North America. It has amber wings and females are most evident in late July and early August as they burrow into sandy soils, leaving behind a squared off entrance and a sandy mound. Deep inside underground, the females have dragged paralyzed cicadas upon which they lay an egg. The larva will hatch and eat the paralyzed cicada. Next summer, after having pupated underground, the adults emerge. The females rarely sting but do alarm many homeowners due to their size and activity in lawns and along sidewalks.
Grass carrying wasps Isodontia spp. create cells from grasses collected by the female. Each cell is stocked with paralyzed tree crickets, katydids and other orthoptera insects. Often packed together, these nesting cells can be found on windowsills, on bases of slider doors and on upper window ledges. Larvae overwinter in these cells and emerge as adults the following year or later that same year if there are two generations.
The oak apple gall wasp Amphibolips spp female lays an egg inside the tissue of an oak leaf inside which the larvae will hatch. The apple-like gall forms as a response to secretions from the larvae as it feeds on the leaf tissue safely inside. The gall turns brown after the adult wasp emerges. No damage is done to the oak. Cutting open the gall when green will reveal the wasp larva in the center.
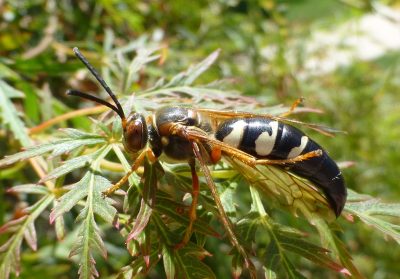
Potter Wasp, Eumenes fraternus, females construct a small, rounded clay structure with a neck-like protuberance with a flattened top that makes it look like a tiny pot. After laying a single egg inside the female puts some paralyzed caterpillars and beetle larvae which the larva will eat. She seals the small opening with mud, which will be chewed open when the adult emerges next year. These tiny pots can be found on plants, rocks, pieces of wood and other places.
Solitary wasps pose little risk to us as they go about completing their life’s work. Defending nests is not a behavior such as is done by social wasps and hornets. Females will sting if handled or alarmed though, so avoid doing that. If digger wasps make you nervous, consider amending sandy soil with organic matter and keeping it moist when females are looking to excavate nesting chambers. Try to tolerate them for the short period of time they are active. Almost all can be found obtaining nectar from flowers in the wild and in cultivated landscapes.
The UConn Home Garden Education Office supports UConn Extension’s mission by providing answers you can trust with research-based information and resources. For gardening questions, contact us toll-free at (877) 486-6271, visit our website at homegarden.cahnr.uconn.edu, or reach out to your local UConn Extension Center at extension.uconn.edu/locations.
A Familiar Bloom in a Season of Change
Spring is the ultimate bringer of change. The restless souls contained within all forms of life begin to awaken, bringing fiery hues back to the formerly dreary expanse of winter landscapes. We meet this shift with a warm welcome, grateful for a chance to start anew. Innately, we crave change, constantly striving towards something greater that will fill a part of ourselves we feel is missing. Also, innately, we are walking juxtapositions. Above our desire for change floats an asterisk, denoting an extraneous condition—our deep fear of the very thing which we wish so desperately for. New experiences bring about uncertainty and inconsistency. Thus, we cling to that which we find familiar and trustworthy to ground us while careening through the unknown.
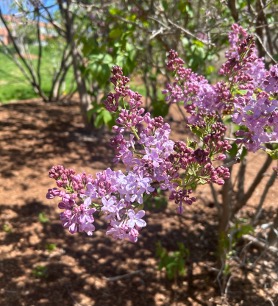
For me, ol’ reliable is the lilac shrub in my backyard. Season after season, I look out my window and am reassured by its presence, whether it is flush with vibrant blooms or displaying its tall barren branches. The leaf and flower buds of common lilac (Syringa vulgaris) are among the first whispers of spring I observe, appearing early in the season.
Members of the olive family, Oleaceae, lilacs are well suited to life in cold climates—in fact, the chill of winter is essential to their bud development and maturation. Although new plantings take a few years to adjust and establish themselves, these perennial shrubs are equipped with substantial longevity. Common lilacs can live for up to a century, cementing their place as a companion to rely on during every phase of our lives.
Common lilacs grow rapidly and immodestly, filling their landscape with a dominating sense of confidence. Success is dependent on being planted in sunny locations with moist, well-drained, and neutral to slightly alkaline pH soils.
The lilac’s blooms are dichotomous, both quietly delicate and also boisterous with a showstopping flair. Flowers emerge between late April and early May. A strong, sweet fragrance diffuses from the quaint petals which cluster together in formations called panicles. Lilac blooms appear in a variety of hues, ranging from lavender to blush pink or even a creamy white.
Even after the flowers of lilacs retire, matte heart-shaped leaves remain until the fall, painting the tall shrubs with dark green. During the dormancy of winter, gray stems and branches are visible, standing tall and proud even when cold weather casts its icy shadow over the once vibrant landscape.
Lilacs are relatively self-sufficient yet require some care and attention to maintain their vigor. Susceptible to fungal diseases like powdery mildew and septoria/pseudocercospora leaf spot, it is important to ensure proper airflow throughout plantings to discourage sporulation. Powdery mildew is characterized by gray mycelial growth on leaf surfaces, while septoria/pseudocercospora leaf spot appears as brown spots that expand into broad patches. Insect pests, namely the lilac borer and oystershell scale, also impose their will on lilacs. Borers tunnel and weave through branches, leaving holes and open wounds as evidence of their travels. Oystershell scale refers to small insects, resembling their namesake in appearance, that take refuge on lilac bark. These pests and diseases can commonly be managed through removal and destruction of damaged tissue. In severe cases, additional integrated pest management strategies may be necessary.
Consistent pruning practices are essential for lilacs to remain healthy throughout every season of change. Lilacs are beings of extreme preparation, developing next year’s buds as soon as the current flowering period is complete. By deadheading blooms promptly after they have run their course, lilacs are able to dedicate more energy to generating healthy flowers for future growing seasons. Renewal pruning is another beneficial technique—cutting back overgrown stems to remove barriers preventing light from reaching inner branches. This encourages new growth and results in lilacs which appear fuller, bursting with color from the inside out. Spring is the most appropriate time to employ these pruning tactics in accordance with lilac’s growing needs. Prune immediately after flowers start to fade for best results.
Lilacs are a cornerstone of spring, providing a familiar and reassuring sight to ground us when our own lives become unrecognizable. Lilacs and the endless wonders of spring gently remove the asterisk from our desire for change, reminding us to take solace in the familiar while welcoming all that the unknown may bring.
The UConn Home Garden Education Office supports UConn Extension’s mission by providing answers you can trust with research-based information and resources. For gardening questions, contact us toll-free at (877) 486-6271, visit our website at homegarden.cahnr.uconn.edu, or reach out to your local UConn Extension Center at extension.uconn.edu/locations.
Keep Your Seedlings Going Strong!
So, you started your seeds, have been watching them attentively, and spring is knocking at the door. It’s still a little too early to put some things outside, but overzealous gardeners may find themselves swimming in seedlings that need management. Consider taking these steps to help you and your seedlings find a comfortable compromise as they wait to go outdoors.
If you haven’t done so already, thinning your seedlings is an important step in ensuring that the plants you put in the ground will be robust and strong. As a fellow gardener, I’m familiar with the pain of disposing of “perfectly good seedlings.” However, this isn’t an entirely true belief. Seedlings that are not thriving in optimum conditions, may be indicating to you that they aren’t strong for planting in the garden.
Thinning prevents crowding and allows for more air flow between seedlings. When crowded, seedlings compete for water, nutrition, light, and space. By thinning, we ensure that plants have enough resources to grow healthy. Thinning also helps to encourage airflow, which can reduce the risk of fungal development. Fungal pathogens can lead to issues like “damping off,” and other plant diseases that put your seedlings at risk.
You may decide to thin your plants by snipping out weaker seedlings at the base. If you have the heart, the patience and the amount of valuable bench space to dedicate to extra seedling trays or containers, you may decide to carefully tease apart seedlings and replant them for one last chance.
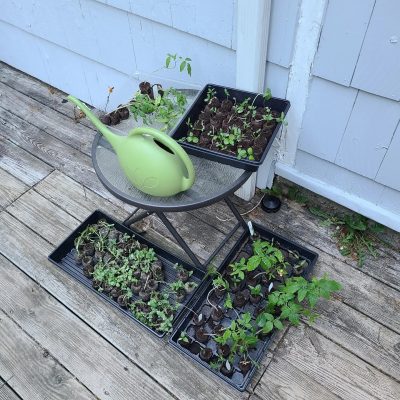
Your strongest seedlings should be potted up into a larger container to encourage them to continue to grow. Putting seedlings into 3- or 4-inch pots (or recycled plastic cups with holes in the bottom) gives them a little bit extra wiggle room while we wait out these temperature fluctuations of a New England spring. Extra space for the root zone will allow the plants to continue to expand. More roots mean more water and nutrient uptake, leading to healthy growth. This practice may also help reduce watering needs on your part, since there is more media to hold moisture in the root zone.
Are your tomato seedlings getting leggy? You can bury the stems of the tomato seedlings to help promote adventitious root development. Remove the cotyledons and any small leaves that you intend to bury below the soil line. Make sure to leave at least one third of the plant’s total height above the soil line to continue healthy growth.
To this point, our seedlings have grown in optimum conditions, or as close to optimum as we’ve been able to provide. Not only have these conditions been ideal, they’ve also been consistent. When your plants get out to the garden, the new environment may be shocking. Hardening off is a process of transitioning them from their ideal growing conditions, into a more realistic environment. Any plant, whether it is a new seedling, a beloved houseplant, or a sheltered patio tropical, needs this transition when moving from inside to outside.
Take your plants on “field trips” during warm spring days by placing them outside in a location with bright, indirect light. Full sun may be too strong for seedlings that have been acclimating with grow lights or through sunny windows so introduce direct light incrementally.
Using cold frames can help to transition your plants from indoors to outdoors. These small, unheated enclosures use the sun’s energy to store heat like a greenhouse. This helps to reduce the drastic temperature swing of nightfall and insulate plants from frosts during the temperamental spring season. Crack them open during warm days for ventilation and to help start reducing humidity.
When conditions are right for hardening off and planting your seedlings, continue to monitor weather conditions. Late spring in New England has been known to throw us a cold snap or two. If frost/freeze warnings occur, bring in potted plants and use a frost cover or breathable fabric to cover in-ground plants as frost protection. Garden stakes will help keep fabric from directly touching your plants and help create a warm air pocket around them to survive those incidental cold nights.
Spring in New England is a season of transition. Warm days may signal planting time, but cool nights and shifting conditions remind us to move forward carefully. By thinning crowded seedlings, giving roots room to grow, and easing plants gradually into outdoor conditions, gardeners can help reduce stress and build resilience. A little patience and flexibility now can pay off with healthier transplants, stronger growth, and a more successful garden as the season continues to unfold.
The UConn Home Garden Education Office supports UConn Extension’s mission by providing answers you can trust with research-based information and resources. For gardening questions, contact us toll-free at (877) 486-6271, visit our website at homegarden.cahnr.uconn.edu, or reach out to your local UConn Extension Center at extension.uconn.edu/locations.
Starting Raised Beds
There are many styles of raised beds to choose from, depending on your needs. Raised beds exist on a spectrum, ranging from framed boxes above ground to unframed, elevated planting mounds. When planning new raised beds, both types have specific considerations to keep in mind.
Mounded Raised Beds
Mounded raised beds are created by mounding existing soil or adding additional material so the planting area sits above ground level. This method works well on compacted sites, in poorly drained areas, or on top of heavy clay soils.
Most mounded raised beds do not have a barrier between the ground and the mound. However, if you are wish to start a raised bed over lawn, cardboard can be placed underneath the mounded soil to smother the grass. If you use cardboard, it is best to allow it to decompose for a few months before planting. This will allow plant roots to grow freely into the soil below rather than being blocked by the cardboard layer.
The bed can be built using soil already on site, by mounding soil from the paths or edges into the bed. Alternatively, you can bring in topsoil and compost to create the beds. Any imported soil or compost should be free of pathogens, contaminants, and invasive weeds. Mounded raised beds are not tilled, and walking on the mound will compact the soil, so foot traffic should be avoided. These beds may need to be reshaped or re-mounded annually. Soil tests can be taken every two to three years, then apply amendments added as needed.
Framed Raised Beds

Framed raised beds offer many of the same benefits as mounded beds, along with additional structure and accessibility. A framed raised bed is more contained than an in-ground bed and can be made of wood, metal, or pavers. These beds are well suited for compacted or poorly drained sites, locations with contaminated soil, or in gardens designed to improve accessibility for people with limited mobility.
Raised bed depth can vary depending on the intended use. Some beds are only a few inches deep, while others may be up to 2 feet. Gardeners who use wheelchairs or who have difficulty bending may want to consider an elevated or deeper bed. Most annual vegetables require 12 to 18 inches of soil depth, root vegetables will require greater depth. Length and width can also vary based on site conditions, but a width of about an arm’s length is generally recommended for easy planting, harvesting, and weeding.
Prefabricated wood or metal beds can be purchased, or you can build your own using lumber. Cedar is often preferred over pine because it lasts longer, although it is more expensive. Use caution when considering repurposed or pressure-treated wood. Before 2004, pressure-treated lumber was treated with copper, chromium, and arsenic, which could leach into the soil. If pressure-treated wood is used, make sure it is labeled for ground contact. Whenever possible, choose untreated or naturally rot-resistant materials.
A good soil mix for framed raised beds is about one-half to two-thirds topsoil and one-third to one-half aged compost. This can require a large amount of material and may be costly depending on the size of the bed. Buying bulk topsoil by the cubic yard is usually less expensive than purchasing bags of raised bed mix. For smaller beds, bagged raised bed mix may be more practical. Avoid using free fill or topsoil from unfamiliar sources, as these may contain contaminants, invasive weeds, or invasive jumping worms.
To save money on filling a raised bed, some gardeners use hügelkultur, a method that fills the lower portion of the bed with logs, sticks, leaves, grass clippings, or kitchen scraps before adding topsoil and compost on top. Larger materials are placed in the bottom then followed by smaller organic materials overtop. Over time, the bulky material breaks down and enriches the soil. Because the material settles as it decomposes, additional topsoil and compost may need to be added annually.
Plant Choice
Annual plants are generally better suited to raised beds than perennials or shrubs. Extreme temperature fluctuations in raised beds are not ideal for overwintering perennials, and the need to periodically add more soil makes raised beds better suited to annual crops.
Care and Maintenance of Raised Beds
Both mounded and framed raised beds dry out faster than in-ground gardens, so supplemental irrigation is usually needed throughout the growing season. Weed pressure may be minimal, but regular weeding will still be necessary. Raised beds should be mulched to help retain moisture and reduce weeds.
The paths between raised beds can be planted in turf, covered with wood chips, topped with crushed gravel, or left as bare ground. Keep in mind that paths between mounded beds may need to be mowed or weeded regularly. They will also likely become compacted over time due to foot traffic.
The UConn Home Garden Education Office supports UConn Extension’s mission by providing answers you can trust with research-based information and resources. For gardening questions, contact us toll-free at (877) 486-6271, visit our website at homegarden.cahnr.uconn.edu, or reach out to your local UConn Extension Center at extension.uconn.edu/locations.
Look Before You Leap Before Buying Fruit Trees
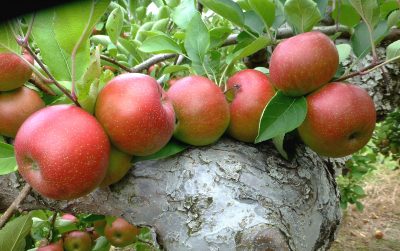
Garden centers and other retail stores have fruit trees for sale now, and in some instances, the price is too good to pass up. But before you run out and buy fruit trees, there are some things you need to consider before purchasing. First and foremost, consider whether you will need more than one tree, or variety of tree, to ensure good cross-pollination.
Peaches, tart cherry, and apricots are self-fruitful and do not need another variety in order to pollinate well. A single tree will produce fruit if all environmental conditions are adequate. But most sweet cherries and pears will not produce much fruit unless the proper cross-pollinator variety is nearby. For example, if you want Bartlett pears, then you will also need another pear variety- d’Anjou, Bosc, or Comice- to ensure proper pollination and good fruit yield.
Providing a cross-pollinator with apples is especially tricky. They are self-unfruitful and require another variety of apple whose flowering period overlaps with it to ensure optimum pollination of the flowers. Pollinator requirements are often not well- understood by novice gardeners who are planning to grow apples for the first time. Many people make the mistake of only buying the apple trees they want for fruit, such as MacIntosh, and they do not realize they will need one more variety of the correct cross-pollinator to get fruit of an acceptable amount.
Apples belong to one of three groups- early, mid, and late-season -blooming. So early and mid-season blooming varieties will provide adequate cross-pollination and fruit set with each other, while mid and late-season varieties will do the same. A late blooming variety then will not provide cross-pollination with an early blooming variety. Conversely, an early blooming variety will not help a late- blooming variety cross-pollinate. The mid-season flowering varieties can be effective cross-pollinators of both the early and late-season varieties.
Note: if there are flowering crabapples nearby that flower at the same time as the apple variety you have, then cross-pollination can be sufficient. Crabapple flowers attract diverse bees and other pollinators. If you already have an ornamental crabapple that flowers when your apple tree does, that will likely be sufficient to ensure good pollination of your apple tree. Apple varieties like Jonathan, Jonagold, Golden Delicious, Gal and several are listed a self-fruitful, but they will set more fruit if cross-pollinated.
To simplify a gardener’s efforts to get the best cross-pollinators for their fruit trees, there are charts available that can be printed and brought to the garden center or nursery that will help in fruit tree selection. If you find a fruit tree variety you really like, do a little research before buying it see whether another variety will be needed for cross-pollination or not. For a good fact sheet that explains the ins and outs of fruit tree pollination there is valuable information on the following link:
https://extension.missouri.edu/publications/g6001
I hope we have a great fruit growing year here in Connecticut. May the pollinators and good weather be with us.
The UConn Home Garden Education Office supports UConn Extension’s mission by providing answers you can trust with research-based information and resources. For gardening questions, contact us toll-free at (877) 486-6271, visit our website at homegarden.cahnr.uconn.edu, or reach out to your local UConn Extension Center at extension.uconn.edu/locations.
Hold Off for Healthier Soil: Managing Spring Compaction Risks
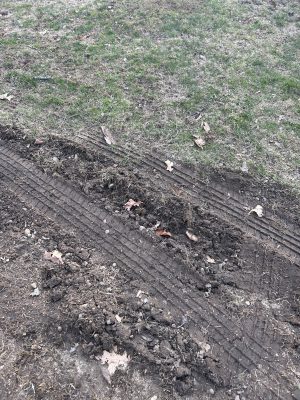
In the case of soil compaction, the early bird often does not get the worm. As temperatures rise, many Connecticut residents are eager to get back into their gardens and begin lawn care. However, after a winter marked by significant snowfall, the effects of snowmelt are still present in the form of pooling water and high soil moisture. Although the warmer weather may seem like the perfect time to begin spring yard work, it is often best to wait. Working or walking on wet soil can lead to compaction, a soil condition that can negatively impact plant health throughout the growing season. Wet soils are more easily compacted than dry soils, and once compacted, they are much harder to remediate.
Soil compaction restricts root growth, making it difficult for plants to access water, nutrients, and oxygen. As a result, plants may show reduced growth and lower yields. Compacted soils also limit water infiltration, which can lead to increased runoff during spring precipitation events. This not only reduces water availability for plants but can also contribute to soil erosion and water pollution, particularly in areas located near streams, ponds, and other water bodies.
Soil microorganisms are impacted by compaction, some of which are responsible for soil nutrient cycling. For example, compaction reduces pore space, which holds oxygen and a lack of oxygen in the soil can increase the rate in which some bacteria perform denitrification, a gaseous loss of nitrogen to the atmosphere. Other soil organisms are impacted as well. Non-burrowing animals, such as mites and springtails, have difficulty penetrating compacted soil, and there is often a decline in burrowing species like earthworms, ants, and beetles.
Common causes of soil compaction include heavy foot traffic and the use of equipment such as lawn mowers, spreaders, and vehicles. Following the same consistent pathway through your yard and garden, even if it seems insignificant, can lead to substantial compaction overtime, especially in high soil moisture conditions. Homeowners should also be cautious about allowing heavy vehicles, such as mulch delivery trucks or off-street parking, onto lawns when soils are wet. Additionally, tilling wet soil can do more harm than good by creating dense soil layers and deep ruts. It is important to wait until soils have dried sufficiently before working them.
To assess whether soil is compacted, start with a visual inspection. Areas with poor plant growth, shallow roots, or standing water after rainfall may indicate compaction. Simple field tests can provide further insight. One method is to dig into the soil with a shovel or spade a few days after a rainstorm. Signs of compaction include surface crusting, plate-like soil structure (resembling stacked dinner plates), or large, dense clods. Another method is to perform a soil hardness test. A few days after rain, try pushing a wire flag or similar probing object into the soil. Hold the flag at the top and press the wire into the soil without bending it. This test is most accurate when soils are moist but not saturated, and care should be taken to avoid rocks. If the probe penetrates less than 4 inches, the soil is considered compacted.
Preventing soil compaction is far easier than correcting it. Avoid walking on garden beds and refrain from working soils when they are wet. Use lighter equipment whenever possible and maintain ground cover to protect the soil surface. If necessary, aerate compacted soils and incorporate compost or organic matter to encourage biological activity from soil organisms that naturally improve soil structure. While organic residues such as compost can help cushion the effects of compaction, excessive traffic will degrade these materials over time. Soils with low organic matter are especially vulnerable to compaction, making regular amendment essential.
Patience in early spring can pay off throughout the growing season. Waiting until soils are drier before beginning yard work will help protect soil structure, promote healthy plant growth, and support long-term landscape sustainability.
The UConn Home & Garden Education Center supports UConn Extension’s mission by providing answers you can trust with research-based information and resources. For gardening questions, contact us toll-free at (877) 486-6271, visit our website at homegarden.cahnr.uconn.edu, or reach out to your local UConn Extension center at extension.uconn.edu/locations.
I “Heart” Philodendrons
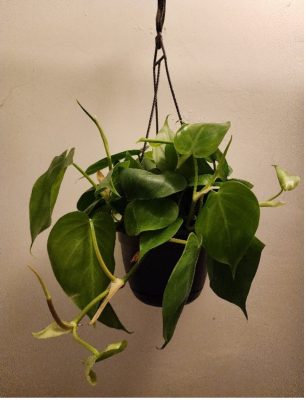
Back in the late1970s when I stumbled upon my mother’s abandoned houseplant book, I had no idea what impact that would have on my life. It was a treasure-trove of knowledge for me, and came with a gallery of some of the most common houseplants. One in particular caught my eye – the Heartleaf Philodendron. I was immediately in love (see what I did there?). All jokes aside, this was one of the biggest staples of the houseplant world, and it still is. Characterized by green heart-shaped leaves, they were commonly displayed in macramé plant hangers.
These plants, like many of our houseplants, come from humid tropical Central and South American forests. The word Philodendron comes from the Greek and means “tree lover.” This name serves as both the scientific and the common name. As one would expect, plants in this genus grow on trees in some fashion. Of course there are exceptions, but most will readily grow up moss poles if provided. A number of the species are perfectly suited to life in a hanging basket, and are commonly referred to as “trailing” to describe their growth habit. A few of my favorite trailing-types are the ones I will focus on for this article. Trailing Philodendrons are one of the easiest plants to grow and also the easiest plants to kill. The secret to their success is to not over water them. The top inch or two of the soil should dry out before they are watered again. They are very unforgiving to overwatering, and quickly develop a fungal infection that will fist cause many leaves to drop, and then the vines will wither and die. Many people see this and assume the plant needs more water, and then accidentally ensure the plant’s death. If they are put outside for the summer, I recommend hanging them under a covered porch so the watering is controlled.
The old-school Heartleaf Philodendron was just the beginning. It is known as Philodendron hederaceum by scientists. It may be incorrectly labeled as Philodendron cordatum, but this is an older/inaccurate name and beyond the scope of this article. One modern favorite variety is called Lemon Lime. As expected, it has some light green to yellow leaves in bright light. Next to the regular green, this variety really stands out. Lemon Lime is similar to one I had thirty years ago called Lemon which had only yellow leaves. There is another new one called Neon that has all yellow leaves as well. It is hard to know if these are true varieties or repackaged versions of the old Lemon with newer names. Brazil is another very hardy variety that has green leaves with a large, thick yellow stripe down the center of each leaf. There is variability in the amount of yellow in each leaf, which adds further interest to the plant. A similar but more striking variety is called Silver Stripe. This plant has a thinner stripe down the middle that is mostly cream or silver colored. This was extremely expensive last year, but is much more common and therefore cheaper now.
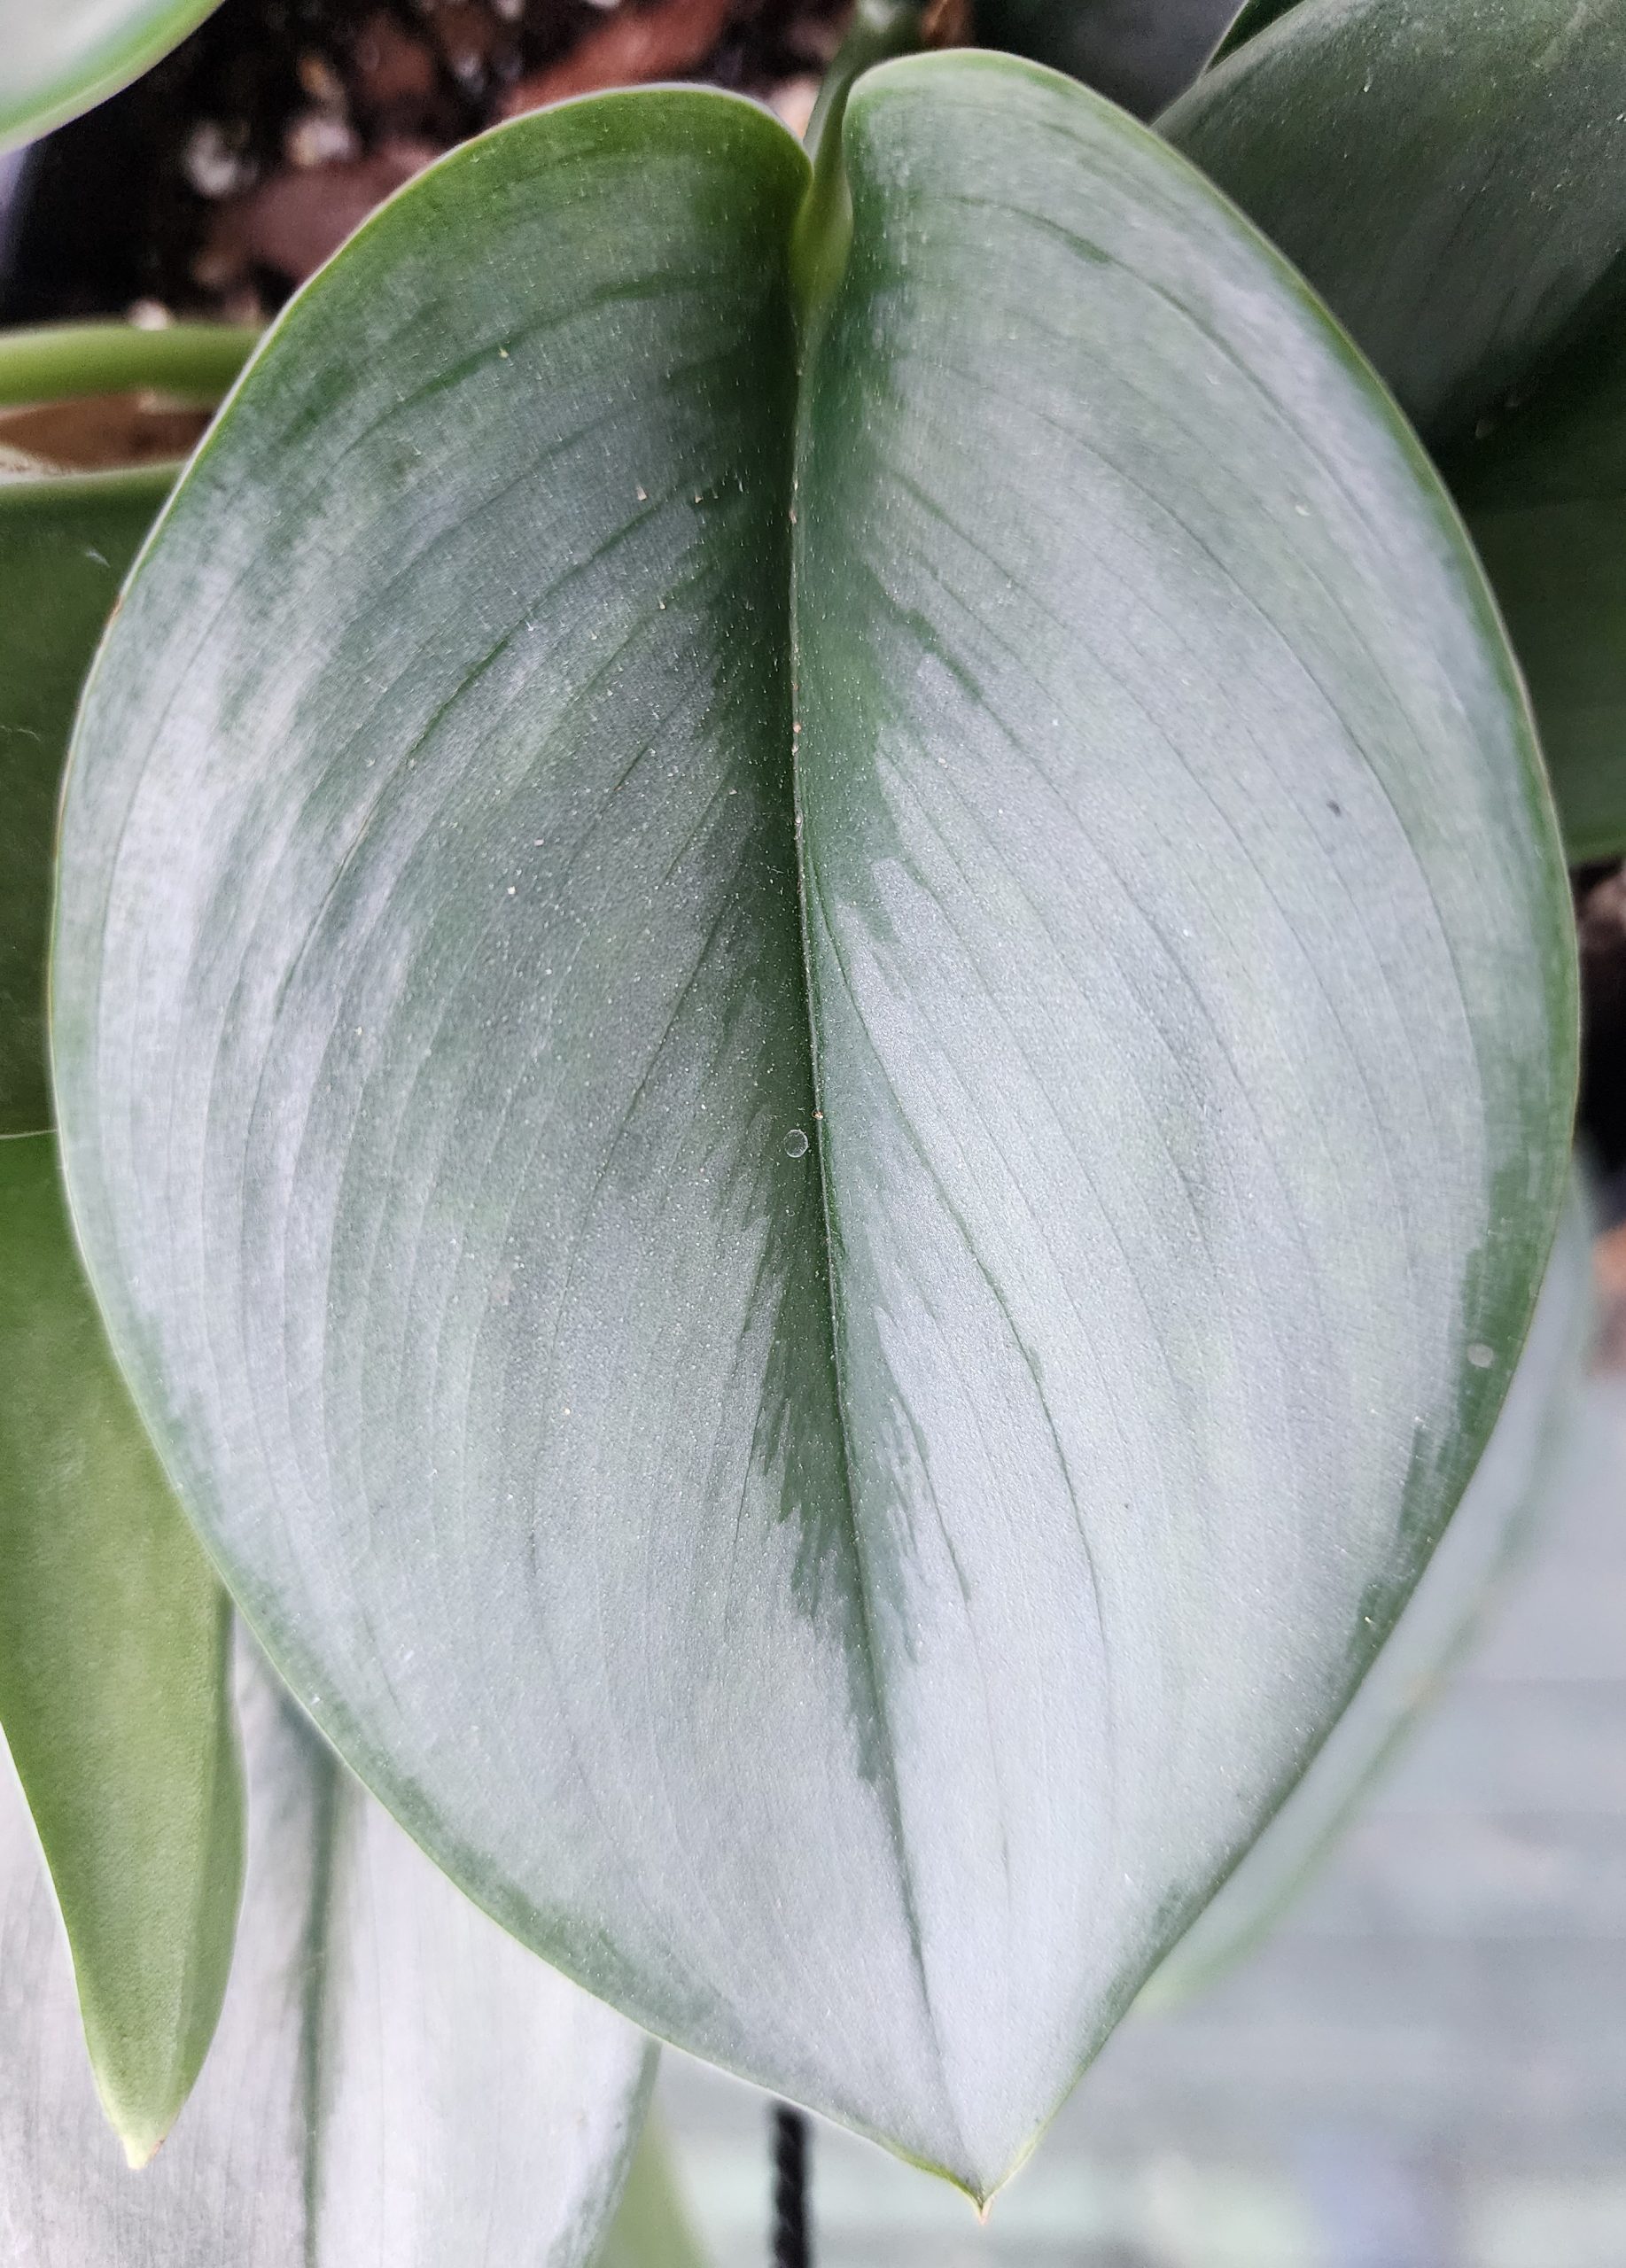
There are a number of different species with similar appearance and growth habits to our P. hederaceum. One of the real stand-outs is the Philodendron brandtianum, commonly referred to as the Silver Leaf Philodendron or Philodendron Brandi. The leaves are a gorgeous true silver color with green stripes following the veins. These are slower growing than the others mentioned here. By the end of last year, it was somewhat affordable in four-inch pots. I have yet to see it offered in a larger hanging basket (probably a few years away from that). A close look-a-like to this plant is the Philodendron sodiroi, which is also called the Silver Leaf Philodendron. Though less intensely silver and with paler green coloration, the leaves are larger. I finally saw one for sale last summer but passed on it as I think it was a mislabeled P. brandtianum. Nevertheless, I am sure these will be equally popular with collectors.

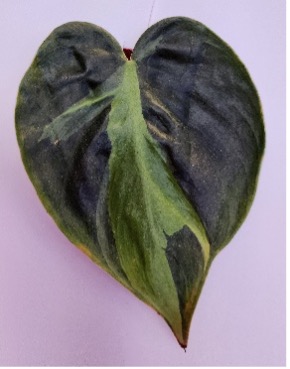
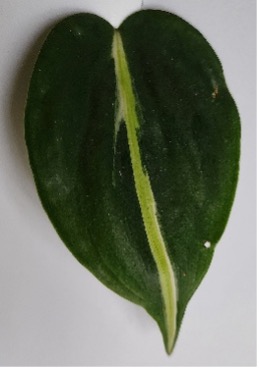
From left to right: Philodendron hederaceum ‘Lemon Lime,’ ‘Brazil,’ ‘Silver Stripe,’ and Philodendron brandtianum (photos by M. Lisy).
All of these plants are easy to propagate by cutting the stem and leaving one leaf per node. Dip it in rooting hormone and keep it in a moist, clear-bag-covered pot and in a few months, there will be new growth. Alternatively, they can be rooting in water, but I prefer the soil method as it doesn’t have to adapt from water to soil when transplanted.
I am hopeful that this article will rekindle an old flame with the Heartleaf Philodendron or its relatives. They are all generally available now in many of the big box, online, and brick-and-mortar plant stores. Why not pick one up to beautify the home for many years to come?
The UConn Home Garden Education Office supports UConn Extension’s mission by providing answers you can trust with research-based information and resources. For gardening questions, contact us toll-free at (877) 486-6271, visit our website at homegarden.cahnr.uconn.edu, or reach out to your local UConn Extension Center at extension.uconn.edu/locations.
The Carbon Sink Under Your Feet: Why Your Lawn Matters

When we think of climate solutions in Connecticut, our minds usually go to big things such as offshore wind, public transit, and forests. We rarely think about our lawns. But soil science suggests that the roughly 40 to 50 million acres of lawn and managed turfgrass in the United States represent a large and often-overlooked opportunity to help keep carbon dioxide out of the atmosphere, especially when those landscapes are well managed. Although forests store far more carbon overall in wood and soil, lawns can still play a supporting role by storing carbon mostly belowground, as long as maintenance inputs like fertilizer, mowing fuel, and irrigation are kept in check. In other words, done well lawns can store carbon in soil; done poorly, those same inputs can wipe out the gains and even make a lawn a net source of emissions.
Your lawn and garden are not just aesthetic choices. They are living systems. Through photosynthesis, grass and other plants pull carbon dioxide from the atmosphere and turn it into sugars. Those sugars are basically “carbon packages” the plant uses to grow. Some of that carbon ends up in leaves, stems, and flowers, and some is sent belowground to build roots and feed soil microorganisms.
As roots and microorganisms grow, die back, and regrow, they add carbon-rich material to the soil. That material becomes part of the soil’s organic matter. In the Northeast, well-managed turfgrass can store carbon at meaningful rates, with published estimates often ranging from a few hundred to more than a thousand pounds of carbon per acre per year.
That same organic matter also gives soil what many gardeners call the “sponge” effect. It helps the ground absorb water, hold moisture longer, and maintain better structure. That means less runoff during storms, better drought tolerance during dry periods, and a healthier root zone overall. Healthier, carbon-rich soil helps a lawn do more than stay green. It helps the landscape better withstand weather stress and keeps more water and nutrients where they belong.
Management that Protects Soil Health
The benefits of a lawn or garden depend heavily on how it is managed. Poor soil management can weaken plant growth, reduce biological activity, and limit the soil’s ability to store carbon over time. If we want the lawn to store more carbon and withstand weather extremes better, management matters. We can start with the following practical steps.
First, test your soil and apply only what the test calls for. Guesswork often leads to over-application of fertilizer, especially phosphorus and nitrogen. Excess phosphorus wastes money, can upset nutrient balance, and increases the risk of runoff into local waterways, where it can contribute to algae overgrowth. Excess nitrogen is also a concern because it can be lost to the air as greenhouse gases and to water through leaching and runoff, affecting groundwater and streams. A soil test helps you target nutrients and lime where they are actually needed, supporting healthier roots and the soil biology that helps build carbon-rich soil over time.
Second, address compaction. When soil is compressed by repeated foot traffic or heavy equipment, it loses pore space. That limits air movement, reduces water infiltration, restricts root growth, and weakens biological activity. Carbon storage does not stop altogether, but the soil becomes less effective at building and holding additional organic matter. In lawns, core aeration can help relieve compaction.
Third, keep the soil covered. Dense grass cover and recycled clippings help shield the soil, reduce erosion, buffer moisture swings, and support soil life. This also supports soil carbon by keeping roots growing and by reducing the loss of carbon-rich soil through erosion and rapid drying. The key is to maintain healthy turf and avoid practices that leave bare ground for long periods.
A Landscape of Stewardship
For Connecticut lawns, the real test is not just how green they look in a good week. It is how well they hold up through heavy rain, summer dry spells, and changing weather patterns. That resilience starts in the soil.
A healthy, carbon-rich soil is one of the best ways to make a lawn more resilient. By focusing on plant-appropriate pH, good soil structure, and science-based nutrient management, we do more than improve how a landscape looks. We make it better able to absorb water, support plant growth, and store more carbon over time.
Your lawn will not solve climate change on its own. But better soil management can make it healthier, more resilient, and modestly better at storing carbon. That is a practical win for landowners, for water quality, and for the broader environment.
The UConn Home Garden Education Office supports UConn Extension’s mission by providing answers you can trust with research-based information and resources. For gardening questions, contact us toll-free at (877) 486-6271, visit our website at homegarden.cahnr.uconn.edu, or reach out to your local UConn Extension Center at extension.uconn.edu/locations.
Watch for these Temperatures this Spring
With a taste of spring earlier in the week, gardeners are itching to get back out there for a little bit of sunshine and horticultural therapy. Don’t let the forecast fool you, we still have a stretch of time before we can really do many of the gardening activities we love.
Interestingly, there is a magic number for gardeners to watch out for. 50°F is a significant temperature for when we, as gardeners, can start to act. However, this temperature, in various applications, needs to be monitored to ensure we’re doing the right activities at the right time.
The first thing we will look for in the spring is air temperature above 50°F during the day. Unfortunately, the couple of days we had last week weren’t enough to really set off the start whistles for us. Consistency is key. When we hit this consistent daytime temperature, we start to see more obvious signs of seasonal changes. With a sustained air temperature above 50°F during the day, we can start to do things like clean out our gardens. Many species of pollinators and beneficial insects will start to become active at these temperatures. While a more accurate tool, known as Growing Degree Days (GDD) can help you identify the specific needs of specific species of both plant and insect development, this rule of thumb gives us a guideline to start with. Remove thick, dense piles of wet and matted leaves, or consider gently fluffing them up with a rake. A one-to-two-inch layer can benefit our plants as a natural mulch, but dense piles should be relocated to compost or the edge of the wood line. If you encourage pollinator habitat, avoid shredding or mulching leaf material as an extra protective measure for any stragglers that may be slow to wake up.
Soil warms much slower than the ambient air temperature, so while it may feel comfortable to work outside, the soil may not be primed for activity. We commonly encourage gardeners to monitor for a soil temperature consistently above 50°F as another milestone. This guideline is found to be the baseline for germination rates of many warm-season plants, and sustained temperatures above this threshold are necessary to promote growth. Cool season annuals and perennials will have different soil temperature thresholds for germination and success. In addition, this is an ideal temperature range for many garden products like fertilizers and pre-emergent herbicides to be effective. As always, check the product label for specifics on temperature ranges, as different products and different species of plants all have different needs. While we get a daily forecast almost anywhere for air temperatures, soil can be a bit more challenging to track. Use tools like Cornell’s Fore Cast or similar resources to help track local soil temperatures.
The last big milestone in the spring comes when nighttime air temperatures consistently reach 50°F or higher. At this point many of our houseplants and tender annuals, including warm-season vegetables, can be planted in the garden or put out onto the patio without protection. This is the stage where we truly feel like spring has arrived and our gardening is in full swing.
When we have a typical season, these benchmarks tend to happen in order. Days get warmer, soil follows suit, and nighttime temperatures are the last to stabilize. However, occasionally, the seasons can throw us a curveball and these may not sync up exactly as planned. Always monitor them as separate markers for the best outcomes in your garden.
By watching these temperature thresholds as the season unfolds, we give our gardens the best possible start. These guidelines are a great place to start for the beginning gardener, and tools like the soil temperature map and growing degree days are there to help the advanced gardener fine tune their practice. Whatever your skill level, we’re here to help you grow!
The UConn Home Garden Education Office supports UConn Extension’s mission by providing answers you can trust with research-based information and resources. For gardening questions, contact us toll-free at (877) 486-6271, visit our website at homegarden.cahnr.uconn.edu, or reach out to your local UConn Extension Center at extension.uconn.edu/locations.
Seed Starting, Simplified
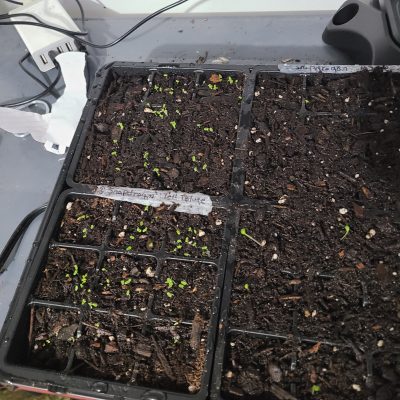
Growing plants from seed is one of the most rewarding parts of gardening. In Connecticut, late winter is the time to start many cold-weather crops indoors, so they’re strong and ready to move outside after the last frost. Starting seeds requires a fair amount of attention, but you don’t need any special tools – this is an affordable project that anyone can tackle.
Start by choosing seeds from a New England or Connecticut–based company. Local seed companies offer varieties adapted to our shorter growing season and changing spring temperatures. One seed packet is usually enough for a 10- to 30-foot row. To determine when to start your seeds, use a calendar and the most up-to-date forecast for the last frost. Write the sowing date on each seed packet, then group packets with similar planting times together to stay organized.
You don’t need any fancy equipment to sow your seeds. All you need are containers with drainage holes and catch trays for excess water. Reuse items from around the house – Styrofoam cups, yogurt or cottage cheese containers, salad tubs, plastic takeout boxes, egg cartons – the list goes on! Before planting, wash containers with soap and water, then rinse with a solution of one part bleach to ten parts water to prevent disease.
Choose a commercial seed-starting mix that is loose and drains well. Garden soil is not recommended because it is not sterile and can introduce mold or disease. Fill containers to about one inch from the top with a moistened seed-starting mix. Level and gently firm the surface. If planting more than one type of seed in a container, make shallow rows and sow seeds evenly. If planting just one type, you can scatter them lightly across the surface. Make sure to label them immediately before or after sowing. Then, cover your seeds with a thin layer of vermiculite or seed-starting mix. Very tiny seeds should remain uncovered. Mist gently with water or set the container in a pan of warm water to moisten from below. Cover the container loosely with plastic wrap or a plastic bag to hold in moisture. You likely won’t need to water again until seeds germinate. Place trays in a warm spot out of direct sunlight. Once seedlings emerge, remove the plastic and move them to a bright window with indirect light. Allow the soil to dry slightly between waterings, but don’t let the seedlings wilt. If needed, thin them out by snipping extras at the soil line with scissors. If they outgrow their containers, you can transplant them into individual pots once they develop one set of true leaves.
Seedlings must adjust gradually to outdoor conditions, a process called “hardening off.” Start by placing them outside in part shade, protected from wind, for about a week. Bring them in at night before temperatures drop. During the second week, slowly increase sun exposure. Start by leaving them outside in direct sunlight for an hour for the first day, and then increasing the amount of time each consecutive day. After this week, if no freezing temperatures are expected, plants can remain outside until transplanting. Hardening off is important in the seed sowing process: skipping this step can lead to sunburned, damaged leaves.
Choose a cloudy day to transplant your seedlings to reduce shock. Dig a hole twice as wide as the plant’s root ball. Gently remove the plant from its container with a spoon, keeping as much soil around the roots as possible. Try not to grasp the plant by its stem; this can cause serious damage. Set it in the hole at the same depth it was growing in its container. Fill the hole gently, without packing the soil tightly around the roots.
Annual flowers like marigolds and zinnias are excellent for beginners. Check the seed packet to determine how many weeks are needed before transplanting outdoors. In late winter, gardeners can start artichokes, perennial herbs, chard, salad greens, onions, leeks and more. By late February/early March, sow cole crops such as broccoli, cabbage, cauliflower, Brussels sprouts, and kale. Tomatoes and peppers can also be started indoors for transplanting later in spring. In New England, peas can be planted outdoors as soon as the soil is workable.
Starting seeds indoors may seem technical at first, but it’s simply a matter of timing, clean containers, good grow mix, and patience. With a little planning now, your garden will be off to a strong start when warm weather finally arrives.
The UConn Home Garden Education Office supports UConn Extension’s mission by providing answers you can trust with research-based information and resources. For gardening questions, contact us toll-free at (877) 486-6271, visit our website at homegarden.cahnr.uconn.edu, or reach out to your local UConn Extension Center at extension.uconn.edu/locations.
Potted Bulbs for Color and Scent
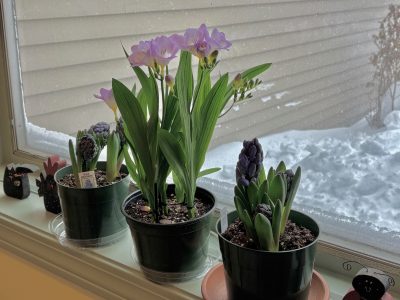
With snow covered gardens and more wintry weather on the way, many of us can’t resist the temptation to purchase potted hyacinths, daffodils, tulips, primroses and other delightful spring blooming plants to bring some early color and fragrance to our homes. It was especially difficult to leave the Connecticut Flower and Garden Show last week without an armload of plants forced into bloom.
To enjoy your plants to the fullest, here are some tips on caring for them. First realize that these plants were ‘forced’ into bloom at an earlier time than they would on their own. Growers manipulate the growing conditions of the plants by regulating temperature, light and moisture. This does stress plants somewhat so depending on the type of bulb, some may or may not bloom again.
If you have not purchased any pots of forced bulbs yet but are planning to, select ones that are still budded or ones where just a few flowers have opened. This will ensure a longer bloom period for you to enjoy. If temperatures are below 40 F, it is best to bag or wrap the plant in the store to keep the blossoms and foliage from cold injury and get the plants home as soon as possible. Leaving them in an unheated car in frigid temperatures is not a good idea.
Whether you’ve chosen to bring home spring flowering bulbs, like hyacinths, or a hardy perennial, like primroses, they pretty much all have similar requirements as houseplants. All these plants appreciate being kept in cool temperatures with between 50 and 60 F being optimum and 70 F probably being the upper limit. Warmer temperatures will cause plant growth and flowering to speed up so your blooms won’t last as long.
Bright indirect light for 6 to 8 hours of the day will keep your plants growing longer. Lately with the cloudy weather and limited sunshine, most of us can keep plants in a south window this time of year as the sun’s light is less intense and also, sparser than we would hope. Usually, the temperatures near windows are much cooler than other areas of the house.
All of these plants, as well as most other houseplants, grow best when kept moderately moist. Avoid overwatering or having pots sit in water as that can lead to root rots. I’ve noticed growers shying away from peat based potting mixes that were more moisture retentive. So, check plants every other day at first to see when they are in need of watering. While the plastic or foil pot wraps might make your selection look more appealing, they often do not have drainage holes so if pots are overwatered, the excess water stays in the wrap and the roots remain saturated and prone to rot. I like to water these plants by taking them out of the wrap, bringing them to the sink and applying enough water so that it runs out the bottom for a half minute or so and then let them sit in the sink until excess water drains out. Then return to their wrap or better yet, a saucer where excess water can be easily seen and dumped.
As far as fertilizing goes, it depends on whether you want to keep these plants and set them out in your garden when warmer weather arrives or will they get relegated to the compost or trash heap. If you intend to plant them out, then fertilize them using a half strength houseplant fertilizer every other week. The reason being you want the green foliage to photosynthesize as much as possible before the plants go dormant. The food produced by this process will enable the bulbs to sprout and grow next year. Even if not planted out, perennials like primroses will bloom for a longer period of time inside if regularly fertilized.
I have found flowering bulbs, like hyacinths and daffodils, to come back pretty successfully when planted in the garden, while having little success with tulips, unless they are species tulips or some of the smaller Greigii varieties. If keeping bulbs for planting out, remove the flower stem after blooms have faded but keep watering foliage until it starts to fade and brown. Remove the dying leaves and then the pot can be moved to a cool, dimly lit spot and just kept barely moist until the soil can be worked in the spring.
For primroses, remove the flower stalks as blossoms fade. Depending on the species purchased, your plants may or may not be hardy outside. Hopefully the plant tag will mention hardiness zones or at least give you the species so you can look it up. Primroses can be kept as houseplants but they do require cool temperatures, bright indirect lighting and regular fertilizing and watering when forming buds and in bloom. In the garden, primroses sulk in hot weather often dying back until next spring when cooler temperatures prevail.
With a little care, flowering bulbs and other plants can liven up these dreary winter days. At least they let us know, spring is right around the corner.
The UConn Home Garden Education Office supports UConn Extension’s mission by providing answers you can trust with research-based information and resources. For gardening questions, contact us toll-free at (877) 486-6271, visit our website at homegarden.cahnr.uconn.edu, or reach out to your local UConn Extension Center at extension.uconn.edu/locations.
Planting Bare Root Trees and Shrubs
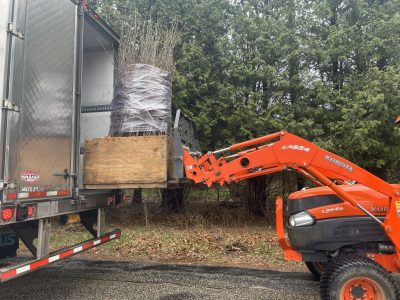
Bare root trees and shrubs, as the name suggests, are not sold in a pot or balled and burlapped. At the nursery bare root plants are grown in the ground, harvested as young plants, and sold without soil surrounding the roots. They are sold while the plant is dormant, usually in late winter or early spring and are best planted while they are still dormant or just before bud break. Historically, they have been used for agriculture or conservation plantings but they are also suitable for the home landscape. Bare root trees and shrubs are a great choice if you need a lot of plant material or are on a tight budget.
Consider using bare root trees and shrubs to provide structure in your garden, to create wildlife habitat, for erosion control, or to start your home orchard or tree farm. Additionally, bare root plants are perfect for planting a hedge because they are similar in size, establish quickly, and don’t require too much digging. They will take longer to fill in the hedge than containerized plants, but they will cost a lot less money. Many popular landscape trees and shrubs are available as bare root plants.
Choose a reputable nursery or grower, preferably one that is growing regionally adapted plants. In New England, choose a grower in the Northeastern United States. When choosing species to purchase, have planting goals in mind. These goals can be those previously mentioned or other goals like revegetating an area with native plants after removing invasive plants. As with any planting project, consider the right plant for the right place. Choose species that are suited to the growing conditions of the planting area. Consider sun exposure, soil characteristics, hardiness zone, plant size at maturity, and location of underground utilities.
Before purchasing bare root plants, have a plan with all the above considerations addressed. Unlike containerized plants, bare root plants have a very specific and narrow timeline for purchasing and planting. They are typically shipped in the early spring, around the time they should be planted.
To keep plants dormant before planting, they can be placed in the fridge or in an unheated garage or basement. They can be stored dormant in the original shipping package for no more than two weeks before planting. Mist the roots every few days so they do not dry out during cold storage.
Planting bare root plants is done in the early spring before buds open or late fall after the plant goes dormant but before the ground freezes. As with all trees and shrubs, they should not be planted too deep. The root flare, or transitional part of the plant between the roots and stem, should be level with the soil. Add a layer of mulch or compost but avoid piling mulch too high up the trunk. Water weekly, or more often under dry conditions, during the first year after planting. Protection from deer and rodents is important when planting young tender trees and shrubs. Use a tree tube or fencing to discourage browsing.
The UConn Home Garden Education Office supports UConn Extension’s mission by providing answers you can trust with research-based information and resources. For gardening questions, contact us toll-free at (877) 486-6271, visit our website at homegarden.cahnr.uconn.edu, or reach out to your local UConn Extension Center at extension.uconn.edu/locations.
Keeping Valentines Day Flowers Fresh
Valentine’s Day is one of the biggest holidays, next to Mother’s Day, in the floral industry. Whether you’re buying fresh cut flowers, or a potted plant for someone special, helping them keep those flowers looking their best can be part of the gift you give this year.

Start by selecting flowers that look healthy and vibrant. You want flowers with firm petals, with buds just starting to open or have just recently opened. Avoid flowers that are releasing pollen, are discolored, or have drooping foliage. Check the stems for rigidity and make sure that plant material is clean with no indications of mold or decay. When you purchase your flowers, many florists will give you packaging to help reduce their exposure to the extreme cold as you carry them to your car. This is an important step, so don’t skip it if you can! Avoiding large temperature fluctuations will keep your flowers fresh for longer.
When you get home with your flowers find a vase that is clean and free of debris. Always wash vases with warm, soapy water in between uses to prevent the transmission of bacteria and disease from one bouquet to the next. Add fresh, tepid water. Remove all plastic, rubber bands, and other packaging from your bouquet. Cut each flower stem at a 45-degree angle using hand pruners or snips. Using scissors, or knives that aren’t sharp may crush the vascular tissue and prevent the flowers from taking up water, leading to faster decline. Remove any leaves that would sit below the water line before placing stems into the vase.
If you have a bouquet of roses, take special care when you are preparing their stems. These flowers will live longer if you cut their stems under water, using the same 45-degree angle, and place them in your vase of water as quickly as possible. This extra step ensures that air bubbles don’t work their way into the vascular tissue and will keep your roses fresh for longer. When we see roses develop a “floppy neck,” this is most often the cause. While it is possible to revive your roses from this issue, it is best to try to avoid it altogether.
There are many anecdotes out there regarding additives to provide food and antimicrobial agents to the water to help your flowers last longer. Many of these anecdotes aren’t based in research. If your bouquet comes with a flower food packet, mix it as instructed and use it in your vase. However, if you don’t have one, don’t worry about adding anything. Instead, focus on ensuring that you are giving your flowers fresh, clean water.
Decay and microbial growth are two of the biggest reasons our cut flowers pass quickly. Many of the strategies mentioned above help to mitigate this concern, but it is important to keep a watchful eye. Besides washing your vase in between use, sanitize your flower snips or pruners in between uses as well and watch the water quality in your vase, replacing it every couple of days with fresh, cool, water. Always change the water if it appears murky or cloudy in the vase.
When changing your water, make a fresh cut 1-2 inches up the stem to ensure that the vascular system is staying open and clean of any debris or bacteria. If stems are starting to get mushy, cut high enough above the decay, or consider removing the stem entirely from the arrangement. Keep your flowers in a location that is bright but avoid direct sunlight, and keep them away from drafts, or entryways where large temperature fluctuations are likely. Lastly, know when to say goodbye and dispose of any flowers that are past bloom, or showing signs of decay. You may notice that you’ll need a smaller vase as you cut your stems shorter or remove flowers as they pass. A mason jar makes for a great display for those longest lasting flowers!
There’s no doubt that fresh flowers bring vibrancy and life into our homes during these blustery, winter months. Whether you’re buying a bouquet for yourself, or for someone special this Valentine’s day, keep a close eye on them and you’ll be sure to have long lasting blooms to enjoy!
The UConn Home Garden Education Office supports UConn Extension’s mission by providing answers you can trust with research-based information and resources. For gardening questions, contact us toll-free at (877) 486-6271, visit our website at homegarden.cahnr.uconn.edu, or reach out to your local UConn Extension Center at extension.uconn.edu/locations.
Microplastics in Garden Soils: Should Homeowners Worry?

If you spread compost on your garden this year, there is a good chance you added a little plastic, too. Researchers around the world are now finding microplastics – tiny plastic fragments and fibers smaller than a grain of rice – in garden soils and compost products that look perfectly normal to the naked eye. In one recent study of commercial composts, every single one of the 11 products tested contained microplastics, with cleaner, eco-labeled brands still showing lower but measurable levels.
That raises a fair question for Connecticut homeowners: Should you worry about microplastics in your yard? The short answer is don’t panic, but don’t ignore it either. Microplastics are not a crisis that should send you ripping out your raised beds, but they are a good reason to be mindful about how plastic moves through our gardens and to be choosy about what we bring in.
Where are microplastics coming from?
Microplastics in garden soil mostly come from everyday sources. Composts and organic fertilizers made from mixed municipal waste or sewage sludge can carry plastic fragments and fibers, and biosolid-based fertilizers have been identified as a major pathway for microplastics into farm and lawn soils. Plastic-coated, slow-release fertilizers can contribute microplastics as their coatings weather and break down. In yards and gardens, plant tags, synthetic twine, netting, and landscape fabric can also fragment into tiny pieces when mixed into soil or added to the compost pile. On top of that, particles from tire wear, litter, and degraded plastics elsewhere can settle out of the air or arrive with runoff.
What they mean for your yard and produce
Scientists are still figuring out the full story, but some patterns are emerging. Lab and greenhouse studies show that plastic particles can affect earthworms and microbes and, in some cases, reduce seed germination, root growth, and nutrient uptake. What this means for a typical Connecticut backyard is still being studied, and while the highest documented levels of microplastics are in intensively treated farm soils, we don’t yet have enough data to say exactly how home gardens compare. Based on what we know so far, microplastics don’t appear to be an immediate emergency in your yard, but they are a good reason to take soil seriously and to reduce plastic input wherever you can. You can’t control every particle that drifts in on the wind, but you can control much of what you deliberately put on your soil and avoid adding unnecessary plastic to a system you want to keep healthy for decades.
One of the biggest questions for homeowners is whether these particles enter food crops in significant amounts. While lab studies show that tiny plastic particles can interact with roots and potentially enter plant tissues, scientists are still working to understand how often this happens in a typical backyard and what it actually means for human health. For now, most scientists emphasize source control, i.e., reducing inputs, as the most practical step. That is something gardeners are already good at: choosing better materials, building healthy soil, and asking hard questions about what they buy.
Practical steps to reduce plastic in your garden soil
Simple shifts in what you apply to your yards can greatly reduce microplastic inputs. Be choosy about compost and soil amendments. Ask what went into bagged or bulk compost, and favor products made from yard waste, leaves, or clean food scraps over those blended with municipal solid waste or sewage sludge. Avoid fertilizers and composts listing “biosolids,” “sewage sludge,” or “municipal residuals,” which are known sources of microplastics. Rethink plastic-coated fertilizers, as their coatings break down into microplastics. Keep plastic out of your compost stream by removing plant tags, synthetic twine, and landscape fabric scraps whenever you can. Skip thin plastic mulches and cheap fabrics and use shredded leaves, wood chips, cardboard, or durable, reusable barriers. And don’t underestimate your own leaves and grass clippings; they are low in plastic, build organic matter and structure, and improve soil without adding new plastic sources. We may not be able to garden without any plastic in the 21st century, but we can make sure that the soil under our feet isn’t quietly becoming a plastic landfill in slow motion.
How Connecticut is already acting on related concerns
Connecticut has not yet written microplastic standards for garden products, but the state has moved aggressively on a closely related issue. As of October 1, 2024, Connecticut banned the use or sale of any soil amendment made from biosolids or wastewater sludge that contains PFAS (per- and polyfluoroalkyl substances, a group of persistent “forever chemicals”), and on July 1, 2025, extended the ban to PFAS-containing biosolid fertilizers. Those laws are aimed at chemicals, not microplastics, but they target many of the same products. To read more about this law, read our article here.
The UConn Home Garden Education Office supports UConn Extension’s mission by providing answers you can trust with research-based information and resources. For gardening questions, contact us toll-free at (877) 486-6271, visit our website at homegarden.cahnr.uconn.edu, or reach out to your local UConn Extension Center at extension.uconn.edu/locations.
A Spider Everyone Can Love
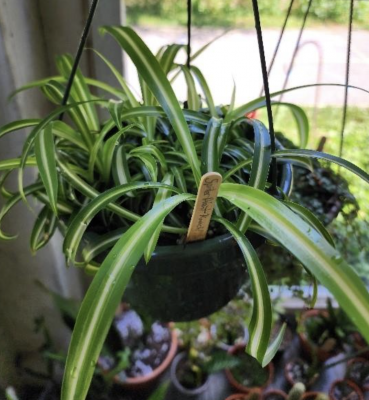
Spiders are one of those creatures that humans fear. Most here in the Northeast are totally harmless, yet many times people run and occasionally hurt themselves trying to get away from them. As such, it is interesting to me that one of our most beloved plants is called “Spider Plant.” Its growth does superficially resemble a spider, but this one brings joy to its owners. In fact, it is one of the hardiest of all our houseplants.
Scientifically it is known as Chlorophytum comosum, and there is quite a bit of controversy in the scientific community over species. In the pictures accompanying this article, the differences in the leaves can be clearly seen. The great debate stems from (pun intended) differences in leaf shape. Scientists cannot decide on whether those differences represent phenotypic variation (changes in shape found within a population) or differences between species. And while it seems like this should be an easy task, look at all the differences seen in dogs, which are all the same species. While the leaves on our houseplants most likely represent different artificially selected cultivars (varieties), determining how many there are in the wild is difficult. Plants normally have some ability to change the shape of their leaves. For example, plants grown in shade tend to have larger leaves than those grown in full sun. These plants are native to South Africa, and tend to grown in forests, which could explain why such variation is seen in the wild. There were two other species listed for a while, but then those got lumped back in to C. comosum and their differences chalked up to environmental variation.
In reality, how many species there are does not really matter for us keeping these wonderful houseplants. What does matter is their forgiving nature. They grow and thrive in any typical houseplant soil. It is best to let the surface dry before watering again. They have an interesting root system that is part of the key to their success. The thick, tuberous roots store water, and that is why they can survive for much longer than other houseplants. When repotting, it is amazing how they fill the pot completely with roots. Although it sounds like this might become a problem, the Spider Plant does not mind. It responds with more leaves, and even babies.

The Spider Plant is easily propagated by planting the little plantlets that form along runners sent out by the mother plant. Simply plant these in typical houseplant soil, water well, and they will start to grow. As they do not have a fully developed root system yet, care must be taken to not let them dry out during the beginning stages. This plant is probably the most easily propagated houseplant. I still have one propagated by my first-grade teacher. It grew in the classroom when I was there, and two years later when my sister had the same teacher, it had produced babies that were sent home with each student. Despite all of life’s ups and downs, the plant is still going and thriving almost half a century later.
There are a number of interesting varieties of this plant. The leaves can be narrow, wide, or curled. The colors of the leaves are interesting as well, and can be found in any combination of leaf-types. There are green leaves with a white center stripe. Alternatively, there are green leaves with white edges. As one would expect, there are all green leaves too. Although I do not have one yet, there is a variety called ‘Hawaiian’ that has a green leaf with a yellow center. Don’t be fooled by some so-called Spider Plants that are purple – those are actually Tradescantia, or Spiderworts, which are a totally different species of plant native to the Americas. No matter which variety is chosen, with proper care Spider Plants could bring the owner enjoyment for a lifetime!
The UConn Home Garden Education Office supports UConn Extension’s mission by providing answers you can trust with research-based information and resources. For gardening questions, contact us toll-free at (877) 486-6271, visit our website at homegarden.cahnr.uconn.edu, or reach out to your local UConn Extension Center at extension.uconn.edu/locations.
Beech Bark Disease – One More Problem For Connecticut Beech Trees
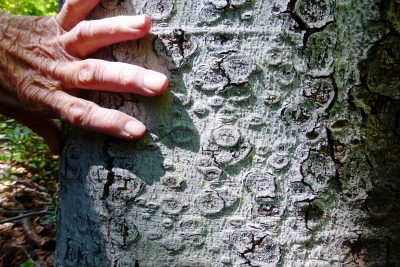
American beeches have been suffering from beech leaf disease that is widespread in both Connecticut landscapes and forests. The prognosis for this disease is currently uncertain, but research is investigating treatments and other methods for possible control. This disease is evident from dark bands appearing on the leaves, so homeowners can to some extent seek help from licensed arborists once this symptom is evident.
Meanwhile, beech bark disease is also becoming a major threat to American beech (Fagus grandifolia) in eastern North America. This disease is a result of an interaction between a scale insect and one of two Nectria fungal pathogens. When these scales are present, beech bark disease has an increased chance of infecting the tree. The scale responsible was introduced from Europe and first appeared in Nova Scotia around 1890, according to researchers. Within forty years, the fungal pathogen combined with heavy infestations of the beech scale were killing trees, although only in Eastern Canada and Maine.
The scale insect, Cryptococcus fagisuga, will attack American beech, European beech (Fagus sylvatica) as well as Chinese and Oriental beeches, F. enleriana and F. orientalis, respectively. The scale insects pierce through the thin bark of the beeches with a stylet and inject enzymes to help digest the plant material. These small wounds in the tree can now be the entry point of fungal pathogens, including the two native Nectria spp. that can cause beech bark disease.
Adults mate and females lay eggs in mid- summer. Eggs hatch from late summer until early winter and form a waxy white covering. These scale insects often go unnoticed until they develop a “woolly” appearance which is evident in the winter. The immature scales overwinter on the tree, and the next year will become adults. If you notice white woolly scale insects on beeches, especially on trunks, these are likely the beech bark scale. In two to three years, scale populations can reach high levels where the trunks may appear white. Scales do not have wings, but they can be blown by the wind to new trees or transported by birds or even humans.
Disease symptoms take several years to develop after scales appear. Anyone hiking through the forests of Connecticut has probably noticed disfigured bark caused by the Nectria pathogens responsible for beech bark disease. In severely infected trees, living tissue just beneath the outer bark is killed. Cankers appear looking like rough, raised, circular disks. Fungal fruiting bodies appear in the center of these raised circles. Sometimes there are so many red fruiting bodies of the fungus that large areas of the trunk appear red. Over time, bark may crack and split off. Trunks of weakened trees can snap in high wind events. Nectria kills areas of woody tissue, sometimes creating cankers on the tree stem and large branches which in turn weaken the tree. Infected trees can thus be susceptible to other diseases and insects.
So, this is not a happy tale, but homeowners do have some good news. Controlling the scale on any ornamental or native beeches on a property resulting in the absence of these scale insects will prevent beech bark disease. Because beech can form thick stands, thin some smaller trees out so the remaining trees will retain vigor. Make sure trees that have no scale present, and no disfigured bark are left with good space between them.
In case you may need an arborist, the Connecticut Tree Protective Association has licensed arborists that can help you assess the situation with your trees. A licensed arborist will be the best choice in any case. They will be educated in tree insect and disease problems and their solutions, if any are available. Contact the Connecticut Agricultural Experiment Station Forestry and Horticulture department for the latest news and control options for disease and insect problems. Hopefully, your beech trees will never have problems.
The UConn Home Garden Education Office supports UConn Extension’s mission by providing answers you can trust with research-based information and resources. For gardening questions, contact us toll-free at (877) 486-6271, visit our website at homegarden.cahnr.uconn.edu, or reach out to your local UConn Extension Center at extension.uconn.edu/locations.
Camellias for Color, Inside and Out

Now that the holidays are over, the decorations are put away and scenes of dreary, wintry weather dance in our heads, one plant with flowers resembling roses that comes into bloom this time of year are camellias. These Asian natives have been cultivated for possibly 5000 years. Most of us are familiar with Camellia sinensis var. sinensis aka, tea! Black tea, white tea, green tea all come from the same plant just processed differently.
Other camellia species were noted and grown for their flowers gracing gardens of temples and nobility. Prized plants were selected and crossed and eventually made their way to England, sometime in the 1730s. These elegant and highly treasured plants soon were spread all over Europe with hybridists and propagators in Italy, France, Belgium, Holland, Portugal, Spain, Germany and the U.K. by the middle of the 19th century. More and more hybrids and cultivars were being developed with the number now well over 3,000. As their popularity grew, camellias were soon being grown in Australia, New Zealand and the U.S. Societies, like the American Camellia Society sprang up and shows were held (and still are) to exhibit various forms and compete for awards.
Options for growing camellias in Connecticut depend on what part of the state you live in. Thanks to breeding efforts of Dr. William Ackerman (retired USDA plant breeder) and Dr Clifford Parks (Univ of NC botanist) varieties of camellias hardy to zone 6 (-10 F) were developed. Depending on the variety and environmental conditions, camellias can bloom from fall to spring. Many of the most popular cold hardy, fall blooming cultivars belong to the Winter Series bred by Ackerman and include plants such as ‘Polar Ice’, Winter Charm’ and ‘Winter Rose’, the latter reaching only 2 to 3 feet high and wide making it a possibility for container culture.
Dr. Parks focused on cold hardy spring bloomers including the April series (C. japonica hybrids). Many grow from 5 to 10 feet tall and can be found at some local nurseries. Look for ‘April Rose’, ‘April Blush’, ‘April Remembered’ and ‘April Tryst’.
Keep in mind that our weather has been somewhat unpredictable so those in zone 6 might want to locate plants in a semi-shaded, protected location. Camellia flowers are just exquisite, resembling roses in colors ranging from white to pink to red. Some are picoteed, some are double and some are very fragrant. The dark green foliage holds up year-round.
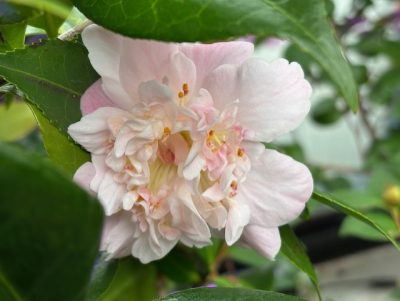
Camellias, being broad-leaved evergreen shrubs, have similar requirements to rhododendrons. They do best in an acidic, well-drained soil amended with organic matter. It is often best to group them for effect and also for some protection from the elements. Plants are slow-growing and need adequate moisture but avoid planting them in poorly drained sites. Semi to full shade is preferable as the leaves may scorch in sunny, dry areas. A fertilizer for acid-loving plants can be applied in early spring as directed on the package. Pruning is rarely needed but could be done right after flowering.
I’ve never been fortunate to live in a warm enough location to plant camellias outdoors, but several cultivars are perfect as house plants if kept in a cool spot indoors. Two available from Logee’s in Danielson are ‘High Fragrance’ with delightfully scented light pink semi-double flowers and ‘Scentuous’ with fragrant, semi-double white blossoms. They have others blooming in their greenhouse.
Growing camellias in containers is a splendid way to get winter color, often along with fragrance. According to Logee’s co-owner and horticulturist, Bryron Martin, plants require an acid soil with a pH around 4.8 to 5.8. They can be grown in a camellia/azalea potting mix. Martin advises that young plants can be pinched back for fuller growth although that will delay flowering a bit. Keep in mind that some cultivars can get up to 6 feet in height so either select those that mature at a smaller size or be sure you have space to accommodate them.
Temperature is key to induce blooms. Ideally Martin recommends nighttime temperatures no higher than 59 F during the winter and preferably 30 – 40 F so an unheated room or sun porch is a great place for camellias. If nighttime temperatures are too high, the buds will drop. An east or west exposure will provide adequate light.
Fertilize camellias in the spring when active growth begins. Use a fertilizer for acid loving plants as directed. Commercial synthetic and organic camellia fertilizers are available. Some growers use a cottonseed meal/bloodmeal homemade blend. To supply adequate magnesium to plants, Martin recommends dissolving 1 tablespoon of Epsom salts in a gallon of water and applying this mixture twice a year.
For late fall through spring blossoms, indoors or out, camellias are attractive, evocative plants that perhaps more folks might consider cultivating. Those looking for a Valentine’s Day activity might consider the Camellia Festival at Planting Fields in Oyster Bay, NY. The Lyman estate in Waltham, MA also has a camellia greenhouse that is open to the public.
The UConn Home Garden Education Office supports UConn Extension’s mission by providing answers you can trust with research-based information and resources. For gardening questions, contact us toll-free at (877) 486-6271, visit our website at homegarden.cahnr.uconn.edu, or reach out to your local UConn Extension Center at extension.uconn.edu/locations.
Plan Early For A Great Growing Season
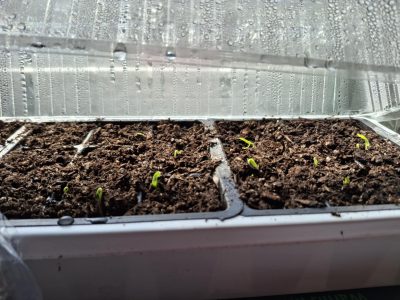
As you start to plan your next vegetable garden, you may reflect on the previous seasons to help you develop your seed selection, layout, and more. Gardening can already be a sustainable practice, but many want to be more intentional with reducing waste, improving efficiency, and promoting sustainability in their home. Your stages of garden planning should include considerations to ensure you are meeting these goals during the growing season.
The first way to improve your practices is to have an honest assessment of your strengths and weaknesses as a vegetable gardener. For example, through years of trial and error, I have finally admitted out loud that I am not skilled at keeping pepper seedlings warm enough to yield bountiful plants in the growing season. As a solution, I now buy my pepper plants from the garden center in the spring, while still using my setup to start other vegetables and flowers from seed. Using the garden center to help fill in gaps allows you to use that time, energy, and money for seed that has a track record of success. You might even have space to try something new!
Plan to save seed before your plants even start growing. Select seed varieties listed as “open pollinated” so that the offspring will come back true to seed in the following season. Plants that do not have this designation may not come back true to type and may lead to unfamiliar plants in the future!
Consider space as a commodity while you’re planning your garden. Think about the space that some plants require, and determine if that product is worth that space, time, and energy. If your row will yield half a dozen heads of cabbage from weeks of watering, weeding, and care, does that meet your gardening goal? Or do you have other goals in mind? Decisions like this early in the planning stages can help you make your garden more efficient, productive, and tailored to you.
Prevent waste by growing what you and your family will eat. Sometimes gardeners get caught up in the novelty. Purple cauliflower is exciting and worth the space if your family will eat the cauliflower. Avoid overplanting to keep your garden efficient and reduce waste. Does your family get sick of certain produce mid-season? That could be a clue that you're overplanting. When planning for the year ahead, ask yourself if your family has the capacity to eat or safely store whatever is harvested when it is ready. Plant yields are easily researched to help you determine how many plants you may need in your garden to meet your goals.
It can be difficult to consider cutting certain vegetables out of your garden for space or efficiency. However, this is where local agriculture can assist. Just like buying pepper starts from the garden center saves time and energy in the seedling space, buying local produce can help fill any gaps you may feel in your garden’s productivity. From a sustainability standpoint, buying local usually means less energy used in transportation, refrigeration and storage when compared to produce from outside our region.
Cost Share Agriculture (CSA) programs are an effective way to supplement your garden produce. These programs often work on a shareholder system, where purchasing a membership up front will guarantee a share of the farm’s harvest throughout the season usually on a weekly or bi-weekly basis. Connecticut has CSAs for produce, cut flowers, and even meat products. Many of them start signups well before the growing season begins, so keep an eye out! Visiting local farmers markets is another way to help supplement your garden produce, with less of a regular commitment. Some even provide forms of family entertainment, like music, during the summer.
As you plan your next garden, remember that sustainability starts with intentional choices and there is no “one size fits all” strategy. Carefully considering your strengths, weaknesses, and goals will help you promote a sustainable and efficient garden in the season to come.
The UConn Home Garden Education Office supports UConn Extension’s mission by providing answers you can trust with research-based information and resources. For gardening questions, contact us toll-free at (877) 486-6271, visit our website at homegarden.cahnr.uconn.edu, or reach out to your local UConn Extension Center at extension.uconn.edu/locations.
Five Soil Myths That Cost Home Gardeners Money
2025
Cranberries, A Symbol of Holiday Cheer
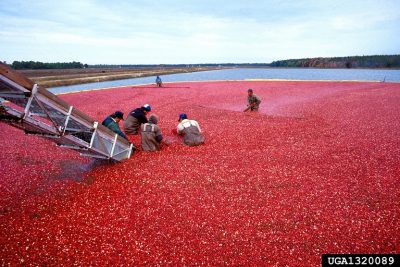
Each holiday season, a wave of bright red cranberries appears on Instagram feeds, Pinterest boards, and tables across the nation in the form of sauces, desserts, drinks, and decorations. Beyond their seasonal fame however, these tart red berries play a major role in U.S. agriculture and culture.
Let’s start with some numbers. The USDA estimated the 2024 U.S. cranberry harvest at about 8.24 million barrels, roughly 824 million pounds of fruit. Here in the U.S., the cranberry king is Wisconsin, producing nearly 4.9 million barrels, around 60% of the national total. In second place is the historical cranberry producer, Massachusetts, with approximately 2.2 million barrels produced in 2024. The top agricultural crop in the state, Massachusetts’ cranberry crop alone is valued at $73.4 million, supporting over 6,400 jobs and generating $1.7 billion in annual economic activity. Cranberries are so important for Massachusetts, in fact, that they are the state fruit and cranberry red is the state color.
Cranberries, known scientifically as Vaccinium macrocarpon, are native to North America and are a close relative of blueberries. Compared with blueberries however, cranberry plants tend to be smaller, low to the ground and vine-like. The vines require acidic soil (pH 4.0–5.5), a reasonably cool growing season, and abundant fresh water. If these conditions can be emulated at home, cranberries can make an attractive edible ground cover. They perform well when planted alongside plants such as conifers and rhododendron, provided they are given plenty of water and appropriate fertilizer for acid-loving plants.
For commercial production, cranberries thrive in uniquely engineered wetland environments - bogs built atop beds of sand, peat, gravel, and clay. The annual commercial production cycle of cranberries begins with winter flooding, which forms protective ice that shields the vines and prepares the surface for sanding, which stimulates spring growth. As temperatures rise in spring, bogs are drained, and bees pollinate the blossoms. Summer is devoted to irrigation and monitoring, followed by harvest from mid-September through early November, before the cycle repeats with winter flooding and freezing.
Cranberry growers will typically harvest their crop one of two ways: through wet harvesting or dry harvesting. Wet harvesting describes the process where bogs are flooded to allow berries to float to the surface before being netted and loaded into equipment for cleaning and processing. This harvesting technique is the most popular, but requires proper equipment and careful planning. Dry harvesting, the process of using mechanical pickers that comb berries into conveyers, is an approach primarily used for fresh markets. More fruit are left on the vine with this approach, but the collected berries for fresh market can be sold at high prices and dry harvesting allows growers without the means to flood and drain their bogs on a schedule to grow cranberries.
Cranberries are deeply embedded in holiday traditions, thanks to their seasonal harvest, festive red color, and historical use. For more than 12,000 years, they’ve been utilized by Indigenous communities, especially the Wampanoag People, for food, medicine, dye, and winter preservation. The cranberries collected by hand in the bogs of southern Massachusetts were both eaten fresh and dried for shelf stability, then eaten as-is later in the winter or mixed with dried meats and fat to make pemmican, a hearty winter staple.
European settlers in New England quickly adopted the appreciation of cranberries, integrating them into winter celebrations. By the 18th and 19th centuries, cranberry sauces, relishes, and baked goods were staples of Christmas feasts. Their vibrant red hue also made them popular in holiday crafts such as cranberry-popcorn garlands or wreath embellishments.
U.S. cranberries reach peak consumption during the holidays. Though 95% of cranberries are processed into juice, sauce, or dried fruit, fresh cranberries remain a holiday staple, used in everything from stuffing and pies to cocktails and décor. Around 400 million pounds are eaten annually, with an estimated 20% consumed during Thanksgiving week, about 80 million pounds. With per-capita annual consumption averaging 2.3 pounds, mostly in juice or processed form, cranberries rank second among berries consumed in the U.S. after strawberries!
Cranberries exemplify a convergence of historical tradition and the advances of modern agricultural practices. They support regional economies, sustain traditional farming techniques, and bring seasonal joy to millions. As you gather with loved ones this holiday season, enjoy an extra serving of these tart crimson berries and remember that food isn’t just sustenance, it’s heritage, celebration, and connection.
The UConn Home Garden Education Office supports UConn Extension’s mission by providing answers you can trust with research-based information and resources. For gardening questions, contact us toll-free at (877) 486-6271, visit our website at homegarden.cahnr.uconn.edu, or reach out to your local UConn Extension Center at extension.uconn.edu/locations.
Gifts for the Gardener on Your List

If you have a gardener in your life, last minute holiday shopping can be tough. Each year, we provide a list of suggestions that might help you as you’re shopping. For 2025, we are considering gardener comfort and adaptability.
Gardening Gloves
While it seems like a trivial gift and your gardener may already have a good pair, gardening gloves are a great gift! It’s always nice to have an extra pair in case your hands get wet working in muddy soil, or if you manage to lose them. Our gloves wear over time, and can thin, stretch, and decline in quality as seasons change. While any pair may be helpful as a backup pair, you might get bonus points for finding your gardener’s favorite brand or style. These are readily available in hardware stores or year-round garden centers.
UV Protective Clothing
With the improvement of UV protective textiles, gardeners can find them in all sorts of forms. UV shirts, gloves/sleeves, and even hats are available to help your gardener stay protected from the sun. This is great for anyone who loves being outdoors, but especially those who may have extra sensitivities to sunlight. While not a direct substitute for sunscreen, they can help provide a little extra protection. I find that these often are best found online, though I have seen individual items at independent garden centers, sporting stores, and gift shops throughout the state.
Cooling Towels
Athletic cooling towels are meant to help keep you cool. Soak them in cool water, wring out the excess and wear as a scarf or drape over your shoulders. The evaporative cooling from the towel helps you stay cool even during the warmest summer days. While they’re usually found with the sports gear, your gardener will love them, too!
Waterproof Shoes
Nobody likes wet feet, especially in the garden. Help the gardener you love stay dry by gifting them with a pair of waterproof shoes! These come in many forms such as rubber rain boots, rubber clogs, or even waterproof sneakers. They can be found at sporting goods stores, shoe stores, or online.
Shop Smart
There are many gifts beyond these recommendations that may suit the gardener in your life. As we approach the last-minute shopping season, keep these tips in mind to help you find the perfect gift.
Look carefully at the label of any seed mixes, seed bombs, or other plantable gifts, especially if you are intending to gift native seeds. Many of these mixes sold across the country may provide plants native to North America, but not necessarily native to our region. The label provides a percentage breakdown of every species of seed included. Cross reference to ensure that they are native to our region.
Purchase durable tools and equipment over novelty items. Give your gardener gifts that they will be able to use for years to come. While gloves with claws to help you dig are fun and unique, a good trowel will stay part of your gardener’s arsenal for many years.
Consider your gardener’s interests to help guide your gifting. If your loved one plants more flowers than vegetables, a garden hod might not be the right fit for them. If they hate weeding, a gift to make the chore easier might be a great fit! Think about the ways the person you’re gifting likes to spend time in their garden and tailor your gift to them.
Don’t rule out experiential gifts just because it’s winter. Gardeners who wish to continue to learn and spend time with like-minded green thumbs may enjoy a workshop, class, or conference. Many regional garden shows (including the CT Flower & Garden Show) take place during the winter. Local garden clubs, libraries, or garden centers may also offer educational workshops that you could purchase tickets for in advance.
Shop smart. While we can’t recommend any brands or specific places to shop, use your smart consumer skills when looking for these or any other gifts this season. Reading reviews, using trusted retailers, and balancing quality with price will help you verify that these gifts will impress.
If you’re shopping last minute for that gardener in your life, remember that it doesn’t have to be stressful! Keep comfort, adaptability, and their unique interests in mind for a gift that’s sure to please!
The UConn Home & Garden Education Center supports UConn Extension’s mission by providing answers you can trust with research-based information and resources. For gardening questions, contact us toll-free at (877) 486-6271, visit our website at homegarden.cahnr.uconn.edu, or reach out to your local UConn Extension Center at extension.uconn.edu/locations.
Seasons Greetings
It is hard to believe it is that magical time of year again. Thoughts turn to how we are going to celebrate the holidays. This would, of course, include decorating our living spaces. Fortunately for plant people, there are no shortage of choices for the season. Plants also make wonderful gifts to take to a holiday gathering. After all, they bring nothing but joy and cheer.

The first holiday plant that comes to mind is the poinsettia. Although native to Mexico, they seem to have found their way into every corner of the country. It is not actually flowers that are the stars of the show, but the colored leaves. What was once a beautiful red has been selectively bred for some absolutely amazing colors. My all-time favorites include a newer snow-white colored one, yellow, and the orange varieties. If two-tone leaves are preferred, there are neat red with pink centers and white with pink centers – both of which look absolutely stunning. A new one for this year has snow white leaves with a slight pink blush at the center. Of course it does not end there! There are varieties like “Jingle Bells” which looks like the red has white paint splattered all over it, which makes it a real conversation piece. The “Christmas rose” comes in many colors now and has the leaves swirled into a rose shape.
The poinsettias are beautiful, but they take a little bit of TLC to get them to stay that way. They should only be watered when they are dry to the touch on the surface. Let them dry too long, and they drop leaves. Cold drafts will produce the same result. If water is splashed on the leaves, the spots will discolor and dry, ruining the look. These plants are best watered from the bottom by filling the tray they are sitting in with water and letting the soil and roots wick it up. Poinsettias tend to fall from grace after the holiday season, and therefore are treated as a temporary decoration.
There are a number of other plants that will make just as nice of a display. The first is the Christmas cactus. They bloom profusely this time of year. They also make a great houseplant if they are allowed to dry out between waterings. To get them to rebloom the following year, put them in a room that is only illuminated by natural light – mother nature will take care of the rest (they need a critical period of darkness to flower). These plants can be so long lived that they can become family heirlooms.
Some lesser-known plants include the frosty fern, which is not a fern at all, but a Selaginella (Spikemoss). Although some species can tolerate extreme desiccation, the species sold during the December holiday season cannot. These are great for people who love to over water because if they dry out at all, they will wither and die. They actually prefer to be in moist, soggy soil but not submerged. Cyclamen are nice looking plants with the flowers held above the leaves. These are somewhat long lasting, but tend to go dormant. They seem to be hard for most people to keep long term. Kalanchoe plants have beautiful flowers of all different colors, but these are also a challenge to keep as a long-term houseplant. Amaryllis bulbs can be beautiful when blooming, and after a dormant season may rebloom the following year. These are easy to keep provided the watering is done only while growing and not while dormant or dying back.
I do not know if it is the marketing or the colors of holiday plants that make them so popular, but do not forget about traditional houseplants for gifts. Some nice philodendrons, spider plants, pothos, or snake plants certainly make wonderful additions to any home. There are so many beautiful new varieties coming to the market all the time. No matter what plant species is chosen, plants tend to put a smile on the face of the receiver. In my opinion, there is no greater gift. If the choices are too many, then why not get a gift certificate for a local independently owned nursery or greenhouse? Happy holidays!!!
The UConn Home & Garden Education Center supports UConn Extension’s mission by providing answers you can trust with research-based information and resources. For gardening questions, contact us toll-free at (877) 486-6271, visit our website at homegarden.cahnr.uconn.edu, or reach out to your local UConn Extension Center at extension.uconn.edu/locations.
Barn Cupolas And What They Do

Cupolas are small structures built over a hole in the roof centerline to provide light, ventilation, a nice view or perhaps some decoration to the overall structure. While found on many kinds of buildings including the International Space Station, the main purpose of barn cupolas is functional over form. With the advent of tighter barn construction to keep livestock warm during the winter, moisture buildup became a problem. The cupola became a necessary addition to barns to help reduce this moisture buildup and to allow fresh air to enter the barn.
While used in the Middle East and eventually in Europe, these structures were more decorative than functional. They were eventually used less as domes became more popular. In the United States, cupolas were introduced in the late 1700s by settlers from Europe and used as barns increased in size and allowed for more hay storage and livestock housing. Tighter construction by means of siding and better roofing became the norm in the mid 1860s, and this resulted in ventilation issues as moisture levels increased.
The larger amounts of hay could build up heat and occasionally spontaneous combustion occurs if fresh air is not provided. Both the hay and the barn could be destroyed. Tighter barns also meant more moisture from both the breathing of the cows and from a constant deposit of urine and manure. Fresh air and the removal of moisture was needed for the health of livestock and to prevent mold developing on and ruining stored hay.
The solution was a nifty piece of architecture called a cupola. Farmers started installing cupolas as a means to draw out hot, moist air and stale gases from manure via louvered slats on all four sides. Fresh air could also enter while rain and snow were mostly kept from entering the roof as these louvers were downward facing. The health of livestock kept in close quarters in cold weather improved, and mold development on stored hay was reduced through this ventilation. Additionally, livestock kept warmer in the cold months required less food, so hay lasted longer and in good condition.
The spacing, size, and number of cupolas needed depended upon the linear footage of roof centerlines. The number of livestock and amount of hay storage were also considered. This is why some barns have many of these structures, while other barns may only have one or two. Barns with open sides have no need for cupolas.

While the primary function of cupolas has been to provide ventilation for haylofts and livestock areas, there are many styles of cupolas that also incorporate various decorative designs. On Hanks Hill Road in Mansfield, there are two barns on two different properties near each other that have the exact same unique design, which is rather fancy while still being functional. I suspect the same person designed and built both as they are almost identical in decorative woodwork and unusual peaked roof lines. I have not found other cupolas with such intricate woodwork and wonderful design features.
Historic barns often have fixed or awning windows that either don’t open or that are hinged on the top or bottom and open only slightly. Some cupolas are topped with a weathervane or a finial. Farmers took great pride in their barns. They could be a large investment, so it’s understandable that many put elaborate cupolas on their barns to make a statement about their pride and prosperity. As you drive around farm country, perhaps now you will notice some interesting cupolas that have been there all along.
The UConn Home & Garden Education Center supports UConn Extension’s mission by providing answers you can trust with research-based information and resources. For gardening questions, contact us toll-free at (877) 486-6271, visit our website at homegarden.cahnr.uconn.edu, or reach out to your local UConn Extension Center at extension.uconn.edu/locations.
Highlighting Connecticut’s Winter Cheer: Common Witch Hazel
Connecticut’s native species of Witch Hazel, Hamamelis virginiana, is a remarkably unique woody ornamental that can be found as a large shrub or small tree. It comes to the rescue this time of year as the leaves continue to drop and our surroundings become starved of color. Its foliage in autumn is a showstopping yellow.
Hamamelis virginiana can grow between 10 and 20 feet tall and is often nearly just as wide as it is tall. In ideal conditions, some can even grow as large as 30 feet tall. It has a loose and somewhat open, irregular rounded shape and is very attractive in landscaping when used as hedge rows, woodland edge planting, or along a pond or river. It’s the last plant to come into bloom each year in the Northeast, blooming from October to December. The bloom coincides with its flashy fall foliage, making it one of the most eye-catching specimens of the winter landscape.
The blooms are bright yellow with spidery, ribbon-like petals and have a pleasant citrusy fragrance. They are clustered tightly around the branches, and the petals curl up protectively during cold spells. A few cut branches in a vase will be sure to perfume and brighten up your home during the dreary winter months. Its late flowers attract certain species of flies, bees, gnats, and cold-tolerant moths. These insects are a food source for native songbirds such as kinglets, chickadees, and titmice.
The medicinal qualities of the Common Witch Hazel are world renowned and have been utilized for centuries. Its anti-inflammatory properties serve as a soothing remedy for bruises, itches, sunburns, acne, and small wounds. In fact, Common Witch Hazel extract is one of the only medicinal plants approved by the FDA as a nonprescription drug. Always consult with a medical professional before incorporating the use of medicinal plants. It's worth noting that there have been several Witch Hazel processing plants in Connecticut, starting in the 19th Century. To this day, most of the world’s Witch Hazel extracts are still produced in East Hampton, Connecticut.
Consider planting a Common Witch Hazel or two in your yard, mixed with hollies, viburnums, and dogwoods for some late-season cheer. Common Witch Hazel will grow in a variety of conditions, from moist to dry, and shaded to sunny. Flowers are most abundant when planted in full sun. It prefers acidic, nutrient-rich, well-draining soil. It’s quite hardy, growing in zones 4 through 8, and has very little trouble with pests or diseases. After establishment, they are virtually care-free. The only maintenance of note is periodic pruning to remove suckers if a controlled shape is desired.
Although it is a slow growing plant, it is worth the wait when it bursts into bloom. With so much going for it, this is a plant that deserves greater consideration for use in ornamental landscapes and yards.
The UConn Home & Garden Education Center supports UConn Extension’s mission by providing answers you can trust with research-based information and resources. For gardening questions, contact us toll-free at (877) 486-6271, visit our website at homegarden.cahnr.uconn.edu, or reach out to your local UConn Extension center at extension.uconn.edu/locations.
Road Salt and Your Soil
When I was a graduate student from Nepal living in New Haven from 2012 to 2014, I kept noticing the same winter aftereffect across town. Along busy streets, the first foot of lawn by the pavement turned yellow and matted, and the road-facing sides of yews and hollies burned while the yard sides looked fine. Coming from a place that does not spread salt each winter, it felt backward. We made the road safer, but the plants and soil paid the price. At UConn’s Soil Nutrient Analysis Lab, we hear versions of this every spring. People send soil from a strip along the road or from a bed near the driveway and say that spot never greens up like the rest.
You have also likely noticed the symptoms. Fine particles form a crust on the soil surface where water evaporates. Turf browns right at the pavement edge. Buds on the roadside of a shrub fail to break. Evergreens brown on the street side when traffic spray carries salty water, while the interior needles stay green. Vegetable beds that sit too close to plow piles can exhibit poor emergence, tip burn, or slow growth, even when the rest of the garden appears fine.
What road salt does to soil
Sodium chloride (rock salt) is the most widely used deicer. Once it dissolves, it separates into sodium (Na⁺) and chloride (Cl⁻). Chloride is highly mobile. It moves with meltwater, so in a wet spring, it can leach through the soil and, where conditions allow, reach groundwater, affecting well water quality.
Sodium changes how soil behaves. In healthy soil, calcium and magnesium sit on exchange sites; repeated sodium inputs displace them, sealing the surface, reducing infiltration, and making the soil feel tighter right where plants already struggle. Sodium also competes with potassium uptake, so salt-burned spots can look nutrient-deficient even when tests show adequate levels.
Alternatives to sodium chloride are often less harsh but cost more. Magnesium chloride and calcium chloride melt at lower temperatures but still add chloride and can injure plants and corrode concrete and metal. Calcium magnesium acetate (CMA) is chloride-free and generally gentler, yet it’s pricier and harder to find.
Lab testing and management options
If you inform the lab that the sample is from a salt-affected area (such as a roadside, plow pile, or splash zone), they will interpret the numbers with that history in mind and, if necessary, use the appropriate salinity method for your sample.
- Soil pH and texture (and organic matter). Sandy roadside fill flushes salts quickly but is more susceptible to damage due to its low buffering capacity. Heavier soils with more organic matter hold up better but can crust at the surface after repeated salting. For optimal plant health and reduced salt uptake, aim for a pH of approximately 6.5–7.0; your report will include a lime rate if your pH is below this range.
- Soluble salts / electrical conductivity (EC). EC shows how salty the root zone was when you sampled. It is most informative right after winter or snowmelt, when salts are near the surface. For mineral soils, labs typically measure EC from a simple soil–water extract.
Start with prevention. Before winter, top-dress the first 1–2 feet along the road with a thin layer of compost to improve structure and exchange capacity. Keep that strip covered, overseed thin turf, or use a salt-tolerant edge, and ask the plow operator to place piles where meltwater drains to the street or to vegetation that isn’t over your well line. Where meltwater goes matters as much as how much salt you use.
After winter, fix what the season left behind. If the roadside sample shows elevated EC, lightly loosen any compacted or crusted soil so that water can infiltrate. Then, leach the area with two or three deep soakings a few days apart to push salts below the main root zone. If a hedge or shrub burns on the roadside year after year, consider moving it back or replacing the front row with more salt-tolerant plants.
For chronic hotspots, shift from one-time flushing to long-term protection: use less deicer, keep piles away from beds and wells, maintain dense groundcover in the first foot along pavement, and in harsh exposures, consider stone mulch plus seasonal compost topdressing to help the soil rebound.
If your well water tastes salty, check the state’s road-salt guidance and contact your town. When the damage is limited to curb strips or driveway beds, soil testing and better winter practices usually solve it.
The UConn Home & Garden Education Center supports UConn Extension’s mission by providing answers you can trust with research-based information and resources. For gardening questions, contact us toll-free at (877) 486-6271, visit our website at homegarden.cahnr.uconn.edu, or reach out to your local UConn Extension center at extension.uconn.edu/locations.
Winterize your Garden Gear Before It’s Too Late!

It’s already November! It doesn’t seem like that long ago when we were giving advice about seeding lawns and watering in new fall plantings. Now that the time has changed, the days feel shorter, and the nights are getting colder, it’s important to remember to take the time to properly store your garden equipment and accessories before locking up the shed for the season.
Freezing temperatures are on the way fast. Drain and roll up any hoses to remove tripping hazards from the landscape. Store them inside a garage or shed to keep them out of the elements and lengthen their lifespan of use in the garden. Make sure that your outdoor water systems are properly winterized. Whether that means flushing your irrigation system, or simply shutting off your outside water, don’t forget this important step to protect your pipes! Once lines are turned off, open external valves to relieve any remaining pressure.
Water can not only wreak havoc on pipes but many garden accessories, too. A glass rain gauge left outside can and will freeze and shatter outdoors. Ceramics like pottery and bird baths are susceptible to cracking, so store them either in the shed or upside down in a sheltered area. Stash your garden gnomes, garden flags and solar pathway lights to protect them from fading and damage. Brittle cold, freezing water, and a careless throw of the snow shovel could spell disaster for garden décor left out in the open.
Inside the shed, take a quick inventory. Leftover seed or bagged mulch could be rodent attractants. Seeds should be stored in areas safe from extreme temperatures to preserve germination rates. Bird seed should be stored in animal proof containers. Chemical products like pesticides and fertilizers may be adversely affected by temperature fluctuations and freezing. They could also make a real mess if a water-based or pressurized solution were to burst. Products leftover from the growing season should be evaluated and moved into a space safe from freezing temperatures. Product labels or manufacturers will have storage and disposal information to help you make the best decision about what to do with your garden chemicals at the end of the season.

Winter will be a great time to thoroughly clean, repair, and sharpen tools. Store them somewhere that is easy to get to later so you can make sure your tools are fresh for the new season! If you have to do the seasonal shed shuffle, this is also a great time to rotate the lawn mower and snow thrower to prepare for the first storms of the season.
Speaking of your gas-powered equipment, check your owner’s manuals for winterizing recommendations and instructions to help maintain the life and quality of your equipment. You may need specific maintenance before long term storage. Contact a professional for any maintenance tasks that you do not feel confident performing on your own.
If you’re running out of space in the shed and garage, consider covering lawn furniture with UV and mildew resistant covers. Take down awning covers and temporary structures. I, myself, have fallen victim to the false sense of security of a mild winter, only to be devastated by the collapse of my garden tent in the first, albeit belated, heavy snow.
While all of this seems like common sense, the mad dash from here to the holidays will have many of us pulled in different directions. Our equipment, tools, and garden infrastructure are some of the biggest investments we put into our gardens. Hopefully this short checklist will help you knock out those last few chores that come with maintaining a four season New England garden.
The UConn Home & Garden Education Center supports UConn Extension’s mission by providing answers you can trust with research-based information and resources. For gardening questions, contact us toll-free at (877) 486-6271, visit our website at homegarden.cahnr.uconn.edu, or reach out to your local UConn Extension center at extension.uconn.edu/locations.
Chestnuts: A Tasty Thanksgiving Treat
With Thanksgiving approaching, many of us will be sitting down to hearty feasts with family and friends. Time-tested recipes on worn index cards or heavily thumbed cookbooks are combed through/uncovered. Many of us gardeners pick a few new plants for our gardens each year, so why not try a new plant on the dinner table? Chestnuts were reputedly served at the first Thanksgiving and thanks to dedicated breeding programs may be available locally today.
It’s hard to imagine that a little over 125 years ago there were probably 4 billion American chestnuts (Castanea dentata) spread out from southern Maine to northern Georgia. They were an important food source for both indigenous people as well as wildlife. Early European settlers found their rot resistant wood useful for many building purposes.
Unfortunately, a disease (Cryphonectria parasitica), known as chestnut blight, was unintentionally introduced in 1876 on imported Japanese chestnuts (C. crenata). These were sold via mail order throughout the eastern U.S., and our native American chestnuts soon became infected. This fungus spreads by windblown spores. Signs of infection include a reddish-orange ‘rash’ on the affected bark and as it reproduces, an orangey substance oozes from pores in the bark. Cankers form and eventually the plant can no longer internally transport water and nutrients. Chestnut blight kills the parent tree but not the roots so even to this day, you are able to find sprouts growing from chestnut roots. As the sprouts develop, they too will be killed back by the blight so while the tree is kept alive, American chestnuts are considered functionally extinct, but all is not lost.
Fortunately, both researchers and chestnut lovers have been working pretty much for the past 100 years on developing varieties resistant to chestnut blight. Breeding work has been done in many locations but the Connecticut Agricultural Experiment Station began their program in the early 1900s and it is the only program that has continued uninterrupted to this day. Presently this CAES program is led by Forest Pathologist and Ecologist, Dr. Susanna Kerio.
Various chestnut species including American, Chinese Japanese and European have been crossed, backcrossed, planted, evaluated, culled and selected by researchers and enthusiasts all over the eastern U.S. As one can imagine, it takes more time to evaluate a tree’s characteristics than say, an annual plant like a tomato.
Organizations like The American Chestnut Foundation started in 1982 have been championing the search. According to Deni Ranguelova, the New England Regional Science Coordinator, the goal is to develop blight resistant chestnuts and restore this magnificent tree to its native range. Members of this organization have the opportunity to obtain straight species or hybrid seed to try their hand at growing chestnuts and add observations to the chestnut knowledge base.
Why all this work on chestnuts? Well for one, they are deliciously mild and sweet. They are low in calories and high in fiber. Chestnuts are a good source of potassium and other nutrients. Eat them freshly roasted (just like in the song!), in holiday stuffings, soups, in main dishes and glazed. To cook them, they do need to be scored whether oven roasted, boiled, steamed or microwaved to keep them from bursting. Lots of instructions, recipes and videos can be found online.
Second, plants are productive. In fact, it was estimated that before their demise that a mature American chestnut may be able to produce 6000 nuts! They can serve as a food source to both people and wildlife as researchers and enthusiasts create blight resistant strains to plant in our natural areas or in commercial orchards.
Aside from being a member of The American Chestnut Foundation and obtaining seed, one can order chestnut seedlings from several online nurseries. Keep in mind that chestnuts do best in a sunny area with well-drained soil. Root rots can occur in poorly drained areas. Plants are being bred to be straight and tall for timber, or shorter and wider for nut production. Make sure you have enough space for a mature chestnut tree, or most likely 2 trees as chestnuts need another plant for cross pollination.
Even if a chestnut tree is not in your future, do try some chestnut dishes at your Thanksgiving table. They may start a new tradition.
The UConn Home & Garden Education Center supports UConn Extension’s mission by providing answers you can trust with research-based information and resources. For gardening questions, contact us toll-free at (877) 486-6271, visit our website at homegarden.cahnr.uconn.edu, or reach out to your local UConn Extension center at extension.uconn.edu/locations.
You Are the Sunshine of My Life
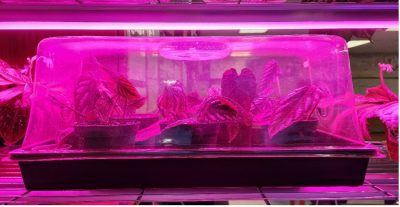
This old song seemed like the perfect title for talking about artificial lights for houseplants. Even if there are windows in a room, the amount of light is very low. Fortunately, there are relatively cheap LED options available. Light is made up of the different colors, or wavelengths, of the visible spectrum – Red, Orange, Yellow, Green, Blue, Indigo, Violet. A plant’s pigments capture light energy and use it to make food. Chlorophyll production peaks in the red and blue spectrums, but accessory pigments help plants capture additional wavelengths of light. As such, there are optimal wavelengths of light that will better support plant growth. This is known as Photosynthetically Active Radiation, or PAR. We measure PAR by using the Photosynthetic Photon Flux Density, or PPFD. This measures the amount of photons of light in the correct range hitting a specific area, and is measured in micromoles per square meter per second (µmol/m2/s). A PAR meter is an expensive way to measure how much usable light is available for your plants.
LED specialty lamps that have a good spectral output (PAR) are easily acquired. I would caution the buyer to read the reviews to help judge the quality. Good lights will generally include some description of PAR and/or PPFD. Light quickly diminishes with distance, as it essentially becomes less concentrated. Look in the product information for how close the plant should be to the light for maximum effectiveness. Generally, keep the plant 12-18 inches away from the light source. If it is too close, or the light is too bright, plants can be burned, drop leaves, or become spotted. A cheaper option is to use existing light fixtures and replace the bulbs with either full spectrum or plant grow bulbs. The ideal plant grow bulbs look pink, as they have red and blue LEDs. Full spectrum bulbs tend to have a better mix of wavelengths to make the light appear more natural to us, but still have good PAR. CRI, or Color Rendering Index is a measure of a light’s ability to accurately show colors compared to natural light. The closer to 100, the better the light’s appearance.
We can also judge a bulb by “color temperature” reported with a Kelvin number. For example, a 2700K bulb is commonly referred to as a warm white. This is reminiscent of the light given off by a traditional incandescent bulb, and shows heavier output in the red end of the spectrum. A 6000K bulb would be called a “daylight” bulb, and has a heavier output in the blue end of the spectrum.
Many people confuse quality of light with brightness, which is measured in lumens. Light can be very bright, but of poor quality. Too bright, and it may burn the plants. Also, buying a light that throws out a lot of green light does not do much, even if it has a high output (lumens). Lastly, Watts are used as a measure of energy consumption. While it is true that higher wattage may mean a greater output of light energy, the efficiency of LEDs means that a lot less watts are needed to put out the same number of lumens as compared to an incandescent bulb.
So, then, this begs the question: What light is best for growing plants? To answer, I am going to assume that the plants are going to be displayed in the living area and viewed by people regularly. In this case, I would try and find a 5000K bulb with a CRI close 97 or 98, and a PPFD rating that matched the requirement of my plants for the given distance from the light fixture.
The following is a quick list of what is useful and what is not useful as a metric for plant growth:
PAR - Photosynthetically Active Radiation. It is the ideal measurement for plant growth.
PPFD - Photosynthetic Photon Flux Density. It is a useful metric to judge output at a particular distance from the fixture.
Kelvin - Kelvin refers to “color temperature” – lower number more red (ex. 2700), higher number more blue (ex 6500). It is not detailed enough as a metric for plant growth.
CRI - Color Rendering Index. It is useful for how true-to-life the plants will look.
Lumens - A unit to measure brightness. It is not particularly useful as a metric for plant growth.
Watts - How much energy is used to run the bulb/fixture. It’s not useful as a metric for plant growth, but lower wattage costs less to run equipment.
Warm vs Cool - Warm indicates the red end of the spectrum while cool indicates the blue end of the spectrum. See Kelvin. It is not detailed enough as a metric for plant growth.
The UConn Home & Garden Education Center supports UConn Extension’s mission by providing answers you can trust with research-based information and resources. For gardening questions, contact us toll-free at (877) 486-6271, visit our website at homegarden.cahnr.uconn.edu, or reach out to your local UConn Extension center at extension.uconn.edu/locations.
Don’t Let Dry Soil Follow Your Plants Into Winter!
This year, Connecticut’s notably dry summer conditions have continued into fall. According to the U.S. Drought Monitor, all counties are abnormally dry for this time of year, and some are even considered to be in a moderate drought. Thus, many trees, shrubs, and perennials are heading into winter low on moisture. These conditions combined with the dry air, low precipitation, and fluctuating temperatures characteristic of Connecticut winters can lead to plant damage if no supplemental water is provided. Many of your plants will benefit from a deep final soak before the ground freezes.
Fall drought stress often doesn’t show up until spring, or even the following summer.Affected plants may appear perfectly normal and resume growth in the spring, using stored food energy. Plants may be weakened or die in late spring or summer when temperatures rise. Browning evergreens, delayed leaf-out, and sudden dieback are common signs of plants that went into winter too dry.
Moist soil is so important in the fall and winter months because it provides insulation to the roots. It may seem counter-intuitive, but properly hydrated soil does a much better job at protecting roots from freezing temperatures than dry soil. Root damage occurs for this reason when plants do not receive enough late-season moisture.
Woody plants with shallow root systems require the most supplemental water during extended dry periods in the fall and winter. Trees in this category include maples, birches, willows, and dogwoods. This category also includes perennials, and shrubs like hydrangeas, boxwoods, and azaleas. These plants benefit from mulch to further conserve soil moisture and buffer the roots from temperature swings. Apply mulch about 2 to 4 inches away from the trunk all the way to the outermost reach of its branches in a doughnut shape.

Evergreens also benefit from fall and winter watering because they do not go dormant in the winter. Evergreens of any age are still actively respiring during the coldest months of the year and will continuously lose water through their needles. If they go into the winter with dry soil, they are more likely to have a difficult spring recovery. This is especially true for those in open or windy areas.
Only water when daytime temperatures are above 40°F, ideally in the late morning or early afternoon so the water can soak in before possible freezing at night. Feel the soil at a depth of 4 to 6 inches to ensure that supplemental water is necessary. Soil should be consistently moist, but not oversaturated or muddy. Stop supplemental watering after the ground freezes because plants cannot absorb water through frozen soil. To water, use a soaker hose to provide a slow stream of water that can penetrate deeper into the soil with limited runoff. If your hose is already stored away for the winter, and your tree or shrub is small, consider drilling a 1/8-inch hole at the bottom of a 5-gallon bucket and filling that with water for a slow, steady stream. If dry weather continues into the winter and there’s little snow cover, additional watering once or twice a month may be needed until the soil hardens.
A final round of watering now can prevent root injury that won’t be visible until much later. Evergreens, deciduous trees, and other landscape plantings will head into winter stronger with a little extra attention this month. Giving the soil one last watering before it freezes is one of the simplest ways to protect your landscape from winter stress.
The UConn Home & Garden Education Center supports UConn Extension’s mission by providing answers you can trust with research-based information and resources. For gardening questions, contact us toll-free at (877) 486-6271, visit our website at homegarden.cahnr.uconn.edu, or reach out to your local UConn Extension center at extension.uconn.edu/locations.
Why is My Lilac Blooming in the Fall?
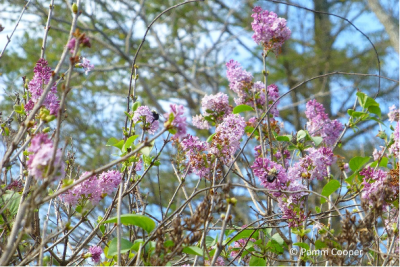
Spring-blooming woody plants like lilacs (especially the old, grafted varieties), ornamental cherries, forsythia, crabapples, azaleas and some magnolias set their flower buds for the following year in early summer shortly after flowering. Usually, flower buds are triggered to bloom by environmental conditions which normally occur after an extended fall and winter cold period, followed by longer days and warming temperatures in spring. It is not typical for these plants to have a second bloom in the fall, but environmental conditions sometimes trigger premature flowering in the fall. Some plants may have only a few flowers rebloom, while other plants may have more flowers open in the fall.
Some of the reasons for this out of season bloom are extended summer heat and drought conditions where supplemental water is lacking. Severe early defoliation, especially from certain fungal pathogens, can also contribute to reblooming. The past two springs have been very wet and diseases such as anthracnose and Pseudocercospora spp. leaf spot may have caused leaves to brown, shrivel and drop early. This stresses the shrub and contributes to out of sync rebloom if other conditions are right. Good sanitation practices such as cleaning up infected leaves will be helpful in reducing fungal infections the following year.
If a plant is healthy and relatively unstressed, the normal seasonal move to cooler weather triggers dormancy. Plants that are deciduous will drop leaves as daylight length and temperature both decrease. Next year’s leaf and flower buds will also remain in a dormant state. Flowering and leafing out will be triggered by increasing daylight and air temperatures the next spring.
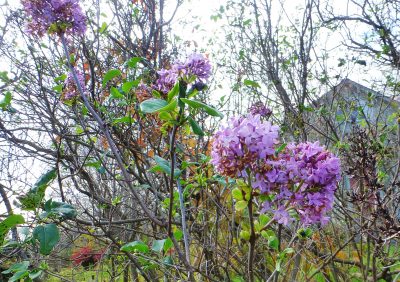
If certain woody plants have been stressed during the growing season, however, the change to cooler weather followed by some warmer weather can trigger some of the flower buds to open prematurely. This false dormancy especially affects flower buds near the tops of old-style lilacs where it is sunnier and warmer. Ornamental cherries may show sporadic flowering all over the tree where there is a southern exposure.
While fall reblooming of ornamental trees and shrubs can lead to a disappointing floral display the following spring, it is not harmful to the plant. After a less showy spring bloom period, flower buds will be produced normally. If stressful conditions caused by environmental conditions, insect pests or fungal pathogens are minimal, then a second bloom in autumn is unlikely to occur. Gardeners and landscapers can only do so much, and while the weather is out of our control, making sure plants are maintained properly to avoid stress during the summer will go a long way in helping them remain as healthy as possible.
The UConn Home & Garden Education Center supports UConn Extension’s mission by providing answers you can trust with research-based information and resources. For gardening questions, contact us toll-free at (877) 486-6271, visit our website at homegarden.cahnr.uconn.edu, or reach out to your local UConn Extension center at extension.uconn.edu/locations.
What’s changing with fertilizers in Connecticut, and how to shop smarter this fall?
If you shop for fertilizer in Connecticut this fall, you will see some labels missing from the shelves and more paperwork behind the ones that remain. The reason is new state rules targeting certain ingredients and how they are documented.
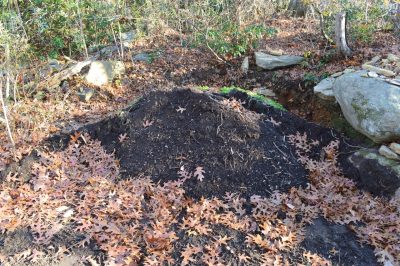 On October 1, 2024, Connecticut banned products made from biosolids or wastewater sludge that contain PFAS from being used or sold in the state as soil amendments. Biosolids are the treated solids left from wastewater treatment. Some products made from them were marketed for lawns and gardens in the past years. Connecticut’s new law closed that door to reduce PFAS in soils and runoff.
So what are PFAS and why the crackdown? Per- and polyfluoroalkyl substances, or PFAS, are a large class of “forever chemicals” added to products to resist water, grease, and stains. They do not break down easily and can build up in people, soil, and water. Health agencies have linked PFAS exposure to certain cancers, immune system effects, and developmental concerns, which is why Connecticut has been tightening rules to limit the entry of these chemicals into our environment.
Effective July 1, 2025, the legislature extended the PFAS biosolids restriction from soil amendments to fertilizers as well. The law also requires manufacturers and registrants to provide a certificate of compliance showing that any fertilizer or soil amendment that contains biosolids is free of PFAS. Products that do not meet the standard must be removed from Connecticut shelves.
What this means for your yard and vegetable beds is simple: expect fewer “biosolids-based” fertilizers on the market and expect clearer paperwork behind any products that remain. If you relied on those products for lawns or gardens, it is time to switch to other nutrient sources.
How can you read labels to avoid fertilizers and Soil amendments with PFAS?
- Check the ingredients panel. Look for words like “biosolids,” “sewage sludge,” “municipal waste,” or “residuals.” If you see those, consider a different product.
- Look for an analysis or ingredient list that spells out plant, animal, or mineral sources, such as feather meal, alfalfa meal, composted poultry manure, sulfate of potash, or rock-derived nutrients. These indicate non-biosolid ingredients.
- Ask your retailer. If a product contains biosolids, the maker must keep a certificate on file stating the product is compliant. Retailers should know whether a certificate exists for what they sell. If they cannot confirm, do not buy.
Safer sourcing ideas that are easy to find
- Start with a soil test. Match products and rates to what your soil actually needs. The UConn Soil Nutrient Analysis Laboratory provides routine tests with fertilizer and lime recommendations for home lawns and gardens.
- Yard-waste compost and leaf mulch made from leaves, grass clippings, and wood chips are reliable ways to add organic matter to the soil.
- Use animal-based fertilizers like composted poultry manure or feather meal, plant-based products like alfalfa meal, and mineral fertilizers like sulfate of potash and limestone.
- Biosolids are not allowed in certified organic production. “OMRI Listed” inputs follow the USDA National Organic Program, which prohibits sewage sludge. Choosing “OMRI Listed” products can be a practical way to avoid biosolids entirely.
A few quick FAQs
- Do I need to throw away the fertilizer I already own? Yes, but only if it contains PFAS or biosolids with PFAS. The new rules apply to the sale and use in the state. Contact your town’s household hazardous waste program for proper disposal guidance.
- Will PFAS show up on a routine soil nutrient test? Standard nutrient tests do not include PFAS. If you are concerned about legacy PFAS on a property that received biosolids, specialized testing is required. Your local Extension office can help you locate appropriate resources.
- What about compost from my town? Ask what goes into it. Compost made only from leaves, grass, wood, and animal waste is a safer choice for home gardens under the new rules.
Connecticut has removed PFAS-containing biosolids and fertilizer products from the garden marketplace. Expect clearer documentation from manufacturers and fewer sludge-based products on shelves. With a little label reading and a few ingredient swaps, you can keep building healthy soil while staying on the right side of the regulations.
The UConn Home & Garden Education Center supports UConn Extension’s mission by providing answers you can trust with research-based information and resources. For gardening questions, contact us toll-free at (877) 486-6271, visit our website at homegarden.cahnr.uconn.edu, or reach out to your local UConn Extension center at extension.uconn.edu/locations
Got Garlic?
Garlic belongs to the allium family, which includes onions, shallots, chives, and even some ornamental plants. People have strong feelings about garlic; they either love it or hate it. Whether you add it to your pantry of seasonings or not, there are tons of fantastic reasons to plant it in your garden.
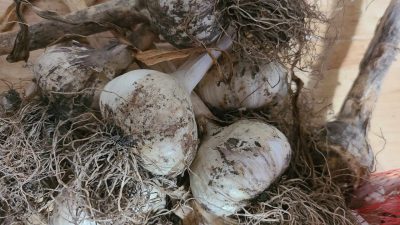
Garlic is great for gardeners on the go. One of my favorite things about these plants is the window in which they grow. You plant cloves in October and harvest the bulbs in July. Planting garlic cloves is one of the last things I do in my garden before hanging up my gloves for the season. This means I have an entire bed already working for me when the spring starts. In early summer, you can harvest the young flower spikes, known as scapes, and use them in recipes for a mild garlic flavor. They blend beautifully with early season cole crops to make some fantastic spring dishes!
From a practical standpoint, the time saved in planting an entire bed before the season has even started is invaluable. Their presence helps to retain garden soil and prevent loss through erosion over the dormant season. Their care is minimal, only needing a side-dress of fertilizer in the spring and supplemental water when active growing starts. On top of all of that, they package themselves perfectly for storage, when cured and stored properly.

Another fantastic benefit to having garlic in your garden beds is that it is well equipped to fend off many vertebrate and invertebrate types of pests. From personal experience, my garlic beds have not needed a fenced in area like my other vegetables and have been relatively undisturbed by local wildlife. While there are claims out there regarding companion planting, I only can confirm for certain that the properties of garlic keep animals away from garlic plants. Scientists are also studying the benefits of garlic for the microbial environment in the soil, to see what other impacts they may have.
As large bulbs develop, they help to break up the soil in the bed for whatever is next to come in the rotation. Once garlic bulbs are harvested, we usually have anywhere between 90 and 100 days left of the growing season. This is plenty of time to rotate in a fast-growing crop like leafy greens, summer squash, carrots, radish, or even some kinds of brassicas.
If you do decide to give garlic a try this year, make sure you pick up clean seed garlic from a trusted source. As with any other plant, healthy starting material will help in yielding healthy plants. Hardneck varieties tend to grow best in our climate. They have a firm stem that starts at the base of the bulb and grows through the plant, giving it a strong single stalk during the growing season (this is where the scapes come from). They need a vernalization (cold) period, which is why it is best to plant them before the ground freezes. There are many varieties of hardneck garlic with a wide range of flavors.
Do not use garlic cloves from the grocery store. Grocery stores typically carry softneck garlic, which has no central stem and may have more cloves inside. A lot of our commercial garlic is grown in California. Softneck garlic may not grow as well in our climate. In addition, commercial agricultural produce can sometimes be treated with growth inhibitors or inadvertently carry pests or pathogens that would not serve your garden well. Local farms, farmers markets, and harvest festivals are great resources to find quality planting garlic. There are also reputable catalog companies out there, but you better get to ordering as time is short!
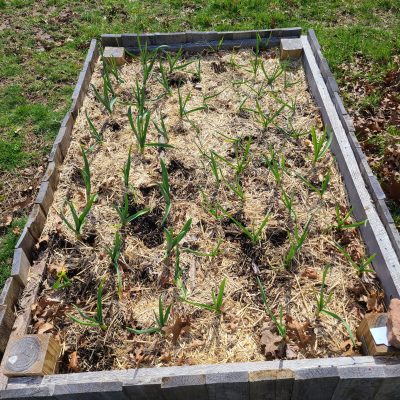
Before planting, break the garlic bulb into its numerous cloves. Don’t be too concerned if some skin flakes off of the outermost layer, but do not peel the garlic before planting it. The intact skin acts as a protective barrier to keep them from rotting in the soil. Place cloves pointy end up in the soil at a depth of 1-2 inches, depending on the size of the clove. Water in and cover with a straw or leaf mulch, and it’s done! Don’t be too shocked if you see them start to emerge from the soil before the snow. Leave them be and assess in the spring, sometimes you don’t even have to cut those leaves back!
Whether you’re a seasoned gardener or just starting out, garlic offers something for everyone. Its numerous benefits in the garden, plus its versatility in the kitchen provide a great starting point for those who want to have their own garden-to-table experience. You’ll be a pro in no time!
The UConn Home & Garden Education Center supports UConn Extension’s mission by providing answers you can trust with research-based information and resources. For gardening questions, contact us toll-free at (877) 486-6271, visit our website at homegarden.cahnr.uconn.edu, or reach out to your local UConn Extension center at cahnr.uconn.edu/extension/locations.
Extend Your Fall Color with More than Mums!
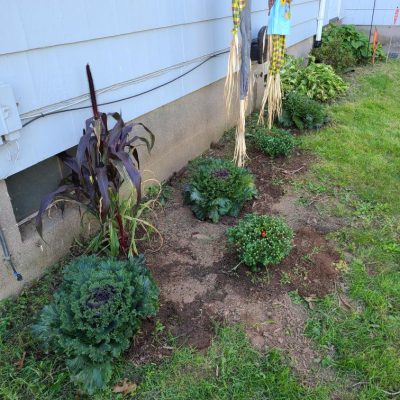
By September, many of our ornamental garden beds and containers are ready for a refresh. Fall annuals help us bring color and vibrancy back into the garden while we still can enjoy the outdoors. The classic go-to for many gardens is the traditional chrysanthemum. These rotund, uniform little plants come in many different colors, various flower shapes, and a wide range of blooming periods from the end of August until the end of October. For extended color, it is often recommended to plant a mix of early, mid, and late season mums to ensure that color will last throughout the autumn. Alternatively, gardeners can mix mums with other types of annuals and perennials to extend their season of color and build a textured, multi-dimensional garden display.
A unique challenge with fall annuals is that they do not grow as vigorously as spring and summer annuals. In terms of size, oftentimes the plant you purchase is the plant you will see in your garden for the remainder of the season. It is important to purchase your plants with this in mind. Fill your space densely and don’t hold as much space for plants to “grow into.”
Large, full ornamental grasses like Pennisetum ‘Rubrum,’ Pennisetum ‘First Knight,’ or varieties of Millet will take up a lot of space and add height and an airy texture to your annual display. If working in a container, add these giants to the middle of your planters and work your way outwards with other annuals.
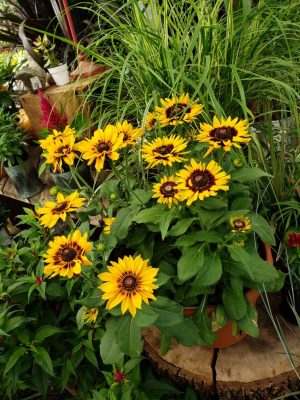
Varieties of Rudbeckia hirta, like the ‘Toto’ series can take up a large space and have an open habit and less uniformity when compared to the traditional mum. Echibeckia (Rudbeckia x Echinacea hybrids) also do a great job of filling the space. Autumn is their time to shine and shine they do! Some of them may be hardy to Zone 6 but always check the variety and plant label to know if they have a chance of survival.
We’re always looking to get more for our money. Don’t let your fall garden spruce up be any different this season! Garden perennials that are currently in bloom, like Rudbeckia, Sedum, or Asters can be purchased and planted in containers for fall display. When they start to wind down, re-plant them somewhere in the garden before the ground freezes for a chance of coming back next season. Who doesn’t love a multi-purpose purchase?
Many of us think of pansies and violets as spring flowers. However, they are gaining more traction in the world of ornamental horticulture as an autumn accent plant. These tiny flowers are already adapted to warm days and cool nights, and come in a wide range of colors for every gardener to enjoy. If you’re lucky, they’ll drop seeds and pop back up again in the springtime!
Annuals like Nemesia and Snapdragons are well adapted to our autumn temperatures and will produce flowers well into the autumn season, though may need frost protection to keep flowers beautiful.
One of the risks we take with flowering annuals in the autumn is the risk of frost damaging flowers before their time. When frosts are expected, it is important to cover plants to preserve flowers. If you find this is a lot of work, let me introduce you to ornamental kale and cabbage. A symbol of a bountiful harvest, these plants naturally lend themselves to an autumn display and can last far beyond their flowering counterparts. In fact, the colder they get, the more vibrant their foliage becomes!
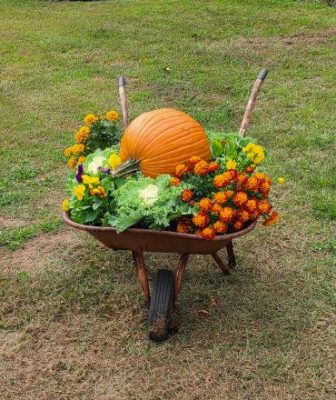
Again, using perennials in fall displays, lends itself to solving this problem. As hardy plants, they are able to adapt to cooler nights and light frosts. This works well with foliage plants like Heuchera, or hardy ferns, that do not need additional frost protection to survive.
To add the finishing touches to your display, consider adding pumpkins, hay bales, or even a home-made scarecrow! Your fall garden will be the envy of the neighborhood!
The UConn Home & Garden Education Center supports UConn Extension’s mission by providing answers you can trust with research-based information and resources. For gardening questions, contact us toll-free at (877) 486-6271, visit our website at homegarden.cahnr.uconn.edu, or reach out to your local UConn Extension center at cahnr.uconn.edu/extension/locations.
Fall is a Great Time to Lime and Fertilize Lawns
With the end of summer drawing near and hopefully bringing cooler temperatures and needed precipitation, now is a great time to attend to your lawn. While some of us are reducing the size of our lawns and adding native plants, in many cases lawns still serve a valuable purpose for practical uses, recreation and to set off plantings. Traditional cool season grasses like Kentucky bluegrass, fescues and rye grasses require a higher pH and more fertility than our native soils provide. Right now is the perfect time to add limestone and fertilizer, if needed. Improved soil conditions will assist lawns recovering from the heat and drought stresses of summer. Also, the cooler fall temperatures allow turfgrasses to resume active growth.
Having your soil tested before purchasing limestone and fertilizer is always a wise move. Check out the UConn Soil Testing Lab’s website or give them a call at (860) 486-4274. Many of our soils tend to be acidic with a pH of 5 or so. You might remember that the pH scales ranges from 1 to 14 with 7 being neutral and values below that acidic and above that alkaline. Cool season turf grasses prefer a soil pH in the mid 6’s. When the soil pH is too low, it reduces the amounts of nutrients that are available to turf grasses even if fertilizer has been applied, increases the solubility of toxic elements like aluminum and can cause a decrease in good root formation, contribute to thatch accumulation and affect soil microbes.
Fortunately adjusting your soil’s pH is relatively easy and affordable. Limestone can be purchased either as a ground white powder or in earth tone pelletized forms. There are two main types. Calcitic limestone consists predominantly of calcium carbonates while dolomitic limestone contains both calcium and magnesium carbonates. Usually, dolomitic limestone is more commonly found as it is mined locally and it is fine to use as magnesium is an essential nutrient.
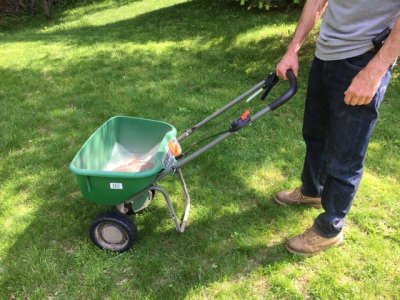
Typically, limestone is applied at rates of 50 pounds per 1000 square feet. If the soil pH needs to be raised significantly, additional limestone can be applied either spring/fall or at 30-day intervals. Once your soil pH reaches the mid 6’s, a maintenance application of 50 pounds/1000 square feet every other year should suffice. Do keep in mind that limestone does take anywhere from 6 to 18 months to change the pH depending on environmental conditions. While some more costly products are advertised as ‘Fast Acting Lime’, studies comparing them to traditional ground or pelletized limestone are inconsistent. If using these products, just follow the instructions on the package.
Choosing a fertilizer is often a confusing task considering the vast selection available. All plants need at least 18 different elements to grow. The 3 that are most often deficient in our soils and components of most fertilizers are nitrogen (N), phosphorus (P) and potassium (K). So, the 3 numbers found on a bag or box of fertilizer, like 10-10-10 or 27-4-6 represent the percent of total nitrogen, available phosphate, and water-soluble potassium, respectively. For instance, a ten-pound box of 10-10-10 contains 10 percent or 1 pound of total nitrogen, and another 10 percent or 1 pound each of available phosphate and water-soluble potassium.
A law passed in 2013, limits the amount of phosphorus that can be applied to established lawns because it is the number one inland freshwater pollutant. Lawn maintenance fertilizers sold in Connecticut will typically have analyses like 30-0-4, 29-0-5 or 10-0-6. While phosphorus applications are prohibited on established lawns, fertilizers with phosphorus can be used when seeding, sodding or overseeding.
Fertilizers are also grouped as either those containing water-soluble nitrogen (WS) of water insoluble nitrogen (WIN). Look for a fertilizer that contains both. That way some nitrogen will be immediately available to your lawn and some will be released slowly over time. Fertilizers containing solely soluble N will produce rapid results but can easily burn if over applied and since some forms of nitrogen are readily leached from the surface soil, more frequent fertilizer applications may be necessary. No more than 1 pound of nitrogen per 1000 square feet should be applied at one time. If grass clippings are left in place then only 2 pounds of nitrogen per 1000 square feet of turf area will be needed each year. The best times to fertilize lawns are in September and in late April through the end of May. Avoid using too much nitrogen as it can lead to increased susceptibility to diseases and lower resistance to stress. If in doubt as to how much lime and fertilizer to apply, consider having your soil tested.
The UConn Home & Garden Education Center supports UConn Extension’s mission by providing answers you can trust with research-based information and resources. For gardening questions, contact us toll-free at (877) 486-6271, visit our website or reach out to your local UConn Extension center.
Plectosporium – Not as Spooky As it Sounds!

A chill in the air, football playing on the TV, and a certain kind of latte in your hand – there is only one season which encapsulates all three. Autumn is at our doorstep, bringing with it vibrant colors to paint the trees and an abundant harvest to use in all the season’s culinary endeavors. Many of the crops most representative of fall are cucurbits – the most relevant of which being various varieties of squash and pumpkins. Although the season is associated with comfort, danger lurks for these plants in the form of a fungal disease – Plectosporium blight.
As the disease name suggests, the fungal pathogen Plectosporium tabacinum is responsible for its occurrence. Following a typical cycle of disease in infected hosts, fungal reproductive structures overwinter on crop residue. The pathogen even has the ability to dwell in soil for up to three years, much overstaying its welcome. As the growing season progresses, fungal spores will enter hosts through natural openings like cuticles and stomata. Plectosporium tabacinum prefers a cool and rainy environment, as windy and wet weather can assist in the spread of fungal spores and therefore the disease itself.
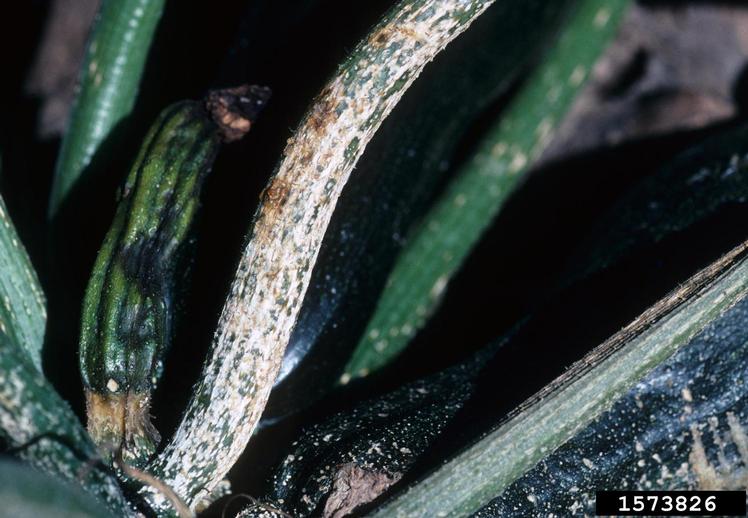
Plectosporium blight has a few key symptoms which are easy to spot. White or cream-colored patches of various sizes will be present on stem tissue and can also spread to leaf petioles – the stalk which connects the leaf to its stem or branch. In severe cases of infection with Plectosporium tabacinum, hosts can become entirely defoliated as these lesions deplete petioles of their strength. Raised circular lesions in colors including white, tan, and gray, will appear on the body of the fruit and possibly leaves. As the disease progresses, infected tissue will become increasingly brittle and dry, forming tan abrasions that detract from the plant’s vigor.
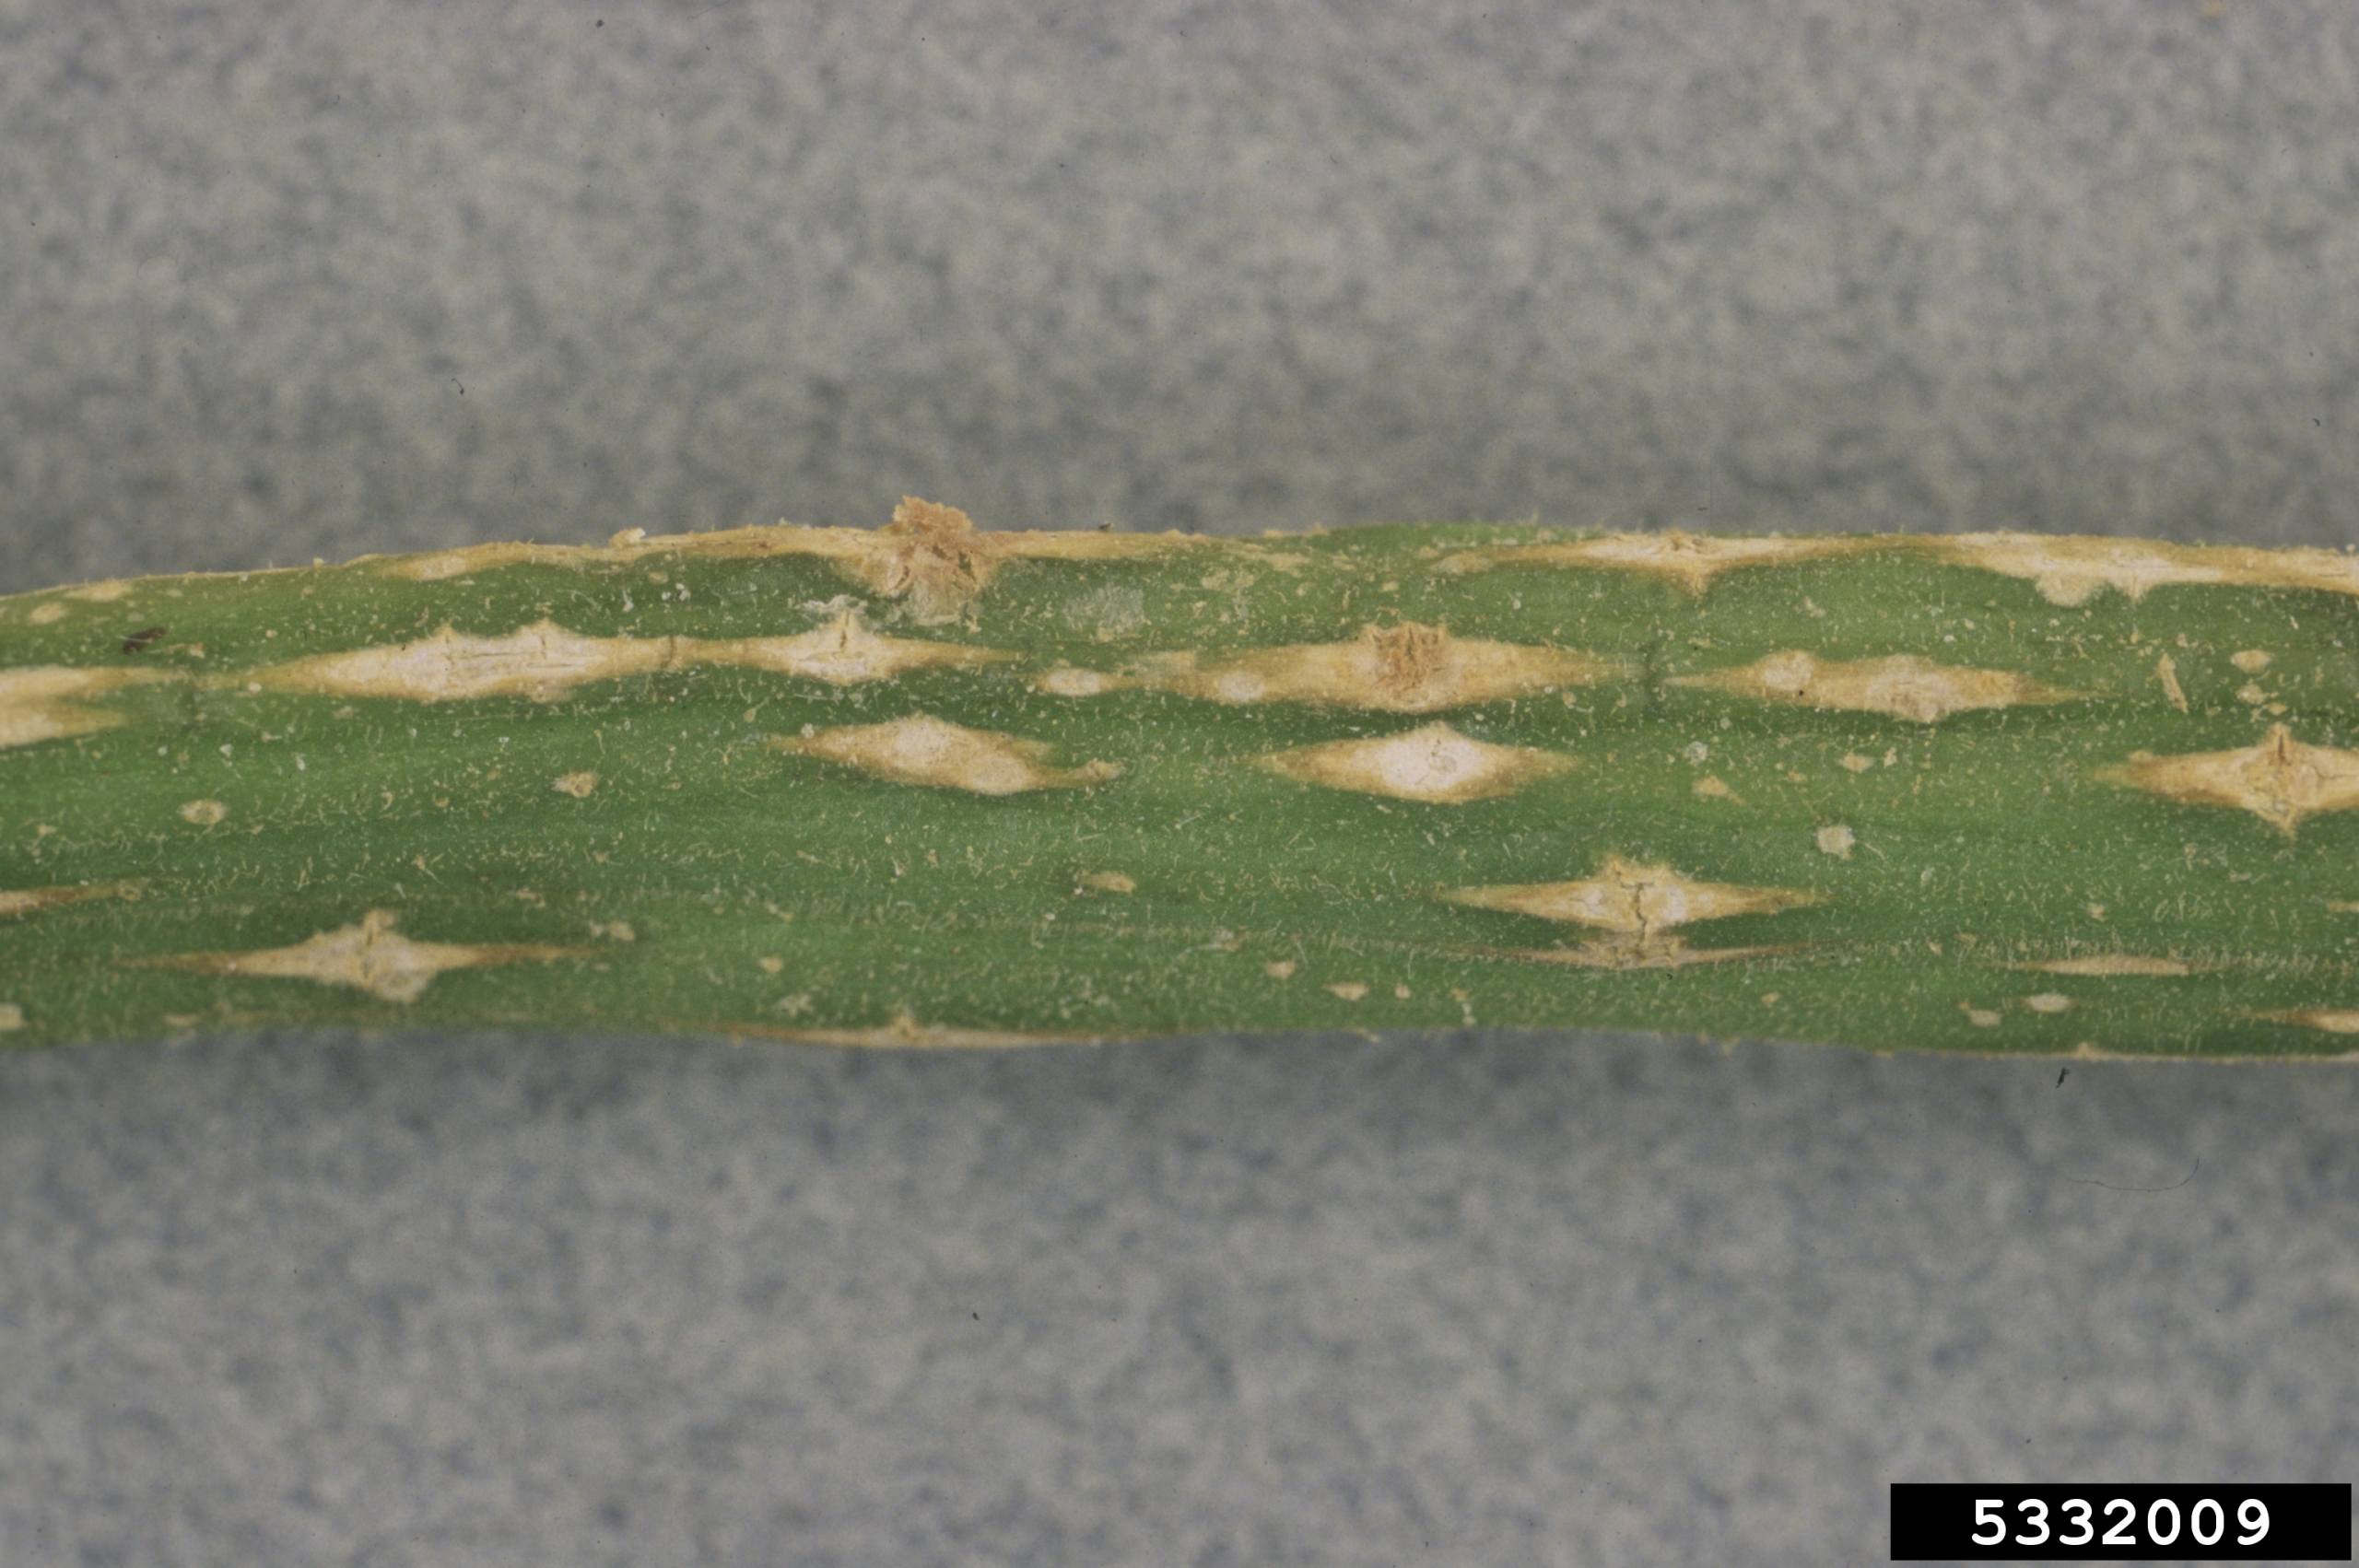
Fear not – all hope is not lost for the unofficial mascots of autumn. There are management strategies readily available to deter Plectosporium tabacinum. Due to the pathogen’s ability to dwell in plant residue and soil for long periods of time, crop rotations are beneficial to position potential hosts away from areas where the disease was observed in the past. In addition, assuring that plants have ample space between each other and therefore promoting air circulation. This leaves fungal pathogens without a suitable place to dwell, reducing infection of plants in the area. Control can also be achieved by fungicides, including Chlorothalonil and strobilurin based compounds. Always read the label in full before using any chemical product on your plants.
The number of management strategies available for Plectosporium blight is a comforting indicator that this disease is easily controlled. As you are outside admiring the fall foliage and enjoying a reprieve from the harsh heat of summer, peruse your fall cucurbit harvest for the aforementioned symptoms. Stay curious and enjoy the dynamics of the season – it'll slip away in the blink of an eye!
The UConn Home & Garden Education Center supports UConn Extension’s mission by providing answers you can trust with research-based information and resources. For gardening questions, contact us toll-free at (877) 486-6271, visit our website at homegarden.cahnr.uconn.edu, or reach out to your local UConn Extension center at cahnr.uconn.edu/extension/locations.
Why Bees and Wasps Really Crash Your Late Summer Picnic!
Did you notice a few unwelcome guests trying to steal a sip from your soda can at your Labor Day picnics last weekend? In late August/Early September, bees and wasps are highly visible, more persistent, and at their peak populations in social hives. We get a lot of calls this time of year asking what can be done to remove them from shared spaces.
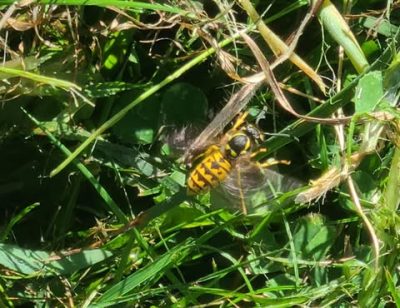
Thousands of described species are spread across 7 taxonomic families, worldwide. Eusocial species, like honeybees and paper wasps, have complex social structures that contribute to the overall survival of the hive. Meanwhile, a large majority of species are solitary and may live close to similar species but don't work together when it comes to provisioning resources or defending a territory. Diets range from carnivorous to herbivorous. However, most of them have developed a relationship with flowering plants in some capacity. Some are specialists, needing specific flowers for various resources, while others are generalists. Flowers have co-evolved with these insects so that they may benefit from the relationship via pollen distribution. Only those that help to move pollen are considered pollinators, though many may feed on floral resources. Entomologists dedicate their entire careers to understanding these insects and their complex relationships with the larger world.
So why do they bother us around Labor Day but not so much during other summer picnics? A lot of it has to do with life cycles. By August, a hive has had a significant amount of time to establish. In spring, a queen will start a nest the size of a quarter. They aren’t on our mind so we’re not on the lookout. By now, some of those social nests can be the size of a basketball, or larger, with thousands of insects working for the good of the hive. At the same time, we're in the season when bees and wasps are on the lookout for sweet, sugary energy sources as their natural floral resources start to become scarce with the change of the seasons. Some become more protective of territory, trying to protect local resources and inadvertently mistake your sodas, fruit, and sweet picnic goodies as their next opportunity. Keeping drinks and food covered at picnics at this time of year is highly recommended to avoid attracting bees and wasps. If you grow fruit trees or berries, clean up any dropped fruit that could also attract these sugar fiends.
In general terms, the easiest management strategy is to avoid the area, if possible. Hives built in low traffic areas can plausibly be left for the season, since workers will die out with colder weather. The only one to overwinter is the queen, and she will usually overwinter in leaf litter or plant material at ground level. In addition, wasps are not going to re-use their hives. The new queen will start fresh with her own nest, and her own colony come springtime. Next spring would be the time to scout for any unwanted guests and physically remove the beginnings of a nest early. This not only helps keep them out of your space but gives the queen time to reestablish a nest somewhere else that is safer for both parties and allows them to coexist with us more favorably.
We always encourage having a bee or wasp identified before managing a nest, for a multitude of reasons. Your local beekeeper may be skilled and willing to help you remove a hive or swarm of honeybees from your property, but they won’t want to go near wasps any more than you might. Some species, like carpenter bees, may cause property damage and management may include removal of the bees as well as some minor carpentry repairs. Others, like the Cicada Killer, may appear big and scary, but want nothing to do with humans and can be left alone to complete their season.
If you or a family member has an allergy, damage is being done to property, or the nest is in a high traffic area, removal of the nest may be appropriate. Chemical management products, like bee and wasp sprays, are highly effective when used according to the label. These products will kill the insects. Not all products may fit all situations, so check labels carefully. As an example, sprays for ground bees and wasps should be labeled for ground use. Remember to read the label in its entirety before use and follow all instructions as written. Consider hiring a pest removal professional who can take the proper safety precautions. These professionals also know strategies that may help reduce the impact on nearby pollinators, treating only the problem at hand.
If you have questions about bees or wasps or need help identifying them to navigate which action to take, the UConn Home & Garden Education Center is here to help!
The UConn Home & Garden Education Center supports UConn Extension’s mission by providing answers you can trust with research-based information and resources. For gardening questions, contact us toll-free at (877) 486-6271, visit our website at homegarden.cahnr.uconn.edu, or reach out to your local UConn Extension center at cahnr.uconn.edu/extension/locations.
Dodder – A Common but Weird Parasitic Plant
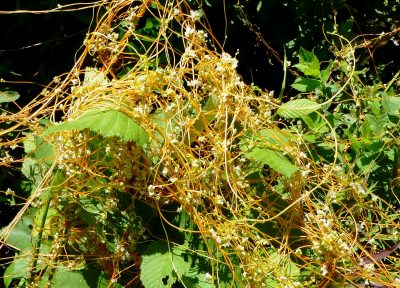
Dodder is an obligate parasite of certain plants. This unusual member of the morning glory family is also known as “Angel’s Hair” and “Strangle Weed.” Like Indian pipe, another parasitic plant, Dodder has no chlorophyll to manufacture its own food, so nutrients and water are obtained from its host plant. Its yellow to orange twining stems can form stringy, dense orange mats that cover its host plants, and it will often climb over other nearby plants as well. This vine twines counterclockwise around stems and other parts of its host. Look for it in mid- July through September in damp fields or on stream and pond banks.
Dodder germinates from seeds produced in earlier years. The new plants have only a few days to find a suitable host plant, or they will die. After connecting with the host plant, dodder will degrade at the soil level where it originated and is then free of any soil contact. Dodder has no leaves or roots, but it does produce flowers and then seeds. The only way new plants can be re-established is from seed produced at least the previous year or even earlier.
Dodder feeds on its host by means of small tubes called haustoria that pierce into the hosts leaf or stem vascular system. One type will siphon water from the xylem, and another type will obtain food (minerals, sugars etc.) from the phloem of the host plant. In this way, dodder obtains essential nutrients and water for its own survival at the expense of its host plant. Five-angled dodder Cuscuta pentagona, a very common dodder species found here in Connecticut does not have specialized host plant preferences.
Since not all plants are suitable hosts for dodder, and because it needs to find a host quickly, dodder has a unique ability to “sniff out” certain plant chemicals and will gravitate toward these plants soon after germination. Notable hosts are jewelweed in the wild and tomatoes in crop cultivation. Thus, if you are interested in finding dodder, in July and August check out places where jewelweed abounds. Look for mats of orange, stringy vines covering the tops of this plant and perhaps on nearby Joe-pye weed and goldenrods.
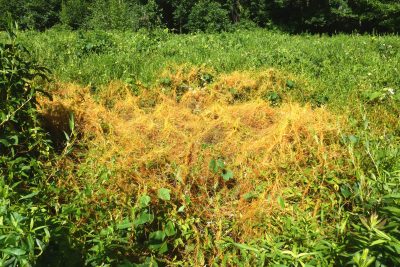
Dodder seeds can survive in soil for twenty years or more and will germinate as conditions are suitable. Because of the longevity of its seed viability, dodder may be found either yearly in the same area or appear there years later. Flooding can also relocate the seeds, so it may appear along various spots along the same stream or pond. Look for its small white flowers appearing in clusters along the vine in late July and August.
Once dodder is firmly established on the host plant in the wild, research has shown that removal of the host plants and the dodder, especially before seeds are set on the dodder, will be more effective than other methods. This may need to be done yearly until any seed bank is exhausted. Try to scout early in July as dodder is getting established. Sometimes small dodder plants can be removed from the host. Some people with dodder persisting in extensive areas have burned these sites, and this will also severely impact any seeds on the ground.
Dodder is an aggressive plant, but it is not considered invasive because it is a native plant. It has received the dubious honor of making the Federal List of Noxious Weeds, though. Although its hosts may be severely weakened, dodder does not always kill its host. While that is not reasonable cause to let it run rampant in a garden, in the wild it is in more of a tournament for survival. May the best plant win…
The UConn Home & Garden Education Center supports UConn Extension’s mission by providing answers you can trust with research-based information and resources. For gardening questions, contact us toll-free at (877) 486-6271, visit our website at homegarden.cahnr.uconn.edu, or reach out to your local UConn Extension center at cahnr.uconn.edu/extension/locations.
Queen Anne’s Lace
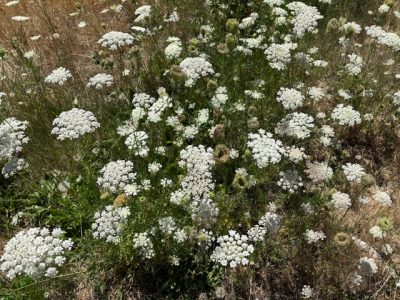
Among the plants that have naturalized across this country, is the seemingly ubiquitous Queen Anne’s lace also known as the wild carrot. This herbaceous biennial originated around the Mediterranean region and western Asia. It is thought to be a wild ancestor of the carrot as both wild and domesticated carrots existed at least 5000 years ago. Anyone weeding or digging out Queen Anne’s lace from garden beds will notice the distinctive carrot smell of the taproots.
Pass almost any sunny roadside or field and you’ll find the delicate white lacy blossoms swaying in the breeze. Plants start out as small rosettes of fern-like, green leaves. The seeds can germinate throughout the growing season if enough moisture is present. Typically seeds germinate within a couple of years but they can remain viable for at least 7 years. A taproot develops where energy is stored for next year’s growth. The following spring, the plant produces more leaves, stalks and flowers. The lacy leaves are finely divided and tripinnate. The hairy, solid stem can grow up to 3 feet before the flower buds are formed.
Queen Anne’s lace blossoms typically appear from June through August in most areas. The tiny white flowers are clustered into a flat, terminal umbel from 2 to 4 inches across. Curiously, many flower heads have a single pinkish to purplish floret in the center. The color is due to the pigment, anthocyanin. For at least 150 years, botanists have been trying to figure out what purpose the dark colored floret serves. It is thought that perhaps it serves as an insect attractant but this remains to be confirmed.
Each floret on the umbel can produce 2 seeds. Since there might be 1000 florets making up the umbel, saying this plant is a prolific seeder is an understatement. In at least 35 states, it is considered a noxious weed as it displaces native vegetation. As the seeds ripen, the flower head curls inward like a closed fist or bird’s nest and turns brown. Eventually the dried seed head might detach from the stem and then it can be blown like a tumbleweed spreading its cache. This plant is especially problematic if it occurs where domesticated carrots are grown for their seed. Cross pollination could take place and the resulting seed would be useless. The seeds have hooked spines and can readily attach to cloth and fur.
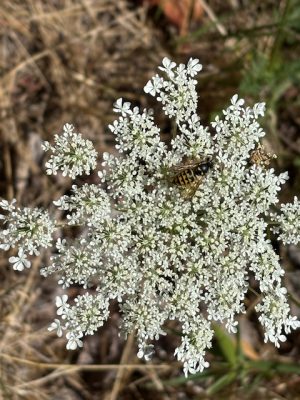
Aside from its lovely, lacy flowers that hold up well in cut flower arrangements, Queen Anne’s lace serves as a host plant for the eastern black swallowtail caterpillar as well as providing a source of nectar for other butterfly species, bees and other pollinators.
Several seed companies offer varieties of Queen Anne’s lace that were bred or selected for their dark coloration. ‘Purple Kisses’ sports umbels in shades of dark purple and pink and is available from Johnny’s Seed. ‘Chocolate Lace’ from Seed Therapy comes in shades of burgundy, chocolate and dusty rose. Although I have not grown these varieties, I suspect they would also self-seed. A better option might be to try Ammi majus, called the Bishop’s flower or False Queen Anne’s lace. It is an annual with similar lacy, white flowers but I have not found it to be a prolific seeder especially if the flowers are used for cutting and not left to go to seed.
Being a member of the parsley (Apiaceae) family, Queen Anne’s lace is edible but not very flavorful. The flowers are sometimes used to make jelly. The root could be eaten when young but gets tough very fast. The seeds especially have been used for medicinal purposes for centuries. Reputedly this aromatic herb has many uses ranging from a love potion to soothing the digestive system, supporting the liver and for kidney and bladder diseases. If you are tempted to sample some Queen Anne’s lace, be very careful to identify it correctly. Other plants, such as poison hemlock have similar flowers and foliage but deadly outcomes.
As to how Queen Anne’s lace got its name, there are a number of anecdotes. Perhaps it resembled the lace collar or headdress of Queen Anne (1655-1714). Another story goes that she was tatting lace and pricked her figure leaving a drop of blood on the lace, representing the dark floret. Or it could be that the dark floret was thought to be the Queen and the white ones her maids. Geoffrey Grigson, an English botanist, conjectured that the name was in honor of St. Anne, the mother of the Virgin Mary and the patron saint of lacemakers.
However Queen Anne’s lace got its name, one has to be in awe of how widespread it has become. Because plants are short-lived but prolific seeders, one way to control it is to remove the flower heads before they go to seed. They do make delightful cut flowers so make use of them in arrangements. You get to enjoy them and there is less seed out there.
The UConn Home & Garden Education Center supports UConn Extension’s mission by providing answers you can trust with research-based information and resources. For gardening questions, contact us toll-free at (877) 486-6271, visit our website at homegarden.cahnr.uconn.edu, or reach out to your local UConn Extension center at cahnr.uconn.edu/extension/locations.
Best Practices for Soil Sample Collection: How You Sample Matters
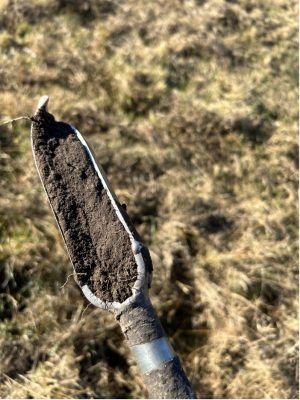
Soil testing begins with the homeowner, gardener, and farmer. The most critical step in soil testing is soil sample collection. Soil testing can help growers make informed decisions about fertilizer application, soil amendments, and soil health. A standard nutrient analysis can chemically extract calcium, magnesium, phosphorus, potassium, sulfur, iron, manganese, copper, zinc, aluminum, and boron from the soil. Other tests can also determine the pH and organic matter content of the soil. Poor sample collection can cause errors in the testing results, potentially leading to inaccurate nutrient recommendations and lowered crop productivity. Consistent and proper sampling procedures allow you to make future comparisons of the same sampling area. They also allow you to limit unnecessary nutrient applications that could lead to environmental contamination through the loss of nutrients. In addition, soil testing costs money and can influence the total cost of fertilizer and amendments needed for application. Following proper sample collection procedures can help you avoid unnecessary expenses.
The first step in collecting a soil sample is to determine an area in which the sample will be collected. You will want to select an area that has similar physical appearance, slope, drainage, limestone or fertilizer treatments, and intended plant usage. For example, if your front lawn has a steep slope compared to a flat side yard, you will want to collect a separate sample from both of those areas, rather than grouping them together as one sample.
The second step is to have a clean bucket and tool for collecting soil. This can be done more easily with a spade, auger, or probe. You will want to collect 10 or more random subsamples from across the selected area, that way the sample submission is representative. Flowers, vegetables, and small fruits soil samples should be collected to a depth of 6-8 inches. A depth of 6 inches is widely accepted since it represents the zone in which there is highest root density and nutrient uptake for many plant species. Soil samples collected for turf should be collected to a depth of 3-4 inches, since most turfgrass roots are concentrated in the top 4 inches of soil. Tree and shrub samples should be collected to a depth of 8 to 10 inches. These are the recommended sampling depths from the UConn Soil Nutrient Analysis Laboratory. It is also important to make sure that the sample is collected vertically, rather than at an angle. Sampling at an angle can affect the sampling depth and lead to inaccurate lab results.
Next, you will want to mix the subsamples together to break up the clumps while removing stones and debris. Once mixed, scoop out at least 1 cup of soil into a zipper lock bag and label the bag with a sample identification. Fill out the submission form with the same sample identification and label a crop code. Crop codes are key for making recommendations. Different crops have different needs. For example, blueberry plants prefer acidic soils that have a pH between 4.5 and 5.0 while turf prefers a pH between 6.0 and 7.2.
Soil samples can be collected at any time of the year, as long as the ground is not frozen, but should not be collected when the soil is very wet or within six to eight weeks of a fertilizer or lime application. Many samples are submitted in the spring to prepare for the growing season, but a fall soil sample submission can be very beneficial for soil pH and some fertility corrections. Limestone and sulfur can be added to the soil in the fall to allow plenty of time for the lime to neutralize soil acidity and bring pH to target levels by the spring. Sandy textured soils should be sampled every 2 to 3 years and clay soils should be sampled every 3 to 4 years. If a soil test reveals that a large correction in pH or fertility is necessary, it may be a good idea to have your soil tested again in 1 year to evaluate the correction. More information on soil testing services and soil sampling procedures can be found at the UConn Soil Nutrient Analysis Laboratory.
The UConn Home & Garden Education Center supports UConn Extension’s mission by providing answers you can trust with research-based information and resources. For gardening questions, contact us toll-free at (877) 486-6271, visit our website at homegarden.cahnr.uconn.edu, or reach out to your local UConn Extension center at cahnr.uconn.edu/extension/locations.
Weed Management for Late Summer
With a perfect combination of warm days, cool nights, and plenty of rain, every gardener has been fighting weeds since this summer began! To add to the frustration, the weather patterns themselves have felt like they have fallen on weekends, holidays, and all those precious hours that we love to be spending in the garden, making it difficult to get out and manage what is there. So how do we catch up?
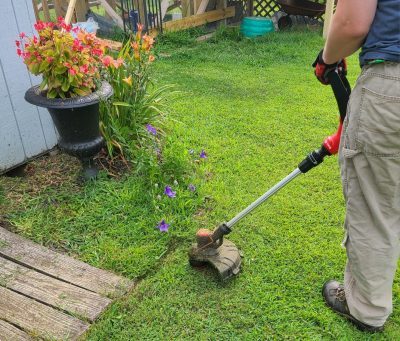
I’m sorry to say that the adage of “pick your battles” is going to be the best strategy to keep you from “getting lost in the weeds.” Mechanical removal like string trimming, mowing, or cultivating your garden are always effective. But some of us are looking for something that feels more efficient or saves our back from hours of labor-intensive weed pulling in this summer heat. Strategizing more long-term goals for your planting beds and lawns might be better for you than running outside with your garden weasel right now.
We’ve all heard “nature abhors a vacuum” before. Weeds are no different. If turf is thin, or garden beds are left with uncovered soil, weeds will pop up. Utilize groundcovers and mulches to keep soil covered. If you’re in between plantings in the vegetable garden, a temporary cover, like cardboard, may keep seeds from contacting the soil until you’re ready to plant! For more long-term coverage, consider cover crops in your vegetable gardens.
Encourage dense plantings through proper fertilizing, watering, and care. Healthy perennials and shrubs will shade out seeds that may try to germinate below them. For lawns, consider overseeding to bulk up thinned turf areas between August 15th and September 15th. Mulch garden beds and pathways with a minimum depth of 3 inches if groundcovers aren’t being used.
Once you have soil coverage under control, look at the nutrition. When the soil is not nutritionally supportive, you often find compounding issues like patches where you can never get grass to grow, poor vegetable production/flowering, and lots of weeds! Many weeds can thrive in these poor soils. While weeds aren’t necessarily a definitive indicator of a nutrient problem, it can be another clue when looking at the health of your planting areas. If you kill the weeds, and the soil remains poor you can expect weeds again the following season. Therefore, testing your soil and correcting imbalances is a long term and sustainable solution.
Some common weeds, like crabgrass, are beyond a stage where we can easily control them with methods available to the homeowner. Fear not! Crabgrass is an annual, and the plants themselves will not return next year! They, instead, propagate through seeds.
At this point in the season, shift your focus towards minimizing next year’s seed bank. As much as we loved to “make a wish” on a dandelion as children, we were only spreading more dandelions into the yard! Keep this in mind now as you tend your garden. Cut grass before weeds can develop flowers and distribute seeds. Remove plants like pokeweed, before they have a chance to develop berries that can be carried off by animals.
Don’t underestimate the value of a good identification. Knowing the exact species of weed in the garden can help you make a targeted approach with whatever physical, cultural, or chemical method you might be considering.
If you must resort to chemical management, read the label in full and follow all instructions provided. At the UConn Home & Garden Education Center we do not recommend the use of anecdotal home remedies for weeds. Many of these methods are not researched. Products used in the garden should be labeled for use on a specific host, a specific pest, and have specific application instructions. As an example, while vinegar may be recommended anecdotally to use on weeds in the garden, one should only consider a product like horticultural vinegar that has a specific formulation, concentration, and a product label that clearly identifies its uses, safety precautions, and instructions for use.
No matter what weed you are trying to manage, persistence is key. This is especially important to remember if you’re dealing with the most aggressive weeds, or even invasive plant species. Rarely do we see a single treatment leading to complete eradication. So don’t be discouraged if plants are taking multiple seasons to tackle. The CT Invasive Plant Working Group has great guidances on what you should do for specific species of invasive plants like Japanese Knotweed, Mile-A-Minute Vine, Tree of Heaven, and more.
If you have specific questions or need help with weed identification in the lawn or garden, send us pictures, or stop by with a sample.
The UConn Home & Garden Education Center supports UConn Extension’s mission by providing answers you can trust with research-based information and resources. For gardening questions, contact us toll-free at (877) 486-6271, visit our website at homegarden.cahnr.uconn.edu, or reach out to your local UConn Extension center at cahnr.uconn.edu/extension/locations.
Extreme Sports for Plants: Temperature Tolerance

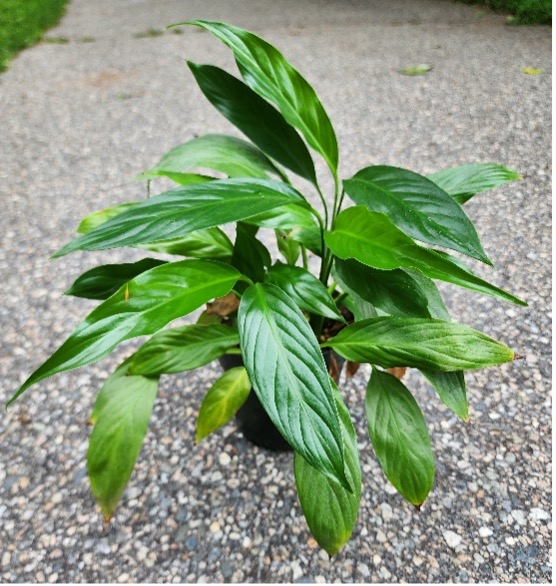
Favorite Summer Plants For Hummingbirds
By Pamm Cooper, UConn Home and Garden Education Center
Every spring I make a list of the plants that hummingbirds visited the most the year before, and then my search at garden centers and nurseries begins in earnest. The plants I look for are the ones that not only hummingbirds seem to benefit from the most, but also the ones that bloom the longest. I also select the plants whose flowers I enjoy as well.
Although annuals generally have the longest bloom time, there are some perennial ornamentals that are very attractive to hummingbirds and are worth considering for a garden or a landscape. Including a small group of these plants would be a great benefit to hummingbirds as they visit your property.
Obedient plants, Physostegia virginiana, can bloom from early June through September. These drought tolerant perennials may get 3 feet tall and some will slowly spread. If that trait is a problem, The ‘Manners’ series such as the white ‘Miss Manners’ obedient plants are not spreaders. The flowers are also attractive to butterflies, especially tiger swallowtails, and pollinators.
Native swamp milkweed, Asclepias incarnata, is also visited by hummingbirds. This plant likes moister soils than most milkweed, and mine is planted near a birdbath that gets emptied frequently to add fresh water. This milkweed, along with butterfly weed A. tuberosa, can be deadheaded to promote rebloom.
Hyssops, Agastache spp., are also a favorite of hummingbirds, and most have a long bloom period, some starting in late spring. The ‘Kudos’ series with small flowers that are yellow, pink or orange are the ones visited the most by hummingbirds on my property. Another favorite is ‘Boa’, which has larger flower spikes lasting a good three months. Deadheading all will prolong bloom time.
Annual flowering plants that are a favorite of hummingbirds include Salvias, cardinal climber, Fuschias, Lantanas and Cupheas. All are easy to grow, and all but the cardinal vine can be used in containers, hangers and window boxes.
The cardinal climber, Ipomena x multifida, is an attractive, fast-growing annual vine that has small, brilliant red trumpet- like flowers. You can save seeds from this plant and use them next year. One plant can grow to fill a large trellis, and you may need to corral it in if it starts reaching out for nearby plants.
Of the Cupheas, the ones most visited, in my experience, are the large firecracker plant, C. vermillionaire, and the smaller one, C. schumannii, also called the orange cigar plant. The former is superior, with a compact, mounding habit and continuous bloom of orange tubular flowers until frost. If the smaller cigar plant is planted directly in the garden, give it some room as it sprawls somewhat.
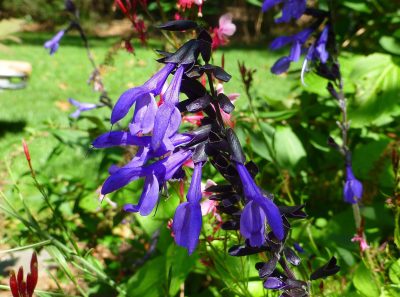
Annual Salvias like the “Rockin’ series, the ‘Black and Blue’, ‘Roman Red’ and the ‘Hot Lips’ salvias are the ones I always have in my containers or plant directly in the ground in spaces I leave for them. I would not venture to guess which ones hummingbird prefer, as they visit all of these throughout the day.
There are a couple of shrubs that I learned by chance observance are favorites of hummingbirds. These are Weigelas, and butterfly bushes, Buddleia davidii. There are Weigelas that bloom only in the spring, some that bloom in spring and then again later in the summer through fall, like the ‘Sonic Blooms’, and some that bloom throughout the year, like ‘Crimson Kisses’ and ‘ Peach Kisses’. The last two are smaller shrubs which have a rounded habit.
The plants I have included in this brief article are only a small example of plants that the average gardener can include on their property in gardens or containers of some type. I will mention that while I do have a hummingbird feeder, the hummers I see are favoring actual flowers over that source of food. Downy woodpeckers and orioles do visit the feeder instead, so it is useful to them, I guess. I may start calling it my downy feeder, at least during the summer.
The UConn Home & Garden Education Center supports UConn Extension’s mission by providing answers you can trust with research-based information and resources. For gardening questions, contact us toll-free at (877) 486-6271, visit our website at homegarden.cahnr.uconn.edu, or reach out to your local UConn Extension center at cahnr.uconn.edu/extension/locations.
Seeing Ghosts in Your Garden?
By Emily Leahy, UConn Plant Diagnostic Lab
While meandering around my backyard this past weekend, I spotted a striking plant which I had never seen before. At first instinct, I assumed it was a particularly unique fungal species and snapped a couple pictures. My curiosity having been piqued, I did some research and learned that it was in fact not a fungus, but a parasitic plant reliant on fungus – Monotropa uniflora. Its name is self-descriptive; Monotropa, illustrating the single turn of its shepherd hook shape, and uniflora, depicting the lone flower produced on each stem. It is also known as “Ghost Plant” or “Indian Pipe.”
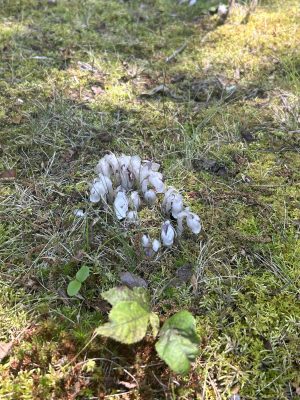
Perhaps the most unusual feature of Monotropa uniflora is its color, or lack thereof. While mostly white-colored overall, hues of pink can be visible along with black flecks spread along the plant. The translucent nature of the plant is derived from the absence of chlorophyll, a green pigment and key component allowing autotropic plants to perform photosynthesis.
Autotrophs are organisms that convert abiotic (non-living) sources of energy, like sunlight, into organic compounds they can use for food production. Most plants have this ability, using the chemical reactions in photosynthesis to produce carbohydrates for their own nourishment. However, Monotropa uniflora, a heterotrophic plant, cannot carry out such processes. They seek the organic compounds needed to sustain themselves from external sources. Autotrophs are often referred to as “producers” and heterotrophs “consumers” to illustrate this distinction. Since Monotropa uniflora is not directly dependent on sunlight for survival, it is often found in shaded areas and forests.
This all begs the question – where does Monotropa uniflora get its nourishment from? The answer comes in the form of its parasitization of mycorrhizal fungi and surrounding trees. The term “mycorrhizal” is used to describe fungi that form a symbiotic relationship with the roots of its host plant. The interaction is mutually beneficial – mycorrhizal fungi receive sugars and carbon from its host, which in turn is aided by the fungus in its absorption of water and nutrients. The root system of the host plant is used as a transportation highway in these interactions.
Monotropa uniflora inserts itself as a third player in the relationship, disrupting its balance. In a clever sleight of hand, the parasite tricks the mycorrhizal fungi into thinking it is forming another symbiotic relationship as its root system interacts with the fungal mycelium. However, the benefits of this interaction are strictly one-sided as Monotropa siphons the carbohydrates, initially derived from the mycorrhizae’s host trees, for its own consumption. This is not severely detrimental to the fungi or host plants, but it certainly detracts from the vigor of their symbiotic relationship and the amount of available resources transferred between the two entities.
Monotropa uniflora has a wide range of distribution throughout the U.S., so it is possible to see these fascinating plants in action in a variety of locations. Its flowering season ranges from early summer to early fall and it thrives even after seeds are released.
A microcosm of ecological phenomena, Monotropa uniflora is quite the unique find. It is enthralling not only to observe, but also to know the complex interactions that occur just below ground. I say we can overlook its parasitic tendencies and appreciate its role in the delicate balance of our natural world – after all, everyone loves a good villain, right?
Need help identifying something interesting in your garden? We’re here to help! The UConn Home & Garden Education Center supports UConn Extension’s mission by providing answers you can trust with research-based information and resources. For gardening questions, contact us toll-free at (877) 486-6271, visit our website at homegarden.cahnr.uconn.edu, or reach out to your local UConn Extension center at cahnr.uconn.edu/extension/locations.
It’s Not Too Late! Plant Now for Fall Harvests
By Heather Zidack, UConn Home & Garden Education Center
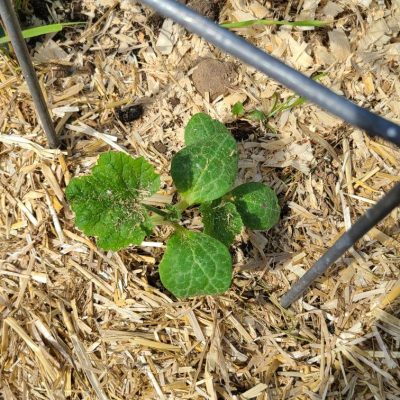
Gardeners have had a broad range of experiences with their vegetable gardens this season. Some planted early in May with the warm weather, which was followed by a cold front that meant covering plants, or keeping them in pots longer than you had planned. For others, a pattern of cool, rainy spring weekends delayed planting! Cornell even sent out a reminder to residents to watch for tractors on the roads a little later this season as farmers, too, were scrambling to adjust in upstate New York. Thankfully, there is still plenty of growing season left for us to shift our practices and still have a bountiful harvest from our home gardens.
There are roughly 100 days left of the growing season until the first predicted frost date, according to the farmers’ almanac. That means you have an opportunity to still plant your dream vegetable garden! Look at the “days to maturity” to determine if planting now makes sense. Many summer crops, like zucchini, cucumbers, and even some types of winter squash have much shorter days to maturity and can be started from seed right in the warm, summer soil.
Have a type of bean, radish or leafy green you love, but can’t process bushels at a time? Plant every couple of weeks this month for a staggered harvest to enjoy your favorites for an even longer period at a more manageable volume!
Do you plan to harvest garlic this month? Be ready to follow up with a short-term crop like leafy greens, beets, carrots, or even some types of corn!
The practice of succession planting gives gardeners a chance to extend the garden season and promotes soil health by keeping your garden beds active. Rotating crops in this fashion reduces the risks of soil erosion, weed overgrowth, and nutrient depletion, when done correctly.
When setting up a succession or rotation schedule, consider what has been in the bed previously and how those plantings might interact. Determine the nutrient needs of the plants you are considering. You want to be sure you are not planting one heavy feeder right after another as this may mean you need to provide more nutritional support than you planned for. Instead, opt for plants that feed on different nutrients, or better still, plants that help to reintroduce nutrients into the soil.
Succession planting and crop rotation not only benefit the garden beds that have been put on the back burner as we’ve tried to find time between the rain and temperature swings, but it may also benefit those who have a history of battling with garden pests. Planting later in the season may help prevent or minimize damage from many single generation pests, like the Squash Vine Borer or the Four-Lined Plant Bug.
Many Cole crops (those in the brassica family) and cool season crops can be started from seed now in preparation for fall planting. However, it may be best to start these indoors instead of directly sowing in the ground. Temperatures over 85 may cause delayed germination or bolting too early once those plants pop out of the soil. Starting them indoors gives you a little more control over the temperature. Otherwise, search for heat tolerant varieties for better results.
If you want a rest from the care of vegetable gardening and harvesting, consider planting annuals. There are many varieties of marigold, cosmos, zinnia, and some other beautiful cut flower varieties that could happily take up some space and lend their services to some late season table arrangements for you!
There’s a lot to still do if you want a bountiful fall harvest, and there are a lot of considerations to make when planning what to plant next. Do your research with cooperative extension or land-grant university resources for science-backed information to guide you in your next steps. And remember, we’re here at the Home & Garden Education Center to help you make sense of it all!
The UConn Home & Garden Education Center supports UConn Extension’s mission by providing answers you can trust with research-based information and resources. For gardening questions, contact us toll-free at (877) 486-6271, visit our website at homegarden.cahnr.uconn.edu, or reach out to your local UConn Extension center at cahnr.uconn.edu/extension/locations.
Hyped for Hydrangeas
Nick Goltz, DPM, UConn Home & Garden Education Center, UConn Plant Diagnostic Lab
When I moved to Connecticut in July of 2021, I remember driving through neighborhoods looking for somewhere I might eventually want to live and being struck by the beautifully-landscaped yards that each home seemed to showcase. I particularly remember being impressed by the tidy hedges of hydrangea, filled with lush globes of blue, pink and purple flowers. Can you think of a flower more emblematic of breezy, long summer days by New England coast than the hydrangea? I’ll wait.
Hydrangeas are a fascinating group of perennial plants with some unique quirks that make them a fun addition for the home garden. The genus is native to Asia and North America, but the species grown most commonly around the world, Hydrangea macrophylla, is native to Japan and has been bred extensively for hundreds of years, resulting in many cultivars. They are also bred with other species to help select for cold tolerance or inflorescence (flower cluster) shape.
Hydrangea macrophylla are commonly known as “bigleaf hydrangea”, but may also be called “lacecap” or “mophead” hydrangea, depending on the shape of the cultivar’s inflorescence. While many species of hydrangeas have white flowers, bigleaf hydrangeas are prized for their beautiful inflorescences that act as a natural pH indicator of the soil the plants grow in. The petals of flowers will change depending on how basic or acidic the soil is. Flowers will be blue, indigo, or deep purple in acidic soils with a pH of 5.5 or less. Plants gown in a slightly acidic soil with a pH between 5.5 and 6.5 will have a mix of purple hues. Hydrangeas grown in neutral to basic soils with a pH greater than 6.5 (especially 7 and up) will generally have fuchsia to pink-colored flowers. Many gardeners will amend the soil of their hydrangea beds from year to year to achieve the color that they hope for.
Many folks know of the color-changing capabilities of hydrangeas, but keep reading for a few tips on how to properly care for them beyond adjusting soil pH. Hydrangeas prefer moist, well-draining soil and a sheltered spot with partial shade. Some cultivars tolerate full sun well, but must be watered consistently to look their best. Hydrangeas do not grow exceptionally large and are considered “low fire risk”, so are a better choice for planting near the home.

There’s a reason why coastal New England towns seem to be filled with hydrangeas while interior towns, particularly for our friends in Vermont, western Massachusetts, Maine, and New Hampshire, have fewer. Bigleaf hydrangeas can tolerate cold temperatures, but only to an extent. Depending on the cultivar, bigleaf hydrangeas grow best from zones 6 to 8. Most cultivars will survive zone 5 winters, but might not flower well without protection – harsh winter temperatures, especially when paired with low snow cover, can kill flower buds.
Flower buds form on old growth for most cultivars of bigleaf hydrangea. Because of this, many folks will accidentally prune away flower buds in winter, resulting in poor flower production come summer. For this reason, it’s important to never prune bigleaf hydrangea in fall, winter, or spring. Only prune away the bare stems from the previous year when you see that no new growth is being produced from them, or in summer when collecting flowers for the vase on your kitchen table!
If you find the twiggy winter appearance unsightly and can’t help but prune, if you struggle with deer feeding, or if you live in an area with common late spring frosts, consider planting a “reblooming” bigleaf hydrangea. There are a few cultivars, such as ‘Endless Summer’ and sports, that will produce flower buds on old growth and (usually) a second flush on new growth. Alternatively, you could plant other species of hydrangeas, such as smooth hydrangea (Hydrangea arborescens), or panicle hydrangea (Hydrangea paniculata), which tend to be a little more cold-hardy, or oakleaf hydrangea (Hydrangea quercifolia), if you’re looking for a hydrangea for an area with very hot summers.
If you have questions about growing hydrangeas, or any other gardening topic, call the UConn Home & Garden Education Center (toll-free) at (877) 486-6271. You can also email us at ladybug@uconn.edu, visit our website, www.homegarden.cahnr.uconn.edu, or visit your local UConn Cooperative Extension center.
Plants Enjoy Summer Too!
By Dr. Matthew Lisy, UConn Adjunct Faculty
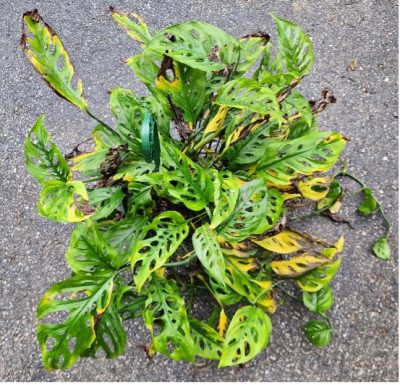
A summer vacation can be beneficial for our houseplants provided that we pay attention to some abiotic (nonliving) factors. Plants need time to adapt to new growing conditions or they can have deadly consequences. Try and make the change as gradual as possible. I usually wait until the end of May, where temperatures are consistently in the 70s for the highs, and no lower than 50s for the lows.
Our plants cannot go from dim, indoor lighting to super bright full sun outside. Any leaves subject to this will burn and die. The best way to acclimate plants to life outdoors is to place them in the shade of a large tree for about a week, and then gradually expose them to some direct sunlight. At first, start with only an hour or two of sun, and then add a bit more the following week until you transition them to full sun. This is assuming that the plants in question are ones that need full sun. Cacti and succulents can generally be transitioned to full sun (one notable exception are the forest cacti).
Most of our houseplants are actually forest-floor species or epiphytes (these grow and live on the trunks of other trees). Either way, those two groups of plants grow in the understory shade of a larger tree in nature, and do well there over the summer. Some plants I saw recently for sale were called neon philodendron. These have light green leaves (similar color to neon pothos). The light was so intense that it bleached the leaves to a pale-yellow color, and some were turning brown. The plants looked miserable, and the grower said she was going to move them to a shadier location.
I am not sure why we cannot have normal weather, but it seems we have had either too dry or too wet the last five years. When it rains consistently, it keeps our plants in a constantly moist state, which leads to root rot. I lost a few really nice philodendrons due to them being too moist in last summer’s constant rain. The ideal setting would have the plants exposed to good light while under cover. This way, the gardener can water them appropriately based on the needs of each plant. If this is not an option, repotting and adding some extra perlite to the mix will help the pot shed the excess water. Be sure to remove the saucer from the pots and hanging baskets while the plants are outside. These will hold excess water and keep the plants in a constantly moist state and favor fungal infections.
A pot or hanging basket may only have about a gallon or two of soil at best, and will dry out quickly in the heat. Depending on your soil type, it may be almost impossible to water enough. Try to avoid full sun in the hottest part of the day between noon and 2:00 p.m.
In an exposed location, wind can rapidly desiccate, windburn, or break plants. A good friend of mine with a large houseplant collection in the Midwest had almost everything he owned blown over and damaged when a tornado swept through his town last summer. Although he did not experience a direct hit, the winds were so bad it ruined many of his mature plants. I told him to look at it like an unintentional propagation event. When vining plants are grown in hanging baskets, they sometimes start to cling to the branches around them and rip in the wind.
Hopefully this article will help plants enjoy their summer vacation. It is a great time for plants to grow and be propagated. Be careful of the extremes of summer, and give the plants a gentle exposure to the outdoors.
The UConn Home & Garden Education Center supports UConn Extension’s mission by providing answers you can trust with research-based information and resources. For gardening questions, contact us toll-free at (877) 486-6271, visit our website at homegarden.cahnr.uconn.edu, or reach out to your local UConn Extension center at cahnr.uconn.edu/extension/locations.
Put an End to Blossom-End Rot: Water and Nutrient Management is Key
By Nora Doonan, UConn Soil Science Graduate Student, Department of Plant Science & Landscape Architecture
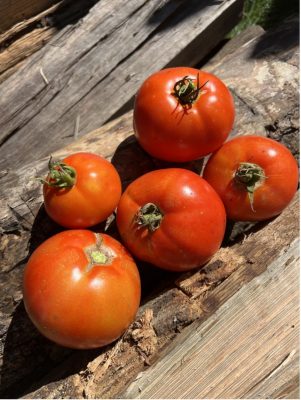
It can be frustrating to put time and energy into growing tomatoes, only to find that your tomatoes have developed blossom-end rot. Blossom-end rot is a physiological disorder that commonly affects tomato plants, characterized by a black, sunken spot on the fruit. This disorder is caused by insufficient calcium as a result of nutrient and water management challenges. Blossom-end rot can also affect peppers, eggplants, squash, and watermelons. In tomatoes, it is commonly seen on larger and elongated varieties, which can have a greater demand for calcium. Calcium is an essential plant nutrient that is required for proper growth, especially for the development of cell walls in the tomato fruit. When a fruiting tomato plant experiences calcium deficiency, the cell wall can collapse and show the appearance of blossom-end rot. Soil tests can reveal if your soil has sufficient levels of calcium and can determine if your soil pH is optimal for nutrient availability.
Oftentimes, the soil is sufficient in calcium levels, but blossom-end rot still occurs. Blossom-end rot can be closely associated with soil moisture that is too wet or too dry. The soil should never dry out completely. It is important to water regularly to ensure that plants receive 1 to 2 inches of water a week. A cycle of dryness followed by overwatering is only promoting calcium deficiency in the plant. If soil is too saturated, there may be insufficient oxygen levels in the soil that can affect the roots’ ability to take up water and nutrients.
One method of maintaining optimal soil moisture is to mulch tomato plants with an organic mulch, such as wood chips or straw, after the soil has warmed up. This will help to prevent excessive evaporation and drying of the soil. Another method is to plant tomatoes in a mound of soil that is high in organic matter or compost. Organic matter can retain soil moisture and provide adequate drainage.
There are other factors that can affect calcium uptake by the plant, such as high concentrations of ammonium, potassium, and magnesium in the soil. This can be caused by over fertilization. Specifically, over fertilizing with nitrogen can promote excessive production of leaves in the tomato plant, which can preferentially distribute calcium to the leaves rather than the fruit.
Calcium movement in the plant is dependent on transpiration, which is the loss of water to the atmosphere from plant leaves, stems, and flowers. Calcium is taken up through the roots and relies on water flow through the xylem for transport through the plant. This movement of water through the xylem is driven by the process of transpiration. Calcium is not redistributed from the leaves to the fruit. In addition, the overfertilization of ammonium, potassium, and magnesium can allow for competition in root uptake of calcium because they are all positive cations. Damages to roots, caused by fertilizer burns or cultivation, can also be a factor in impairing nutrient and water uptake. To prevent blossom-end rot through fertilization practices, apply fertilizer as recommended by a soil test and apply nitrogen fertilizers in the form of nitrate, rather than ammonium.
Any affected fruits can be removed from the plant, as they will continue to drain moisture and calcium for development from other fruits. A foliar application of calcium can be made to the leaves when the fruit is young, but it is not the most effective method, since calcium in the leaves is relatively immobile. The goal is to prevent the need for foliar application through water and nutrient management across the tomato plant growth stages. Hopefully these methods will allow you to prevent blossom-end rot starting at beginning stages of growth, so that you can enjoy a bounty of beautiful, red tomatoes.
The UConn Home & Garden Education Center supports UConn Extension’s mission by providing answers you can trust with research-based information and resources. For gardening questions, contact us toll-free at (877) 486-6271, visit our website at homegarden.cahnr.uconn.edu, or reach out to your local UConn Extension center at cahnr.uconn.edu/extension/locations.
Put in the Work Now for Lasting Garden Beauty
Spring Showers Bring Flooded Gardens
By Amelia Martin, UConn Plant Science Graduate Student
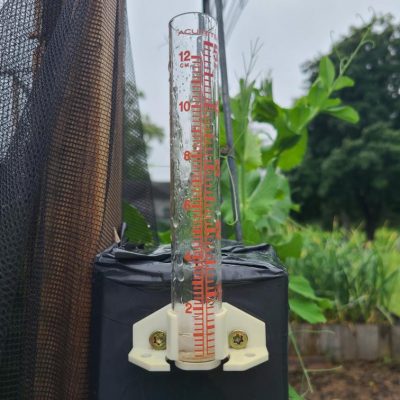
You may have noticed the heavy rains and chilly temperatures last week’s nor ’easter brought to Connecticut. Maybe you were one of many who checked their back window to see their gardens had flooded and their plants are looking worse for the wear. If this sounds familiar and you are curious what garden flooding means for your plants and want to know how to protect them- you found the right article!
A flooded garden is not a unique problem, especially during periods of heavy rainfall, but there are some factors that may contribute to the severity of flooding. Having minimal or poor drainage can amplify the problem, especially if planting in garden boxes with closed bottoms. Soil compaction can contribute to flooding if you are planting directly in the ground. Compacted soil can happen if there has been too much tillage, if wheels or machinery have been over the area, or even from excess foot traffic. Lastly, the layout and landscaping of a yard can contribute to flooding as well. If you placed your garden at the bottom of a hill or there are minimal drainage angles surrounding your garden, water may be pooling up faster than it can drain.
To prevent flooding, check your gutters and make sure they are free from debris and directed to a drain or storm barrel. Put down gravel and mulch to help prevent surface flooding. Avoid cutting your grass too short to maintain strong roots which help to absorb water. Maintain healthy soil to allow for the best water absorption. Dig out a shallow drainage channel if you have the space for it. Consider switching to raised beds with drainage rather than in-ground gardens in easily flooded areas. Try adding native plants to your garden. Native plants have deep roots which helps them absorb excess water and prevent runoff. While handling these issues would be preventative measures, let’s talk about what to do if your garden has already flooded.
Assess the drainage situation and take note of where the water is pooling the most. If flooding is unusual in your garden- there may be something blocking the normal drainage route, which may be a quick fix. If not, knowing where water is likely to pool may help in future garden planning, or help you determine where to make improvements.
Stay off your garden beds. If you step on your soil while it is saturated, it will compact it, ruining the soil’s tilth. Instead, if you need to access your garden beds consider putting a wooden board down to walk on to distribute your weight better.
Re-fertilize your plants. Heavy rain can wash away nutrients out of the soil through a process called leaching. Check the forecast to make sure no more extreme weather is immediately approaching before fertilizing- or you may have to do it again.
Add supports to your plants. The wind and rain may have led to plants falling over. Add in some additional supports to get them upright again and give them a better chance for the next time heavy rain comes.
While having a flooded garden may be a bummer, there are some gardening activities that are actually easier to do in saturated soil! Once the rain stops and the ground is still wet, use this time to weed. The soft ground will make weeds especially easy to pull up- just try not to step on the garden beds. After a rain or a flood, re-mulching is always a good idea. The rain might wash away some previously placed mulch, use this as an opportunity to locate any spots barren of mulch and in need of a re-fill. After a couple days when the soil is soft but not sodden, the ground will be the perfect consistency to dig and put stakes.
Lastly, check for any young plants that didn’t survive the water or any seeds that haven’t come up. Take this as an opportunity to plant new seeds, as seeds do better in already moist soil where they have less chance of being displaced when watered.
At the end of the day, while having a flooded garden may not be the best for your plants, it is not the end of the world. There are a handful of preventative measures that can be taken ranging from backyard renovations to quick fixes- it is about finding what works best for you and your garden.
The UConn Home & Garden Education Center supports UConn Extension’s mission by providing answers you can trust with research-based information and resources. For gardening questions, contact us toll-free at (877) 486-6271, visit our website at homegarden.cahnr.uconn.edu, or reach out to your local UConn Extension center at cahnr.uconn.edu/extension/locations.
Why Are Seeds Sprouting in My Tomato?!
Nick Goltz, DPM, UConn Home & Garden Education Center, UConn Plant Diagnostic Lab

UConn Home and Garden Education Center alum Carol Quish wrote a short blog post about vivipary in 2014 that, over a decade later, is still one of our most-read pieces. Why are folks still interested to read this post after so much time? Because seeing seed vivipary in a tomato you’re about to eat is just so darn weird. To better discuss and understand vivipary however, we should start with a little refresher on seed biology.
Reflecting back on 4th period science class with Mr. So-and-so, you’ll recall that producing a seed is both a distribution and reproduction strategy for plants. Generally, a seed is composed of a developing young plant called an embryo and a nutritious tissue to support the embryo called an endosperm, both of which are encapsulated within a hard seed coat. When an embryo is triggered to begin growing and breaks through the seed coat, many people consider this the stage of germination.
A seed will typically be in a state of dormancy while within the fruit and for a period after fruit harvest and dispersal. This strategy of undergoing dormancy is usually advantageous to the seed so it does not germinate and begin growing under adverse conditions, such as the beginning of winter or before being eaten by a hungry critter. A delicate combination of environmental cues and plant hormones maintain – and break – seed dormancy. When temperature, light, moisture, and other environmental conditions are right for that seed, hormones like gibberellin (GA) and abscisic acid (ABA) will shift in balance and germination will occur. Dormancy is typically maintained when levels of ABA are higher than levels of GA, and is broken when levels of GA are higher than levels of ABA.
When germination occurs while the seed is still within or attached to tissue of the parent plant, this is considered vivipary. Appropriately, the word “vivipary” is Latin for “live birth”. Vivipary is an essential strategy for some plants, such as mangrove trees, to increase likelihood of reaching a safe place to grow. For most plants however, vivipary is considered a physiological disorder or otherwise undesirable outcome as it decreases likelihood for successful establishment and growth, post-germination. Some highly-domesticated plants, like tomatoes, peppers, strawberries, wheat, and corn, are more prone to vivipary than others.
Seed germination within an overripe tomato. Photo credit: J. Copes.
While there isn’t uniform consensus on what combination of factors trigger vivipary, promoting high ABA levels in seeds while they’re still in the parent plant will certainly lower the odds. While there is nothing that can be done to change the genetics of the tomato on your counter, you can take steps to minimize the environmental triggers that would decrease ABA levels. Minimizing free moisture, preventing excessively cool temperatures, and drying, consuming, or processing the seed before the fruit bearing it become overripe are important strategies.
For tomatoes specifically, be sure to harvest them before they are fully ripe! Overripe tomatoes are much more likely to experience vivipary. For the same reason, whether buying or growing your own vine-ripened tomatoes, it’s important to consume them quickly. Furthermore, be sure to store your tomatoes at room temperature and not in the fridge. Not only will they be more likely to have a mealy texture when you eat them, but low temperatures may also increase the likelihood of vivipary.
The next time you happen to take a bite of a tomato filled with seeds that have experienced vivipary, don’t fret! The taste and texture may not be what you were expecting, but they’re perfectly harmless. That said, a better destination for a viviparous tomato may be your garden bed rather than your caprese salad! Seeds that have germinated within the fruit will still grow and eventually produce fruit like any other tomato seedling.
If you have questions about growing tomatoes, or any other gardening topic, call the UConn Home & Garden Education Center (toll-free) at (877) 486-6271. You can also email us at ladybug@uconn.edu, visit our website, www.homegarden.cahnr.uconn.edu, or visit your local UConn Cooperative Extension center.
Set Your Lawn Free
By Dawn Pettinelli, UConn Home & Garden Education Center
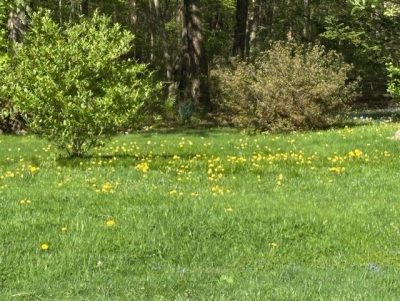
For many, the sight of a lush green lawn brings about the desire to cast off one’s shoes and stroll through the sun-warmed grass feeling the soft verdant carpet below. Lawns, or at least grassy areas, are a ubiquitous part of almost every home outside city limits. While admittedly that perfect lawn is a source of curb appeal and homeowner pride, in recent years considerable attention has been given to the ecological and environmental costs of maintaining turf that is the envy of the neighborhood.
Managed turf grass areas, including golf courses and park areas cover about 8 percent (400 square miles) of the land area in Connecticut. That perfect lawn typically requires supplemental irrigation, fertilizer, regular mowing and often pesticide applications. Water could be better used for drinking, other domestic uses and just left in natural systems. Excess nutrients as well as pesticides can be found in ground and surface waters causing both human health as well as ecosystem problems. While some are turning to electric mowers and blowers, gas-powered equipment dependent more on fossil fuels, are most prevalent (at least in my neighborhood) contributing to climate change.
So what is a residential lawn owner to do? The authors of Redesigning the American Lawn were among the first to coin the term “freedom lawn.” So, what is a freedom lawn? Basically, anything that is green is allowed to grow. That would include dandelions, self-heal, violets, bluets, buttercups, clover and wild strawberries to list a few of those so-called “low growing broad-leaved plants”. By my definition, weeds are plants growing in the wrong place, so the plants are weeds no longer when accepted as part of the lawn.
One of the greatest reasons for encouraging a variety of plants to inhabit turf areas is that the world is facing a critical loss of biodiversity. There are significant declines in beneficial insect, native plant and bird populations, along with other living organisms. While that lush green lawn offers aesthetic pleasure to some, it does little to provide habitat or food for creatures other than problematic ones like grubs or chinch bugs.
A mixed grass- herbaceous plant lawn will contain flowering plants for pollinators and other beneficials. Various plant species have varying root systems. Some have deep taproots that break up compacted soil and bring up minerals. Others have more fibrous root systems that are continuously turning over added organic matter to the soil. A variety of plants along with their root exudates and associated microbes can help aggregate the soil, improving air and water passage. Porosity plus water holding capacity can be increased as well as lessening the potential for topsoil erosion. A healthy plant community usually portends a healthy soil.
Leaning into a freedom or pollinator lawn does not mean digging up one’s entire lawn and reseeding it although that is one option. Two seed mixes that I have seen advertised are Flawn and Fleur de Lawn. Both contain a mixture of fescues, microclover and the latter, some other flowering species. Probably greatest success with these seed mixes would be achieved starting with bare soil.
One can start encouraging biodiversity and pollinator plants by discontinuing the use of herbicides and allowing some flowering plants to move in. Often, they can be mowed before they set seed. When reseeding bare spots, use more drought tolerant fescues or native grasses like little bluestem to reduce the need for irrigation, once established. Higher mowing heights up to 3 or 4 inches will encourage deeper rooting of all plants making them more resilient during periods of drought.
Learn about the benefits of some of the low-growing broad-leaved plants that want to call your lawn home. Clovers add nitrogen to the soil reducing the amount of fertilizer necessary. Violets are host plants for the endangered regal fritillary. Dandelion greens are a great source of vitamins A and C. It is true that many of these plants are not native, but neither are the cool season turf grasses normally found in lawns.
In many yards, keeping part of it in lawn is essential for children’s play and sports activities, pet areas and entertaining. Take a tour of your yard and determine where a lawn makes sense and where it might be more appropriate for woody plants, ornamental beds or even a vegetable garden. Steep slopes or perpetually shaded areas may be best for groundcovers. Areas where water frequently collects after heavy rains might be more suitable for a rain garden.
However small, every effort to encourage biodiversity, provide for our beneficials and improve soil health is a step in the right direction. Rethinking your lawn areas might be a good place to start.
For information on lawns or any other gardening topic, call the UConn Home & Garden Education Center (toll-free) at (877) 486-6271 or email us at ladybug@uconn.edu or visit our website, www.homegarden.cahnr.uconn.edu.
Spring Landscape and Garden Issues in 2025
By Pamm Cooper, UConn Home & Garden Education Center This spring has been a dramatic one as ornamental trees and shrubs are putting on quite a colorful floral display. Many deciduous ornamentals including redbuds, forsythia, crabapples, fruit trees, quince azaleas and many others were not adversely affected by last summer’s drought and the cold, windy winter and frozen soils that followed. A lesser noticed but significant drama is the negative effect these same environmental conditions had on ornamental and native evergreens.
Rhododendrons and ‘Green Giant’ arborvitae seemed to suffer the most damage followed by cherry laurels and hollies. Last year’s drought conditions that extended into late fall combined with very windy winter conditions and frozen soils were tough for some evergreens. Winter desiccation injury on broadleaved and needled evergreens causes foliage browning when plants cannot take up the water needed to keep foliage healthy. Damage to many rhododendrons and some azaleas could be seen during the winter and is still evident this spring. Buds may provide new leaves by June if branches are still alive.
In contrast, 'Green Giant’ arborvitaes suddenly showed symptoms after warm weather began this spring. This was evident especially in trees on windy sites. Needles are brown or off color and time will tell if they are able to recover. If branch tips are flexible and show new buds, growth may resume. Prune any dead branches that show no signs of recovery.
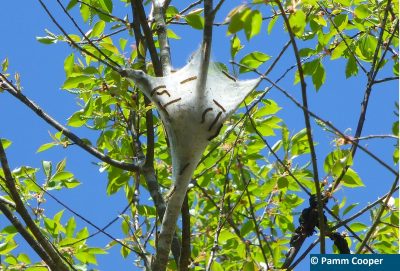
Eastern tent caterpillars have hatched from overwintering egg masses on native black cherries. Silken nests are evident located in crotches of these trees. Caterpillars feed outside the tents at night and hide in them during the day. There is only one generation, and feeding is generally finished by late June. Trees have time to leaf out again to remain healthy during the growing season. Birds like cuckoos and vireos will rip tents apart to feed on the caterpillars.
If you have Oriental lilies, be alert for the lily leaf beetle. This bright red insect can severely defoliate these lilies. Adults overwinter in soil close to the plants they were feeding on the previous season. They appear as soon as lilies begin new growth above the ground. Leaf undersides should be checked for eggs and larvae and crushed when found. Leaves can be treated if needed with a product that larvae will ingest as they feed on the treated leaves. Never spray flowers with any insect control product and always follow directions as written on the product label.
Snowball aphid feeding damage is noticeable on the new leaves of European cranberry bush and snowball viburnums. As the aphids feed on the new leaves and twigs, leaves curl and twigs twist in response to aphid feeding on the sap. Aphids can be found by uncurling the leaves. Treatment is difficult as they are not out in the open where contact control products can reach them. Feeding should end within two months of egg hatch. These aphids overwinter as eggs laid on the branches of host viburnums.
Viburnum leaf beetles, Pyrrhalta viburni, are another significant pest of ornamental and native viburnums. They’re active soon after viburnums leaf out. Damage will be seen as larval populations grow and they skeletonize leaves. Some viburnums may suffer complete defoliation. This pest prefers arrowwood, European cranberry bush or American cranberry bush viburnums. Try switching to resistant varieties such as V. plicatum and Korean spicebush viburnum V. calesii if leaf beetles are a chronic pest.
If anyone has small St John’s wort shrubs or certain weigela cultivars that seem to be dead, wait and see if new growth resumes as it gets warmer and sunnier. The smaller St. Johns’ wort shrubs die back in fall, leaving brown stems with withered fruit. Prune these back almost to the ground as basal growth appears. Some weigela cultivars are just slowly getting started, while others are already full of leaves. Do not give up these plants but wait and see what happens in May.
As always, our UConn Home and Garden Education Center office staff welcomes any questions gardeners may have concerning landscape and garden plants problems. Across the New England region, people are having much the same problems as we are having in Connecticut from the winter weather, but we can hope that plant recovery be swift and complete. Enjoy the growing season and stay alert- scout for pests and other problems before they get out of hand.
The UConn Home & Garden Education Center supports UConn Extension’s mission by providing answers you can trust with research-based information and resources. For gardening questions, contact us toll-free at (877) 486-6271, visit our website at homegarden.cahnr.uconn.edu, or reach out to your local UConn Extension center at cahnr.uconn.edu/extension/locations.
A Gardener’s Guide to Planting by Hardiness Zones
By Marie Woodward, UConn Home & Garden Education Center
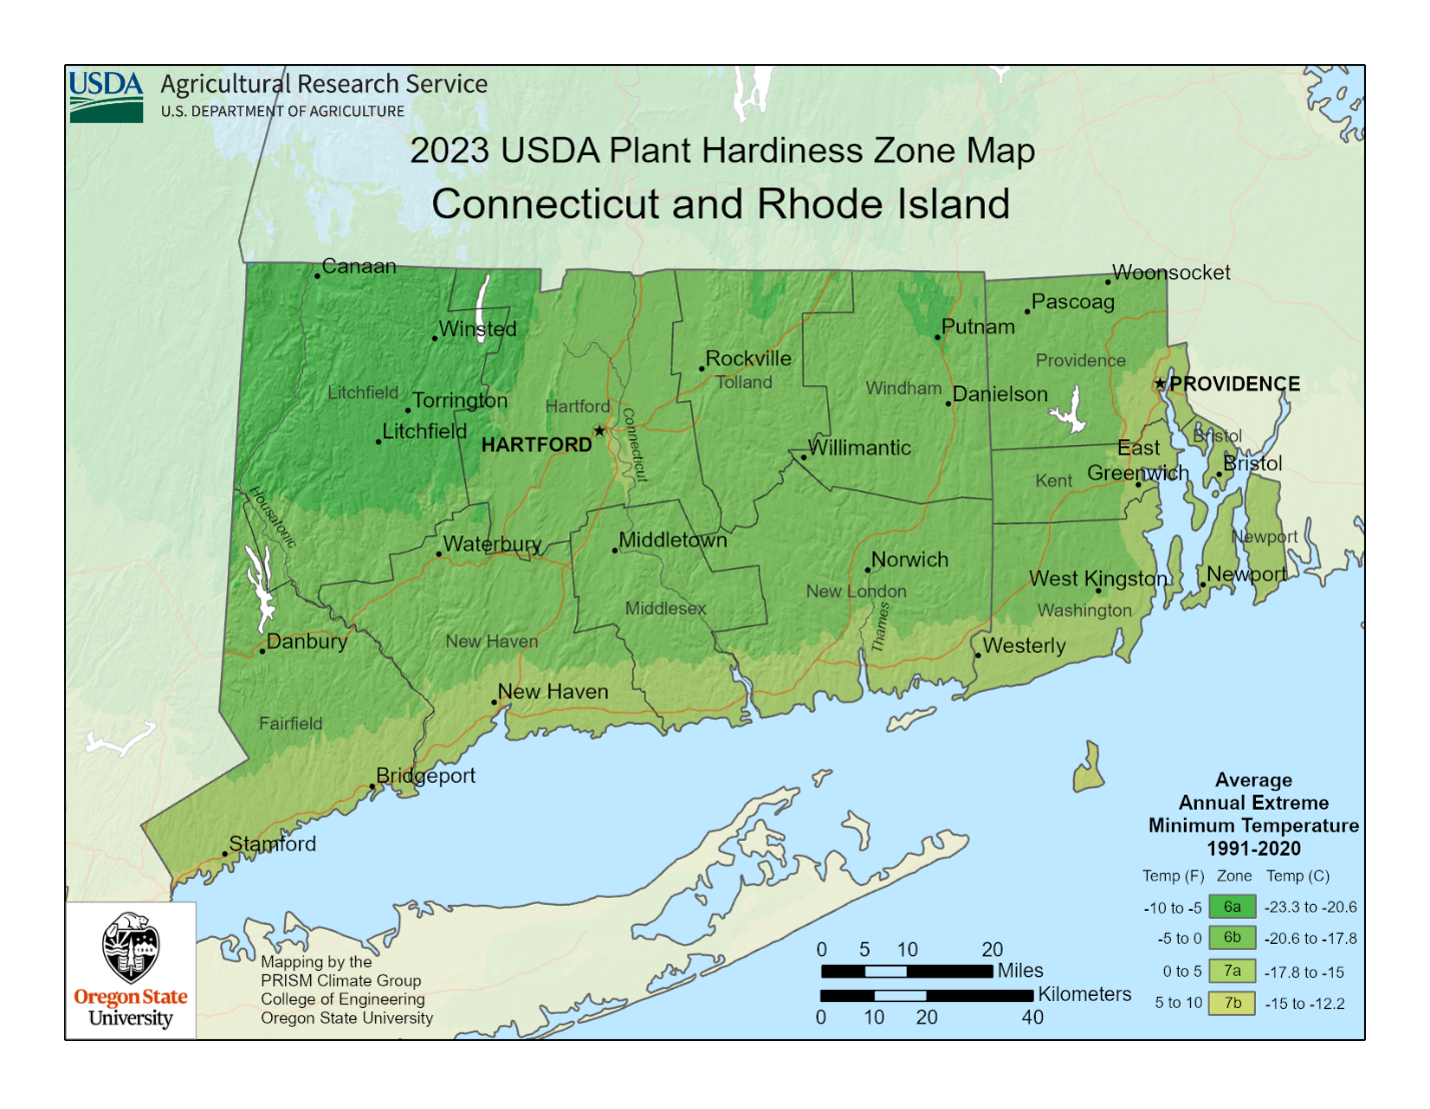
If you are wondering whether that shrub, flower, or tree that you saw in a magazine or catalog will grow well in your garden, using a hardiness zone map is your best bet to ensure success.
A hardiness zone map is a tool that divides a geographical area into distinct zones based on average annual minimum winter temperatures. These maps are used by gardeners and farmers around the world to determine which plants are most likely to thrive in a particular region. Each country has its own hardiness map that correlates to their climate. In the United States, the USDA publishes a hardiness zone map, which covers all fifty states and includes Puerto Rico, Guam, American Samoa, and the U.S. Virgin Islands. It uses climate data collected over many years from weather stations throughout a specific region. Then the data is analyzed to determine average minimum winter temperatures from different areas.
The concept of hardiness zones was first introduced in 1927 by Dr. Alfred Rehder. Rehder worked at Harvard's Arnold Arboretum as a botanical taxonomist. He wanted to address the challenges gardeners and growers faced in selecting plants suited to their local climate. Prior to Rehder’s map, there was no standardized system for categorizing plants based on their ability to survive winter temperatures. His hand-drawn map featured eight hardiness zones and was based on the lowest winter temperatures recorded in various regions across the country. Rehder aimed to provide a practical tool for gardeners and growers. His map made it easier for them to choose plants with the best chances of survival in their region, ultimately contributing to more successful gardens and agricultural endeavors. Rehder’s innovative approach recognized the importance of adapting agricultural practices to local climates. In the 1960s, the USDA adopted and adapted Rehder's concept, creating the first official USDA Plant Hardiness Zone Map.
Since its initial release, the USDA Plant Hardiness Zone Map has been updated several times to reflect changes in climate and the availability of more accurate data. The latest update of the USDA hardiness map was released in November 2023, jointly developed by the USDA's Agricultural Research Service (ARS) and Oregon State University's PRISM Climate Group. This update incorporates data from 1991 to 2020, covering a broader range of weather stations than previous versions. One of the key findings from this update is that the contiguous United States has become approximately 2.5 degrees Fahrenheit warmer on average compared to the previous map. As a result, around half of the country has shifted into the next warmer half zone, while the other half has remained unchanged. The updated map still consists of 13 zones, but now offers more detailed information on temperature ranges within each zone, including 10-degree zones and 5-degree half zones. Connecticut has two hardiness zones each of which is divided into half zones; (6a,6b); (7a,7b), to better reflect the temperatures in the state over the past few decades.
The importance of hardiness zones lies in their ability to help gardeners and farmers choose plants that will thrive in their specific region. By selecting plants appropriate for their zone, growers can reduce the risk of frost damage and increase their chances of a successful growing season. However, due to unexpected temperatures outside the average range, there is no guarantee that a plant won’t suffer but it does reduce the risk of plant damage. In addition to gardeners, researchers use hardiness zones to study the spread of insects and exotic weeds, while the USDA Risk Management Agency uses the map to help determine crop insurance rates for commercial growers.
While the USDA Plant Hardiness Zone Map is an invaluable tool, it is important to note that it is not the only factor gardeners and farmers should consider when selecting plants. Other factors, such as soil type, precipitation, and local microclimates, can also impact plant growth and survival. Gardeners should use the map as a starting point and supplement it with local knowledge and research to make the best plant selections for their specific needs.
The development of the USDA Plant Hardiness Zone Map is a testament to the importance of adapting agricultural practices to local climates. Since its inception nearly a century ago, the map has evolved to reflect changes in climate and incorporate more accurate data. Today, the map remains an essential resource for gardeners and researchers alike, helping them to better understand and navigate the complexities of plant growth in the diverse regions of the United States. Knowing a plant’s hardiness zone when selecting that shrub, tree or flower will help you grow the garden of your dreams.
The UConn Home & Garden Education Center supports UConn Extension’s mission by providing answers you can trust with research-based information and resources. For gardening questions, contact us toll-free at (877) 486-6271, visit our website at homegarden.cahnr.uconn.edu, or reach out to your local UConn Extension center at cahnr.uconn.edu/extension/locations.
USDA Hardiness Zone Map 2023

USDA Hardiness Zone Map 2012

USDA Hardiness Zone Map 1990

Celebrate Arbor Day!
By Dawn Pettinelli, UConn Home & Garden Education Center

Arbor Day is celebrated in Connecticut on April 25th. Since it is a day traditionally set aside for the planting of trees, perhaps you might consider adding one to your home landscape. If you haven’t the need for another arboreal specimen, then plan on giving your existing trees a little TLC.
Trees have a lot to offer. They provide us with cool shade on hot summer days, brighten our spring season with lovely blossoms, add color to the fall landscape and winter interest throughout cold, dreary days. Trees provide food, nesting sites and shelter for many animals, especially birds. They help reduce noise pollution, trap particulate air pollutants, and can alter the microclimate surrounding them.
Most importantly, trees supply plenty of oxygen for us to breathe. Each year, an acre of trees produces enough oxygen to keep 18 people alive. They also sequester carbon dioxide. Trees convert atmospheric carbon dioxide into plant matter as they photosynthesize. This has important consequences worldwide. As more and more of our forested land is being cleared, less carbon dioxide can be stored in trees and more is available to increase the atmospheric carbon dioxide levels which, in turn, can contribute to global warming.
While we can’t stop global deforestation, we can make a difference in our own backyards by planting more trees or making sure that the trees already present receive the conditions they need to thrive.
When selecting a tree for your landscape, do consider factors like its ultimate height and spread, susceptibility to insect and disease problems, flowering, fruiting and fall foliage potential, rate of growth and site requirements. Review gardening books, consult with nurserymen and maybe visit an arboretum to view mature specimens.
Trees are purchased either as dormant stock through mail order sources, containerized, or balled-and-burlapped (B & B). Dormant trees generally arrive in the spring or fall and should be soaked for a couple of hours and planted immediately. If you can’t get them in the ground right away, they can be stored in a cool place for a few days out of direct sunlight. Make sure them are kept moist.
Containerized stock can be planted throughout the growing season although cooler spring or fall is best. Hard to transplant species are best purchased this way as there is less disruption to their root system. If potbound, make several vertical cuts about one-quarter inch deep around the root ball before planting.
Purchasing B & B trees is fine for younger specimens, but often larger trees have a good portion of their roots removed in this process. This can lead to poor survival. For greatest success, choose small to medium sized trees.
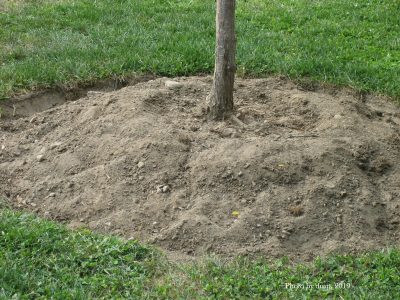
Holes for planting only need be as deep as the root system. The key is to make them at least 2 feet wider than the root ball. Especially in heavy or compacted soils, be sure to
loosen as much soil around the planting area as possible so roots can grow freely. The majority of roots are found in the upper 3 feet of soil.
Amendments such as peat moss or fertilizer are not necessary to add to the backfill. However, if the soil pH or phosphorus levels are low, ground limestone and bonemeal can be mixed into the backfill.
Add water to the hole before planting and let it drain. Next, position the root ball. Remove plastic mesh and cords. Burlap can be cut away as much as possible. Fill in the hole about half way. Gently firm the soil around the root ball. Don’t stomp on it or you will compact the soil. Water thoroughly and when the water drains, finish filling the hole. Make a well around the tree with soil and water once more. Apply a 2 to 3 inch layer of mulch keeping it away from the trunk. Newly planted trees need a thorough soaking each week throughout the first growing season either from natural precipitation or from you.
If you have questions about trees or any other gardening topic, call the UCONN Home & Garden Education Center (toll-free) at (877) 486-6271 or email us at ladybug@uconn.edu or visit our website, www.homegarden.cahnr.uconn.edu.
Unbeanlievable: Here’s a Vegetable That Produces All Season Long
Abigayle Ward, Soil Science Graduate Student
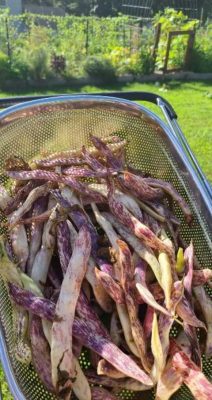
Full of fiber, packed with protein, and great to grow, beans have been a staple in the diet of humans for thousands of years. Native edible beans can be found on every continent but Antarctica, although many of the beans we eat today are domesticated varieties that originated in South America, Europe, and Asia. Fabaceae, the bean family, is one of the largest families of plants in the world, with over 20,000 species described. As legumes, beans can convert nitrogen in the atmosphere into nitrogen useable by other plants, making them very useful to integrate into crop rotation for savvy home gardeners who want to save a little money on nitrogen fertilizer. In fact, excessive nitrogen fertilization of legumes can inhibit the natural nitrogen-fixation process, so use only a low-strength nitrogen fertilizer if absolutely necessary. Legumes can even be used as cover crops in the winter to prevent soil erosion and provide a boost to your soil health all winter long. You can direct-seed beans and still get production all season, meaning Connecticut gardeners can get beans in the ground now.
Fava beans (Vicia faba) are grown all around the world, very adaptable to many climates, and are generally very easy to grow. They are cold-tolerant and can be grown all the way down to USDA Hardiness Zone 3. In Connecticut, for the best results, you should plant fava bean seeds in the early spring in a place that gets full sun and doesn’t stay too moist. They will take about three months to begin producing beans but will continue producing throughout the season and into the fall. Some frost-resistant varieties will even survive temperatures below freezing, and since they self-pollinate, bees are not necessary for the production of pods. Fava beans do not require trellises, but some larger varieties may benefit from cages or trellises for additional support. In the summer, pollinators love the flowers, and understandably so – bean flowers not only signal the coming produce but are also eye-catching. Many varieties have white and dark red flowers. Some varieties have pink flowers. Bean pods can be harvested and eaten whole if they are young and tender. It is important to note that some people may have an adverse reaction to consuming fava beans, a metabolic disorder called favism. Favism causes anemia in response to the inhalation of the plant’s pollen or consumption of the beans. Be sure to check with your doctor before trying these beans for the first time.
For “summery” beans that are native to central and south America, you can try planting kidney, cranberry, appaloosa, or navy beans, all in the genus Phaseolus. Perhaps the delight of beans in the Phaseolus genera is their diversity in appearance. Appaloosa beans are especially whimsical, with white, brown, and reddish mottling. They strongly resemble the horse for which they are named. Some of these species behave like pole beans, meaning they will need to be trellised, while others behave like bushes, meaning they should not need to be trellised. The seed packet should indicate whether they will need to be trellised. As with fava beans, be sure to water Phaseolus when the soil seems dry, taking care to avoid watering the leaves. Excessive leaf wetness may increase the likelihood for fungi to grow and cause disease.
No matter what bean you try growing, pests and disease are ever-present. Aphids, bean beetles, and European corn borer are all possible bean pests. Beans are susceptible to diseases like powdery mildew, Fusarium wilt, and bean rust. Selecting disease and pest-resistant varieties will reduce the risk of yield loss. Like most legumes, the ideal soil pH for growing beans is 6-7. Since native Connecticut soil typically has a pH closer to 5.5, be sure to send a soil sample to the UConn Soil and Nutrient Analysis Lab to test the pH (and nutrients!) of your soil before planting to ensure you get accurate recommendations for any amendments your garden may need to allow beans to thrive!
The UConn Home & Garden Education Center supports UConn Extension’s mission by providing answers you can trust with research-based information and resources. For gardening questions, contact us toll-free at (877) 486-6271, visit our website at homegarden.cahnr.uconn.edu, or reach out to your local UConn Extension center at cahnr.uconn.edu/extension/locations.
Rocky Start for Rhododendron’s This Spring
By Heather Zidack, UConn Home & Garden Education Center
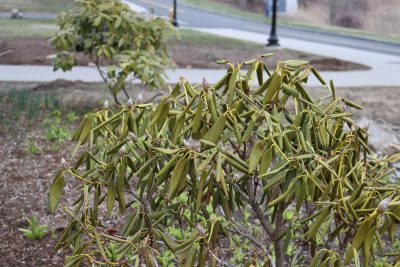
Rhododendrons are looking rough this spring. You’ve probably seen it in your yard or in your neighborhood. The UConn Home & Garden Education Center has been seeing an increase in the number of calls regarding injury or damage to rhododendrons. In most cases, we are finding these reports to be winter injury. This is an environmental type of damage, caused by a perfect storm of conditions that we have seen throughout the state. So, let’s take a closer look into why this is happening.
Plants lose water through their leaves. During active growth, that water is constantly replenished from the roots. When the temperatures drop and the ground freezes in the winter, available water becomes limited. Plants have adapted to this in many ways. Dormancy is triggered by multiple factors, but water conservation is certainly one of those. Deciduous trees shed their leaves completely. Evergreens have developed various leaf adaptations to help with survival, too.
As broadleaf evergreens, rhododendrons have developed a waxy coat on their leaves to help prevent water loss. They also have a physiological mechanism to help defend themselves further. Just as you’d clasp your hands together on a cold winter day to shield them from the elements, rhododendron leaves curl themselves into cigar-shaped cylinders. The leading theory is that this happens to protect the leaves from further water loss. This natural defense mechanism has grabbed our attention this spring, since our weather patterns have lent a hand in amplifying a natural phenomenon.
At the end of last summer, CT started to see a moderate drought in much of the state. These conditions have persisted through this spring. Water availability was limited as plants went into the winter and remained limited throughout the season. Add in frozen soil and harsh winter winds and the environmental stress increased even more. When water is unavailable to the roots – through either freezing or drought conditions, plants lose their ability to return water to the living tissues. This drying out, referred to as desiccation, leads to winter injury or winter kill depending on the severity of damage. While we are finally seeing rain, these plants need time to recover and may not be ready to unfurl just yet.
Many have noted that some plants are faring better than others even within the same bed. This is also normal to some extent. It can be easy to forget that plants are living things in our landscapes. There is going to be variance in their ability to withstand environmental pressures and their recovery rates.
If you are seeing this in your rhododendrons, be patient this spring and monitor over the next month or so. With an increase of rain in the forecast, the extra hydration should help plants recover - or at least push out new growth. These shrubs will shed any leaves that are damaged beyond repair on their own. Do not prune or fertilize shrubs until the end of May to avoid further injury. If we go a week without rain, consider watering your shrubs to help speed up recovery – but only water if the soil feels dry to the touch! If by mid-late May you are seeing absolutely no improvement, we start to consider other factors that may contribute to the plant’s health. For now, they just need a little more time.
The UConn Home & Garden Education Center supports UConn Extension’s mission by providing answers you can trust with research-based information and resources. For gardening questions, contact us toll-free at (877) 486-6271, visit our website at homegarden.cahnr.uconn.edu, or reach out to your local UConn Extension center at cahnr.uconn.edu/extension/locations.
What’s That Smell? CT Dairy Farmers Hard at Work
By Abigayle Ward – Soil Science Graduate Student, UConn Department of Plant Science & Landscape Architecture
As temperatures warm up, perhaps you feel inclined to open windows to let some fresh air into your home or to feel the breeze on your morning commute. But then it hits you: The pungent aroma of freshly-spread manure. The few weeks that the smell persists serve as a reminder of the agricultural roots of Connecticut. Dairy farming began during the American colonial period in the 1600s, and milk remains one of the most important agricultural products in Connecticut. Some dairy farms have been in continuous operation for over 10 generations.
A single cow can produce around 100 pounds – about 18 gallons – of manure per day. Connecticut is home to nearly 19,000 dairy cows, so you do the math – that’s a lot of manure!
Typically, farmers spread manure on their crop fields twice per year: Once in the early spring, and again after corn harvest, usually in late fall. Manure is rich in nutrients, which helps grow the crops farmers use to keep happy cows throughout the year. Manure is also an excellent source of organic matter, which enriches the soil with carbon, provides nutrients to support healthy soil microbiomes, and gives our sandy Connecticut soils structure, which is essential for happy crops and high yields.
Many Connecticut dairy farmers are also on the forefront of research and development. In Coventry, Hytone Farm uses a brand-new anaerobic digester to harness the power of microorganisms to break down thousands of gallons of manure and food waste every day. Biogasses, such as methane, are collected and can be used to generate electricity. The solids, called “digestates”, can be used as fertilizer, animal bedding, or even as building materials. Freund’s Farm in East Canaan has been turning digestates into compostable, nutrient-rich CowPots, which can be buried directly in your garden and will biodegrade over time. Running since 1997, Freund’s is home to one of the first anaerobic digesters in New England. Collins Powder Hill Farm – home of the Collins Creamery – makes and sells compost from leaves and manure. All these practices help these local farms, and many others, increase carbon sequestration, reduce greenhouse gas emissions, and yes, reduce the smell of manure.
For home gardeners who wish to harness the power of manure, applying a commercially produced manure compost is the safest route. While applying raw manure is safe for crops that will not be consumed by humans, composted manure is recommended for application in gardens where human food is being grown. The composting process heats up the manure to temperatures that kill pathogens, such as E. coli, which could make you sick. Furthermore, composted manure should be odorless – getting your garden many of the benefits without the smell!
While the smell may be a mild inconvenience now, it is a sign that our dairy farmers are hard at work, continuing a tradition older than our country and serving our communities. You can support our state’s dairy farmers by purchasing locally-produced dairy products, adding some composted manure to your garden, and – of course – waving to the tractor drivers!
The UConn Home & Garden Education Center supports UConn Extension’s mission by providing answers you can trust with research-based information and resources. For gardening questions, contact us toll-free at (877) 486-6271, visit our website at homegarden.cahnr.uconn.edu, or reach out to your local UConn Extension center at cahnr.uconn.edu/extension/locations.
Potted Plant Paradise
By Dr. Matthew Lisy, UConn Adjunct Faculty
UConn Home & Garden Education Center
Finally, spring is here! It will soon be time to repot all our houseplants as soon as the cold weather completely stops. Many of the plants purchased over the winter, as well as the ones sitting around for years should be repotted. This does not imply that the pot size needs to be increased. Many times, the plant can be left in the same size pot. If it is rootbound, and the plant is known to get large, it’s good to go one pot size up. Increasing the pot size when it is not needed just leads to root rot as the soil will not dry out properly. Alternatively, if the plant is getting big, another option is to divide it into numerous smaller plants, each requiring a smaller pot.
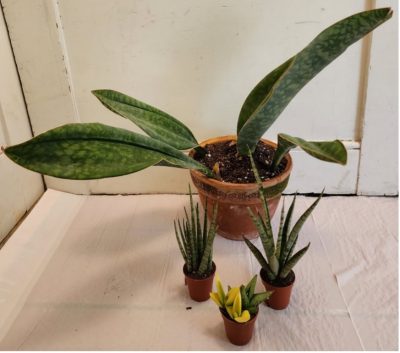
Many people think that if the pot size does not need to increase, then there is no need to repot. This could not be further from the truth. The plant is in a fixed medium. The soilless mix will quickly run out of nutrients, even with regular fertilization. Also, salts tend to build up in the soil, which harms the plant over the long run. This is a natural consequence of plants in pots. Soil can also get compacted too much over time and interfere with proper aeration of the root zone. Tease away the loose soil from the root ball being careful not to break the roots. Add the new soil and watch the plant grow!
This is also a great time to change out the pot. Most of our houseplants come in plastic pots. These are usually not very attractive. Plastic pots are good for plants that like to be kept moist. I prefer a clay pot in most cases. This allows the soil to breathe and makes it harder to over water. What I do not care for or recommend are the automatic watering pots. I have found that these have a tendency to keep the soil too moist, and do not allow for a drying out period between waterings. Stores use them as they require no maintenance from their staff, and the plants cannot wither and die due to lack of water. Long term, these types of pots lead to root rot.
Different plants have different soil needs. Cacti and succulents like it dry and fast draining. Orchids like it airy and chunky. Most houseplants prefer a mix that holds moisture but drains. Try and match the plant to the right soil type. There are great commercial mixes available for purchase, and prices on these have come down some lately. Take some time to research the proper soil type for each plant. Many of the plants take a typical houseplant mix, but some require additional drainage. In this case, add perlite and/or sand. To enable to soil to hold moisture for a longer period of time, add some vermiculite.
In all honesty, almost any soil can work for almost any plant provided that the watering is controlled. Most of the time, houseplants get overwatered which leads to fungal problems. People want to water at some magical interval, like every Friday, for example. In reality, the weather greatly influences how quickly or slowly our plants dry out. Sometimes they need water sooner, and sometimes they do not need water at all. Let the plants determine the watering schedule. If all these suggestions are followed, our plants will be living in a potted paradise, as will we!
The UConn Home & Garden Education Center supports UConn Extension’s mission by providing answers you can trust with research-based information and resources. For gardening questions, contact us toll-free at (877) 486-6271, visit our website at homegarden.cahnr.uconn.edu, or reach out to your local UConn Extension center at cahnr.uconn.edu/extension/locations.
Ready! Get Set! Spring Into Action!
By Dawn Pettinelli, UConn Home & Garden Education Center
Climbing temperatures and longer days signal springtime! Time to pull out the rakes and wheelbarrow from the shed and get out in the yard. Take a stroll through the lawn areas and gardens and note what tidying up needs to be done. Pick up fallen twigs and rake up areas where leaves accumulated over the winter.

While we did not have a severe winter, there was some necessary snow and ice removal around driveways and walks. Often the lawn next to these areas has gotten ripped up or compacted and is in need of repair. Rake up the damaged sections and add topsoil if needed to level out the area. Then scratch up the surface and put down some grass seed. Usually at this time of year, little irrigation is necessary but be prepared to lightly water if dry, sunny conditions prevail. Another option is to line your driveway with tough groundcovers or pollinator friendly flowers although this can be challenging if drivers routinely miscalculate their parking abilities.
Speaking of lawns, check to see that your lawnmower and weedwhacker are in working order. Wait until closer to the beginning of April when lawns actually start to green up before applying limestone or fertilizer. They can be purchased now, however, so you’re ready to go when grass starts growing and the ground is dry enough to walk on. Crabgrass controls can be put down about the time the forsythia is in full bloom.
Next take a good look at your woody plants – your trees and shrubs. Some of us experienced pretty icy conditions over the winter that caused a fair amount of breakage. Remove any cracked or damage branches. Cut back to a bud, stem or the ground depending on where the damage occurred. Now before the plants leaf out is a great time to prune. After removing dead and damaged stems, cut out any crossing or rubbing ones, those that are too crowded, and then prune for desired height and shape. Keep in mind the plant’s mature size as you prune. Better to select a plant that fits its space than to continue hacking it to the size you desire. This is also a perfect time to prune fruit trees such as apples and pears, and also blueberry bushes.
By now your vegetable garden should be all planned out and seeds purchased, or at least ordered, as well as onion sets or plants, seed potatoes and sweet potato slips. Tomato and pepper seeds can be started in soilless media indoors. I prefer to plant 2 seeds of tomatoes in each cell of a 4 pack and 2 seeds of peppers in each cell of a 6 pack, because the peppers take longer to germinate and grow slower than tomatoes. Seeds are set about a quarter inch deep in the moistened media and kept about 70 degrees F under fluorescent lights. After the seeds germinate and the seedlings grow their first set of true leaves, the weaker of the two plants, if both seeds germinate, is removed.
Cool season vegetable seeds should be collected or purchased for early plantings. These include peas, radishes, lettuce, spring turnips, spinach, chard and many Asian greens. A few warm days might have us chomping at the bit but wait until the soil temperature reaches 45 degrees F. How would you determine soil temperature? Using a soil thermometer, insert it into the soil where you want to plant your seeds about 1 to 2 inches deep and take a reading in the morning and then again around 2 pm. Shade the thermometer if in direct sun. Average the two readings and plant when there are a few days of at least 45 degrees F and the weather forecast is favorable.
Many of us are not cleaning up perennial gardens in the fall so that beneficial insects can overwinter in debris. You can start going in now and cutting down stems and tidying up. Fall bloomers like asters and mums can be divided. Limestone can be added if necessary but wait to fertilize when new growth appears.
The warmer weather puts a smile on our faces and we can share the joy of spring by planting pansies with their abundant blossoms and cheery faces. One can never have enough pansies, or at least, I feel that way. Get out and welcome spring, spruce up your lawn and gardens and be thankful that winter is over!
For questions on these or other garden chores or on other gardening topics, feel free to contact us, toll-free, at the UConn Home & Garden Education Center at (877) 486-6271, visit our website at www.homegarden.cahnr.uconn.edu or contact your local Cooperative Extension Center.
Have You Tested Your Well Lately?
By Alec Janis M.S. – Connecticut Institute of Water Resources

In 1718, in what is now Franklin, Connecticut, a well was dug as an all-purpose public source of water for the community. In about 1755, the people began to complain about the water’s quality, saying it stained clothes and remained tainted until 1794, when an earthquake shook the town. After the earthquake, it was found that the well had been restored to its original quality. Although this is a more extreme example, the quality of your well water can change at any time, which means that just because it was safe to drink when it was installed, that may not be the case today.
The Connecticut Department of Public Health recommends that all residents test their wells every two to five years. If you’re struggling to remember the last time you tested your well, you’re not alone. We estimate that 96% of Connecticut well owners do not follow these guidelines.
So how does your well work? When it rains, some water is absorbed by the plants in the landscape, but they can’t uptake all that water. After water travels past the plant roots, it continues until it reaches an area where all the spaces in the soil have been saturated. This is known as the water table. Think of the soil like a sponge; as you add water, the water fills all the holes and space inside until it’s completely soaked through. If you have a shallow well, your water is being pulled directly from this water table.
If you have a drilled well, your water comes from much further underground. Below the saturated layer of soil, there’s solid stone called bedrock. Throughout the bedrock, there are small cracks, called fractures, where water moves. You can see an example of this when passing a rocky cliff face along the highway that seems to be randomly covered in ice. The ice you see has formed from water that has made its way through soil on top of the ledge, into the fractures in the stone and eventually drips out of small cracks where it freezes in the cold air. A drilled well is a bored hole in the bedrock, intersecting many fractures. Instead of following the original path, water now pours out of the fractures and pools in the newly formed hole.
Now that we know how water travels, let’s consider everything the water is interacting with on its way down. Consider the animal waste on your lawn from a pet or a passing deer, the fertilizers or pesticides you may use on your lawn, or even the de-icing salts you put on walkways during the winter. Precipitation, in the form of rain or snow, pulls everything underground. However, not all of this will end up directly in your well water. The dirt acts as a filter stopping some contaminants while letting others through. Depending on the chemical make-up, certain compounds will remain in the soil while others will break down and continue to travel through.
When this water reaches the bedrock, it will continue to pick up and lose different chemicals. This process will slowly erode these cracks, causing the paths to change over time. As the stone erodes, metals and minerals will be picked up with the traveling water and occasionally end up in your drilled well.
This is why it is important to routinely test your well water quality every few years. As water erodes fractures in the bedrock, new cracks and pathways form, changing the contaminants that are entering your well. We currently don’t have a simple method to track how groundwater is moving, so testing is the best way to understand what’s happening in your well.
To get your well tested visit a local or lab participate in the UConn Extension well testing program. We are hosting a collection event at the UConn Extension - Middlesex County Extension Center (1066 Saybrook Rd, Haddam, CT 06438) on May 3rd from 10:00am – 1:00pm. These tests test for coliform bacteria, lead, arsenic, uranium, nitrates, sodium, chloride, fluoride, pH, hardness, sulfate, turbidity, iron, and manganese. These tests, normally valued at $350, are being offered for a reduced cost of $200.
We will mail a sample kit to participants who have signed up in advance of the collection event. Sample kits will also be available at the collection event on May 3rd as well as at the Old Saybrook Environmental Fair (Old Saybrook Middle School, 60 Sheffield St, Old Saybrook, CT 06475) on April 26th.
Participants can sign up online at https://s.uconn.edu/haddam-well-testing. The deadline to be mailed a sample kit is April 25th.
If participants cannot make the day above, we offer a walk in service year-round where participants can bring their water sample to the UConn main campus Monday through Thursday from 8 am – 5 pm. For more information on how to sign up, visit https://ctiwr.uconn.edu/walk-in/.
We support UConn Extension’s mission by providing answers you can trust with research-based information and resources. For home gardening questions, contact the UConn Home & Garden Education Center at homegarden.cahnr.uconn.edu, or reach out to your local UConn Extension center at cahnr.uconn.edu/extension/locations. For more information about the CT Institute of Water Resources and Well testing services, visit https://ctiwr.uconn.edu/
Narcissi and the Reflections of Spring
By Abigayle Ward – Soil Science Graduate Student, UConn Department of Plant Science & Landscape Architecture
According to an ancient Greek myth, all those who had fallen in love with the young man Narcissus were met with contemptuous rejection. On a hunting trip, Narcissus stopped to drink from a pond and became enamored with his own reflection. Cursed to never experience a requited love of his own, he stared at himself until his death, and his place was taken by a flower.
While it remains disputed whether the character was named after the flower or vice versa, the enduring significance of the narcissus as a harbinger of spring is uncontested. With a native range spanning throughout most of Europe, northern Africa, and parts of Asia, legends describing this culturally significant early-season perennial have been told since antiquity. In China, daffodils are carefully grown to bloom for the Lunar New Year, which began this year on January 29th. Their Mandarin name, shuixianhua, literally translates as “immortal water flower”, attesting to their resilience throughout the early season cold.
The Royal Horticultural Society in the United Kingdom describes 13 different types of narcissi based primarily on morphological appearance and when they bloom. Some have long trumpets, while others have multiple flowers to one stem. Others have small trumpets and many petals, called ‘double daffodils’, while others still have few petals dwarfed by large, bowl-shaped trumpets. Daffodils also come in many interesting color combinations – while most of us are familiar with the classic yellow petals and orange trumpets, they also come with white petals, white trumpets, and some even have shades of salmon pink. As one of the earliest-blooming flowers in your garden, they add a lovely splash of color to an otherwise brown landscape. In beds, they go well with red or pink tulips. By themselves, daffodils make good borders, particularly if different color combinations are intermixed to create visual intrigue.
While it is too late now to plant daffodil bulbs with the guarantee of blooms, they can still be safely planted. If you have some bulbs and want to give them a try, be sure to plant them in a sunny spot with well-drained soil at least 6 to 8 inches below the surface. They may sprout, but not form a flower. Do not fear: Daffodils are quite resilient and will likely flower the next spring. If you want to wait, the ideal time to plant daffodils for blooms in the spring is November.
If you find an already-blooming daffodil at your local garden center, it can be planted in the ground any time after the blooms themselves have faded. Both the bulbs and the foliage are frost-hardy well into sub-zero temperatures, making them well-suited for growing in the unpredictable winter weather of Connecticut.
After the flowers have bloomed, you may wish to cut the flower stems and bring them indoors for some bright colors. If you leave the flowers on the plants, be sure to deadhead them as soon as the flowers begin to wilt. If daffodils are allowed to go to seed, the plant will divert precious nutrients and energy away from the bulb. Once the plant has finished flowering, only the foliage remains. While it is tempting to remove the foliage, the leaves are collecting energy and creating food for the bulb via photosynthesis. If the leaves are removed too early, the daffodil may not flower the following spring. Some gardeners like to tie up the leaves in rubber bands or braid them to keep them out of the way, although it is generally best practice to leave them alone until they turn brown by themselves. Damage to the leaves could introduce pathogens or attract pests, which could impact the ability of the plant to flower next year.
With proper care, daffodil bulbs can multiply, ensuring many blooms come back year after year. As we move forward into the season of renewal for ourselves and our gardens, consider planting some daffodils to add a bit of sunshine to your home landscape.
The UConn Home & Garden Education Center supports UConn Extension’s mission by providing answers you can trust with research-based information and resources. For questions about spring bulbs like daffodils or other gardening questions, contact us toll-free at (877) 486-6271, visit our website at homegarden.cahnr.uconn.edu, or reach out to your local UConn Extension center at cahnr.uconn.edu/extension/locations.
Yes, You Can Grow Orchids!
By Dawn Pettinelli, UConn Home and Garden Education Center
Some favorite booths at the CT Flower and Garden Show this past weekend were the ones filled with orchids. Orchids are becoming more popular as houseplants and many folks are finding that they can be grown successfully in the home without elaborate care or special equipment. If you’re in a traveling mind, check out the Orchid Exhibit at the New England Botanic Garden in Boylston, MA that runs through March 23, 2025.

Orchids are grouped into two general divisions. Epiphytic orchids naturally grow on trees in the tropics. Trees are used for support. Water and nutrients come from rain, bird droppings and organic debris collecting around the roots. Terrestrial types will grow in a highly organic soil. While epiphytic orchids may tolerate or even enjoy a dry, dormant period, terrestrial species, in general, need to be kept moist throughout the year.
Two styles of growth are exhibited by orchids. Monopodial orchids grow in an upright direction from the central stem on which aerial roots and flowers develop. Sympodial orchids generate new growth from the base of the plant. As the new stems mature and bloom, younger shoots once again are produced and the cycle is continued.
The orchid family is organized into several genera (each called a genus) which may contain from one to many species. Much hybridization has occurred and the names can be baffling to a novice. For instance, hybrids resulting as a cross between Cattleya mossiae and C. warscewiczii are labeled Cattleya x Enid, the ‘x’ indicating the plant is a hybrid.
Some of the easiest orchids for beginners are phalenopsis, paphiopedilum, epidendron, oncidium and cattleya. Not every member of each genera can be successfully grown in the home so be sure to check with your source. Almost all colors are available and blossom size may range from very tiny to several inches in diameter.
The basic requirements for orchids are good ventilation, 40 to 50 percent humidity, light, proper watering and a well-draining potting mix usually composed of fir bark. Often osmunda fiber, tree fern and/or perlite are added to the fir bark.
Specific cultural requirements vary as to the species. Some tolerate higher light levels than others. Many varieties of the orchids listed above prefer 55 to 60 degree F nights and 65 to 68 degree F days although cattlyas, epidendrons and oncidiums like it about 10 degrees warmer. If growing on a windowsill, put the varieties that like it cooler closer to the window. Make sure leaves do not touch the glass.
Ways to increase humidity include grouping plants together, placing on gravel lined trays filled with water, frequent misting or use of a humidifier. Plants should not sit in water and the foliage, if misted, should be dry by evening. Don’t keep plants too close together as good air circulation helps prevent diseases.
Watering is perhaps the trickiest part of growing orchids. There is not accurate rule for when to water because it depends on the size of the container, the type of growing medium, temperature and light conditions. Obviously, plants will have to be watered more often in hot, dry weather and less during cool, damp periods. When watering, soak the potting material thoroughly. Do not water again until the medium feels dry to the touch. If in doubt, do not water.
Since fir bark contains virtually no nutrients, plants have to be fertilized on a regular basis. Some recommend fertilizing at every third watering with a half strength orchid fertilizer. It is best to place plants in the sink and water until it drains from the pot, not putting the plant back in its saucer until it is thoroughly drained. Special orchid pots are available with enlarged drainage holes. Fertilizers should just be applied when plants are actively growing.
Orchids are a plant you have to experiment with but once you’ve experienced success, you will find that as a hobby, they can be quite contagious. Those seeking more orchid information might want to check out the Connecticut Orchid Society (www.ctorchids.org) or the American Orchid Society (www.aos.org).
If you have questions on growing orchids or any home or garden topic, contact the UConn Home and Garden Education Center, toll-free, at 877.486.6271 or visit us at www.homegarden.cahnr.uconn.edu or call your local Cooperative Extension Center.
The Challenges of Boxwood: Pests, Diseases, and Alternatives
By Marie Woodward, UConn Home & Garden Education Center
Boxwood, a classic choice for formal gardens and hedges, has faced increasing threats in recent years. As gardeners grapple with these challenges, it is crucial to understand the issues at hand and explore alternative plants for our landscapes.
Boxwood Blight is an aggressive fungal disease that affects various Boxwood species and causes rapid defoliation and potential plant death. First identified in the United Kingdom in the mid-1990s, this disease has since spread across North America. Early symptoms include stem cankers, sunken lesions, and eventual dieback. To mitigate the risk of Boxwood Blight, choose resistant cultivars, practice good garden hygiene, and monitor your plants for early signs of infection.
The Box Tree Moth is an invasive pest native to Asia that feeds on Boxwood plants. Since its arrival in North America, this moth has wreaked havoc on Boxwood populations, leading to defoliation and plant stress. Symptoms of infestation include see-through plants, "stick shrubs," and stem cankers. Regular monitoring and integrated pest management strategies are essential for controlling this destructive insect.
As Boxwood plants continue to face challenges from pests and diseases, it is wise to consider alternative options for our gardens. Ilex crenata (Japanese Holly) is a versatile, broadleaf evergreen that can be shaped into hedges or topiaries. Its small, glossy leaves provide a neat appearance, and its adaptability to various soil types and sun exposure makes it a low-maintenance choice.
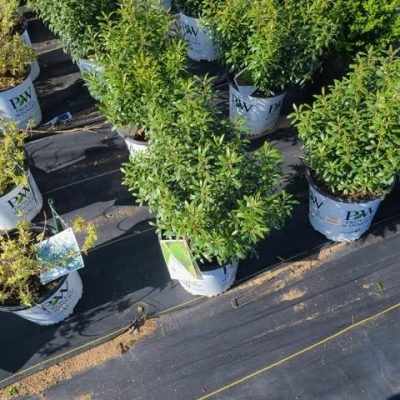
Euonymus japonicus (Japanese Euonymus), an evergreen shrub with small, glossy leaves and tolerance for a range of growing conditions is another possible substitution. Its compact growth habit and easy maintenance make it an excellent choice for hedges or screens.
Ilex glabra (Inkberry), is a slow-growing evergreen native to North America, featuring dark green leaves and red berries in the fall. Its low, spreading habit makes it ideal for low hedges or mass plantings.
Privets (Ligustrum), are fast-growing, low-maintenance evergreen shrubs with small, glossy leaves. They can be used for hedges, screens, or as stand-alone specimens. However, keep in mind that three cultivars, border privet, (Ligustrum obtusifolium Sieb. & Zucc), California privet, (Ligustrum ovalifolium Hassk.) and European privet (Ligustrum vulgare L.) are listed on UConn’s invasive plant database. If you decide to plant privets, look for seedless cultivars such as Golden Ticket privet (Ligustrum x vicaryi "KCLX1") at your local nursery.
The Boxwood Blight and Box Tree Moth present ongoing challenges for gardeners and landscapers. By understanding these threats and adopting appropriate management strategies, we can mitigate the damage they cause. Additionally, exploring alternative plants can help create more resilient and sustainable gardens in the face of these challenges. With careful planning and thoughtful plant selection, our landscapes can continue to thrive in the face of adversity.
The UConn Home & Garden Education Center supports UConn Extension’s mission by providing answers you can trust with research-based information and resources. For questions about your boxwoods or other gardening questions, contact us toll-free at (877) 486-6271, visit our website at homegarden.cahnr.uconn.edu, or reach out to your local UConn Extension center at cahnr.uconn.edu/extension/locations.
Shine a Light – But Which One?
By Emily Leahy, UConn Home & Garden Education Center
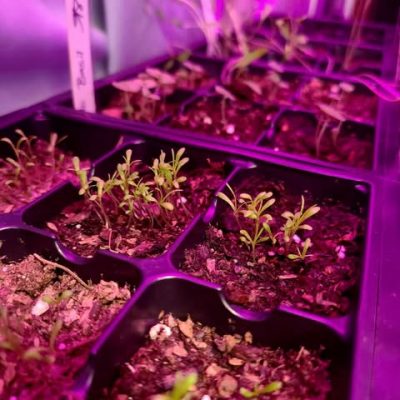
The dead of winter brings a longing to spend time outside in the garden again. While this may not be possible yet, it is easy to craft your own growing space indoors. The elements of the outdoors that allow plants to thrive – light, warmth, and water – can all be brought indoors with a little creativity and the right resources.
Some steps remain unchanged. Still, refer to the plant’s label for guidance on choosing a proper container, water and nutrient needs, as well as temperature preferences. Guidelines on how much light the plant should receive can also be found on the label – but how can this be applied indoors?
One of the more challenging aspects to simulate, indoors, is an adequate amount of light. When outside, plants rely on the sun for light needed to carry out photosynthesis. This chemical reaction produces sugars which are used as energy in processes essential for the growth and maintenance of a healthy plant. While plants can still receive sunlight indoors through rays shining through windows, this often cannot act as an equitable substitute for unobstructed sunlight outdoors. This is where supplemental light sources in the form of grow lights come into play. Grow lights are specially designed with the purpose of emitting a wider spectrum of light wavelengths to enable photosynthesis. But with so many options available, how can you choose which is the best option?
Generally, there are two types of grow lights – bulbs and fixtures. Bulbs can be placed into existing light fixtures like lamps or overhead lighting. However, this can be unsuitable as it is difficult to control the distance from the plant and angle at which the light shines. Grow light fixtures are separate systems which can provide multiple plants with light simultaneously, offering a more even distribution. With proper setup, they can be positioned at an advantageous angle to provide plants with their preferred amount of light.
Next comes the question of which kind of light is appropriate for your plant – incandescent, fluorescent, or LED? It is important to determine beforehand the level of light which your plant prefers – high, medium, or low. Incandescent lights, while costing the least, are also the least efficient. 90% of their energy is released in the form of heat, while only 10% is light itself. While this makes them good contenders for low-light plants, they also require caution as they can provide plants with an overwhelming amount of heat.
Fluorescent lights are well-suited for plants requiring low to medium light. They emit the full spectrum of light, essential for promoting growth as they mimic natural sunlight. Most often they are seen as strips or tubes of light that can be affixed above plants, but they can also be purchased in bulb form. LED lights emit the full spectrum of light as well, while simultaneously emitting less heat than other bulb types. Yielding a high overall efficiency, LEDs can be customized with different colors/wavelengths of light to provide certain advantages for some plants. For example, blue lights promote vegetative growth, while red lights do the same for flowering and fruit growth.
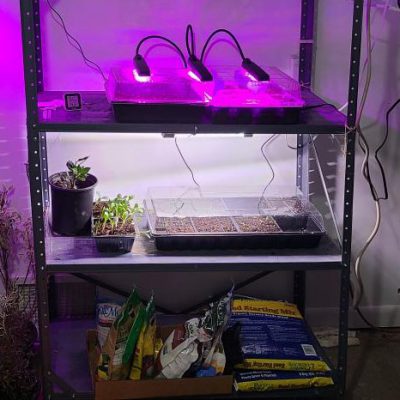
After choosing the most suitable kind of grow light for your plant, there are a variety of other tips helpful to consider. The type of plant not only determines the proper type of light to use, but also how much light should be provided. Supplying light 24 hours a day is not ideal as it can overwhelm the plant – remember the objective is to mimic the light conditions of the outdoors. Therefore, plants will require some hours of darkness each day.
Seedlings generally prefer 14-16 hours of light per day, as they necessitate the most encouragement for growth. 12 hours of light is suitable for herbs and other greens, while houseplants fall between the range of 6-12 hours per day – be sure to refer to the product label for any specifications on light preferences.
In terms of setup, lights should be angled to ensure a direct stream of emittance onto the plant in order to receive its full benefits. It is best to affix lights about 12 inches from the plant, although adjustments can be made as you see fit. Some indoor gardening systems are available that can be customized to fit specifications according to the type of plant being grown. It is also important to purchase lights that are rated to withstand humidity and moisture if they are being kept in a greenhouse-like environment.
Be sure to always refer to your plant’s label for its specific preferences for light and other growing conditions. With the help of grow lights, you can wait out the winter by bringing a little bit of the outdoors, indoors!
The UConn Home & Garden Education Center contributes to the Cooperative Extension mission of the University of Connecticut by connecting the public with research and resources provided by the University. For your gardening questions, feel free to contact us, toll-free, at the UConn Home & Garden Education Center - (877) 486-6271, visit our website at https://homegarden.cahnr.uconn.edu/, or contact your local Cooperative Extension center https://cahnr.uconn.edu/extension/locations/.
Soil and Plant Tests for Managing Nitrogen Fertilization
By Haiying Tao, Ph.D., UConn Home & Garden Education Center
Nitrogen (N) is often the most limiting nutrient in growing plants. When deficient, plant yields and quality are reduced. However, excessive nitrogen applications could cause concerns in water quality and greenhouse gas emissions. Managing nitrogen is a very difficult task for farmers and gardeners because nitrogen exists in many different forms in the soil and can be lost from soil via many pathways. In addition, different forms nitrogen can be transformed from one form to another. The weather, especially rainfall and temperature, can impact these processes. Heavy rainfall can lead to significant nitrogen leaching and runoff.
Fortunately, there are strategies that can be used to help us manage nitrogen for optimum plant yield and quality, while minimizing nitrogen loss. Most home gardeners benefit from the standard nutrient analysis when testing their soil. Recommendations and questions regarding additional sampling, interpretation, and fertilization recommendations for specific tests and crops mentioned below should be referred to the University of Connecticut Soil Nutrient Analysis Laboratory.
Predict nitrogen requirement and preplant soil tests
Testing soil for nitrate and ammonium forms of nitrogen as well as soil organic matter (SOM) can help you predict soil nitrogen supply during the growing season. SOM can provide substantial amounts of nitrogen via mineralization, which is a process where soil microorganisms convert organic forms of nitrogen to the plant available forms of ammonium and nitrates.
Typically, for every 1% of SOM in the top 6 inches of soil, approximately 20 to 40 lbs of nitrogen per acre can become available via the mineralization process. If you can predict the nitrogen requirement of the desired crop, the amount of nitrogen that needs to be applied can then be estimated using the differences between demand and supply. Note that for SOM testing, 6-inch soil sampling depth is typically recommended.
Pre-sidedress Soil Nitrogen Test (PSNT)
The Pre-sidedress soil nitrate-nitrogen test (PSNT) can be used for corn and vegetable crops such as tomatoes, peppers, fall planted cabbage, etc. Soil sampling and testing for PSNT takes place in June or early July, typically when corn plants are 6 inches to 1 foot tall. At this time of the year, the heavy rainfall season has passed, soil is at its optimum moisture and temperature condition for mineralization, and crops, like corn, begin to increase nitrogen uptake exponentially.
Soil samples should be collected at 1 foot depth. The samples should be packed with icepacks during shipping to the soil testing labs. Typically, if PSNT is higher than 25 ppm, nitrogen fertilization is unlikely needed. Crops that have shallower root systems may require a slightly higher PSNT level because they do not have extensive root systems to take up nutrients from a large volume of soil.
End-of-Season Cornstalk Nitrate Test (CSNT) for Corn
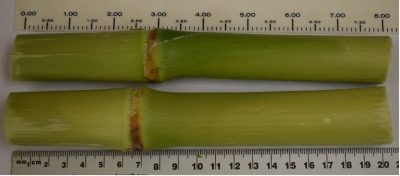
The end-of-season corn stalk nitrate-N test (CSNT) is a post-harvest plant tissue test for corn that can evaluate nitrogen uptake and availability during the crop’s growing season. This test is appropriate for corn produced under both rain-fed and irrigated conditions. Although the test is too late to guide current crop fertilization, the post-harvest evaluation can estimate N sufficiency levels during the corn growing season and provide a valuable tool for fine-tuning future nitrogen management strategies.
Approximately one week prior to or after harvest, 15 random cornstalk samples for every 10 to 15 acres should be collected to form a composited sample. Each cornstalk sample should be collected by cutting an 8-inch section between 6 and 14 inches above the ground. Remove the leaves and sheaths, place the samples in a paper bag, and immediately send the samples to a laboratory for CSNT testing. Avoid taking samples from severely damaged plants. Typically, a CSNT higher than 2000 ppm suggests excessive nitrogen was available during the crop growing season.
We recommend that farmers regularly conduct CSNT to evaluate N sufficiency levels in their cornfields and fine-tune their N management strategies in subsequent growing seasons. Farmers should begin their fine-tuning by reducing fertilizer N applications in cornfields where CSNT results were in the excessive category or even eliminating fertilizer N applications if the CSNT is exceptionally high in the heavily manure fields. Notice that the CSNT could be high in drought years, this is another reason that it is best to test CSNT every year to accurately assess the nitrogen management practices.
If you have further questions about the different types of soil tests available to farmers and home gardeners, please contact the UConn Soil Nutrient Analysis Laboratory at 860-486-6270 or at https://soiltesting.cahnr.uconn.edu/. The UConn Home & Garden Education Center contributes to the Cooperative Extension mission of the University of Connecticut by connecting the public with research and resources provided by the University. For your gardening questions, feel free to contact us, toll-free, at the UConn Home & Garden Education Center (877) 486-6271, visit our website at https://homegarden.cahnr.uconn.edu/, or contact your local Cooperative Extension center https://cahnr.uconn.edu/extension/locations/.
Tissue Cultured Houseplants
By Dr. Matthew Lisy, UConn Adjunct Faculty
UConn Home & Garden Education Center
Ever wonder how new varieties of houseplants are produced so quickly? Tissue Culture is most likely responsible for this. Many people think this is new technology, but it has been donesuccessfully since the 1950s. Recently, I was surprised to see tissue cultured houseplants available in a big box pet store.
If plant breeders had to wait for a plant to clone itself the natural way, the supply of rare houseplants would be extremely limited. This would cause the consumer to have to pay an exorbitant price, and the demand would far exceed the supply. Tissue culture allows for a short cut.
Plant cells exhibit totipotency, or the ability to regrow a whole new plant from a single cell. While our cells differentiate and stay that way, plant cells can dedifferentiate and then grow into a whole new plant. This is why plant propagators can take a small piece of a plant leaf, and grow it into a whole new plant with roots, stems, leaves, and any other tissues the plant needs.
The plants I found were in a very small package almost the size of a cell phone. There was some nutrient agar in the bottom, and a bunch of little, tiny plants. Some of the plant packets had rotting plants, but I selected two nice and green healthy ones – Philodendron sp. ‘Pink Princess,’ and Philodendron sp. ‘White Knight.’ In order for tissue culture to be successful, the cutting used needs to be completely sterilized, or fungus and bacteria will ruin the culture. The agar provides all the moisture and nutrients the growing plants need. Although operations can vary, once baby plantlets are observed, they are generally moved to a larger growing medium under sterile conditions. When big enough to handle, the plants are potted up and grown on like any other plant would be. The plants I bought were extremely tiny, with leaves, stems, and very small roots. I left them in the bags they came in for a few weeks, and put them under LED grow lightsto increase their size.
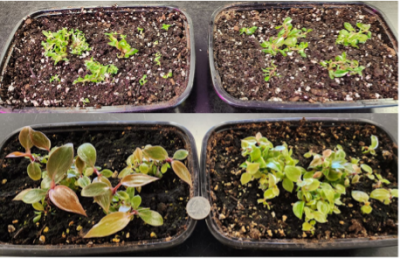
Once the plants looked big enough to handle, I placed them into soilless growing medium. It’s a good idea to keep them moist under a plant dome to avoid dehydration. I would regularly mist the enclosure to keep the humidity high. The plants have done extremely well. When I started to notice some fungus on the surface of my soil, I quickly increased the air flow which dried it upimmediately. I still have the plants in the dome, but with all the vents wide open. The plants have grown much bigger and are looking great. Once the plants get to the point where they could use their own pot, I will separate the biggest ones out and leave the little ones to grow on for a while. Once they start growing after transplanting, I fertilized every time I watered.
The disadvantage of buying tissue cultured plants when they are young is that it takes a long time for them to reach a respectable size. It is also difficult to see what they actually look like and can be difficult to separate the baby plants. There are, however, many advantages. Plants are very cheap, numerous, and free from pests and diseases. The grower also gets a special sense of accomplishment when the plants are raised from little plantlets to full grown adults!
For your gardening questions, feel free to contact us, toll-free, at the UConn Home & Garden Education Center at (877) 486-6271, visit our website at www.ladybug.uconn.edu or contact your local Cooperative Extension center.
Reducing Lawn Areas to Enhance Property
By Pamm Cooper, UConn Home & Garden Education Center
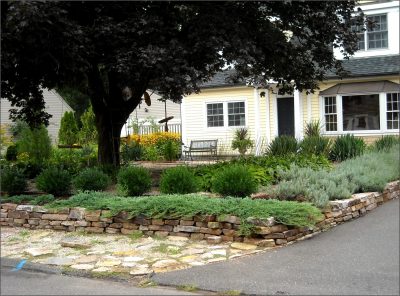
The trend in North America of having a lawn surrounding a house is not a world-wide one. As a matter of fact, it’s only since the 1940s that American lawns took a turn toward a neat, manicured, park- like atmosphere. Almost every house that is built today features a lawn and some type of decorative plantings. Shrubs are planted along the foundations of houses, and often an ornamental tree or two are strategically planted to accent the landscape. It creates the idea of a little park surrounding every home, accented with walls, decks or a patio according to individual preference.
Sometimes it is desirable to reduce lawn areas, especially when an acceptable turf grass stand cannot be maintained without a great deal of expense or work. A lawn is not like a garden that can be tilled over and started anew when things turn out poorly. A lawn is intended to be a permanent part of the landscape. Problem areas that chronically fail to produce the desired dense stand of turf grass may need to be converted into something else. The idea should be to look at the home landscape as a property, and not necessarily as a lawn.
The best way to begin determining what may look better on your property may be to take a drive around your area and see what other people have done. This is especially helpful when dealing with shade problems where grass can’t be grown so that it fills in properly. Sometimes homeowners have limbed up trees, like oaks or maples, to allow enough sun to grow a suitable stand of grass. Some people have given up and may have tried some other type of planting. As an example, Flowering Dogwoods are native trees which do best planted beneath taller trees with no grass or other plant within three feet of their trunk. Sometimes you see ground covers planted around the bases of trees, filling in up to the point where grass can form an acceptable dense stand.
There are some properties that have no lawn areas at all. Instead, perennial flowers, ornamental grasses, shrubs, and walkways are incorporated sometimes with a grass walkway. Almost any plants and trees can be selected if they are suitable for our climate zone and soil type. Keep in mind, though, that there may be quite a bit of maintenance involved in any landscape planting. Even low maintenance plants may need to be pruned or divided periodically.
Modified mowing is another way to reduce lawn area. This works especially well where there is a large area that can be left uncut for most of the year. In spring, before letting the grass grow, a wildflower mix suitable for the site can be scattered in. Or the grass can just be left alone and mowed down in the spring or fall to keep it tidy and prevent trees from getting established. Often the uncut area is contoured to enhance a driveway or other feature.
A lawn can drastically affect one’s enjoyment of one’s home landscape. Turf can be looked at as more of a “floor of a garden,” rather than as the focus of the property. If having a great looking lawn is out of reach, consider alternatives that can enhance both the visual appearance of your home and the overall enjoyment of being at home. Where a lawn constantly struggles, do not hesitate to consider planting something else. It will help lessen the load of things to worry about.
For questions about lawns, lawn alternatives or other gardening questions, feel free to contact us, toll-free, at the UConn Home & Garden Education Center at (877) 486-6271, visit our website at www.homegarden.cahnr.uconn.edu or contact your local Cooperative Extension center.
All-America Selection Winners for 2025
by Dawn Pettinelli, UConn Home & Garden Education Center
Each winter the All-America Selection winners are announced. This non-profit organization has established trial gardens throughout the United States and even as far north as Canada. New varieties, species or strains of annuals, vegetables and bedding plants are grown and judged on their performance. Those chosen as winners are outstanding plants and deserve a trial in your gardens as well.
This year’s national winners include 3 vegetables and 5 flowers. ‘Green Lightening’ is a very attractive, striped pattypan squash that tastes as good as it looks. The 5-inch or so fruits weigh in at 1 to 2 pounds and are ready to pick about 50 days after planting from seed. Judges marveled at the abundant yields on these 2 feet high, bushy plants.
![]()
Kohlrabi ‘Konstance’ exudes a vibrant purple color as well as a sweet, crunchy texture. A curious but easy to grow and tasty addition to the vegetable garden, this kohlrabi matures at just 42 days from seed. Upright plants, about a foot high, produce round, purple 4 to 5-inch ‘bulbs’ that can be eaten fresh or served roasted or sauteed. Fruits are crack-resistant and plants resistant to several diseases.
Sweet pepper ‘Pick-N-Pop Yellow’ produces adorable, snack-size, extra sweet mini peppers. The pointed, conical fruits are about 4 inches long springing from compact 2-foot-tall plants. The prolific harvest begins about 65 days after transplanting. This variety shows great resistance to bacterial leaf spot.
One can never have too many dahlias and this year’s AAS winner, ‘Black Forest Ruby’ is a gem that can be started from seed. Since this variety is an octoploid (having 8 times the normal chromosome number) there is much variability in flower shape (ranging from single to double), plant height and structure. Most will be upright about 2 feet high with jet black foliage and ruby-red flowers. You can save tubers from the best-looking plants.
Dianthus ‘Interspecific Capitan™ Magnifica’ with its impressive bicolor pink and white frilly blooms looks as good in the garden as it does in a vase. Plus, the more you cut, the more blooms appear. Summer heat tolerance was impressive with the 2-inch flower heads also standing up to rain and cold. Plants range from 1 to 1 ½ feet tall and bloom all summer. Look for these vegetatively propagated plants at your local garden center.
Sunny sites will positively shimmy when planted with marigold Mango Tango. This rich red and primrose yellow bicolor blooms all summer long even without deadheading. Reaching only 8 to 10 inches in height makes it perfect for edging garden beds, containers or window boxes. Seeds can be started indoors and plants set out after the danger of frost has passed. Fertilize and water regularly for bountiful blooms.
Can there be too many petunias? ‘Petunia Shake™ Raspberry’ will convince you that there’s always room for one more. The fantastic flowers are reminiscent of a blended raspberry milkshake swirled with lemon-lime green sorbet. The 5 to 8 inch mounded plants can do front of the border duty, serve as groundcovers or billow over hanging baskets. Plants will bloom about 70 days from seed and hold up to heat and rain.
![]()
I’ve never thought of snapdragons as fragrant, yet ‘DoubleShot™ Yellow Red Heart’ is said to have an amazing candy-like scent. Aside from this unusual trait, Yellow Red Heart promises to delight with vibrant yellow blossoms with a red throat that start early and continue through to a heavy frost. This snapdragon reaches about 20 inches in height with semi-double 1 to 1 ½ inch blooms produces all season long and able to tolerate light frosts.
Four regional 2025 Ornamental Winners well suited to the Northeast, include one petunia and 3 nasturtiums. If you’re looking for a vibrant pink petunia great for bedding and containers, try ‘Dekko™ Maxx™ Pink’. The vibrant pink 1 to 1 ½ inch starry blooms are produced all season long and hold up well to rain and heat.
Nasturtiums are top performers in garden beds and containers and are noted for their hummingbird attraction and edible leaves and flowers. New colors in the Baby series of nasturtiums to try out this year might be ‘Baby Gold’, ‘Baby Red’ and ‘Baby Yellow’. All can be grown from seed and start blooming about 50 days after sowing. Two-inch blooms cover compact 12-inch-high mounded plants. Colors are intense and plants stand up to drought, heat, cold, rain and wind. Considering our fluctuating summer weather, these are sure to do well both in the garden and in containers.
Check out these and past AAS winners. They were chosen because of their remarkable characteristics and they are sure to be winners in your yard too.
For your gardening questions, feel free to contact us, toll-free, at the UConn Home & Garden Education Center at (877) 486-6271, visit our website at www.homegarden.cahnr.uconn.edu or contact your local Cooperative Extension center.
Heirloom vs Hybrid – An Age-Old Garden Debate
By Heather Zidack, UConn Home & Garden Education Center

Temperatures are dropping, the holidays are over, and gardeners are starting to look towards the next growing season with excitement. Many gardeners swear by the tried-and-true heirloom varieties, while others are drawn to the disease resistance or increased vigor of hybrids. The debate over which is “best” can get heated between gardeners. Do you know the differences?
Pollination is a key factor. Successful pollination occurs when pollen meets the sticky central part of a flower, known as the stigma. Fertilized seeds develop in the ovary, which will then form into fruit. Over the span of thousands of years, tasty fruit has proven to be a good way to help with seed dispersal in the environment. And taste, along with many other traits, have helped humans decide what plants to cultivate.
Hybrid seeds, also commonly referred to as “F1” or “F1 hybrids,” have been developed through selective breeding. To create an F1 hybrid, breeders have selected parent plants with desirable traits and pollinated them under controlled conditions. While it sounds easy enough, lineages can be tricky. It can be time consuming for plant breeders and some will spend years of their career trying to achieve a specific outcome.
F1 hybrids are often praised for their environmental resilience and higher yields, among other traits. They may be less reliable for seed savers, though, as the offspring of the F1 hybrids are not guaranteed to come back with the same traits as the original plant from your first season, a term we call “true to seed.”
Hybrid seed should not be confused with GMO or genetically modified seeds. Hybrid seed is a product of breeding and selection and does not undergo the laboratory interventions that are needed for genetic modification. Currently, there is only one GMO product available to home gardeners, known as “The Purple Tomato.” All other GMO seed is only available commercially and farmers using these products must sign agreements that lay out the terms of use for the seed purchased.
You may find the term “open pollinated” in your search for seed. These seeds are created without direct human intervention. They have stable genetics and produce predictable traits in their offspring year after year, since they are naturally pollinated. This is great news for those gardeners who enjoy saving their own seed.
It is best to plant open pollinated varieties of similar species away from each other to avoid random cross-pollination. Alternatively, gardeners cand hand pollinate a few flowers and keep them covered. For this, I recommend mesh party favor bags that allow for the fruit to expand. Allow the fruit to develop and harvest them specifically for their seed.
Heirloom seeds are open pollinated plants that have been passed down usually over generations. Often, there is a local history or cultural significance that comes with them. You can find interesting physical traits and some beneficial resistances from heirloom seeds. Since they are open pollinated, their genetics are more likely to be stable and produce true to seed offspring for seed savers, as well.
At the end of the day, I always advise gardeners to look beyond the title and really assess what is going to meet your needs and make your experience most enjoyable. If you love to tell a story with your garden, and enjoy saving your seeds year after year, an heirloom variety might be the perfect fit! On the other hand, if you bring home a packet of tomato seeds that have been bred for small space gardening, and you plan to buy new seeds every year, then enjoy that tomato to its fullest! There are many gardens out there with a beautiful blend of both.
If you have questions about seed selection, or for other gardening questions, contact the UCONN Home & Garden Education Center, toll-free, at (877) 486-6271, visit their web site at www.homegarden.cahnr.uconn.edu or contact your local Cooperative Extension Center.
2024
Plant Hazards to Avoid this Holiday Season
By Nick Goltz, DPM, UConn Home & Garden Education Center, UConn Plant Diagnostic Lab

Using low-heat LED lights is a great way to reduce fire risk while keeping things festive. The stewards of this tree toko the extra step of installing a rope fence to discourage visitors from damaging the tree or lights. (Photo taken by Nick Goltz)
With the holidays upon us, many of us are focusing, with good reason, on last-minute gifts, travelling, reconnecting with loved ones, and all the joy and stress that will inevitably come with it. With all the hustle and bustle of the season, it can be easy to overlook some of the safety hazards that also come about this time each year, especially those involving the holiday plants that we rarely give a second thought.
On countless desks, coffee tables, and, in warmer climes, doorsteps, you are likely to encounter at least a dozen poinsettias this December. Poinsettias (Euphorbia pulcherrima) are some of the most conspicuous and popular plants associated with the holiday season here in the US. They are often thought to be highly poisonous if ingested. While ingestion may cause some mouth and skin irritation and gastrointestinal upset, sometimes with some associated vomiting or diarrhea in small animals, poinsettias are vastly “overhyped” with their supposed toxicity.
There is no documented case of human fatality associated with poinsettia ingestion, and most calls to poison control lines for ingestion report no adverse symptoms whatsoever. Medical intervention is usually unnecessary for people or pets that ingest the plant, except for those with allergic reactions to related plants (particularly those with latex sensitivity). For more information on poinsettias and their fascinating history, see Heather Zidack’s column from mid-November, “Poinsettias: The Story of a Holiday Treasure”. While poinsettias may be overblown with regard to their supposed toxicity, other common plants one might see around the holidays, including amaryllis and mistletoe, are quite toxic to humans and pets if ingested.
What we call “amaryllis” in most stores and garden centers is likely not the true South African amaryllis (Amaryllis belladonna), but rather a related South American plant in the genus Hippeastrum, which has been cultivated more extensively and has a greater number of cultivars on the market. Both are bulbous tropical plants that bloom in winter in the northern hemisphere, and both are poisonous if ingested. The bulb, commonly sold waxed or bare in stores around the holidays to be used as a table centerpiece or hostess gift, is especially toxic and should be kept away from pets and children. If you’re curious to learn more about the history and cultivation of this holiday plant, check out Dr. Matt Lisy’s recent blog post, “Amazing Amaryllis” on the UConn Home & Garden Center’s very own Ladybug Blog (https://uconnladybug.wordpress.com/).
Though in antiquity it represented fertility and offered protection from evil, mistletoe (usually Viscum album, European mistletoe and Phoradendron leucarpum, American mistletoe) has been associated with Christmas since some point in the late 1700’s. Though lovers may steal a kiss or two beneath the mistletoe this Christmas, be sure the mistletoe can’t be stolen by children or pets as you decorate for your holiday party! Although European mistletoe is more toxic than American mistletoe, both plants are dangerous if ingested, particularly by pets and children, who may be attracted to the small white berries that have a high concentration of toxin. If you know someone that accidentally ingests a plant not known to be edible, be sure to contact the poison control hotline by calling 1-800-222-1222 or by visiting https://www.poison.org. For pets, contact the ASPCA poison control hotline by calling 1-888-426-4435 or by visiting https://www.aspca.org/pet-care/animal-poison-control. Conveniently, they have a poisonous plants list on this site that you can reference as you shop at your local nursery or garden center.
Though thankfully Christmas trees (typically fir, pine, or spruce) are not known to be toxic to pets if ingested, the sharp needles can cause injury if ingested and the trees themselves can pose other hazards if not maintained with care! If you have a pet that likes to chew through wires (there is a scene in a famous Christmas movie that likely comes to mind), be sure to keep those out of reach, or perhaps opt for battery-powered illuminating ornaments. For their safety and yours, cats and birds should always be discouraged from climbing or flying into your tree!
Finally, though we all can appreciate rustic and vintage holiday décor, another strategy to reduce the risk of fire this holiday season is to upgrade your string lights to low-heat LEDs. Whatever type of string light you use, unplug it before you go to bed to help reduce fire risk. If you use a live tree, be sure to keep it watered as dehydrated trees are more likely to catch fire.
With these tips in mind, the Plant and Soil Health team at UConn wishes you and your loved ones a safe, joyous, and restorative holiday season! For questions regarding winter plant safety or for any other gardening questions throughout the year, contact the UConn Home & Garden Education Center for free advice by calling (877) 486-6271, toll-free, visit our web site at www.homegarden.cahnr.uconn.edu/, or contact your local Cooperative Extension Center.
This is For the Birds!
By Dawn Pettinelli, UConn Home & Garden Education Center
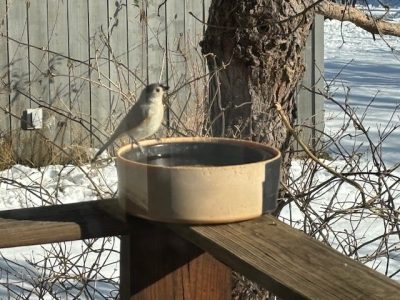
As December brings frigid temperatures and snowy landscapes to Connecticut, our feathered friends face unique challenges in finding the resources they need to survive. Shorter days and frozen ground make food and water scarcer, while icy winds and snow create harsh conditions for shelter. By providing birds with seed, water, and shelter, you may be making a significant difference in their survival and well-being during this often challenging season.
Winter robs many birds of their natural food sources like insects, berries, and seeds. While it is true that birds can survive without our subsidies, supplemental feeding can provide extra energy that birds need to maintain their body heat. In December, focus on offering high-calorie foods that cater to a variety of species common to Connecticut, such as chickadees, cardinals, juncos, and woodpeckers.
Many types of bird feeders are available including hopper and platform feeders, tubes, and suet cages. Whichever you choose, it should be one that can be washed out every week or so. Uneaten seed pieces and other debris can mold plus there is the chance of contagions whenever living creatures congregate.
Feeding the birds is a popular activity and there are many types of seeds, seed mixes and other foods available for purchase. Black-oil sunflower seeds are a favorite of many birds, thanks to their high-fat content and thin shells, which are easy to crack. You can buy shelled seeds to minimize the pile of shells that accumulates under the feeder. Smaller white safflower seeds are included in many seed mixes and are reputed to be a favorite of cardinals. Thistle or Niger seeds are a sought-after treat for finches and other small birds. I have only tried using a thistle sock once and found it got soggy, and the seeds froze so maybe a specialized tube feeder would be the way to go if offering this food source.
Unshelled peanuts are a great fuel for birds supplying both protein and fat. They are also a sure way to attract squirrels. I have been buying unsalted, dry roasted peanuts and put a few handfuls on my porch railing each morning when I put out the water bowl for the birds. There’s a regular assortment of birds who eagerly await their morning breakfast and the peanuts are gobbled up by titmice, chickadees, flickers, downy woodpeckers and blue jays before the squirrel even has a chance to make it to the porch from the woods.
A good seed mix for the feeder should contain a variety of food items including black-oil sunflower seed, cracked corn, safflower, peanut chips, white prose millet, and maybe some sunflower hearts and dried fruit. Like most things in life, you get what you pay for, and cheaper mixes often contain that red milo and other fillers that birds in our area are not partial to. If you notice piles of uneaten seeds under your feeders, try switching to another seed mix.
Many bird species, but especially insect eaters, really love suet. Packed with fat, suet provides essential energy and attracts woodpeckers, nuthatches, blue jays and I’ve even had crows in queue for their turn at the suet feeder. Opt for suet mixed with seeds, berries, nuts or mealworms for added nutrition.
Place feeders in somewhat sheltered areas to protect birds from the winds but make sure that they are not located near where predators can hide. Refill regularly, as food is quickly consumed in cold weather. Be on the lookout for bears. Typically, they are not a problem from mid-December through mid-March but if a bear finds your feeder, bring it in and cease feeding.
During a typical, cold winter water is a rare and precious resource. While snow can provide hydration, many birds prefer liquid water for drinking and bathing. Maintaining a water source in freezing temperatures can be a lifesaver. I opt for a Solar Sipper that I have had for years. It is just a bowl inside a bowl with a cover that has a hole in the top. It keeps the water from freezing down into the 20s, especially on a sunny day. I just bring it in at night, wash it and put out clean water in the morning. Heated birdbaths are another more hi-tech option.
December’s freezing temperatures and strong winds make safe shelter essential for birds. They need places to roost, stay warm, and avoid predators. Encourage birds to stay in your yard by planting native trees, shrubs, and evergreens. Dense conifers like spruce, hemlock, and pine provide excellent cover from snow and wind. Additionally, leaving leaf piles or brush heaps in your yard creates ground-level shelter for birds like sparrows and juncos. Refrain from cutting back seedheads from coneflowers, coreopsis, goldenrods, sunflowers and native grasses to provide natural seed sources.
Providing food, water, and shelter not only supports birds during the toughest months but also brings joy to your home. Watching vibrant cardinals against the snow or hearing the cheerful calls of chickadees can brighten even the coldest day. By creating a welcoming space for birds in your backyard, you contribute to their survival and get to enjoy the beauty of nature during winter’s quiet, cold days.
For your gardening questions, feel free to contact us, toll-free, at the UConn Home & Garden Education Center at (877) 486-6271, visit our website at www.homegarden.cahnr.uconn.edu or contact your local Cooperative Extension center.
‘Tis the Season for Holiday Plants
By Dr. Matthew Lisy, UConn Adjunct Faculty

Once again, the winter holiday season is upon us! I am sure I have said this before, but I never cease to be amazed at the seemingly endless varieties of holiday plants available. This year, I planned on not buying any holiday plants, but one trip to two local greenhouses changed my mind immediately. If one plant could exemplify the season, it would be the Poinsettia. Although red and white Poinsettias have been the standard for many years, there are a lot of really neat colors available if you look hard enough. One of my all-time favorites is orange. I used to grow this variety when it first came out, and could never stock enough of them. In the old days, you needed to set it next to a red one to tell the difference, but fast forward many years, and the orange is now much more intense and can stand alone in all its glory.
If I had to pick just one favorite Poinsettia, it would be the yellow. It just looks so unusual and unlike anything else. I first saw it years ago in small quantities in a big box store, but now they are much more common. The regular white has a slight yellow tint to it, but there is a super bright white that looks as pure as freshly fallen snow. Another new favorite is called “Christmas Mouse,” and has rounded leaves that resemble mouse ears in contrast to the normal pointed ones. Of course, there are also Poinsettias that are actually spray painted with a plant-safe paint. These plants usually also have glitter sprinkled onto them. Even though these are artificial looking, they are beautiful works of art in their own right.
There are new varieties of cyclamen around too. These are characterized by interestingly shaped flowers that are more open. Some of the varieties even have the flowers turned upright. The colors are amazing and range from dark maroon reds to almost neon pink. Another plant I am really excited to see this year is the Amaryllis. These have been around an extremely long time, but what changed is the number of places carrying many different varieties for sale. I like when I can just buy the bulb and pot it up on my own. This is less expensive and allows me to buy more varieties. There are even some places selling the bulbs with a type of paint coating on them which is said to eliminates the need for watering. I prefer a bulb in a pot as I think it looks more natural, but that is a matter of opinion. What I have seen a lot less of this year is the Christmas Cactus. While they are still around, their numbers are not nearly as plentiful as in the past. The Amaryllis and Christmas cactus are the two plants you can keep long term. They each have special care routines that you will need to follow to get them to bloom again the following year. The Christmas cacti need a certain lighting (or darkness) period, and the Amaryllis need a dry dormant period.
Wherever you are going for the holidays, I suggest bringing one of these festive plants to the host as a gift. There is nothing more cheerful than a brightly colored plant during the dark days of winter. On that note, why not buy some for yourself and enjoy them all season? Either way, I suggest you make the most of things with a nice new plant variety that you never had before. There certainly are plenty from which to choose!
For your gardening questions, feel free to contact us, toll-free, at the UConn Home & Garden Education Center at (877) 486-6271, visit our website at www.ladybug.uconn.edu or contact your local Cooperative Extension center.
Holiday Gifts for Gardeners
By Dawn Pettinelli, UConn Home & Garden Education Center
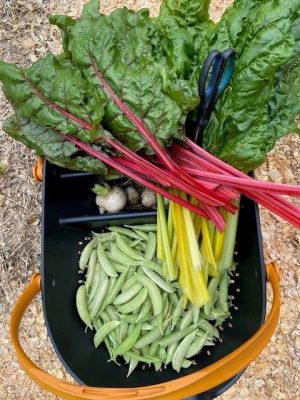
Let the holiday shopping begin! Compared to many family members and friends, buying a gift for the gardener in your life is a breeze. Lots of great possibilities and there’s always the option of a gift certificate to their favorite local garden center. These are just some of my personal suggestions.
With long, dark days settling in, reading is a great winter sport. I’m partial to whodunnits and might curl up with The Garden Party by Marty Wingate or The Garden Club Murder by Amy Patricia Meade. For non-fiction readers, especially those longing for greater self-sustainability, perhaps Small-Scale Homesteading by Michelle Bruhn and Stephanie Thurow might be an informative resource when just starting out. With all the calls we get about vegetable problems, two books by Susan Mulvihill; The Vegetable Garden Pest Handbook and The Vegetable Garden Problem Solver offer up lots of great photographs and least toxic controls for a myriad of insects, diseases and other pest problems. Of course, you can also call us at the Center for assistance.
Gardening magazines still offer excellent articles, advice and inspiration. A subscription to the Connecticut Gardener should be in every CT gardener’s mailbox or inbox. Fine Gardening is also CT based and fills our head with amazing plant information and truly inspiring gardens. I’ll also admit to a subscription to both Horticulture and The American Gardener.
Working in the garden often brings me to my knees and when that up close and personal, I find there are 2 tools always in my bucket. First is a Cobra head weeder, crafted in Wisconsin last I looked. This curved-headed tool can be used for weeding, thinning, making seed rows, digging in little seedlings and whatever other use you can come up with; a multi-tasking tool that is long-lasting and affordable. My deluxe soil knife features a smooth, sharp side and a serrated side with inch measurements, useful when planting. I find it does a nice job dispatching both annoying roots and jumping worms. When deployed on the ground, those larger, oval-shaped kneelers are tough and functional.
In my most recent issue of The American Gardener, there is a Craftsman 54-inch wood-handle action hoe that I would like to try so I can weed standing up. It works with a manual push-pull action but might be just the thing us older gardeners need.
While I have 2 different types of pruners that are great for stems from about a half to one inch in diameter, I can use help on the opposite extremes. Last year my sister got me a hand-held mini-chainsaw and it is wonderful for removing 1 to 3 inch or so stems or branches. It’s really made pruning much easier. On the other end of the spectrum, a pair of horticultural scissors with long blades treated to resist rust would be great for harvesting or deadheading cut flowers as well as indoor houseplant grooming.
For years, I have placed picked vegetables, whether peppers, carrots or chard into those attractive wicker baskets. Recently, I was given one of those garden trugs made out of recycled plastic that had holes on the bottom so I could gather up my harvest and then hose the soil off in the same container. There are several trugs on the market including those made of wood and wire mesh. They do make cleaning your vegetables a lot easier than doing it at the kitchen sink.
Gardeners go through gloves and despite what the ads say, if a pair lasts me a season, I’m lucky. They are always needed and appreciated, and you can’t go wrong gifting these to a gardener. For those with a lot of roses, consider purchasing a pair of rose gauntlets so their arms won’t get all scratched up when pruning.
Indoor gardeners might appreciate watering cans with long spouts that dispense water slowly, attractive cache pots, houseplant fertilizers, cork plant coasters or misters. Bird lovers may enjoy feeders, bird baths, bird houses or seed and suet for their fine-feathered friends.
There are many types of garden ornaments to present to your plant loving friends and family. Plus, tis the season for holiday plants – poinsettias, holiday cacti, amaryllis, frosty ferns are just a few of the selections that your gardener recipient might enjoy. With all these choices, the gardener on your gift list is sure to be pleased.
For your gardening questions, feel free to contact us, toll-free, at the UConn Home & Garden Education Center at (877) 486-6271, visit our website at www.homegarden.cahnr.uconn.edu or contact your local Cooperative Extension center.
Poinsettias: The Story of a Holiday Treasure
Poinsettias: The Story of a Holiday Treasure
By Heather Zidack, UConn Home & Garden Education Center

It just isn’t the holiday season without a poinsettia. We adorn homes, churches, and other public spaces with them at this time of year. Their bold color and striking presence are hard to miss. With a story as spectacular as their seasonal color, the poinsettia is a plant to be treasured.
Poinsettias have a rich history and culture. While we associate them with the coldest time of year here in the Northeast, they actually come from a much warmer climate! Known as Cuetlaxochitl in their native region of Mexico, they were cultivated and used by indigenous peoples for medicines, dyes, and decorations. In Aztec culture, the Cuetlaxochitl held cultural significance as a symbol of purity and were also used to symbolize a new life earned by warriors who had died in battle. The Mayans called this plant k'alul wits. Many traditional uses for k’alul wits are still practiced by the Téenek people in southeastern Mexico, today.
Their association with the Christmas holiday started when Franciscan monks in Mexico began to use their bright red and green foliage to decorate nativity scenes. It became known as la flor de Nochebuena, translating to “the Christmas Eve flower.” It was brought to the United States by Joel Roberts Poinsett, the first U.S. minister to Mexico, in 1825. Poinsett was a man of many talents, having a career in politics, a passion for science, and an enthusiasm for agriculture. Through continuous plant breeding and developments, there are now hundreds of varieties of poinsettia.
Contrary to popular belief, poinsettia flowers are small and barely noticeable. The insignificant yellow flowers are surrounded by stunning, colorful bracts. Bracts are not flower petals, but rather, specialized leaves. The bracts of a poinsettia change color when daylight hours begin to shorten. Breeders have developed poinsettias that have bracts of various shapes, textures, and colors. Some are variegated or have speckles of color on them. These cultivated varieties (cultivars) are quite different from the straight species, Euphorbia pulcherrima, in its native environment, where it can grow over 10 feet tall, is semi-evergreen, and can sometimes grow a bit scraggly.
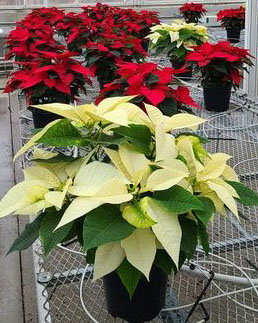
Greenhouses start poinsettia production as early as July. Tiny plugs get put into their pots while we’re all still soaking up the summer sun. (It makes sense when you remember that they’re originally from Mexico!) They grow as little green plants through the rest of summer and autumn. The fall equinox will naturally trigger these plants to change color, however, growers can manipulate their greenhouses to create ideal darkness/brightness to help time the coloring of their plants for holiday sales.
If you’ve got a green thumb and are trying to get a previous years’ poinsettia to “reflower,” simulating this dark period with an opaque container, paper bag, or moving the plant into a closet or dark location for 14-16 hours a day can do the trick! Make sure they’re receiving 8 hours of bright, direct light, and not a ray more! After about 4 weeks of these conditions, most poinsettias can go back to their life with your other houseplants, as normal, and you should see a change in color.
Shopping for a new poinsettia as a gift or decoration this year? Always shop for a plant that is brightly colored and has tight (tiny yellow) flowers that aren't already going by. Select a plant that has evenly moist soil, and a nice shape that doesn’t appear to have been crowded for too long. Here in Connecticut, make sure that your florist, grocer, or grower packages the poinsettia for you to help protect it from cold winds while transporting it to and from your car. When you get it home keep it away from entryways, drafts, fireplaces, or heating vents, and keep it in a room that is between 60° and 70°F. Water your poinsettia when the soil begins to dry out in the pot and enjoy the holiday season.
Whether you’re reviving an old poinsettia, shopping for a new one, or deciding that artificial is the best choice for your home this year, take the time to recognize the special journey these plants have taken to become such a treasure and staple in our holiday celebrations. There truly isn’t anything quite like it!
For questions about caring for your poinsettias or for other gardening queries, contact the UCONN Home & Garden Education Center, toll-free, at (877) 486-6271, visit their web site at www.homegarden.cahnr.uconn.edu, or contact your local Cooperative Extension Center.
Berry Good Pick for Winter Interest
By Dawn Pettinelli, UConn Home & Garden Education Center

Looking for a splash of color in your yard amid winter’s dreary landscape? Check out one or more of the many winterberry (Ilex verticillata) cultivars. This deciduous member of the holly family sports bright, shiny red berries from early fall through late winter. Branches may be cut and used in holiday arrangements.
Winterberry can be found growing throughout eastern North America from Canada down along the east coast and west to Texas. Look for the brilliant red berries when driving past marshy areas in particular. While winterberry will grow in well-drained soil, it is a great candidate for areas that stay moist and aren’t particularly well drained. These plants naturally occur in forested wetlands as well as along the banks of streams, ponds or other water sources.
There are several factors to consider when selecting a winterberry bush for your yard. One of the most important is the mature size of the plant. Cultivars are available that vary from dwarf, 4-foot, compact plants to 15-foot, more rangy specimens. ‘Red Sprite’ and ‘Berry Poppins’ are two red-berried, compact cultivars. ‘Winter Red’ and ‘Sparkleberry’ typically top 10 feet. Check out suggested cultivars for Connecticut with the UConn Plant Database (https://plantdatabase.uconn.edu/). While initially slow growing, winterberries may eventually form clumps through suckering and depending on the cultivars, may form dense stands if allowed.
The berries on most cultivars are a brilliant red. There are, however, some that have gold or orange fruits. ‘Goldfinch’ boasts golden yellow berries while both ‘Aurantiaca’ and ‘Afterglow’ offer delightful orangey fruit.
Do realize that plants are dioecious, meaning that individual plants may be male or female. Only the female plants produce berries. The male plants supply the pollen to fertilize the female’s flowers so that berries are produced. One male plant can fertilize at least 10 females if located within 50 feet or closer. Look at tags so a compatible male cultivar is chosen. Appropriate pollinators should be listed on nursery tags.
Unless plants are in bloom or have berries, it is not possible to tell males from females, but they should be marked on their tags at the nursery. When in bloom, the female flowers have tiny green immature berries in the center while the males have fluffy, yellow, pollen-bearing anthers. Occasionally the female flowers have non-pollen bearing anthers, probably effective is luring pollinators to fertilize their flowers. Although not common in Connecticut, one native species of cellophane bee, Colletes banksi, is a specialized pollinator of winterberry.
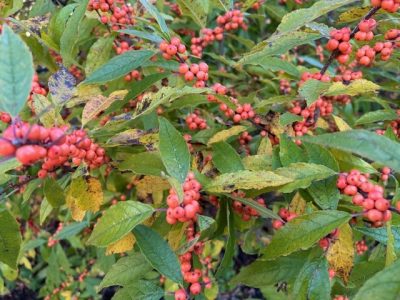
Winterberries do best in full sun to partial shade. The shadier the site they are grown in, the fewer blossoms and berries they will produce. Being native New Englanders, they prefer acidic soils rich in organic matter. If your soil pH is between 5 to 6.5, plants should happily grow. Once plants are established, only minimal fertilization is usually required. For the first few years, about a cup of a complete organic or synthetic fertilizer could be lightly worked into the soil surrounding the plant each spring.
Plants can be used in foundation plantings, as a hedge, in rain gardens and when setting up areas attractive to wildlife. Not only are pollinators attracted to the flowers but over 48 species of birds feed on the berries, typically after they soften following periods of freezing and thawing.
Pruning can be tricky and is best kept to a minimum so selecting the right sized cultivar for your particular site is crucial. Winterberries have an upright growth habit but may sucker. They bloom on old wood meaning the flower buds that open in the spring were formed last fall. If grown as a multi-stemmed shrub, a few stems can be removed if plants seem crowded.
Complaints about little or no berry production may be due to lack of a male pollinator, too much shade, young plants that have not established a good root system, improper pruning or excessively dry conditions. In general, winterberries are rewarding, easy to grow shrubs that make quite the impact when little else in the landscape stands out.
For questions about selecting or growing winterberries or for other gardening queries, contact the UCONN Home & Garden Education Center, toll-free, at (877) 486-6271, visit their web site at www.homegarden.cahnr.uconn.edu or contact your local Cooperative Extension Center.
The Fall Invasion of the Asian Lady Beetle
By Marie Woodward, UConn Home & Garden Education Center
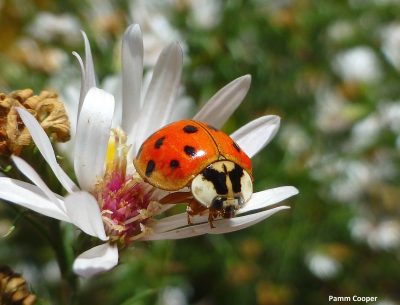
As the leaves change color and the weather turns colder, many people look forward to the beauty and coziness of autumn. However, one uninvited guest often accompanies the season: the Asian lady beetle. This insect, scientifically known as Harmonia axyridis, can be a nuisance to homeowners as it seeks shelter in warm buildings during the fall months.
The Asian lady beetle is native to eastern Asia but was introduced to the United States and other parts of the world in the early 20th century as a biological control agent for aphids and other pests. While they are highly effective at controlling these pests in the gardens and crops, their rapid spread and tendency to congregate in large numbers have caused problems for homeowners.
These beetles are easily recognizable by their orange to reddish-brown coloration, small black spots on their wing covers, and distinctive M-shaped marking behind their head. Their size ranges from 5-8mm in length. They have six short legs and two antennae.
During the fall, the Asian lady beetle seeks protected locations to spend the winter. They gather in large groups, often on the sunny side of buildings, before ultimately finding their way into homes and other structures through cracks and gaps. It is not uncommon to find them gathered in attics, wall voids, or other quiet, undisturbed areas.
Once inside, these beetles can become a nuisance due to their sheer numbers and tendency to release a yellowish, foul-smelling liquid when disturbed. This liquid can stain walls, fabrics, and other surfaces, and may cause allergic reactions in some individuals. Additionally, some people find the beetles’ scent unpleasant or even nauseating.
Prevention is key to avoiding an Asian lady beetle infestation. Sealing entry points, such as cracks around windows, doors and utility openings, can significantly reduce the likelihood of an invasion. Additionally, keeping exterior lights off at night and planting trees or shrubs away from the house can reduce the attractiveness of your home to these insects.
If beetles have already found their way inside, using a vacuum cleaner is the best means of removal. However, be sure to dispose of the vacuum bag or empty the canister outdoors immediately to prevent the beetles from returning back into your home. Alternatively, insect light traps or sticky traps can help capture and remove beetles.
It’s essential to remember that while the Asian lady beetle can be a nuisance, it is not a significant threat to your home or your health. Taking proactive measures to prevent their entry and managing their presence can significantly reduce the annoyance caused by these uninvited guests.
As the fall season arrives, keep in mind the potential for Asian lady beetles to seek shelter in your home. By understanding their behavior and implementing preventive measures, you can enjoy the beauty and warmth of autumn without the invasion of these pesky insects.
If you have questions about Asian lady beetles or other gardening topics, contact the UConn Home & Garden Education at (877) 486-6271 or www.homegarden.cahnr,uconn.edu or your local Cooperative Extension Center.
Do You Dig Dahlias?
By Dawn Pettinelli, UConn Home & Garden Education Center
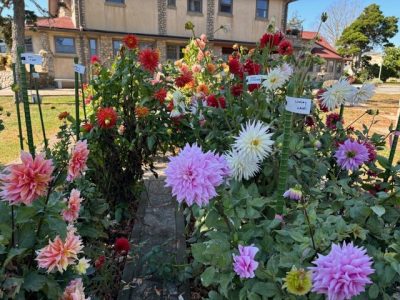
A couple of weeks ago, I was fortunate to visit the spectacular dahlia gardens on Enders Island in Mystic. For those unfamiliar with this retreat, an 11-acre seaside estate was donated to the Society Edmund by Mrs. Alys E. Enders in 1954. This Roman Catholic religious community offers ministry, retreats and respite to many. The grounds are open to all for contemplation or just unbound appreciation of nature and horticultural beauty.
Gardeners will delight in the gorgeous, well laid out garden rooms but especially be entranced by the vast array of dahlias. The gardens at Enders Island are filled with over 300 varieties of prize-winning dahlias in all colors (except blue), shapes and sizes imaginable. A Dahlia Preservation Trust was established to preserve the dahlia collection that is rated as one of the largest in New England.
Any of us growing dahlias while appreciating their cheery, attractive blossoms lasting long into the fall, do realize they are not winter hardy, even with milder winters attributed to climate change. Dahlias are native to Central America. In fact, they are Mexico’s national flower. Those wishing to save the tuberous roots for replanting next year, must dig them up and store them over the winter.
Ideally, gardeners should wait until a frost blackens the foliage. Then, if possible, wait a week so any carbohydrates left in the above ground tissue can make their way to the roots to enable good sprouting next spring when the tuberous roots are replanted. This has been a particularly confusing fall to both plants and gardeners. Frosts have hit some areas but often not severe enough to affect all plants and dahlias in more protected sites are still blooming their heads off, a trait most appreciated by pollinators such as bees.
On the other hand, it is November. Time to reign in gardening activities and begin preparations for the holidays. What’s a gardener to do?
Since my plants were losing bottom leaves to disease and looking a little ragged, I just decided it was time to dig them and move the tuberous roots into the cellar. Before digging any dahlias, be sure to note their names. If tags were not written out when planting, make them out now if color and flower type are important.
Cut back stems to 2 or 3 inches and carefully dig the tubers starting at least 8 inches away from crowns so tubers do not get sliced or speared. Use a spade or pitchfork but dig in carefully. This year the soil is so dry that it was not necessary to leave the tuberous roots in the sun for a few hours so the soil clinging to them could dry and be shaken off. Every one I dug up was dry enough so that practically no soil clung to the roots. Each was placed in a separate container with repurposed labels.
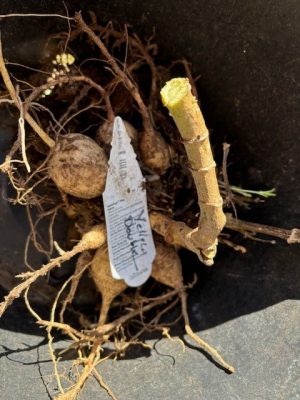
Perusing through online sources, many suggest washing tubers off with a hose and letting them dry before storing. I have let them dry out in wet falls and shaken dried soil from them before storing but have never hosed them off. Maybe follow the approach that makes most sense to you. If any remaining soil is washed off, the tuberous roots should most likely be stored in lightly moistened peat moss or other slightly damp organic material, so they will not desiccate over the winter. For me, leaving a bit of soil around the roots that are stored in pots in the cellar over winter helps to keep tubers from shriveling with only a sparse sprinkle of water once or twice a month.
When happy, dahlias will multiply but it is probably best to leave the whole clump together and separate it before planting next spring when multiple buds or eyes can be seen. Keep the tuberous roots at 45 to 55 degrees F and check every 2 to 3 weeks for signs of decay or desiccation.
For an early start, the tuberous roots can be set into beds usually by late April unless unseasonably cold weather is predicted. If you have questions about overwintering dahlias or for other gardening questions, contact the UCONN Home & Garden Education Center, toll-free, at (877) 486-6271, visit their web site at www.homegarden.cahnr.uconn.edu or contact your local Cooperative Extension Center.
Helping Plants During the September-October Drought
By Pamm Cooper, UConn Home & Garden Education Center

Here at the UConn Home and Garden Center we have been getting questions about lawn and garden issues that have been particularly widespread in the state. Whether in the landscape or the garden, there is always something going on, good or bad, and keeping up with pests or cultural issues can be challenging. Because of the extended late season drought conditions this year, plants may be showing signs of stress. There are some basic things homeowners can do to help plants go into winter as healthy as possible.
Plants in temperate climates, like we have in New England, are normally manufacturing food to enable carbohydrate storage for new growth that will occur next spring. To do this, plants need both sunlight and water, and our extended drought conditions have limited most plants to enter survival mode, and carb storage is a second priority. The best way to help your plants is to water deeply any that still have green leaves. People with wells may need to determine if this is a priority for them. We can hope for a warm winter or insulating snow cover to help any plants with shallow roots survive until warm weather returns.

One sign of drought stress in woody broadleaf plants is leaf edges that curl upward. This is a good clue as to the beginning of water stress. Make sure to water these plants deeply, to ensure roots will be able to pick up the water. Usually the next day, leaves will start to uncurl if adequate water is applied. If drought stress continues, leaves may turn brown at the edges and early leaf drop may occur.
Evergreens, even established ones, can benefit from regular watering as long as the soil is not frozen and drought conditions remain. Evergreen foliage, whether needles or leaves, photosynthesize all year, and it is important that soil is not dry. Normally, we have snow that melts on and off, and if soils are not frozen, roots will be able to take up water and photosynthesis can still take place.
Perennials of certain species may be doing fine in this drought. Yarrows, some ox-eyed daisy cultivars, obedient plants, goldenrods, mountain mints and Agastache may be showing no signs of stress. Still, if any have green leaves at this point, consider watering them if dry and warm conditions continue.
This weekend I planted a small shrub, and I had to dig about fourteen inches down to accommodate the root mass. I have to say that I was surprised that the soil, not particularly one that dries out often, was powdery to the bottom of the hole. If you are planting anything now, make sure to water the soil thoroughly as you fill in the area around the roots, then water again when done. This is especially needed for small trees and shrubs but do the same for perennials.
Next year, woody plants that were impacted by drought this year may be more susceptible to certain diseases like verticillium wilt, Nectria canker and evergreens to Rhizosphaera needlecast. Be vigilant and scout for any signs or symptoms of these diseases.
Lawns that did not receive any rainfall or supplemental watering during the past two months may be dormant and crunchy at this time. It may not be clear if the grass will recover when temperatures cool and adequate water is applied. Some grass species may be dead, but it may not be clear until next spring when they fail to green up. There still may be time to apply supplemental irrigation, and with warm temperatures, grass may or may not green up, but at least the crowns may be kept alive to generate new leaves next spring. If any lawn areas were seeded in late summer, water new grass as needed. If it is wilting, water it for sure.
Be alert to what is happening in your own backyard, for the sooner you discover any problems the better. Contact us at the University of Connecticut Home and Garden Education Center for advice on lawns, landscapes, and other gardening subjects. Here's hoping for some needed rainfall and cooler temperatures to help our plants recover from the trying drought of 2024.
Penn State Extension has a good article on long-term effects of drought stress- https://extension.psu.edu/the-long-term-impact-of-drought-on-trees-and-shrubs
If you have questions about caring for plants during a drought, or if you have other gardening questions, feel free to contact us, toll-free, at the UConn Home & Garden Education Center at (877) 486-6271, visit our website at www.homegarden.cahnr.uconn.edu or contact your local Cooperative Extension center.
Gorgeous Grasses
By Dawn Pettinelli, UConn Home & Garden Education Center
Autumn shines a spotlight on ornamental grasses. With their rustling blades and fluffy seedheads they are star performers in late season gardens going head-to-head with asters, mums, Montauk daisies and boltonias. Plus, they are great in fresh or dried cut flower arrangements.
The huge selection of grass species available is great for gardens but makes selecting difficult. Heights range from a few inches to more than 6 feet; colors from deep green to chartreuse, burgundy to black. Solid or variegated? Would a clump former, spreader, or self-seeder best fit your needs? Are seed heads important for fall and winter interest? Is this grass planted as an ornamental feature in your garden bed or landscape or are you looking for natives to support pollinators and perhaps serve as food for birds and others? Answers to these questions may guide you in grass selection.
Two favorite non-natives grown for their ornamental value are cultivars of Miscanthus and Pennisetum. While the miscanthus species has been listed as potentially invasive in CT, a number of attractive cultivars are available for purchase and can be striking if well positioned in the garden. Two outstanding selections are ‘Gracillimus’ and ‘Zebrinus’. The first has shimmering silver veined green leaves growing in graceful mounds. Reddish flower plumes emerge in fall changing to a light silvery hue. Plants are clump formers but can reach 6 feet or more in height.
‘Zebrinus’ is more commonly known as zebra grass for its definitive yellow and dark green striped foliage. This plant gets big over time. Mine is now 6 feet across and probably 10 feet high. I wrap a rope around it in the late summer to keep it upright through fall rains and winds. Stalks have been used quite effectively as a substitute for cornstalks around the lamppost.
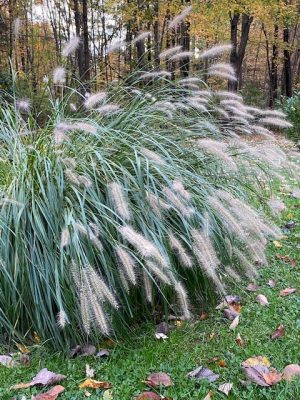
My Pennisetum alopecuroides was grown from seed probably 20 years ago. These plants are absolutely gorgeous in the fall. Despite the many bottlebrush seed heads, I’ve never found a seedling. The fine, arching foliage resemble flowing water hence the common name, fountain grass. Cultivars of this graceful, flowing grass range from 18 inch ‘Piglet’ to 5 foot ‘Fox Trot’.
Native grasses are soaring in popularity and much easier to find at garden centers than they used to be. One switchgrass (Panicum virgatum) cultivar, ‘Heavy Metal’, is quite popular for its upright, striking blue-green foliage. If happy, it can reach 4 to 5 feet in height. The wheat-colored seed plumes are attractive to us during the gloomy winter months but also as a food source to a number of bird species.
Little bluestem (Schizachyrium scoparium) is a favorite also of humans and wildlife, including both birds and butterflies. This upright native grass is pretty ubiquitous along roadsides and in fields and meadows. New growth begins a clean blue green but, by the end of the growing season shifts to deep bronze and chestnut hues. This is a tough plant content in sandy soils and reaching about 2 feet in height. The silvery seed tuffs are retained for most of the winter. Little bluestem combines well with a number of perennial wildlings like rudbeckia, pearly everlasting, goldenrod and species of asters.
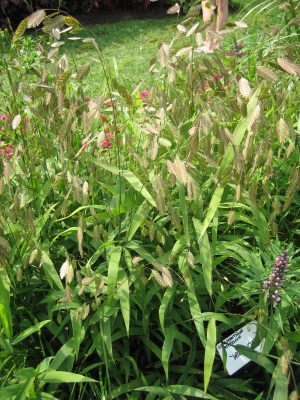
Also commonly found along roadsides, purple lovegrass (Eragrostis spectabilis) grows on sites from full sun to part shade. This is a very well-behaved grass in the Poa (bluegrass) family. It is native to eastern and central U.S. and produces those airy pink seedheads you might admire as you drive.
Northern sea oats (Chasmanthium latifolium) has very distinctive, but attractive seedheads. Native to the eastern and southern parts of the U.S., it is hardy from zone 5 to 8. Northern sea oats is a clump former with showy panicles of flowers in late summer that mature into wide, drooping seedheads. This grass likes moist but well-drained soils and is a larval plant for several species of butterflies as well as serving as a food source for several mammal and bird species.
Other native grasses worth investigating include side oats grama (Bouteloua curtipendula), big bluestem (Andropogon geradii) and prairie dropseed (Sporabolus heterolepsis). Check out both native and exotic ornamental grass offerings for their varied textures, colors, forms and flowers.
For more information on growing ornamental grasses or selection or for other gardening questions, contact the UCONN Home & Garden Education Center, toll-free, at (877) 486-6271, visit their web site at www.homegarden.cahnr.uconn.edu or contact your local Cooperative Extension Center.
I Want My Mum: A Fall Classic Through the Ages
By Abigayle Ward, UConn Department of Plant Science & Landscape Architecture Graduate Student

With the arrival of fall, one popular bloom brings the brilliant colors of forest foliage to our doorstep: With flower colors coming in purple, red, orange, yellow, and more, chrysanthemums, or more simply, mums, have been a favorite for centuries. First domesticated in China over 3,000 years ago, mum roots, seedlings, and flower pedals were used as herbal remedies in traditional Chinese medicine.
For nearly 2,000 years, mums have been the symbol of fall in Chinese culture: The Double Ninth Festival, celebrated on the ninth day of the ninth lunar month, celebrates harvest, ancestors, and the beauty of autumn, with mums taking center stage as both decorations, accessories, and a floral wine.
First introduced to Europeans in the 1600s, mums quickly became a fall favorite. By the mid-1800s, the Victorians had written extensive literature on the interpretation and meaning of the color of each bloom. While some colors have carried the same meaning for thousands of years – such as white blooms symbolizing mourning – others took on entirely different meanings. While in China, a red mum represents fortune and luck, a Victorian would interpret this as a declaration of love.
Luckily, it seems many home gardeners in the United States nowadays are more concerned with the aesthetic appeal of their blooms than the meanings, so major misunderstandings are avoided. With several thousand cultivars available, mums come in many color combinations and growth habits. The National Chrysanthemum Society of the USA recognizes 13 different flower classes, ranging from 6-inch diameter flower balls with many layers of florets to smaller, 2-inch diameter flowers with only a single layer of a few petals. Some mums bloom early, in August, while others will bloom in October.
Further, some mums are annuals regardless of USDA hardiness zone, while others are perennials in zones 5-9. While so-called “florist mums” or “pot mums” are generally grown as annuals and will not survive winter frost, “garden mums” can survive winter frost if planted early enough in the growing season. If you wish to purchase a garden mum, but the mums are unmarked, a good way to tell the difference between florist and garden mums is to check for stolons near the base of the plant. Stolons, also known as “runners”, are shoots that grow out from the base of the mother plant. A daughter plant may have roots growing from the end of a stolon. If you want to purchase a perennial mum, check around the base of the stem for stolons – they will most likely be quite short but are a good sign that the plants may overwinter successfully. Alternatively, if you want to be sure you grow a permanent mum installation that comes back year-after-year, you can start some varieties of hardy garden mums from seed in late winter prior to planting out in spring. Get any mums you want to try overwintering in the ground as soon as possible. You can plant mums next year in spring or summertime to give them plenty of sunny weather to grow hearty root systems prior to the first winter frost of 2025. Mulch around your fall planted mums to help insulate their roots from frost.
Both annual and perennial mums benefit from at least 6 hours of direct sunlight per day. In Connecticut, a sunny spot to the south of your home would be ideal. Water mums thoroughly once the topsoil is dry but try not to wet the leaves or the flowers. Water left on the leaves or flowers can make mums prone to fungal diseases, which can make them unsightly or even kill them in severe cases. Towards the end of the season, especially between October and November, consider leaving the blooms on as long as possible to allow late-season pollinators to collect nectar.
Whether planted in a permanent flower garden or kept in a pot on the porch for fall, mums are an excellent addition of rich fall colors to any home gardener’s flower collection. Consider picking some up this season at your local garden center or plan on purchasing plants or seeds next year.
If you have a question on caring for your mums or for other gardening questions, contact the UCONN Home & Garden Education Center, toll-free, at (877) 486-6271, visit their web site at www.homegarden.cahnr.uconn.edu or contact your local Cooperative Extension Center.
Coax Bulbs into Bloom for Late Winter Color
By Dawn Pettinelli, UConn Home & Garden Education Center
Autumn adorns us with vibrant leaves, whispering grasses, warm colorful mums, colorful cucurbits and sun-bleached cornstalks. Time spent cleaning up the gardens and yard now will be appreciated come spring. A favorite fall task is selecting and planting bulbs for spring color, accent and scent. When doing so, purchase a few extras to force into bloom.
The word, forcing, is rather harsh. I’d like to think of it more as coaxing or gentle persuasion. What we’re really doing is subjecting the potted bulbs to a shorter simulated winter so they will burst forth into bloom weeks earlier than if planted in our gardens.
Many species of bulbs can be forced. Hyacinths, tulips and daffodils are most popular. When visiting your local garden center to purchase bulbs, look for varieties that say ‘Good for Forcing’. Most hyacinths force well. Tulips and daffodils range greatly in size and bloom time. Usually the smaller, earlier, shorter varieties can be brought into early bloom most successfully.
Minor bulbs such as crocuses, snowdrops, scilla, Siberian squills, chionodoxa, netted iris and wood hyacinths are also great choices for forcing. As a general rule of thumb, these smaller bulbs need a minimum of 8 to 10 weeks of chilling versus the 12 to 14 weeks the larger bulbs may require.
Select pots with adequate drainage. Typically, 6-to-8-inch bulb pans or azalea pots are used. This type of pot is wider than deep. Look at the size of your bulbs first as one generally wants pots twice as deep as the height of the bulbs. Realistically any size pot could be used as long as it has adequate drainage.
Use a soilless, commercial potting media and moisten it with warm water so that it is damp but not saturated before potting up your bulbs. For a 6-inch bulb pan, plan on fitting in 3 hyacinths, 3 to 5 daffodils or 5 to 7 tulips, depending on the size of the bulb, or 10 to 12 minor bulbs. Yes they will be a bit crowded but it’s only temporary and they will give you a better show.
Fill the pot about halfway or so with the potting mix and set in the bulbs so that the minor bulbs will be slightly below the soil line but the larger bulbs have their noses sticking out of it. Give the pots a good watering but let them drain so no water is running out.
Then place them in a dark place with temperatures ranging from 33 to about 34 degrees F. Often a shed or unheated garage works well. Some folks may have a cold section of cellar, perhaps in the bulkhead. I find that placing them in an old aluminum trash can in the garden shed works well as mice can’t get in the can to nibble on them. Others have dug trenches in the garden in which the pots are placed and covered with leaves. Apartment dwellers could place the pots in a plastic bag in the refrigerator if room permits.
Pots should be checked every 2 to 3 weeks to see if watering is necessary and to check for root growth. Bulbs will be ready to move inside once white roots are evidenced through drainage holes and shoots begin to emerge from the bulbs. When these two growth signs are noticed, pots can be brought into bright, indirect light when the temperatures stay from 50 to 60 degrees F. It usually takes 3 to 4 weeks from when bulbs are brought inside until when they bloom.
At this time, they would appreciate a light fertilizer application. A typical houseplant fertilizer at rates listed on the package would suffice. Turn the pots regularly so the plants do not lean towards the light. Once you see the flower stalks form, the bulbs can be brought into warmer temperatures where their blossoms can be enjoyed. Keep in mind that the higher the temperature, the quicker blossoms will both open and fade. If possible, keep them cool or at least move the pots into cooler areas at night.
In some cases, the bulbs fail to bloom and this may be due to storing bulbs before or after purchasing at too high a temperature, not long enough chilling temperatures, lack of adequate moisture, or bringing the forced bulbs into high temperatures too quickly. Most of the time success is achieved and enjoying the sights and scents of spring flowering bulbs inside our homes in late winter is quite a reward for not a great deal of effort.
If you have questions about forcing bulbs or any other gardening questions, feel free to contact us, toll-free, at the UConn Home & Garden Education Center at (877) 486-6271, visit our website at www.homegarden.cahnr.uconn.edu
Is Early Leaf Drop an Indicator of Tree Health?
By Nick Goltz, DPM, UConn Home & Garden Education Center, Plant Diagnostic Lab
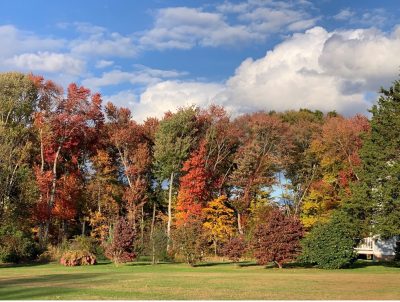
The autumnal equinox, one of two times of the year at which day and night are equal in length, just passed on Sunday the 22nd. While this point marks the astrological start of fall, many of the trees lining the roads on my drive to work (and in many of our clients’ yards) seem to want to get a head start on the season. Since late August, we’ve been getting calls from folks across Connecticut asking why the leaves on their trees are changing color and falling early. You may even be thinking, “Hey, a few of my trees are dropping their leaves early too. Is that something that can indicate how healthy they are?” In a word, maybe!
First, let me share the good news that, for most trees, premature color change and leaf drop doesn’t mean that they are in any immediate danger. Plants, much like humans and other animals, respond to stress differently depending on their environment and the kind of year they’ve been having. Just like we might see a little hair loss after a particularly stressful few months, trees may drop their leaves early as a response to stress. Identifying what is causing the stress however, is important when deciding if concern is warranted.
What type of stressors might be causing this early color change and leaf drop? For most trees, the answer is water. Connecticut and several other states in New England had a series of heavy rain events and flash flooding throughout the summer. While we’ve had hardly any rain in the land of steady habits for several weeks now, for many trees, the damage has already been done and symptoms are just appearing now. Saturated soils deprived plant roots of oxygen, damaging them and making them more susceptible to disease. Plants in especially low-lying areas, caught in floodwaters, or grown in poorly-draining clay soils likely experienced the most damage and earliest leaf drop. Some plants may have even perished outright from the damage. Besides water, excessive heat and the increased prevalence of fungal and bacterial diseases, as well as some insect pests, may have also contributed to the stress our plants are letting us know about now.
So, how can you know if the early color change or leaf drop is an issue for your favorite tree or just its way of complaining about a stressful summer? When and where the leaf change and drop is occurring can help you determine if the damage is likely a normal stress response or due to something more sinister.
Consider when the color change and leaf drop first began. In this instance, seeing some leaves begin to change in the last week of August is less concerning than seeing them change at the end of June. Plants that have their leaves change color and drop in midsummer or earlier are most likely dealing with a disease or pest issue, rather than a stress response. I recommend you get advice for these plants by contacting the UConn Home & Garden Education Center and remove them from your garden if they are unlikely to recover.
Also, consider what part(s) of the canopy was affected. Conifers such as white pine drop their leaves (we usually call them needles) in response to stress too, but you will typically see this take place on the interior of the plant – the older needles that aren’t capturing much sun anymore. Branches on deciduous trees, such as oak, that are in shady spots tend to drop their leaves early too, and this is normal.
Branches in full sun that lose their leaves very early, while others on the tree remain fine, are a bit suspicious. Mark these branches with tape or string and monitor them carefully as the plant produces its first leaves or flowers in the spring. If these marked branches do not produce leaves or flowers with the rest of the tree, get advice (again, by contacting the folks at the UConn HGEC)! The best option is usually to cut them close to the main trunk, then disinfect your pruning tools.
If you’re concerned about the health of your tree, including as a result of a potential disease or pest issue, practice good fall habits to give your trees the best foot forward next spring! Clean as much leaf litter as possible and remove it from the base of trees that dropped their leaves early. If you suspect the plant is diseased or has pests, throw away these leaves or burn them before composting. For example, many plant pathogenic fungi can survive the winter on fallen leaves and reinfect healthy plant tissue the following spring. It’s also a good idea to minimize added stress for your plants. Try not to expose them to herbicides, deicing salts, fertilizers, or other chemicals until they’re looking strong again.
If you aren’t sure how to proceed with your fall cleanup or if you’d simply like a second opinion on your favorite tree, get free horticultural consultation from the UConn Home & Garden Education Center by emailing ladybug@uconn.edu or by calling (877) 486-6271.
Time to Fertilize Your Lawn
By Dawn Pettinelli, UConn Home & Garden Education Center
While September brings with it shorter days, we still have plenty of opportunities to attend to those fall yard and garden chores. Among them is applying fertilizer to lawns. Keep in mind that for the most part, our lawns consist of cool season grasses. In a more typical year, turfgrass growth slows down during dry, hot summer weather. Up until the past few weeks, this summer had seen enough rainfall to keep lawns green and growing.
Turf plants take up nutrients as they grow and these need to be occasionally replenished. September through mid-October is a perfect time to do so as the cooler temperatures stimulate shoot and root growth and hopefully, some gentle fall rains will help the nutrients infiltrate the soil and reach the roots.
So, what kind and how much fertilizer does one need? Of course, the best way to determine that is with a soil test (www.soiltesting.cahnr.uconn.edu) but without a soil test, follow the directions on the fertilizer package. Whether one chooses a natural/organic or a synthetic fertilizer is up to the individual. A 2024 National Lawn Fertilizer Study by Axiom, found that 95% of respondents said it was important to apply fertilizers that are safe for children, pets and the environment. Somewhat ironically, despite safety concerns, 67% have used fertilizers that contain weed killers or insecticides. In most cases, applications of any kind of pesticide, whether it be an herbicide, insecticide or fungicide are not necessary at this time of year.
Most folks who tend lawns or gardens are aware that fertilizer packages come with a guaranteed analysis. These are the 3 numbers on the package, for example 5-10-10. They are always in the same order and always stand for the percent by dry weight of total nitrogen, phosphorus and potassium. Unless you are purchasing a lawn starter fertilizer, which you would use for new seedings and soddings, you will notice that maintenance lawn fertilizers sold in Connecticut have 0 as a middle number, so for instance 18- 0- 4.
This is because of phosphorus legislation passed in 2013. Many people may not be aware that phosphorus is the number one inland freshwater pollutant in the state and when it enters streams, rivers, ponds or lakes, it encourages algae growth that eventually dies and decomposes depleting the oxygen in the water and leading to fish kills. Also, it may encourage the growth of toxic cyanobacteria as well as making the waters undesirable for recreational activities. In a nutshell, the law says that phosphorus should not be applied to an established lawn unless a soil test performed in the past 2 years provides a recommendation for phosphorus.
When applying a lawn fertilizer, either the soil test recommendations or the ones on the package call for approximately 1 pound of nitrogen to be applied for every 1000 square feet of lawn. Two things to check are the size of your lawn and also, the setting on your spreader.
Ideally one would like to apply the fertilizer when the grass is dry but before a light rain. If no rain is predicted, it would be beneficial if the lawn was watered lightly so that fertilizer prills are not sticking to the blades of grass but washed into the soil.
Lawn fertilizers generally are available as either fast or slow release. The nutrients in fast release fertilizers, especially nitrogen, are generally water soluble and readily available to your lawn grasses. Many lawn fertilizers also contain slow release or water insoluble forms of nitrogen. These are typically more expensive but supply nitrogen over longer periods of time. They are less likely to burn and more slowly fertilize plants.
Whichever one you pick; it should be put down by October 15th. Weather is unpredictable after that, and plants may or may not be able to use the nutrients before colder temperatures prevail and grass growth slows.
This time of year is great for reseeding any bare spots, topdressing with compost if organic matter levels are low, using a mulching mower to incorporate leaves as they fall and for aerating if the soil is compacted. Send your lawn questions to ladybug@uconn.edu or call the UConn Home & Garden Education Center with your queries at (877) 486-6271.
High-tech Tomatoes
By Dr. Matthew Lisy, UConn Adjunct Faculty
UConn Home & Garden Education Center

Tomatoes are one of the most popular food plants in the world, and as such, have undergone massive amounts of selective breeding. Native to western South America, the tomato can now be found all over the world. Originally grown for ornamental purposes due to fear of toxicity, modern gardeners grow many different colors including red, yellow, pink, orange, and white.
Tomatoes are prone to certain diseases which led to dependence on chemicals to control either the disease or the pest that transmits it. Disease resistant varieties of tomatoes were made by crossing certain parental tomatoes that had beneficial traits. For example, if a certain tomato tasted great but was prone to some type of wilt disease, it was crossed with a tomato that was resistant to wilt. Of course, this was VERY time consuming, and many times the final product is not perfect, but as close to ideal as possible. This does make people dependent on the seed producers, but at least you get the tomatoes you desire.
People were sad that they could never get the old heirloom varieties with superior taste to grow in the presence of modern-day diseases, so science came up with another solution – grafted tomatoes. Using young plants, the grower would take and graft the top of the desired tomato onto the roots of the undesirable but disease resistant rootstock. Certainly, these types of tomatoes have an important role in agriculture, but they are not feasible/economical in many situations.
One modern scientific solution is genetic engineering. This process takes a gene, or piece of DNA that codes for a specific trait, out of one species, and places it into another. The public generally does not like this type of technology partially due to a lack of understanding of the process, but also a fear of what could happen because of it. While science continues to make new GMOs, many companies will not use them due to consumer preference. In 1994, the “Flavr Savr” tomato became the first genetically engineered food to be granted a license for human consumption by the FDA. Although flavorful throughout its long shelf life, this tomato failed to meet commercial standards due to being easily damaged during harvest and shipping. Even though this tomato failed to become the success the company had hoped for, Calgene (now owned by Monsanto) made history.
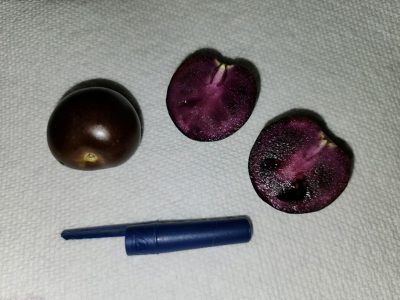
Thirty years later, the year 2024 saw another milestone in the world of GMO tomatoes. Norfolk Plant Sciences, and its seed-selling subsidiary, Norfolk Healthy Produce, produced the first tomato with completely purple skin and flesh. This is also the first time a GMO food crop has been approved for home gardeners. The color comes from the anthocyanin pigment, which is said to have heart-healthy and antioxidant benefits when consumed in the quantity found in this tomato. In addition, this pigment may increase the shelf life of the tomato. The gene for this pigment came from edible snapdragon flowers.
Many times, people fear GMOs saying that it is unnatural to have an extra “foreign” gene in an organism, and the potential risk of a “new combination of genes” created by this engineering process. The Food and Drug Administration deems this tomato as safe for human consumption as any other. In the end, each person should do their own research and make an informed decision for themselves and their family. For me, it is an exciting time to be alive as we are living through history. I felt really excited to grow the first-ever GMO tomato for home gardeners. One day, many of the tomatoes will be like this, but for right now, I will marvel at the original.
For your gardening questions, feel free to contact us, toll-free, at the UConn Home & Garden Education Center at (877) 486-6271, visit our website at www.homegarden.cahnr.uconn.edu or contact your local Cooperative Extension center.
Tips from UConn Floriculture Help Spruce Up Container Plantings
By Dawn Pettinelli, UConn Home & Garden Education Center
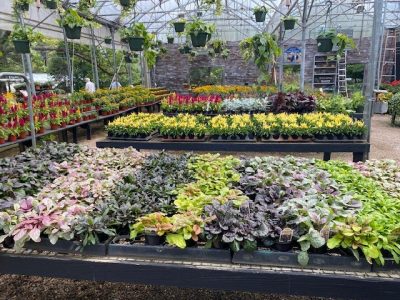
As summer wanes and the cool breezes of autumn begin to roll into Connecticut, it’s the perfect time to refresh your container plantings. Shelley Durocher-Nesta, UConn Plant Science Floriculture Grower, says this summer’s rain and high temperatures have many of our container plantings looking a little ragged but fall presents a unique opportunity to infuse your outdoor spaces with rich colors, interesting textures, and seasonal charm that lasts well into the cooler months
By the end of summer, many annuals start to fade. To maintain a lush and lively look, she suggests replacing them with plants that thrive in cooler weather. A top candidate for fall plantings, both containerized and inground are mums, obviously. They offer an explosion of color in shades of yellow, bronze, pink and reds. Asters are runner’s up, flashing their cooler shades of purples and pinks.
Ornamental cabbages and kale are leafy plants bringing texture and interest to plantings, often with their lacy ruffled edges. Hues range from deep purple to violet and from white to green, some being two-toned.
Recently, pansies and violas have been showing up as fall bloomers. These delicate flowers add a pop of color and laugh off light frosts. Pansies, with their cheerful ‘faces’ are particularly popular and come in a wide range of colors. Ornamental peppers in shades of yellow, purple red and orange are also available often in 4-inch pots
Depending on your color scheme and container size, two other great fall accompaniments are heuchera (coral bells) with their stunning foliage in a myriad of colors, and sedums that can be used either for their unique fleshy foliage or pollinator-friendly blooms.
Don’t forget ornamental grasses for their attractive seedheads and whispering foliage. If pinched for room, a few stalks of dried grasses or wheat can give your containers a rustic, harvest-time feel.
Before purchasing new plants, access the plants presently in your containers. Groom, deadhead and cut back leggy annuals like petunias and verbena. If you have summer plants that are still thriving, you can repurpose them by combining them with fall plants in the same container for a mixed-season look. However, often one finds that their summer layout doesn’t work as well with new plants. Don’t hesitate to replace staid offerings. Durocher-Nesta, agrees saying that switching out her summer planters that are getting a little tired by the end of August is a joy.
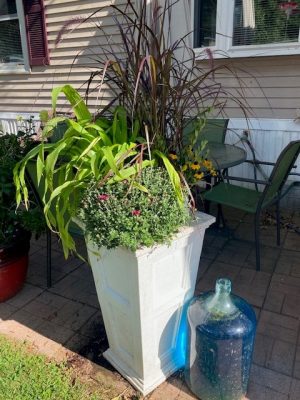
Refresh the soil in containers before planting new fall selections. Summer plants have depleted the nutrients, so replacing the top few inches with fresh potting mix can get fall plants off to a better start. If your container is large and you can’t replace all the soil, mix in some compost or at least a slow-release fertilizer, as directed on the package, to rejuvenate it,
Consider elevating some containers on stands or steps to create varying heights. Grouping containers of different sizes together on your porch or patio can also add depth and visual interest.
One of the joys of fall container gardening is the chance to play with a different color palette. While summer is about bright, vibrant colors, fall offers a more subdued, warm earthy palette. Think deep purples, burnt oranges, and rich reds, balanced with greens and whites.
As the weather cools, plants will need less water but check regularly. Container plants can dry out quickly especially on sunny fall days. Stick a finger in and add water when the top inch of potting media feels dry.
Regularly deadhead spent flowers and remove any yellowing leaves to keep your containers looking tidy and to encourage continued blooming. As frost becomes more likely, be prepared to cover sensitive plants or bring containers indoors on particularly cold nights.
In addition to the plants, fall-themed accents can enhance the seasonal appeal of your containers. Consider adding small pumpkins, gourds, or decorative squash to the mix. For a touch of whimsy, add seasonal decorations like mini scarecrows, wooden sunflowers or decorative berries.
Sprucing up your container plantings for fall in Connecticut can bring a fresh, seasonal look to your outdoor spaces. With the right plant choices, thoughtful arrangement, and a few seasonal accents, your containers can remain a focal point of beauty and interest well into the cooler months. Durocher-Nesta shares thoughts about her favorite fall flower: “Bright and fresh mums bring a smile to my face during a time of year when falling leaves and shorter days mean winter is coming. They’re one last Hoorah! for the growing season.”
If you have questions on container plantings or on any other home or garden topic, contact the UCONN Home & Garden Education Center, toll-free, at (877) 486-6271, visit their web site at www.homegarden.cahnr.uconn.edu or contact your local Cooperative Extension Center.
Fall is a Fabulous Time to Plant!
By Heather Zidack, UConn Home & Garden Education Center
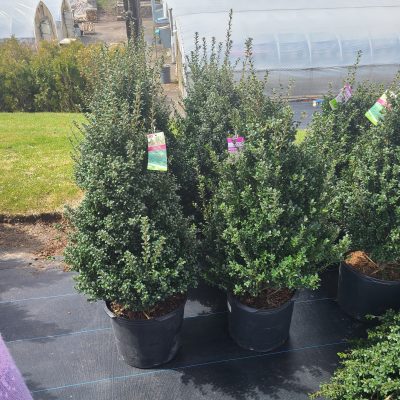
There’s no doubt that spring planting is exciting. The instant gratification that comes with putting in our new gardens and seeing flowers and greenery right away is unmatched. Late season planting is a different animal altogether. There’s a slower pace, less pressure for perfection, and a promise of beauty next season – leaving us the chance to take up other projects in the spring.
Many gardeners will start planting hardy bulbs this fall, but you can do so much more! Planting trees, shrubs, and perennials in the late summer/early fall provides enough time for plants to get established without the heat and drought stresses of summer. New plants installed in the fall have enough time to develop healthy roots and settle in before winter. Allow at least 6 weeks (about 1 and a half months) before the first hard frost to ensure strong establishment. It’s less stressful for plants, but also easier for gardeners to plant, water, and support our gardens when the weather is a bit cooler.
Your fall planted perennials, trees and shrubs will also flower “on time” next spring. Whether you've noticed it or not, flowering plants that we buy during the growing season are sometimes manipulated to bloom when you see them on the shelf. And while most plants will settle into their natural flowering cycle after their first year, planting in the fall ensures that you are starting the season with a bed that will bloom as nature intended.
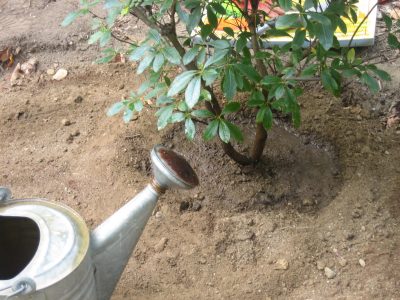
Keep a keen eye out for garden centers that may be trying to sell down their stock, so they don’t have to keep it during the winter. Plants may look a little more weathered, and past their prime. But don’t fret! If you shop smart, you can find some great plants for fantastic prices.
Shop for plants that have a nice form and strong root ball. Avoid plants that have apparent injury to trunks or branches. Old insect feeding damage, off colored leaves, or some drought damage may be recoverable. Remember that perennials will be cut back before their next flush, and deciduous shrubs will drop leaves and need pruning regardless of what they may look like right now. Never buy a plant that seems to have issues that you cannot identify, regardless of the bargain. If there are plants that you want that are unavailable, leave space for them to be planted next season.
The lower stress environmental conditions also make it a suitable time to transplant or divide plants that bloom in the spring or summer. When digging plants for transplanting, make sure to dig wide and deep to get as much of the root ball as possible. Division is a common practice with perennials and is as simple as driving a shovel through the center of the plant and digging out half of it to put somewhere else. Larger plants can be divided multiple times.
While it may seem like a promising idea to help push your plants along with some robust growth, fertilizing is not recommended in the fall. Pushing tender growth too close to chilly weather can leave the plant vulnerable to environmental damage, loss of shoots, and possibly even loss of flowers next season. Maintain them with adequate watering and supportive care. Provide good sanitation by removing and disposing of any questionable leaves that fall in your space, especially those from newly installed plants.
Planting in the fall and supporting your fall garden will help you lay a foundation for a successful spring.
If you have questions on fall gardening or on other gardening topics, feel free to contact us, toll-free, at the UConn Home & Garden Education Center at (877) 486-6271, visit our website at www.homegarden.cahnr.uconn.edu or contact your local Cooperative Extension center.
End of Season Strawberry Renovation
By Dawn Pettinelli, UConn Home & Garden Education Center

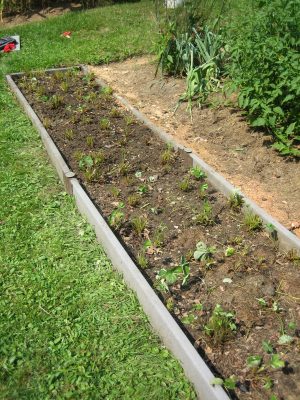
So, you decided to grow some strawberries this year. You carefully prepared the bed and have enjoyed your first crop. Now you are wondering what to do to keep your strawberry bed healthy and productive. In part, the care after harvest depends on whether you are growing June bearing or day neutral (everbearing) varieties and what kind of row systems you have them planted in.
June bearing strawberries are most commonly grown in what is known as the matted row system. Mother plants are set 18 to 24 inches apart in 3 to 4 1/2 foot rows and runners are allowed to root anywhere within the row. This system is usually the easiest to maintain. Typically, at the end of the third growing season both plant quality and fruit quantity start to decrease and the whole bed is dug up and replanted with new disease-free strawberry plants. Try to incorporate this into your garden rotation plan to reduce disease problems.
June bearers can also be grown in single rows composed of different aged plants with the original plants set about a foot apart. A second row is started with first year runners and set 18 inches from the initial planting. Use only the first or second daughter plants produced along the runners because they are the most vigorous and productive. The rest are usually discarded.
The next year a third row is made again using the first one or two daughter plants and once more surplus runners and plants are removed. After the original mother plants have produced fruit for about 3 years, they are generally replaced with new, disease-free stock and the cycle continues. This way one always has a row or two of strawberries in production. Ideally the row with the new strawberry plants should be located on a section of the garden where strawberries haven’t been grown for 3 to 5 years. This isn’t always possible in small yards, which is why it is important to purchase certified virus free stock.
After year two when June bearing strawberries have finished producing their crop, it is time to renovate. According to Evan Lentz, UConn Fruit Specialist and Assistant Extension Educator, renovating your June-bearing strawberries is one of the best ways to maximize your annual production, reduce disease instance, and maintain an orderly planting. Proper renovation ensures that you set yourself up for success in the following year and allows you to extend the life and productivity of this semi-perennial crop. This is doubly important for individuals producing fruit in an organic or no-spray system.
This can be done sometime in July through August. Lentz suggests starting by either mowing or clipping with hand trimmers all the foliage about 2 inches or so above the crowns. Next, go through the bed removing all weeds, and weak and extra strawberry plants and dead or dying leaves. Thin to space plants at least 10 to 12 inches apart and cultivate around these remaining plants.
Now is the time to fertilize your strawberries whether beds are renovated or not. Lentz recommends working in about 3 to 4 pounds of 10-10-10 or its organic equivalent per 100 square feet. Lightly scratch the fertilizer into the soil. Brush or rinse any fertilizer off leaves at the salts will injure them.
Day neutrals, such as ‘Tristar’, ‘Seascape’ and ‘Mara des Bois’ produce a fairly decent size crop in June and continue forming occasional berries until frost. Unlike June bearers which develop fruit buds in late summer and early fall, the ever bearers have the ability to form fruit buds throughout the summer. An advantage to growing day neutrals is you will still get strawberries even if a late spring frost kills their initial fruit buds.
In general, day neutrals are grown for 2 or 3 years and then a new batch of strawberries is planted. The day neutrals produce far fewer runners than the June bearers. The new daughter plants should all be removed although they can be transplanted into another area if desired. Plants are usually set one foot apart in single rows about 18 inches wide.
According to Lentz, all strawberries require at least an inch of water per week for vigorous growth. If dry weather sets in, plan on irrigating plants, especially those just renovated. Use a mulch of pine needles, straw or wood shavings to conserve moisture, keep weeds down and berries off the soil. Since strawberries are shallow rooted, it is important to keep weeds under control.
It does take a little time to maintain a strawberry bed but the luxury of picking your own berries for strawberry shortcake, jam or fresh eating makes it all worthwhile. If you have questions about growing strawberries or on any other home or garden topic, contact the UCONN Home & Garden Education Center, toll-free, at (877) 486-6271, visit their web site at www.homegarden.cahnr.uconn.edu or contact your local Cooperative Extension Center.
Spectacular Sedums: Your New Favorite Groundcover
By Abigayle Ward, UConn Dept. of Plant Science & LA Graduate Student
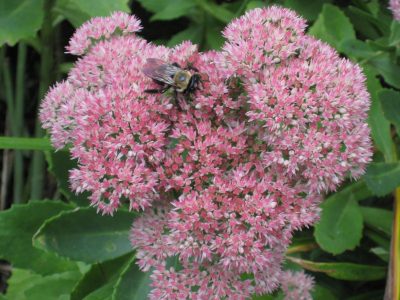
With varieties native to North America, tolerance to frigid temperatures down to minus 40 degrees F, and nearly 500 species described, sedums subvert all expectations of a succulent. Also known as stonecrop, sedums have been a garden favorite since the 17th century, and it’s easy to see why. Their visual interest and tolerance of harsh growing conditions make them well-suited as groundcover for the landscaper with an artistic eye.
You can purchase either tall or creeping varieties of sedums. Also known as ‘clumping’ varieties, tall sedum varieties can grow up to 3 feet tall although many will only grow to 1 foot tall or less. Tall, top-heavy varieties can be prone to falling or flopping over especially if overfertilized or if they receive too much water. They are well-behaved perennials that are clump formers, and thus can be useful as focal points in garden beds. Alternatively, creeping varieties of sedums grow from 2 to about 6 inches tall. These creeping varieties will spread a few feet in every direction but do so very slowly. If you wish to fill your bed with sedums, you can stick vegetative cuttings throughout the area you want them to grow. Keep moderately moist until well rooted. Once they root, they will usually fill out your bed fairly rapidly.
With such a large variety of leaf shapes and sizes, interesting bed textures can also be created with sedums. Some varieties have large, broad, spoon-shaped leaves while others have many short, pointed leaves surrounding the main stem. You may wish to combine different textures together into one bed to make a wild, visually striking design, or try taking advantage of certain textures for specific locations in the bed. For example, you could choose short creeping varieties with small leaves for bed edges, and select slightly taller creeping varieties with larger, broader leaves to build up to the bed’s focal point.
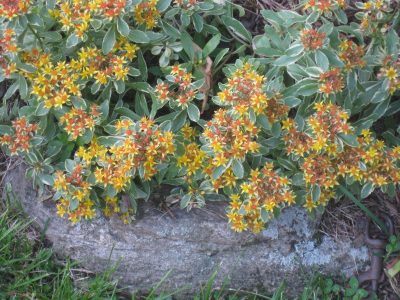
Sedums come in a smattering of delightful color combinations from electric green to deep purple, red to teal; there’s a color of sedum for any design. Many keep their color year-round, and produce delightful bunches of tiny, colorful flowers between summer and fall, depending on the species or cultivar. The magenta, yellow, and lilac-colored petals attract pollinators in great numbers, especially between August and September here in Connecticut. The flowers persist until wintertime, when they dry out and turn brown as the plant goes dormant. While you may choose to remove the flowers before the winter snowfall, you can also leave them on the plant to add some color contrast in your garden as the brown stalks are surrounded with snow. Additionally, leaving the dried flowers on the plants may help creeping varieties spread, as the tiny seeds fall to the ground and germinate come springtime.
While generally very tolerant of adverse growth conditions, sedums do best in sunny spots with well-drained soil. Luckily for those of us in Connecticut, many of our soils are well-drained. Sedums require little nutrients to thrive and typically are happy with just a spring application of an all-purpose garden fertilizer. Since sedums go dormant in the winter, no fertilizer should be applied later in the year. While other groundcover plants may need water in a drought, sedums, like most succulents, can go extended periods of time without supplemental irrigation. To top it off, their foliage is bitter, and thus unlikely to be damaged by grazing wildlife. The limited maintenance requirements of sedums make them attractive candidates for both lawn alternatives and green roofs alike.
While resistant to consumption by mammalian wildlife, the juicy sedum leaves are sometimes appealing to hungry aphids and thrips. To manage aphids and other sap-sucking insects, you can simply spray sedums with water to knock off the pests – just be mindful of overwatering, as the sedums may rot. Alternatively, you can try attracting ladybugs and other aphid predators to your sedums by planting marigolds, dill and other predator attracting plants nearby. The ladybugs will partake in the pollen and snack on the sapsuckers. Avoid spraying insecticides, as they will kill both pests and beneficial insects, including pollinators. Leaving leaf litter in your garden over the winter gives a place for ladybugs to hibernate. Come spring, newly hatched ladybug larvae will be on the hunt for a meal, ready to vigilantly defend your sedums from attacking aphids.
Your next groundcover selection can be both visually appealing and low maintenance. If you’re looking to update your groundcover, consider picking up some sedums at your local garden center in the spring or summer.
If you have questions on growing sedums or on other gardening topics, feel free to contact us, toll-free, at the UConn Home & Garden Education Center at (877) 486-6271, visit our website at www.homegarden.cahnr.uconn.edu or contact your local Cooperative Extension center.
Flock to Phlox
By Dawn Pettinelli, UConn Home & Garden Education Center
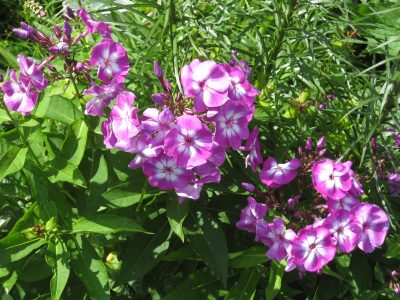
About now, many of our perennial gardens are looking a bit lackluster. Early summer bloomers have fizzled out and autumn charmers like asters and mums have yet to pop. Garden phlox (P. paniculata) to the rescue!
Annual and perennial phlox comprised about 70 different species, many of which are native to North America. Their habitats range from woodlands to meadow and their growth habits from low and mounded to tall and upright. All have clusters of tubular flowers that are exceptionally attractive to hummingbirds and hummingbird moths along with bees and butterflies.
There are an outstanding number of garden worthy cultivars. My favorite is ‘David’, a white, powdery mildew resistant variety that grows to about 4 feet with loads of slightly fragrant blooms. I have it planted in my white garden and this sturdy, upright plant has come back year after year with virtually no problems.
UConn Plant Science & Landscape Architecture professor, Dr. Jessica Lubell-Brand noted phlox ‘Jeana’, the 2024 Perennial Plant Association’s Perennial Plant of the Year, is treasured for its long blooming period as well as its butterfly luring abilities. Plants can reach up to 5 feet in height and its more loose and wild appearance works well in cottage gardens featuring attractive pink flowers and decent powdery mildew resistance.
Sometimes shorter varieties are a better fit and if that is the case, for your beds look to ‘Coral Crème Drop’, which according to Dr. Lubell are part of the Candy Store series. She raves about their vibrant coral blossoms with their August feel. Another top garden candidate in her book is ‘Glamour Girl’, also with hot coral blooms as well as good resistance to powdery mildew.
A number of garden phlox sport distinctive eyes. ‘Bright Eyes’, as the name implies is a delicate pale pink with a bright crimson eye while ‘Laura’ is a mildew resistant, royal purple variety with a white eye. Both grow to about 3 feet in height.
Many gardeners find these phlox indispensable for August into September color in the perennial garden. They are tough, colorful, vigorous plants that are hardy and relatively long-lived. They make excellent background plants for narrow borders and can bridge the gap between varied sized perennial plantings. Garden phlox come in a wide range of hot and cool colors ranging from white and light pinks, to purples, reds, oranges and magenta.
For healthy, vigorous plants, they should be grown in full sun to part shade. Phlox enjoy a moderately fertile soil with a pH in the 6s. While established plants are fairly drought tolerant, larger and more numerous flower heads are produced when adequate moisture is supplied. They grow at a moderate rate so division every 3 to 4 years is usually sufficient.
Both to encourage sizable blooms as well as to reduce the incidence of phlox’s number one nemesis, powdery mildew, Dr. Lubell recommends reducing the number of stalks early in the growing season to 6 to 8 per plant. This provides better air circulation to plants.
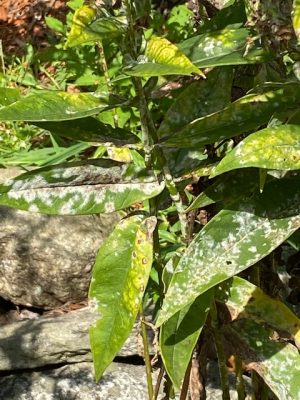
Powdery mildew is a fungus disease that is more widespread during humid, wet summers. It typically does not kill plants, but they look awful with their leaves covered with what looks like white powder. Two options for dealing with this disease according to Dr. Lubell, are to select resistant phlox cultivars or to pre-emptively spray with a least toxic substance like potassium bicarbonate or your fungicide of choice. As stems die or get killed by frost, be sure to remove them from the garden and put in the trash, not the compost pile.
Insects are not usually a problem but during dry, hot summers, spider mites may attack plants. Usually, a strong blast from the hose will knock them off. This may need to be repeated several times if dry weather persists.
A key gardening practice when growing phlox is dead-heading, or removal of spent flower heads. Garden phlox produce a lot of seeds and if left to fall to the ground and germinate, vigorous plants will most likely produce blooms in that undesirable, muted magenta color. Often these seedlings crowd out the more desirable cultivars that were intentionally purchased.
Not only are garden phlox cultivars pretty spectacular on their own but Dr. Lubell says they pair nicely with a variety of other perennials including lilies, yarrow, ballon flower, daylilies, bee balm as well as numerous annuals.
If you have questions on garden phlox or on any other gardening questions, feel free to contact us, toll-free, at the UConn Home & Garden Education Center at (877) 486-6271, visit our website at www.homegarden.cahnr.uconn.edu
Current Landscape and Garden Conundrums
By Pamm Cooper, UConn Home & Garden Education Center
Here at the UConn Home & Garden Education Center we have been getting questions about three pests that have been particularly widespread in the state. Whether in the landscape or the garden, there is always something going on, good or bad, and keeping up with pests or perceived pests can be challenging. The following reflect the most common inquiries we have had over the past few weeks.
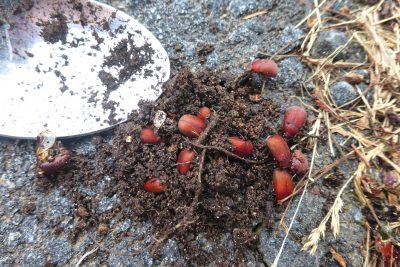
Asiatic garden beetles have been a real problem for many gardeners this year. An imported pest, these small, rusty brown, night-feeding pests can devastate plants overnight then disappear during the day. Leaving you to wonder what is eating your plants. Favorite plants include dahlias, basil, zinnias, sunflowers, peppers, eggplants and goldenrods. They will feed on over 100 herbaceous and woody plants. In the evening a plant can look great, and the next day it can be a skeleton of stems and leaf veins.
Check damaged plants at night with a flashlight; if they are active, you should find them. During the day, dig an inch or so into the mulch and soil under damaged plants. These beetles will hide there during the day. Some people have reported finding as many as 300 in a night, then 50 each night, until they find few or none. New beetles will fly in daily, so be vigilant. Feeding by adults should end by the end of August. Crush them or put them in a container of soapy water until they succumb. Foliage can also be treated with an appropriate insect control product that will kill them after they feed on the leaves, Read and follow label instructions carefully for any control products if they are needed.
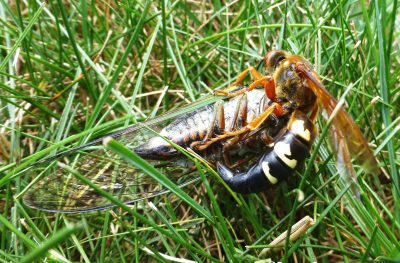
Cicada killers are rather mild-mannered (like Clark Kent) burrowing wasps that can cause alarm when they appear in the summer months. These wasps are very large, and females have the potential to sting, but have no aggressive nest-guarding instincts as do most other wasps or bees. What they have is size, and so become easily feared, especially when they burrow along sidewalks or other sandy areas close to pool, gardens and houses.
Female cicada killers burrow a rather rectangular tunnel deep into soft soils into which they will eventually drag a cicada they have paralyzed. They lay one egg on the victim and the larva will feed on the carcass and pupate over the winter. They may be a chronic problem in areas of sandy soils and can be discouraged by disrupting tunneling activity by drenching areas where they are actively tunneling with water. They do not like moist soils, so this may be the only control method needed. Digging may disrupt root systems of plants if the tunnels are made at the base of plants, and watering the plants affected in this way may settle the soil back around the roots. Use of any pesticide would only be effective if wasps are still going in and out of tunnels and should be used only if necessary.
The final pest we will cover are aphids. These piercing-sucking feeding type insects are small, but they can occur, seemingly overnight, in large numbers on plants. Aphids prefer newer growth like upper stems but are not so fussy later in the year when they feed on flower buds, old and new leaves and flower stems. Later in the summer some species may cover older stems right down to the ground. This is especially a problem on common and swamp milkweeds. Aphid feeding can cause wilting of plant parts above where heavy feeding occurs. Leaves can be mottled, then become distorted before turning brown.

Control of aphids relies on paying attention every day. Aphid females can give birth to live young during the summer, often fifty or more new aphids appear from each female per day. This is why control seems effective, then before you can say “my plants look really good now”, there are scads of aphids back where they were before. Aphids in high numbers, especially on sturdy stems, can be crushed by hand, sprayed with a suffocating type product like insecticidal soap, or knocked off by a strong jet of water. Keep in mind that the reproductive females have wings, and they will take flight at the first sign of trouble. That is why they can persist on plants.
If aphids are a serious issue on plants, with no control measures apparently working, consider removing the affected plants and adding plants you know they so far have shunned as a food source. It may be a painful but necessary step.
Be alert to what is happening in your own backyard, for it is certain something, good or bad, is going on. The sooner you discover the bad, the better. Know that: “On every stem, on every leaf, and at the root of everything that grew, was a professional specialist in the shape of grub, caterpillar, aphis, or other expert, whose business it was to devour that particular part. “~Oliver Wendell Holmes
For questions about garden pests or any other gardening questions, feel free to contact us, toll-free, at the UConn Home & Garden Education Center at (877) 486-6271, visit our website at www.homegarden.cahnr.uconn.edu
What’s Eating My Brassicas?
By Dawn Pettinelli, UConn Home & Garden Education Center
Broccoli, cabbage, kale and other members of the brassica family are tasty and so good for you but its not just us who find them delectable. Brassicas have a number of insect pests but probably several caterpillar species do the most damage.
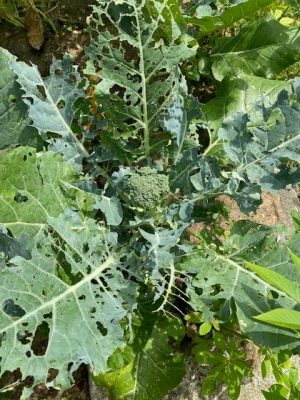
When checking plants, look for holes in the leaves. A few irregular holes may soon become a skeletonized leaf with only the midrib left if control measures are not taken. These caterpillars can quickly devour plants.
Two of the most common pests are the imported cabbageworm and the cross striped cabbage worm. According to Dr. Shuresh Ghimire, UConn Vegetable Extension Specialist, imported cabbageworm is the offspring of the cabbage butterfly, a butterfly with white wings with 1-2 round black spots on the forewing. Eggs, laid singly on leaves, are light green or yellow and slightly elongated. Three to 5 days later, the eggs hatch. The lime green velvety caterpillars feed for 2 to 3 weeks.
Dr. Ghimire noted that imported cabbage worm feeding and resting mostly occur on the underside of leaves. Be sure to check both the tops and bottoms of leaves. Damage includes round or ragged feeding holes and deposits of wet, green or brownish frass. There can be 4 to 5 generations each year. This pest overwinters as a pupae close to host plants.
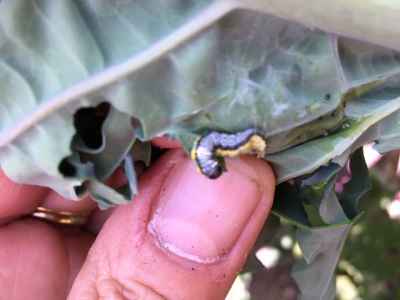
The cross-striped cabbageworm used to be a southern pest but no longer. The adult moths fly at night so are seldom seen. Cross-striped cabbageworms are most abundant on late-season plantings says Dr. Ghimire. Unlike the other major caterpillar pests, such as cabbageworm and diamondback moth, the cross-striped cabbageworm lays its eggs in batches (3-25) rather than singly, so caterpillars emerge in clusters. Egg batches are yellow, flattened, overlapping like fish scales, and attached to the lower leaf surfaces.
The distinctive-looking caterpillars are bluish gray on top with green on their undersides, a yellow stripe on each side with a row of numerous black bands across the back. Clusters of these caterpillars are voracious feeders and plants infested with cross-striped cabbageworm larvae are often completely skeletonized, while adjacent plants may be left undamaged. There are 2 or 3 generations per year.
Two other caterpillar pests of brassicas are the diamondback moth and the cabbage looper. Eggs of these two pests are laid singly and most years they do not cause considerable damage to home vegetable gardens.
There are several strategies to control these caterpillars on broccoli plants. If you have just a few plants, check them every few days looking at both sides of the leaves and either squish any caterpillars you find or drop them into a can of soapy water.
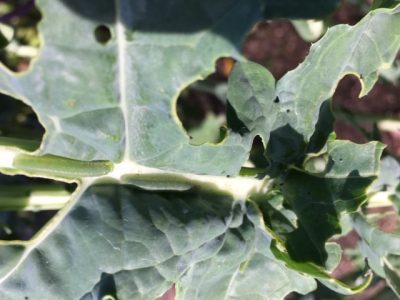
Rotating your plantings and interplanting with flowers may confuse pests. Dr. Ghimire suggests planting flowers to attract natural enemies, like Braconid wasps, which lay eggs on soft-bodied caterpillars such as cabbage worms. The larvae feed inside the live caterpillars, weakening or killing them. Some plants known to attract pest predators include dill, parsley, hyssop and mints.
Since brassicas do not need to be pollinated, they can be covered with netting or row covers to exclude insect pests. The holes in the netting should be one-quarter inch. Hoops can be used to hold up the barrier or one can make wooden or PVC cages for a custom fit. Be sure to tuck or pin the edges to the soil so pests can’t crawl under.
Finally, if the caterpillar infestation becomes too extensive, Dr. Ghimire recommends Bacillus thuringiensis (Bt), which is a biological control for Lepidoptera species of moths and butterflies. Bt is a bacterium that when sprayed on your plants and consumed by the caterpillar enters the insect’s gut and causes it to die. While it is effective for controlling these pests, it is harmless to humans and other animal species. Limit its use to brassicas to prevent it from affecting desirable caterpillars.
As with all garden pests, the key to healthy plants is regular monitoring and putting control measures into practice when pests are first noticed. For questions on brassica pests or any other gardening questions, feel free to contact us, toll-free, at the UConn Home & Garden Education Center at (877) 486-6271, visit our website at www.homegarden.cahnr.uconn.edu
Coleus: A Victorian Dream
By Abigayle Ward, UConn Dept. of Plant Science & LA Graduate Student

Seen anywhere from great-grandma’s ornamental garden to your neighbor’s hanging basket, coleus are the colorful, velvet-textured leafy cousins of oregano and deadnettle. Native to tropical regions of Africa, Asia, and Oceania, it is thought that Dutch botanists introduced the fascinating foliage to Victorian England in the mid 1800s. Coleus were readily welcomed into homes as parlor plants and into ornamental gardens. They were especially coveted in so-called “carpet bedding” gardens, where bedding plants of equal height are used to create colorful designs such that they appear like “carpets” when viewed from above. Other than coleus, the Victorians enjoyed using colorful flowers such as petunias, asters, and zinnias as carpet bedding. Carpet bedding is still popular today; we have at least one such garden featuring coleus and petunias on display at the University of Connecticut Storrs campus. To design a carpet bedding garden, try combining simple shapes and lines to make symmetric, harmonious patterns. Use green vegetation, such as sedums, or even a green cultivar of coleus, to contrast with the bright colors of flowers and the mulch or soil below.
For those of us lacking yard space comparable to an English country house, a large carpet bed garden might be impractical. Instead, coleus can be planted alongside other flowers for a splash of color in a flower bed against a house or fence. Coleus are the perfect complement to the colorful clapboard siding characteristic of houses in New England – draw attention to the colors of both by putting reds with greens and yellows with purples. If coleus are planted directly into the ground, slugs are one major pest to look out for. In particularly wet summers, such as those in recent years, slug populations can devour entire coleus plants.
To avoid slugs, container gardens may be a wise option. Sitting above the ground and out of field soil, slugs will have more difficulty reaching the tasty, tender leaves. For those with outdoor space around their apartments, container gardens are also generally a renter-friendly option. Coleus grow well in window boxes and other small containers, and they can help add a warm, friendly atmosphere to the entrance of any home. Most cultivars of coleus available on the market today are tolerant of both shaded and sunny conditions, and thus are well-suited to either covered or open porches. In containers, the main pests to look for are thrips, mealybugs, and aphids. These three pests can cause discoloration in leaves, such as silvery/gold, yellow, or black spots. Outside where predators of these pests thrive, infestations should not progress to the point of killing entire plants, but affected foliage may be unsightly. While systemic insecticides may help keep these types of pests off coleus, they also can kill bees. Avoid applying systemic insecticides to coleus outdoors whenever possible. Try moderately forceful sprays with water instead, insecticidal soap or other least toxic controls.
The Victorians also kept coleus as houseplants, and so can you. In plant hardiness zones 6a-7b in Connecticut, coleus are very tender annuals. They will grow prolifically when temperatures are above 60°F, and will experience cold injury if temperatures fall below 50°F. When temperatures plunge below 40-50°F and overnight frost becomes a possibility, leaves will start to blacken and die. At the end of the growing season before the first frost, consider planting stem cuttings in pots and bringing them indoors for colorful, year-round foliage. Coleus as houseplants will do best in north-facing or east-facing windows. Avoid placing them in windows where they experience too much direct sunlight for too long during the day. If windows are unavailable, coleus also grow decently under grow lights.
No matter where they are grown, the main attraction of coleus is its brilliant foliage. Plants grown in containers may benefit from occasional nitrogen additions to keep them growing all season long. Like others in the mint family, coleus grow flower spikes when stressed or when the plant is near the end of its life cycle. While the flowers on the spikes are not very attractive from an aesthetic standpoint, bees, hummingbirds, and other pollinators flock to them. While the spikes can be pruned off if they appear too early in the growing season to encourage further vegetative growth, consider leaving the late-season spikes on, so that bees can collect nectar to sustain their hives over the winter.
While the selection of coleus cultivars were limited in Victorian England, decades of horticultural breeding efforts have given us access to over 1,000 varieties today, including sun-tolerant cultivars, with endless colors, leaf shapes, sizes, and growth habits. Consider adding this versatile Victorian dream to your home garden for splashes of colorful summer foliage.
If you have questions on coleus or on other gardening topics, feel free to contact us, toll-free, at the UConn Home & Garden Education Center at (877) 486-6271, visit our website at www.homegarden.cahnr.uconn.edu or contact your local Cooperative Extension center.
Great Hostabilities
By Dawn Pettinelli, UConn Home & Garden Education Center
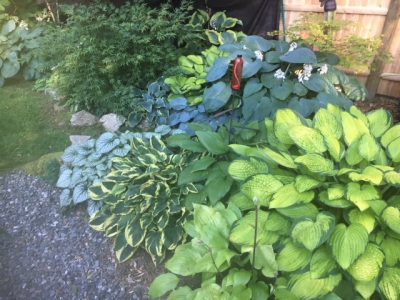
So versatile and ubiquitous are hostas that I have yet to visit a garden that doesn’t have at least one whether left by a previous gardener or selected by the present one. Hostas certainly are workhorses of the garden renowned for their shade tolerance, hardiness and longevity. Plus, few plants have such large variations in size, leaf color and texture. According to the American Hosta Society, there are more than 3000 varieties of hostas covering 45 species including stalwarts of our gardens such as Hosta sieboldiana, H. elegans and H. montana. Now the hostas you purchase are likely complex crosses of multiple species.
Hostas are native to Asia and came to the United States through Europe during the 1800s. Many of us older gardeners referred to them as plantain lilies because their broad leaves resemble a common weed (or herb depending on one’s perspective), plantain. The young leaves are reputedly edible. In fact, the Japanese are said to serve them raw, boiled or fried in tempura. Their palatability probably explains why gardeners around here half-jokingly refer to them as ‘deer candy’.
Hostas are divided by size into 5 groups. Minis are less than 6 inches tall, small range from 7 to 10 inches, medium from 11 to 18, large from 19 to 28, and giants are greater than 28 inches. ‘Gentle Giant’ and ‘Empress Wu’ are close to 4 feet tall with a spread of over 5 feet, if you’re looking for a plant to make a voluminous impression. Keep in mind a plant’s full size when incorporating them into your planting beds.
A notable feature of many hosta cultivars is leaf variegation. On marginally variegated plants the edges of the leaves are light in color, maybe cream or yellow. Medio variegated types have light colored centers with darker edges. There are also 5 groupings for color: green, blue and gold, plus the 2 types of variegation. The gold and variegated cultivars do best in part sun to dappled shade. Placed in a heavily shaded area, they can lose some of their color as only the green parts of the leaves photosynthesize.

Leaf shapes range from thin and smooth to ridged and heart shaped. Sizes range from 2 inches on ‘Mouse Ears’ to over a foot and a half on giant hostas.
While grown mainly for their attractive foliage, hostas do bloom once a year. Most have delicate-looking, tubular flowers in various shades of purple that are attractive to hummingbirds and bees. Fragrant white ‘Royal Standard’ grace part of a patio in my white garden. Their heady scent is especially pronounced on warm summer evenings. ‘Royal Wedding’ is another fragrant, white-flowering variety. Cut down the flower stalks once flowering is finished.
Growing hostas is a breeze. These tough, dependable plants put on their best show when not located in full sun as the large leaves can scorch during periods of hot, sunny weather. That being said, there are some cultivars like ‘Guacamole’ and ‘Paradigm’ which can tolerate full sun with adequate moisture.
An ideal location would be a semi- to fully shaded site in a soil with a pH in the mid 6s and moderate fertility. Hostas are often planted under trees as once established they can tolerate dry shade to some extent. Remember that a tree’s roots will be competing with the hostas and your plants would benefit from extra water and fertilizer.
The two major pests of hostas are slugs and deer. Ragged holes and tears on leaves are a sign of slugs. These soft-bodied creatures feed at night or on cloudy days but slime trails on the leaves or ground may be visible in the morning. Controls include hand-picking, beer traps, diatomaceous earth and slug baits.
Deer can make short work of a bed of hostas. Three strategies are to use repellents, fence them out or plant your hostas amid less appetizing plants. Some have reported less deer damage to blue leaved hostas, maybe because they have a waxy coating. If you’re growing hostas in deer country, you’ll have to figure out what works best for you.
At the end of the season, frost will flatten the leaves of your hostas. Cut them back and remove the foliage from your garden to give both slugs and diseases less places to overwinter. Plants typically need division every few years if they are outgrowing their allotted spaces. Dig up and divide in the spring when the new stems start to poke through the soil but before the leaves unfurl.
If you have questions about growing hostas or any other gardening questions, feel free to contact us, toll-free, at the UConn Home & Garden Education Center at (877) 486-6271, visit our website at www.homegarden.cahnr.uconn.edu
Calling the Cut – Tree Triage, Care, and Removal
By Nick Goltz, DPM, UConn Plant Diagnostic Lab/UConn Home & Garden Education Center
The forecast is looking good for a perfect 4th of July weekend. Most folks will take advantage of the weather ahead to plan that perfect grilling menu for when their friends and family visit. This is a much-needed respite from the severe weather that passed through over the past few weeks. Severe winds and torrential rains hammered Connecticut and most of the rest of the Northeast after a recent heat wave. With the weather for the week ahead of us is looking much better than the weather of the week behind us, now is the perfect time to assess our trees and determine if any action needs to be taken before the next storm comes!

I’ll start and end this column with the advice that a professional arborist should be called-in if you are ever unsure of your tree’s health, or if you need support regarding safe management and potential removal. In Connecticut, one of the best resources for finding a licensed, local arborist as well as additional resources regarding tree care and maintenance can be found on the Connecticut Tree Protective Association website, ctpa.org. That said, tree triage can start with you at home. There are many things one can be on the lookout for to determine if a tree need professional attention, and potentially in what order the work should be done.
I’m sure you’ve heard this phrase used to describe real estate, but with trees too, location is everything. The first thing to consider when performing your tree triage is the location of the tree. Regardless of tree age, size, species, or health, the trees that should always merit our immediate attention are those in locations where they could pose a danger to life or property if a limb were to fall off or if the tree were to topple altogether. Trees within striking distance of homes, power lines, and important structures like chicken coops and pet houses should always be the first inspected before the storm comes and after it passes. If a tree knocks down a power line or hits a home, call for help. Never attempt to work around a live cable (one that still carries electricity) without the proper training and equipment.
The second thing to consider as you perform your tree triage is health of the tree. Trees weakened by disease or age are more likely to succumb to strong winds or topple after standing water weakens or kills roots. Inspect your trees for symptoms of stress and disease such as branches that no longer produce leaves. Depending on the species of tree, a few may not be much cause for concern, but if there are several branches on a tree that no longer produce new leaves or needles, the tree is likely not in great health. Another symptom of stress or disease is a visible canker, or large wound, on the trunk of the tree. Trees in good health will typically grow new tissue over an injury sustained by pruning, animal feeding, or a previous storm. Cankers that appear to be getting larger over a few years, rather than smaller, are often a cause for concern.
There are even some obvious signs of disease such as conk or shelf mushrooms that grow directly from the wood of the tree. While these organisms are important for nutrient cycling in natural ecosystems, they often indicate that a tree is approaching the end of its life. The shelf mushroom is only the sexual structure of the fungus, there to produce spores and reach new trees. While removing the mushroom may slow the spread of the fungus to other trees nearby, the majority of the “body” of the fungus will still exist within the tree, weakening it by breaking down woody tissue over time.
Trees, like other living things, do not live indefinitely and become more vulnerable to illness and stress as they age. Just like people need to take care of themselves to ensure they live a long, healthy life, so too must trees be cared for over the course of their lives to ensure they have the best possible outcome. Regular fertilization and pruning are essential to not only ensure that a tree grows robustly, but also that it does not become lopsided or heavy on one side as it ages. Even healthy trees can fall if they are never pruned and have a poor center of gravity! Pruning should be performed frequently to promote new growth, discourage lopsidedness, and allow increased airflow through the canopy. This will have the double benefit of decreasing disease pressure that often accompanies high canopy humidity and prolonged leaf wetness. Though it depends on the species of tree, most here in New England perform best when pruned while they are dormant in winter. Remember to not remove more than 1/3 of the tree’s branches when pruning, if possible!
There are other factors to consider when determining if a tree should come down that we don’t have space to discuss at length here, such as the species of tree, whether the tree is used for other purposes (such as part of a living fence), whether the tree has historic or personal significance, or what removal of the tree may mean for other plants nearby that depend on its shade. And, of course, nobody should consider tree removal without considering cost and time. If cost is a concern, remember to do your triage and prioritize the management of trees that could potentially damage your home, property, or power lines if they were to fall. These considerations and others are worth discussing with an arborist as they survey your property!
For questions about planting and pruning trees or other gardening topics, feel free to contact us, toll-free, at the UConn Home & Garden Education Center at (877) 486-6271, visit our website at www.homegarden.cahnr.uconn.edu or contact your local Cooperative Extension Center.
Remove Those Suckers!
By Dawn Pettinelli, UConn Home & Garden Education Center
About now the gardens should be planted, and it is time to turn our attention to the trees and shrubs on the property. New growth is almost fully expanded and pruning of spring flowering shrubs can commence. When out there with your pruners, keep an eye peeled for suckers and water sprouts, both on the plants you’re pruning and other woody plants in the yard.
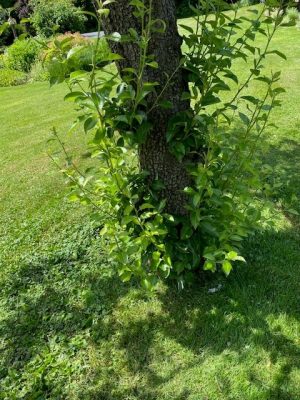
Many trees and shrubs produce vigorous, upright stems that can reach several feet high over the growing season if left unchecked. Those arising from the root system are known as suckers while those growths arising from the crown portion of a tree or large shrub are referred to as water sprouts. At the very least, they are unattractive and take away from the architectural framework of a plant. More importantly they use water, nutrients and energy that could be put to better use if not taken from the rest of the plant. If not removed, they can crowd out the main plant resulting in reduced vigor.
Some woody plants naturally tend to produce suckers and sometimes these young vigorous shoots are needed to rejuvenate older plants as aging stems are removed. An example would be shrubs like red-twigged dogwoods or lilacs. Suckers arising from trees such as apples, crabapples, honey locust, lindens and others, however, should be removed.
In the case of grafted plants, like hybrid tea roses or apples, the desired variety is grafted on to a rootstock that might be more cold hardy, have dwarfing genes or other desired features. Occasionally the rootstock revolts, so to speak, and sends up its own shoots. In the case of roses, one might notice a stem with red flowers when the plant was purchased as a named cultivar with different colored flowers.
Suckers and water sprouts often occur because plants are in some way stressed or due to damage to their root system. Plants can be under stress for a number of reasons. Some common reasons would be insect or disease problems, drought, too high of a water table, compacted soil and/or difficult growing conditions.
Planting too deep will also stress a plant and could cause suckers to develop. Whenever planting woody plants sink them so that the level of soil in the pot they are grown in is level with the soil they are planted in.
Another reason for suckers or water sprouts is that plants are pruned incorrectly or too drastically. Seldom is it advisable to remove more than one-third of the plant at one time. Also, avoid topping ornamental or woodland trees.
Ideally suckers and water sprouts should be removed as soon as they are produced. Often, they can just be rubbed or twisted off in spring as their stem is just starting to expand. Once they reach pencil-size in thickness, cut with clean, sharp pruners. Do your best to remove them flush to a limb or as close to the tree’s trunk or root system as you can. Don’t leave stubs as these will likely have buds at their base and just regrow.
Speaking of suckers, there are often questions when growing tomatoes about what to do with the sprouts popping up where the leaf attaches to the main stem. Typically suckers just form on indeterminate tomato varieties, which are those that continue to grow, bloom and set fruit as long as growing conditions allow. If all suckers are left on the plant, it becomes quite unruly and hard to stake. Also, fruit will be plentiful but usually smaller.
Usually, the suckers below the first fruiting cluster are removed so the development of those tomatoes won’t be slowed. Then it is up to individual gardeners to decide whether to leave suckers or not and how many to leave. Often a few are left to increase and extend the harvest. Tomatoes in our area are prone to many leaf diseases, especially during humid and wet seasons. As the bottom leaves yellow and die, it is beneficial to let some of the suckers on top grow so plants can produce more foliage to yield food for the plant and to shade the developing fruit. Some experimentation might be necessary keeping in mind that it is better to remove too little than too much.
For questions about pruning suckers and water sprouts or on other gardening topics, feel free to contact us, toll-free, at the UConn Home & Garden Education Center at (877) 486-6271, visit our website at www.homegarden.cahnr.uconn.edu or contact your local Cooperative Extension Center.
Firefly Petunias Light Up the Night
By Dr. Matthew Lisy, UConn Adjunct Faculty
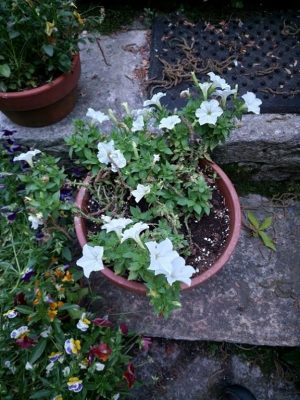
The world of genetics has really had a tremendous impact on our lives. There is a lot of talk about GMOs, or genetically modified organisms, in the news. Labels even alert us to the presence of these crops in our foods. I wanted to share a new plant called the Firefly Petunia. It was not fireflies, but mushrooms that gave this plant its ability to glow. This is known as bioluminescence in the world of biology.
Through feats of genetic engineering, a gene is taken from one organism and placed into another. This is where people become worried. Humans, however, have been doing this for hundreds of years. The best looking or most productive organisms were bred together for the next generation. This is called selective breeding, and it essentially concentrates beneficial versions of genes in the offspring.
Now what is determined to be the most beautiful is truly in the eye of the beholder. Some people, for example, selected for white flowers in a normally purple flowered species, Echinacea purpurea. Some have even taken things a step farther and crossed different species of plants to obtain new colors of flowers. In nature, separate species have evolved isolation mechanisms to maintain their identity. When our plant breeders force a cross of the species boundary, much of the time it was done with closely related species of plants within the same genus. A great example of this is the crossing of Echinacea purpurea, the purple cone flower, with Echinacea paradoxa, the yellow cone flower. This was done to obtain hybrid offspring that have red or orange flowers. These were back crossed with the parent varieties, so they have the same growth habit and form, but with new colored flowers.

This hybridizing never really ruffled many feathers though, as the plants were very closely related anyway. More modern GMOs, like our Firefly Petunias, are obtained not through “natural” pollination processes, but through genetic manipulation. Scientists literally take one or more genes from one species and place them in another. These species are not closely related, so it may become an ethical conundrum. Here, one may ask if we should take a gene from a mushroom and place it into a plant. A similar circumstance was seen over twenty years ago in the aquarium industry, where genes from corals and jellyfish were placed into tropical fish to make them fluorescent Glofish.
On the question of ethics, I cannot tell you what to think, or what is right or wrong. We each will need to answer that question for ourselves. It does remind me of a quote from Jurassic Park, where Dr. Ian Malcolm states “…your scientists were so preoccupied with whether or not they could that they didn’t stop to think if they should.” The real question is where do we go from here. For the fish, it was species after species of Glofish, and for me, the novelty started wearing off. After all, how many species will be made fluorescent before it just gets boring? Now for our plants, will we have roads lined with glowing trees to eliminate the need for streetlights? Will we have glowing houseplants that function like night lights? Ultimately, it will be up to you, the consumer.
For me, this is just cool science. We ship and plant petunias all over the world. Are these glowing petunias going to cause any harm? Probably not, as none of the other ones have. When I go outside at night to take the dog out and see the bioluminescent petunias, it puts a smile on my face. It reminds me of the fact that we, as humans, are capable of many things. I can’t help but ponder if this will inspire a sense of awe and wonderment in our children. Maybe some may even study genetics because of these petunias. What if one of them ends up finding a cure for a debilitating human disease, all because of a glowing plant? And while some may say that this daydream of mine is just science fiction, need I remind you that so were glowing plants a few years ago?
For your gardening questions, feel free to contact us, toll-free, at the UConn Home & Garden Education Center at (877) 486-6271, visit our website at www.ladybug.uconn.edu or contact your local Cooperative Extension center.
Seen any Sawflies?
By Dawn Pettinelli, UConn Home & Garden Education Center
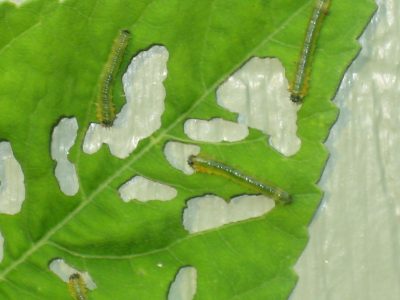
Gardeners know that amidst the promises of each new growing season come its challenges, usually in the form of weather or pests. A common insect pest this time of year are sawfly larvae, which feed on some of our favorite plants including roses, azaleas, perennial hibiscus, dogwoods, and some pines. If populations are high, significant damage can occur.
Sawfly adults are small, short-lived insects slightly resembling wasps to which they are related but their waists are generally thicker. Their ovipositor (egg-laying appendage) is somewhat saw-like in appearance, hence their common name. Eggs may be laid singly or in groups.
Larvae look like small caterpillars but there is a distinctive difference between caterpillars in the Lepidoptera family that transform into butterflies and moths, and sawfly larvae in the Hymenoptera family. Larvae in both families have numerous pairs of legs. From the head, the first three pairs are thoracic legs that correspond to an adult insects’ three pairs of legs. Count the number of fleshy leg pairs (pro-legs) after that. Caterpillars have 5 or less pairs while sawfly larvae have 6 or more.

Check your rose bushes for rose slugs, a common name for at least 2 species of sawflies whose larvae may be feeding on your plants. One is thought to be native to the U.S. and the other accidentally introduced from Europe. Both were noticed as pests in the Boston area over 100 years ago and do similar damage to rose foliage.
The small green caterpillar-like larvae that may be ½ to ¾ inch long depending on the species skeletonize the leaves and only the veins remain. They can feed for several weeks if not controlled and move to the undersides of the leaves during the day making them hard to spot. One or two generations may be present each season, again depending on species. Mature larvae will pupate in the soil below plants, where they overwinter and will reemerge the following spring.
Hibiscus sawflies feed on members of the mallow family with the most common one in this area being the large-flowering perennial hibiscus. The green larvae are small, and also can be found on the undersides of leaves where they often go undetected until large leaf areas are consumed.
There are at least 3 species of sawflies that feed on azaleas in this area. The small green larvae have tannish heads but are hard to spot at first as they feed on emerging foliage. Keep an eye out for foliar feeding at the edges of the leaves. The larvae are less than ½ inch in length and feed until late June or early July. There is only one generation per year and these larvae will also drop to the ground to pupate and overwinter in the soil below plants.
Pine sawfly species seem to prefer Mugo, Scots and red pines although they can feed on others. Some are inadvertently introduced pests like the European pine sawfly. Since they were first noticed around 1925, they have become widespread pests. The larvae may be up to an inch long and is grayish-green with mostly darker parallel stripes. Red-headed pine sawfly larvae have red heads as the name indicates but has a yellow body with black spots.
Pine sawfly adults typically lay groups of eggs so multiple larvae hatch and feed in groups. They have a very distinctive defense mechanism when disturbed. Most curiously they rear up and ‘wave’ as you wave your hand over them. This does discourage insect, avian and vertebrate predators, at least to some extent.
Dogwood sawfly females can lay more than 100 eggs on the underside of their preferred grey dogwood host plant. Larvae can consume the whole leaf as they mature leaving only the large midvein. Young larvae are translucent and yellowish but develop black spots and become covered with a white powdery coating as they mature. Their appearance can make a gardener think there are two species of insects attacking plants rather than one. When mature, the larvae seek out an overwintering location with rotted wood on the ground being preferred.
Regardless of which species of sawfly is attacking your plants, options for control include hand picking, insecticidal soap, Spinosad or other insecticides labeled for sawflies. While Bacillus thuringiensis (BT) can be used for caterpillars in the Lepidoptera family, like cabbageworms and Eastern tent caterpillars, it does not work on sawflies.
If you have questions on identification or control of sawfly larvae or any other gardening questions, feel free to contact us, toll-free, at the UConn Home & Garden Education Center at (877) 486-6271, visit our website at www.homegarden.cahnr.uconn.edu
Keep your Perennials & Annuals Looking Fabulous All Season Long!
By: Heather Zidack, UConn Home & Garden Education Center
Hanging baskets, planter boxes and perennial gardens that are bursting with color are seldom planted in spring and left untouched until autumn. Deadheading, pruning, trimming and pinching are all techniques that gardeners can use to get that perfect look all season long. While it may be intimidating, this simple task can result in a huge visual impact with only a little effort. Through a series of pruning techniques, we manipulate our perennials and annuals to give us the most beauty we can get out of them in such a short season. It is important to recognize that cutting healthy flowers or shoots can help plants in the long term – no matter how much it may pain us as gardeners to do so.
Deadheading is a widespread practice where gardeners remove flowers that have gone by. One of the first things to become aware of is the difference between a bud and a spent bloom on the plant you are working on. Many gardeners will snip petunia buds, mistaking them for spent flowers. It is important to be vigilant with these cuts. Remember that your plant's goal is to reproduce, and they use flowers to do so. By removing the flowers, you are stopping the plant from producing seed and encouraging it to restart the cycle – meaning more flowers for you!
Some gardeners will select “self-cleaning” varieties of annuals that will shed their flowers without the need to deadhead all summer long. In general, these may not produce seed; therefore can easily restart the process themselves.
The whole practice of deadheading, pinching and trimming herbaceous plants can be boiled down to redirecting the plants energy into different purposes. Where deadheading helps to clean spent flowers, pinching will remove new buds before they bloom. If you want to encourage beautiful single stem cut flowers, for example, you may decide to pinch lateral (side) flower buds to force the plant to put all its energy into a single bloom at the top. Alternatively, pinching the terminal (top) bud will give you many smaller flowers on one stem, creating a fuller appearance.
This same principle applies to pinching shoots of herbaceous plants to make them fill out more. Cutting further down a stem will again remove that terminal bud and cause the plant to focus its energy on new shoots that come from nodes further down the stem. Think of how full your basil plants flush out when you harvest fresh herbs.
Often, gardeners will notice that in mid to late summer their hanging baskets will start to look “tired.” They may notice prolific flowering on the ends that hang down, but often see that the center of the basket is not as full or may even be dying out. The first thing to check for is to make sure that you are watering them regularly. Because hanging baskets are suspended in the air and uninsulated, they will dry out faster. When you are trimming herbaceous plants for growth you can take one third of the plant volume away at a time, safely. Think about it as playing hair stylist! Cut back one third of the longest growth at the ends, and watch new growth come from the roots. It may also help your hanging baskets to remove any branches that have been shaded or dried out in the interest of “lightening” the growth that is hanging down. Again, you may lose flowers for a week or two – but the result down the road will be beautiful!
For perennial gardens, June is a wonderful time to do some pruning as well. Cutting back early flowering perennials can encourage a second flush of flowering in some species. This works exceptionally well for plants like Salvia, Nepeta, and Lavender. Deadheading throughout the season will help plants like roses and Echinacea continuously flower. And pinching can help perennial mums form their shape for the fall.
Summer is a stressful time for plants! Disease, pests, and extreme weather can all contribute to a stressful environment. Our New England summers can promote these pressures with high heat and humidity levels. During these times, pay careful attention to your watering habits and adjust, as necessary. In times of drought or excessive heat, plants will use water faster for hydration and cooling, just like we do. Being aware of this can help you know when to check for water and help you be more diligent with your watering practices. Using a balanced, water-soluble fertilizer can also promote plant health and reduce stress in perennials and annuals. This is why it is great to fertilize after pruning and deadheading. If you need more information on trimming, watering, fertilizing, or any other gardening questions, feel free to contact us, toll-free, at the UConn Home & Garden Education Center at (877) 486-6271, visit our website at www.homegarden.cahnr.uconn.edu
Luscious Lemony Herbs
By Dawn Pettinelli, UConn Home & Garden Education Center
With summer almost around the corner, many of us are setting in vegetables and herbs in hopes of preparing delectable culinary delights as these plants mature. Aromatic herbs bring amazing flavors and zing to all sorts of savory and sweet concoctions. A citrusy taste complements many dishes and some may not be aware of the wealth of lemon-flavored herbs that are widely available and also easy to grow.
Long-lived lemon balm has been a staple in my herb garden for years. The attractive heart-shaped, scalloped leaves have a delicate scent when rubbed. Lemon balm is a hardy perennial native to Europe and has long been grown for its culinary and medicinal purposes. Fresh or dried leaves can be made into a calming tea that reputedly reduces anxiety. They can also be used in savory chicken dishes, to make pesto and even in baked goods. The lemon balm I grow is the species and it produces flowers that, like many members of the mint family, are loved by bees. A dilemma ensues as to whether to leave the blossoms for the pollinators and deal with the copious seedlings that pop up the following year, or cut the plant back to encourage more leaf production. Also, once lemon balm flowers, the leaves take on an unpleasant ‘soapy’ taste. Cultivars such as ‘Compacta’ are sterile, so no seeds are produced.
As long as it is grown in a well-drained soil, lemon thyme is another long-lived herb. Growing just 4 to 6 inches tall, it’s an attractive plant in the herb garden, as an edging plant or even as a front border plant in perennial gardens. There are green, golden, and variegated leaved cultivars. Sprigs of lemon thyme can be dried but I like to use them fresh in chicken or rice dishes. The pinkish flowers usually open in July and are a big pollinator draw. Like many herbs, the best flavor is obtained collected before flowering. Plants respond well to regular trimmings.
Lemon basil is an annual in our climate but easily grown from seed. Like all basils, it does best in a sunny, fertile site with adequate moisture. Plants also do great in containers. Leaves have a fresh lemony scent and taste with some hints of mint and spices. If growing from seed, one might want to try ‘Sweet Dani’, which was a 1998 All America Selection winner. Named cultivars such as ‘Mrs. Burns’ lemon basil usually have larger leaves than the seed grown types. Pinch out flower stalks as they form for better flavor or for a longer and more abundant harvest, cut off the top third of your plants about once a month. This encourages greater branching and leaf production. Lemon basil rice is my favorite way to use fresh leaves.
A tender perennial, lemon verbena, is mostly grown as a container plant and overwintered indoors. Plants have an exceptionally strong lemon scent and if happy, grow quite vigorously. They can easily get 3 or 4 feet tall and will grow into a small tree in warmer climates. Lemon verbena is native to South America, so it enjoys full sun and hot weather. Leaves can be used in potpourris, teas, and sweets.
Another tender perennial best grown in a pot is the lemon scented geranium. There are several named cultivars with some, like ‘Mabel Gray’ and ‘Rober’s Lemon Rose’, having a stronger scent. Either buy plants or start from a friend’s cutting. The lovely scented wavy leaves can be placed in the bottom of a cake or loaf pan and then filled with batter and baked, imparting a lovely pattern and slight lemony flavor. They can be used fresh or dried for a variety of culinary uses and are also good in potpourris.
Those enjoying Asian cooking are likely already familiar with the rich flavor of lemon grass. While it is native to India and only hardy to zone 10 to 12, it is a pretty vigorous grower that would do well in either a garden bed or container. Reportedly plants may reach 2 to 3 feet in height by midsummer if kept well-watered. The leaves as well as the bulbous base of
the stem are used in recipes. A few stalks can be removed as needed for cooking. Cut back potted plants to 6 inches before overwintering in a sunny window indoors.
For more information about growing lemon scented herbs or on other gardening topics, feel free to contact us, toll-free, at the UConn Home & Garden Education Center at (877) 486-6271, visit our website at www.homegarden.cahnr.uconn.edu or contact your local Cooperative Extension Center.
Tying Climbing Roses
By Marie Woodward, UConn Home & Garden Education Center
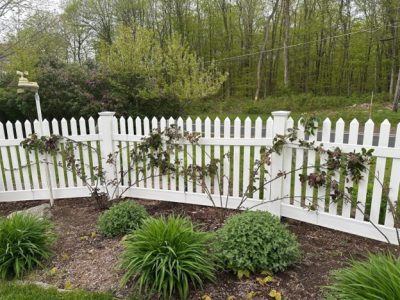
Climbing and rambling roses are a beautiful addition to any garden, adding height and depth to your outdoor space. These types of roses require proper training and tying to ensure that they grow in the desired direction, produce the most blooms and don’t become tangled or unruly. Follow this guide on how to tie climbing and rambling roses to get the best results.
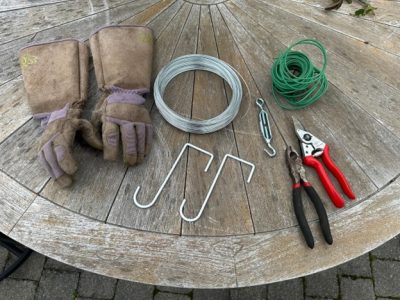
For materials, one would need some twine or soft plant ties, a sharp pair of pruning shears, sturdy long-sleeved, thorn resistant garden gloves. Also, some wire and tools to secure to a trellis, fence or other structure may be necessary.
Climbing roses have two types of canes. Main canes are stems that originate from the base of the rose giving it its structure and support. They are also referred to as leaders. Lateral canes originate from the main cane. It is the lateral canes that produce the flowers and add volume to the shrub. In general, main canes are not pruned unless they are diseased or dead.
Before you start attaching the plant to a trellis, make sure that your rose is properly pruned. Removing any dead or diseased canes will encourage healthy growth. Cut back any wild or overly long shoots to create a manageable framework for tying. Starting with this step will allow for more control as you move through the process of tying.
Supportive wiring, better known as strain wires, helps to promote flowering. They hold the main canes at a 45–90-degree angle. These angles encourage lateral canes to flush and produce more abundant flowers.
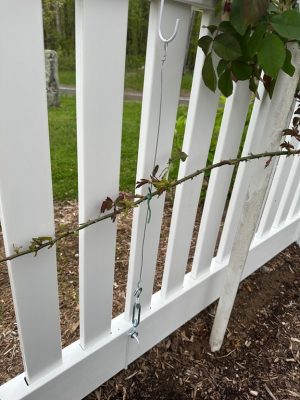
If you're training your roses against a wall or fence, attach the horizontal strain wires to the structure, spacing them about 12-18 inches apart vertically and 5 feet apart horizontally.
If you have a vinyl fence you can use vinyl safe hooks and secure the wire with a turnbuckle vertically, spacing them about two feet apart to avoid drilling holes in the vinyl material.
Using twine or soft plant ties, attach the rose canes to the support structure at regular intervals, starting about 1.5 feet from the ground. Tie them securely but not too tightly You want to allow room for the canes to grow and expand. Avoid fishing lines or other rigid materials. Using the wrong ties or tying too tightly could lead to cane injury.
As the roses push new growth, continue to tie the new main canes to the support structure. Continue to guide them in the desired direction, with those 45–90-degree angles as a guide.
Regularly check your roses and adjust the ties as needed. Ensure that they remain secure but not too tight. Prune any wild or unruly shoots and remove any dead or diseased wood to keep your roses healthy and under control.
By following these steps and regularly maintaining your climbing rose, you’ll create a stunning vertical display that adds beauty and depth to your garden. While this guide provides good tips on for starting and maintaining younger climbing roses, older roses that have been neglected may need restorative measures. If you need more information on climbing roses or any other gardening questions, feel free to contact us, toll-free, at the UConn Home & Garden Education Center at (877) 486-6271, visit our website at www.homegarden.cahnr.uconn.edu
Tips on Selecting a Flowering Tree
By Dawn Pettinelli, UConn Home & Garden Education Center
If there’s a spot for a spring flowering tree in your landscape, now is the time to look at the trees showing off their floral splendor. Do you find one or two particularly appealing. Take note of the various flower colors, tree shapes and sizes. Once you’ve selected an alluring flowering tree or two, do a bit of homework.
Many of the spring flowering trees have several cultivars and they may vary in flower color, leaf variegation, mature height and width, fall color and so on. Pick the one that fits your location. Will the plant be in sun or shade? Is it going to be positioned as a specimen tree or incorporated into a foundation planting or a border? Will it add multi-season interest with attractive foliage, fruits or seed pods, or interesting bark? What insect or disease problems is it prone to?
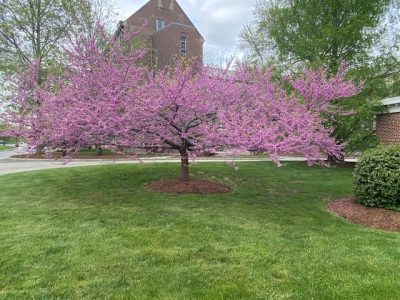
Redbuds (Cercis canadensis) are bursting with blossoms right now, at least on the Storrs campus. The extremely abundant, purple-pink peas shaped blossoms practically cover the tree. At maturity, trees reach about 20 to 30 feet tall with a slightly larger width, ending up in a roundish shape with a flatter top. After flowering, heart-shaped leaves develop while faded blossoms give birth to small, flattened legume seed pods that contrast nicely with the plant’s dark, scaly bark. Cultivars are available with white or more true pink flowers, variegated foliage, weeping forms and attractive fall foliage colors. Redbuds tolerate full to part sun and well-drained soil but avoid hot, dry locations for best establishment and flowering.
Dogwoods are a favorite of many. Their pink, white or red colored bracts dazzle especially in filtered sunlight. Dogwoods are native to the eastern and central United States where they are usually found as an understory tree. Most cultivars grow to about 30 feet in height with about the same width at maturity. The large 4-inch blossoms mature to form shiny red fruit much loved by birds. These exceptionally beautiful plants favor a cool, moist, acidic soil with adequate amounts of organic matter. Dogwoods struggle when faced with heat stress, drought, and pollutants so site carefully.
Another flowering tree that also does best in more natural settings, especially those with moist soils is our native shadbush or serviceberry (Amelancher canadensis). The name, shadbush, comes from the fact that this plant typically blooms when the shad return to fresh water to spawn, usually right about now. This plant can be grown as a single stemmed specimen or a multi-stemmed large shrub. Mature trees reach about 20 feet in height but there are shorter, more shrub-like cultivars. Shadbush sports white flowers in 2-to-3-inch racemes. Dark fruits are attractive to many animals plus both the gold autumn foliage and gray bark are very attractive.
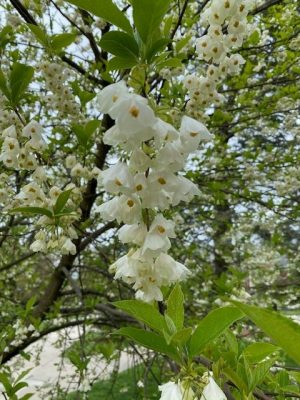
A standout for me this time of year is Carolina silverbells (Halesia carolina). A multitude of white, bell-shaped blooms adorn the branches of this 20-to-40-foot tree. Although it is native to southeast U.S., it is hardy to zone 5. Autumn color is not notable, but the tan 4-winged fruit persist well into the winter and stand out against the stark winter landscape and silvery grey bark. Be sure to check out ‘UConn Wedding Bells’, a very floriferous cultivar discovered by UConn Plant Science professor, Dr. Mark Brand. It has a smaller, rounder form with flowers larger than the species.
The star magnolia (M. stellata), as its Latin name implies, is definitely a stellar landscape plant. Gorgeous, lightly fragrant 3-to-4-inch blossoms grace the dense cluster of stems. Mature plants reach up to about 20 feet with a slightly narrower width. Plants do produce red fruits but most drop before they mature. I was delighted to find a seedling after I lost the parent tree in that late October snowstorm we had a number of years ago.
Other worthy spring flowering trees to consider include the flowering crabapples and cherries that have many exciting and lovely cultivars. A great place for information on woody plants is the UConn Plant Database (www.plantdatabase.uconn.edu). If you need more information on selecting a tree or any plant for your landscape or on other gardening topics, feel free to contact us, toll-free, at the UConn Home & Garden Education Center at (877) 486-6271, visit our website at www.homegarden.cahnr.uconn.edu or contact your local Cooperative Extension center.
Eastern Tent Caterpillars
By Pamm Cooper, UConn Home & Garden Education Center
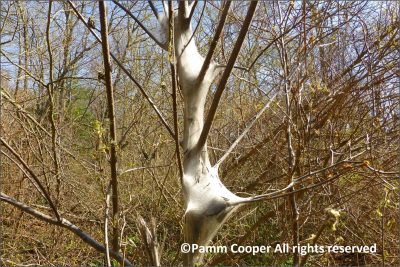
Eastern tent caterpillars, Malacosoma Americanum, are native to North America and are noticed mainly because of the silken tents they build in the forks and crotches of trees in early spring. While most tents are found on black cherries, they can also be found on other trees such as apple and crabapple. They are readily visible since tents are constructed before leaves fully expand. There is only one generation per year.
These caterpillars are hairy and dark when small, and later instars have two yellow lines along the back. A white medial stripe goes along the sides of the body, and this is flanked by two yellow lines. There are blue blotches along its side as well. Bottom hairs on the body are rusty brown. Forest tent caterpillars are also hairy, but they do not make tents, and their bodies
are blue with white dots on the back. Handling should be done with gloves on as some people may have sensitivity to the hairs.
Egg masses are black, laid on small branches of host trees the previous year, and the egg mass rings around the branch. Sometimes they are mistaken for small black knot galls. 150-300 eggs may be in each egg mass. Caterpillars typically hatch as black cherry leaves begin to expand the next spring. Caterpillars feed on leaves and buds and rest communally by day in the nests they construct from silk.
While they can almost defoliate small trees, these caterpillars usually have completed their feeding stage in time for the trees to put out new leaves by early summer. The more tents there are on small trees, though, the greater number of caterpillars there are, so damage will increase.
While protected from many predators while inside the tents, there are birds that will tear the tents apart to feed on the caterpillars inside. Both the black-billed and the yellow-billed cuckoos are known for their ability to do this, and native vireos will also seek out and rip apart the tents.
Mature caterpillars leave the host plants in early summer in search of suitable sites to pupate within a silken cocoon they will spin. Moths emerge later that year. The moths have a fluffy light brown body, and the wings have three bands with the center being narrower than the outer bands and a lighter brown in color. The center band is bordered on both sides by thin, creamy bands.
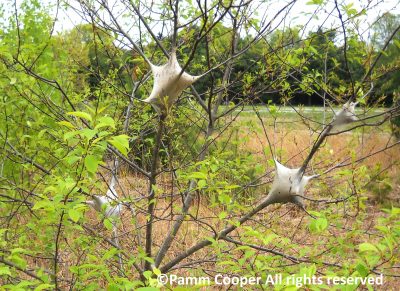
Occasionally, eastern tent caterpillars have outbreak years where large numbers of the tents can be seen on the same tree. Fresh buds may also be consumed if trees are severely defoliated. When found on residential properties, tents can be swept apart by rakes or brooms, exposing caterpillars to predators, or knocking them off the trees. If warranted, foliage can be sprayed with a biological product called Bacillis thuringiensis subspecies, Kurstaki, or BtK, which only harms caterpillars and not other insects. Caterpillars will ingest the product as they feed on the foliage.
Most healthy trees can tolerate severe defoliation from eastern tent caterpillars. If concerned, look for egg masses in the winter on trees that had been damaged the previous spring. Remove them, if possible, or crush them, or prune the branch off below where the egg mass is found. Or let them be if the trees appear to have recovered. Letting nature take its course with native insects on native trees can often benefit birds and other predators. Do not confuse them with the notorious gypsy moth caterpillars which do not make silken tents or nests of any kind.
If you have a question about tent caterpillars or other gardening topics, contact the UConn Home & Garden Education at (877) 486-6271 or www.homegarden.cahnr,uconn.edu or your local Cooperative Extension Center.
DIY – Grow Flowers for Cutting
By Dawn Pettinelli, UConn Home & Garden Education Center
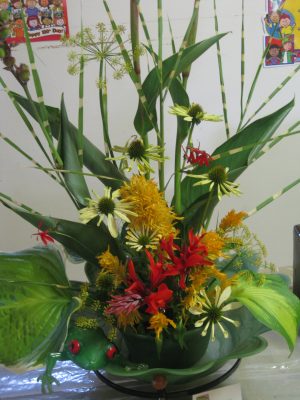
Do you just love fresh flower arrangements for the table or even that single bloom in a vase by your bedside? Wouldn’t it feel great to just stroll out your back door, clip some blossoms, bring them inside and enjoy their beauty? There’s no reason that you can’t. Even a small yard or garden space can yield blossoms for cutting.
While many of us have flowering perennials and even woody plants that make for great arrangements, perhaps a dedicated cut flower planting would provide many more stems for cutting and not create any empty spaces in our garden designs. When planning your cut flower garden, first decide where it should go. The majority of blooming plants need at least 6 to 8 hours of sun each day, a well-drained, fertile soil and adequate water during dry spells. As with all garden plants, a soil test is a great way to find out what is needed to add to soils before planting but without a soil test, follow the directions on fertilizer packages.
There’s still time to prepare new beds for cut flower plantings but another alternative would be to turn over part of the vegetable garden to cut flower production. Probably your vegetable garden already has great soil and is located in a sunny area.
The hardest part of designing a cut flower garden is selecting what plants to grow. There are so many beautiful and exciting flowers to choose from. A good suggestion is to grow easy flowers at first and then progress on to more demanding ones. Another important factor to consider is which flowers need to be purchased as transplants (or started inside earlier under lights) and which can be easily grown by sowing seeds directly in the garden. While there are a number of flowering plants that can be started by direct seeding, you’ll get faster blooms if you purchase or grow your own transplants.
Some that I typically grow each year from seed are zinnias, the tall African marigolds, cosmos, bachelor buttons, calendulas, nasturtiums, and some sunflowers. Cool weather calendulas and bachelor buttons can be sown now but wait until later in the month to plant the rest. A number of cutting annuals will self-seed if blossoms are allowed to mature and the beds are not heavily mulched. Some that spring up for me include ageratums, verbena, ammi, nigella, and wheat celosia. If you have some known self-seeders, wait a bit longer to prepare or till beds to see what sprouts.
Those best purchased as transplants include rudbeckia, snapdragons, cleome, stock, strawflowers, globe amaranth, tithonia, asters and amaranth. Some might have tiny seeds or be slower to germinate or just need a longer time until they produce flowers so starting with transplants may be a good option.
Two annual bulbs that are great for cutting are gladioli and dahlias. A few glad corms can be planted every other week until about mid-June to provide a summer full of spiky, colorful blooms. Dahlia tubers planted mid-May generally start producing blooms by late July but continue until a heavy frost.
There really are quite a few potential cut flower candidates to choose from. Feel free to select whatever colors and flower forms appeal to you most. From a designer’s viewpoint, consider what colors would be most compatible with where you want to place arrangements indoors. Also, whether making more formal arrangements or informal bouquets, flower shape plays a prominent role. Often the most attractive arrangements are filled with an assortment of shapes featuring a focal flower, spiky exclamation points, mounded shapes to hold the arrangement together, greenery for filling spaces and delicate airy springs to lighten the mood. I find mints, artemisia, and ferns make good fillers while grasses, kalimeris, boltonia, and white wood asters provide an airy touch.
The majority of annual flowers do fine at about a 9 by 9 inch spacing so you can pack them in pretty close. Do note that for copious blooms, a fertile soil and adequate water are essential. Maintenance also includes dead-heading, or removal of spent flowers to encourage the production of more blooms. Keep an eye out for plant pests as well.
Even beginning gardeners can set aside some space to grow beautiful flowers for enjoyment indoors. Try out a few this year, make notes on their performance and change up the plant rooster as they gain your approval or not.
For cultural information on growing various species of cut flowers or on other gardening topics, feel free to contact us, toll-free, at the UConn Home & Garden Education Center at (877) 486-6271, visit our website at www.homegarden.cahnr.uconn.edu or contact your local Cooperative Extension center.
Start Now For a Rosy Summer
By Dawn Pettinelli, UConn Home & Garden Education Center
The warmer days of spring will soon be upon us and it is time to think about spring rose care. Any winter protection such as mounded soil, mulch, leaves or rose cones that were placed around grafted bushes should be removed. Release any stems that were tied for winter protection. Fertilize your plants when new growth sprouts with a complete fertilizer such as 5-10-10 or and natural organic equivalent at the rate recommended by a soil test or follow the manufacturer’s instructions on the package. Generally, the fertilizer is sprinkled around the base of the plant and gently worked into the top of the soil.
Repeat blooming roses are heavy feeders and ideally should be fertilized monthly through July. Stop fertilizing at this time as later fertilizations may result in tender new growth late in the season that may not have time to harden off properly. Roses that bloom only once in June are usually only fertilized once in the spring. These include many ramblers and climbers, species roses and antique varieties. Rose books often recommend a dose of Epsom salts for each rose to supply magnesium. If you use a dolomitic limestone to modify the soil pH, however, the plants will most likely have enough magnesium available to them and additional magnesium will not improve growth or branching. Note that according to the American Rose Society, roses prefer slightly acidic soil so strive for a pH between 6.0 and 6.5..
Most types of roses benefit from a spring pruning with the exception of climbing roses which are generally pruned immediately following flowering. Roses are pruned to improve their appearance, to remove diseased or dead wood and to increase the quantity and quality of flowers.
Polyanthas, floribundas and shrub roses do not require much pruning. Any canes that are damaged or broken should be removed as well as canes that are rubbing together. If just the tip of the stem is winter killed, cut back to sound wood just above a healthy bud. Rose bushes that are really overgrown can have about one-third of their canes removed from the base.
Hybrid teas and grandifloras usually require more severe pruning. After eliminating all dead and damaged wood, cut back to 18 to 24 inches. Make your pruning cuts at a slant slightly above a bud, preferably one oriented away from the center of the plant.
If your roses are grafted, it is also important to remove any suckers arising from the rootstock.
Spring is a great time to add a few more roses to your garden. Roses are soil either bare-root or as container plants. Those sold in containers can be planted either in partial leaf or full leaf. Mail ordered bare-root stock, however, should be planted when it is still dormant. It is best to plant bare-root roses as soon as you get them. If planting has to be delayed for a day or two, remoisten the packing material and store in a cool, shady location. When it is time to plant bare-root stock, unpack the plant and place the roots in warm water for an hour or two. Cut off any dead or injured parts and plant immediately after soaking.
Roses require a minimum of 6 hours of sun each day for maximum bloom. An area with good air circulation will cut down on disease problems. Soil type is not as important as drainage. Roses will not tolerate wet feet.
When planting grafted plants, set the bud union, which is the point where a rose cultivar is grafted to the root stock, about one inch below the soil level. Roses require about one inch of water per week. If at all possible do not get the leaves wet when watering as this promotes the spread of diseases such as black spot.
Roses benefit from the application of an organic mulch like shredded bark, pine needles or cocoa bean hulls. Mulches not only keep weeds down but help conserve moisture. If you have any questions on roses or other gardening topics, contact the UConn Home & Garden Education at (877) 486-6271 or homegarden.cahnr.uconn.edu or your local Cooperative Extension Center.
It’s Spring! Time to Feed the Plants!
By Dawn Pettinelli, UConn Home & Garden Education Center
Plants need nutrients to grow and develop just like we need vitamins and minerals. They get most of their nutrients dissolved in the water they take up with their roots. When we add fertilizer to the soil around our garden plants, we are adding vital plant nutrients.
Native Connecticut soils are typically low in pH and low in nutrients. Our native plants have adapted to our native soils but most of our garden plants are not from around here. Zinnias and tomatoes are from South America, bluegrass lawns and lilacs hail from Europe and rhododendrons from Asia. Our native soils may not supply the nutrients they need so it is up to us to do so.
Of course, the best way to know which nutrients and how much to add is with a soil test. April is a very busy month at the UConn Soil Nutrient Analysis Lab (www.soiltesting.cahnr.uconn.edu) but there is still time to get your soil tested before planting.
Without soil test recommendations, always follow the directions on the fertilizer package. Applying too much can injure your plants plus excessive nitrogen and phosphorus can wind up in our waterways. Before fertilizing, calculate out the square footage of your garden or lawn. You don’t need to measure exactly; you can measure a pace and then walk down the length and across the width of your gardens to get a rough estimate of area. For odd-shaped beds or lawns, break them down into more square, oval or rectangular areas and add them up.
All fertilizers come with 3 numbers on the package denoting the percent, on a dry weight basis, of nitrogen, phosphorus and potassium. Nitogen promotes green, leafy growth, phosphorus encourages fruits and roots, and potassium is for all round health and tolerance to stresses like drought, cold and disease. So, fertilizers with a higher nitrogen number would be most appropriate for turf grasses, trees and shrubs, while ones higher in phosphorus are generally used in vegetable and flower gardens.
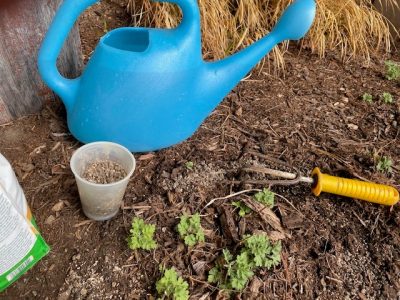
Whether you select a synthetic or natural organic fertilizer is a matter of personal choice. Both are beneficial to plants. For annual plantings, whether vegetable or flowers, it would be ideal to mix the fertilizer into the top 6 inches of soil. That’s where most of the roots will be so it makes sense that the nutrients they need are there too. Put down the fertilizer, as well as any limestone or other amendments shortly before planting. Long season annuals, like tomatoes, pumpkins and marigolds would appreciate a second application of fertilizer, referred to as side dressing, about 2 months after the first one.
As you are cleaning up your perennial beds and see the new shoots popping through the soil, add some fertilizer around plants and carefully scratch it in. Do the same for bulbs. It is harder to fertilize if the beds are heavily mulched. Not much fertilizer spread on top of mulch will make it to the plant roots. Rake or pull away the mulch, sprinkle some fertilizer directly to the soil around your plants and replace the mulch.
For trees and shrubs, fertilizer should be spread under the whole canopy as a healthy root system will grow at least as wide as the branches and perhaps even more so. Do your best to remove the mulch before fertilizing. Typically trees and shrubs are fertilized once a year in the spring. Once they have reached their mature size, often the fertilizer is cut down to half rate as woody plants can recycle many of the nutrients they need.
Lawns can be fertilized now but pay attention to the moisture level of the soil. With all the rain that we have been experiencing, the soil is pretty soggy in spots. Stay off wet soils as they will become compacted. Most lawns do well with just a spring and fall application of fertilizer. If the clippings are left down, they supply nutrients plus add organic matter to the soil. Be sure to set your spreader on the proper setting.
If you have questions about fertilizing or if you have any other gardening questions, contact the UConn Home & Garden Education at (877) 486-6271 or www.homegarden.cahnr,uconn.edu or your local Cooperative Extension Center.
Watch for Bulb Diseases
Dr. Nick Goltz, UConn Home & Garden Education Center; UConn Plant Diagnostic Lab
Gardens in New England come to life in spring thanks, in large part, to bulbs! Spring bulbs are reliable, perennial color-bringers and seem equally at home in landscapes and containers. Daffodils (Narcissus spp.), grape hyacinth (Muscari spp.), and tulips (Tulipa spp.), are just some of the bulb plants that grace our gardens this time of year, and they remind us that the blooms of summer alliums aren’t far behind. While these plants might seem effortless to grow, they are not without their fair share of disease issues!
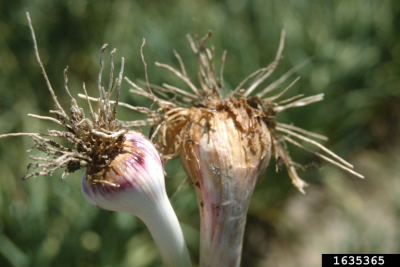
One common disease of bulbs we see here in Connecticut is Fusarium wilt and bulb rot.
Bulbs generally prefer average to loamy soil with good drainage. When planted in clay soils or following long periods of rain in early spring, however, they are susceptible to rot diseases caused by fungal pathogens such as those in the genus Fusarium. The various wilt and rot diseases caused by Fusarium species can be destructive and sometimes difficult to control. Symptoms include wilting, brown lesions at and below the soil line, vascular discoloration, bulbs that are soft or spongey, and, especially with garlic (Allium sativum) and relatives, a purple-red discoloration of bulb tissue. Plants affected by this soil-borne fungal disease do not recover, so it is wise to be proactive with management and prevention.
If your bulb plants do not emerge properly in the spring or emerge but wilt soon after, fail to flower, or display other symptoms associated with root rot diseases, pull them up and throw them away! Fusarium and similar fungal pathogens often survive the winter in the soil on diseased plant tissue from the year before, so it is important to keep your garden clean and to not compost diseased plant tissue, as most home compost bins do not reach temperatures necessary to kill pathogens. Fungi like Fusarium thrive in soggy soils, so do your best to prevent flooding and standing water where bulbs are planted. There are no fungicides that will completely control or eradicate Fusarium in a landscape, but some are helpful with preventing infection of healthy plants. Remember to always wear protective equipment and follow label rates and instructions if you choose to apply fungicides.
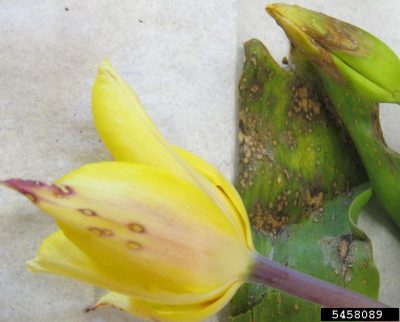
Another common fungal disease of bulbs grown here in the Northeast is Botrytis gray mold or tulip fire. Fungi in the genus Botrytis cause disease symptoms on many different host plants. Though it is often called “gray mold” when associated with other plants, for tulips, the disease is usually called “tulip fire” due to the spots it causes on leaves and flowers, often with dark borders resembling a burn.
Botrytis fungi are very common and are capable saprophytes, meaning they feed on dead or decaying tissue and contribute to nutrient cycling in the environment, but can be problematic in managed landscapes. To cause disease, Botrytis fungi must first colonize and get nutrients from dead or declining plant tissue, such as fading flower petals, over-ripened fruit. Once the fungus is established in its host plant, it becomes more aggressive and invades healthy plant parts, causing brown lesions and decay.
To prevent Botrytis gray mold and tulip fire, try to encourage good airflow around your plants. Many people plant their bulbs closely together, like eggs in a carton, but this can make bulbs susceptible to tulip fire over time when treated as perennials. Dig up your tulips when they appear crowded, and each year when dealing with a potential disease issue. Inspect bulbs before you plant them again, and discard bulbs that are not firm, discolored, or otherwise do not appear healthy. Rotate to new locations and avoid planting consecutively in the same spot if there has been a history of disease there.
If you have questions about growing bulb plants, are dealing with a plant health issue, or regarding other gardening topics, feel free to contact us, toll-free, at the UConn Home & Garden Education Center by emailing ladybug@uconn.edu. You can also call us at (877) 486-6271, visit our website at www.homegarden.cahnr.uconn.edu, or contact your local Cooperative Extension center.
Grow Vegetables – Save Money
By Dawn Pettinelli, UConn Home & Garden Education Center
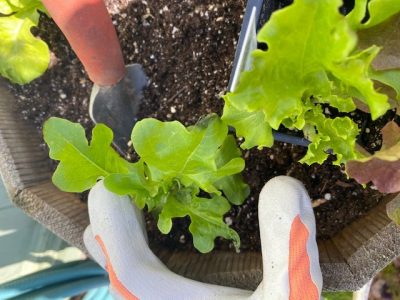
Anyone who grocery shops on a regular basis has likely noticed a higher tally at the checkout counter. The latest consumer pricing analysis from the USDA is predicting a 1.3 percent increase in food prices. While we can’t do much to lower the prices, one thing we can do is grow some of our own vegetables and herbs.
The investment in a small 100 square foot or so garden is not large, and one can be assured of healthy, high quality fresh produce. Vegetable gardeners can also control what, if any, types of pesticides are used on the plants. One source suggested that a $70 investment in plants and seeds could produce a harvest worth $600 or more over the growing season. Already having basic garden tools was probably taken for granted.
If yard space is limited or too shaded, consider renting a plot in a community garden, maybe teaming up with a friend trading garden chores for produce, or consider growing in window boxes and other containers. Even small areas provide opportunities to grow your own food. While a head of lettuce can cost $2-3 dollars at the grocery store, for that same amount one can often pick up a cell-pack of 6 lettuce plants and grow them out in a large container, or 6 square feet or so of garden bed.
Starting plants directly in the garden by direct seeding can also offer considerable savings. I picked up a package of mixed lettuce variety seeds for $3.25 that contains 500 seeds. This would enable one to grow multiple succession plantings for at least 2 or 3 years. If stored in a dark, cool, dry spot, many seeds last for at least 2 years if not longer.
Good candidates for direct sowing would be bush or pole beans, lettuce and other green leafy vegetables, radishes, peas, carrots, summer and winter squash, cucumbers, and corn. If they tickle your tastebuds, you can toss in turnips and parsnips.
Some vegetable varieties have greater cold tolerance than others so your peas, radishes, and many green leafy vegetables can usually be planted by the end of this month depending on the weather. In northern parts of Connecticut, it would be good if the soil warms and dries up a bit more.
Other types of vegetables are better to set in the garden as transplants, whether you grow them yourself or purchase them in cell-packs. The main reason for this is twofold. Certain plants, particularly in the brassica family, like cabbage, broccoli and cauliflower germinate fine in warm household temperatures but like to be grown cooler than many of us keep our houses and if left in those warm temperatures grow long and leggy instead of short and stocky. So, it’s just easier to purchase healthy, stocky plants grown in a greenhouse to set in the garden or container, although the leggy ones usually catch up.
The second reason why some plants are better purchased as transplants is because vegetables like tomatoes, peppers, eggplant and leeks have a long growing season – often 80 to 100 days from transplant until they produce harvestable crops. It makes more sense to plant 3- or 4-week-old transplants around Memorial Day so harvesting can start in late July or August. Contrarily, even though some winter squash and pumpkins might take 100 days or so to mature, I typically just direct seed them around Memorial Day because they seem to catch up with transplants, that usually experience a bit of transplant shock, pretty quickly so I don’t feel like I am gaining much by purchasing transplants and more importantly, the particular varieties I prefer are not always available as plants.
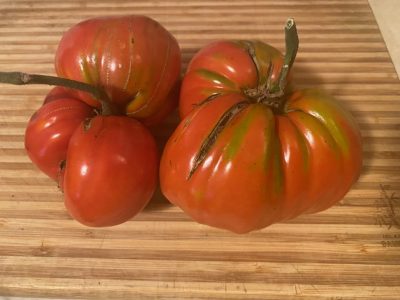
Regardless of whether you have a few containers to fill or a large garden, do some research before purchasing seeds or transplants. There are so many different cultivars available so look up variables like days to harvest, disease resistance, cold tolerance, productivity and more. Make notes on how they taste and any problems during the growing season.
When planning your edible plantings, also think about succession sowings, finding out what pest problems to be on the lookout for, last and first frost dates, mature size and space requirements, and days to harvest.
Feel free to contact the UConn Home & Garden Education Center with questions on growing vegetables, herbs and other plants or if you have any other gardening questions, contact the UConn Home & Garden Education at (877) 486-6271 or homegarden.cahnr,uconn.edu or your local Cooperative Extension Center.
Sensational Sansevieria
By Dr. Matthew Lisy, UConn Adjunct Faculty
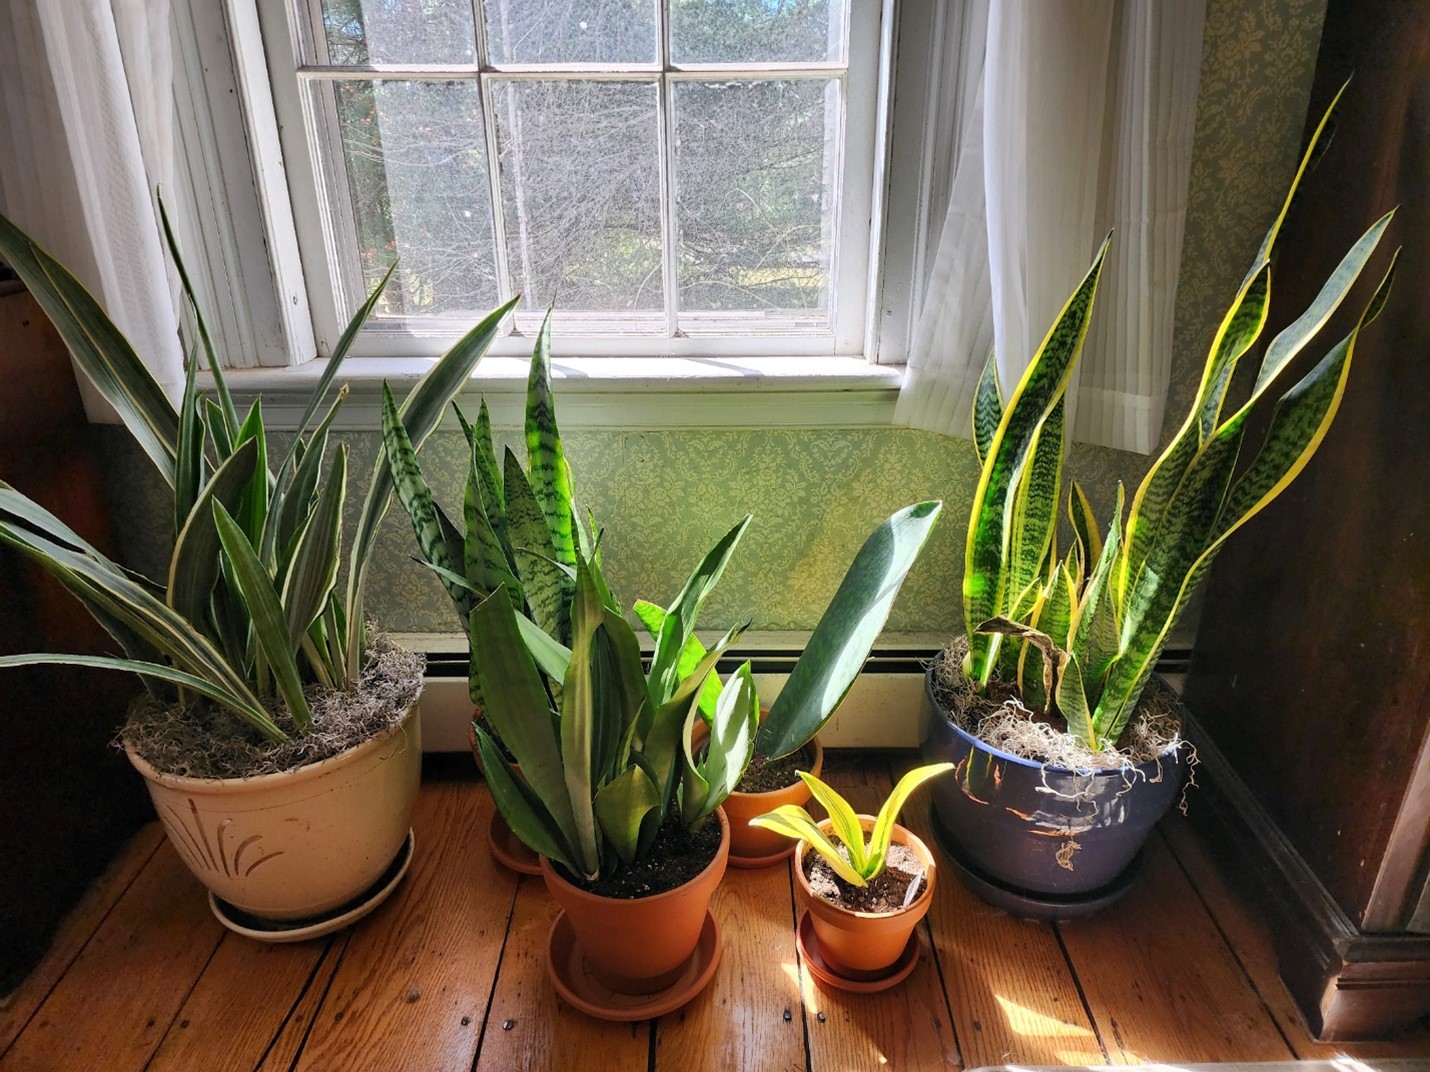
The Sansevieria group make up some of my favorite houseplants. Scientists recently placed them in the genus Dracaena, but its former scientific name seems to be also one of its common names. This plant has many common names including “snake plant” and my personal favorite “mother-in-law’s tongue”. Like many varieties of houseplant, there are some staples that have been around for decades, some newer species that have come to market, and some really interesting cultivars.
These plants have a rhizome, and the leaves grow from the base of your pot. They are very prolific when they like their environment. In fact, they tend to break the pots they are in, so I would recommend using plastic pots, which their growth will eventually deform. If you want to use a clay or ceramic pot, I suggest putting them in a slightly smaller plastic pot, then putting that in the clay pot. You can hide the gap between the two pots with Spanish moss. Being native to Africa, they cannot tolerate cold temperatures. Typical household temperatures work well, but avoid anything below 55 degrees F.
Their upright growth habit allows the grower to have many varieties in a small area.
Overwatering is the quickest way to kill any houseplant, but especially so with these. In the winter, you probably only want to water once a month, and sparingly at that. Do not let them get soggy or this otherwise hardy plant will rot. In the warmer months when the plant is actively growing, allow the soil to dry between waterings, but then water more liberally. These plants have the reputation of being a low light plant, which they certainly can handle. Sometimes people place them in the darkest corner where they hang on for a few months, but then eventually run out of stored resources and die. Remember they do need some light to photosynthesize so bright indirect light is best. The other problem I have seen is their unique, flat leaves can become covered in dust. Either dust them manually, use a blower, or take them outside in warm weather and hose them off.
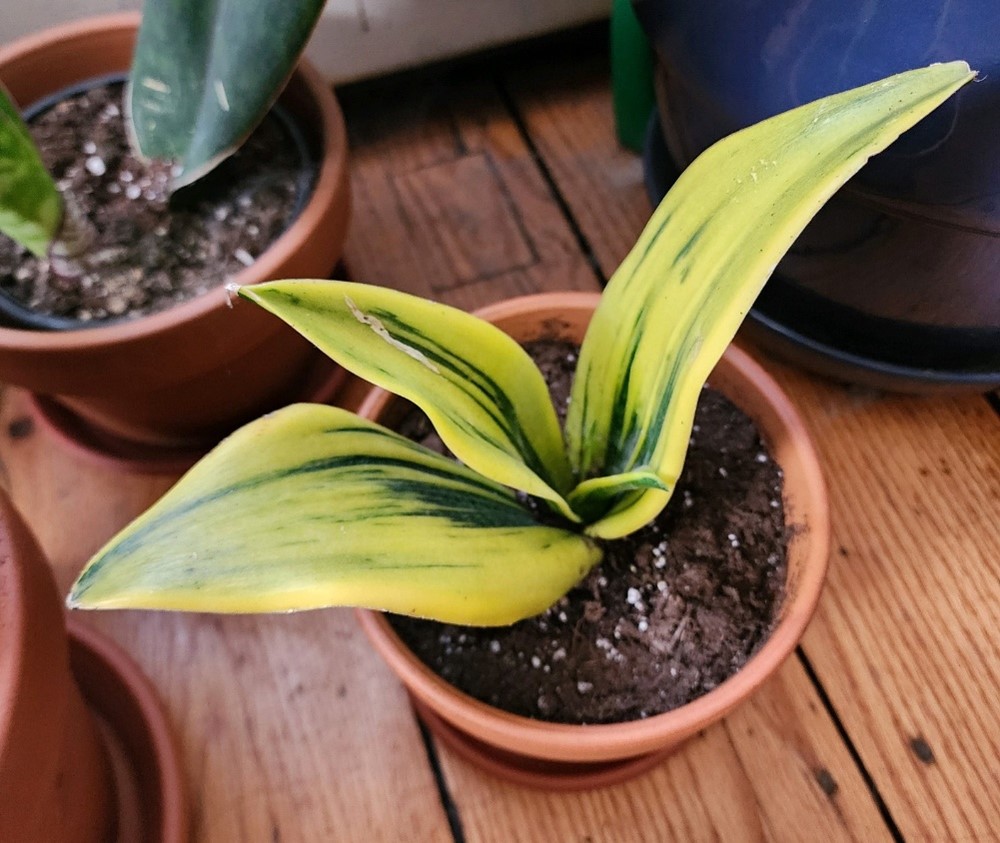
The Sansevieria group can be divided into two types, those with flat leaves and those with cylindrical leaves. Of those groups, there are species that grow tall and some that grow short.
The tall ones make great floor plants while the shorter ones do well when placed on a table. All varieties are fairly easy to propagate. My favorite way is to let the plant grow, and then divide them during repotting; this looks the best in my opinion. If you want more plants quicker, you can take leaf cuttings. Either dip in rooting hormone and replant, or you can place the cuttings in water to take root (change the water daily for best results).
Most of us are familiar with the green and dark green snake plant, as well as the gold edged version. There are some absolutely stunning new varieties on the market today that have selected for any of those colors. For example, there is one called “Moonshine,’ which has no pattern in the leaf at all, instead being pale green. Another interesting one is called ‘Hi Color,’ which has more yellow than green in the leaves. There are others that are selected for their rather dark green hue that approaches black in color. One of my new favorites is a different species called Sansevieria masoniana, commonly referred to as “whale tail”, “shark fin”, or some combination thereof. No matter which one you choose, you really cannot go wrong with these plants. They are readily available at most garden and home centers, so why not pick one up and brighten up your home?
For your gardening questions, feel free to contact us, toll-free, at the UConn Home & Garden Education Center at (877) 486-6271, visit our website at www.homegarden.cahnr.uconn.edu or contact your local Cooperative Extension center.
A Beginner’s Guide to Orchids
By Dawn Pettinelli, UConn Home & Garden Education Center
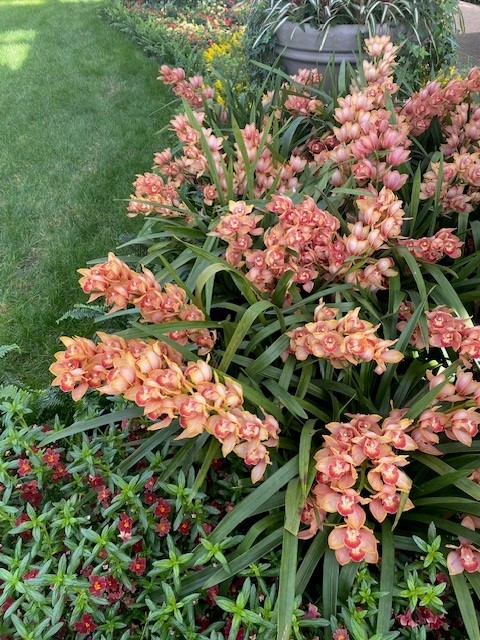
Orchids, with their captivating beauty and elegance, have long held a revered status among plant enthusiasts. If you’re tempted to dive into orchids, this is the perfect time to explore what’s available as it is orchid show season. Those looking for a day trip might want to explore Florals in Fashion at the New York Botanic Garden until April 21. Closer to home, the CT Orchid Society holds its show April 20-21 at the Bristol Senior Center.
Often associated with exotic locales and intricate care routines, these plants are surprisingly adaptable and many can thrive in the comfort of your own home. Whether you're a seasoned gardener or a novice looking to add a touch of sophistication to your indoor space, cultivating orchids can be a rewarding endeavor.
Orchids belong to one of the largest and most diverse plant families, Orchidaceae, comprised of over 25,000 species. They come in various shapes, sizes, and colors, but broadly speaking, orchids can be categorized into two main groups based on their growing habits: epiphytic and terrestrial. Epiphytic orchids grow on trees and absorb their moisture and nutrients mostly from rain. They are usually found in tropical rainforests and need a specialized bark based growing medium. Terrestrial orchids grow in soil and while the most spectacularly colored ones come from the tropics, we are fortunate to have native terrestrial orchids such as lady slippers.
Another important distinction among orchids is their growth pattern, which can be classified as sympodial or monopodial. Sympodial orchids grow horizontally sending out new shoots or pseudobulbs from a rhizome or creeping stems. Cymbidiums and dendrobiums are species that exhibit this behavior. Monopodial orchids grow vertically, with a single stem that continues to elongate as the plant matures. Paphiopedilum and vanda species have this growth habit. Understanding these distinctions can help you tailor your plant care routine to suit the needs of your orchids.
The key to growing orchids successfully in the home is understanding the conditions they need to grow and thrive. These will vary according to the species but in general orchids need bright, indirect light. East and south windows usually supply ample light, but a sheer curtain may be needed to keep orchids out of hot sun from south windows during the summer. Direct sunlight may burn their leaves. Orchids also do well under artificial light.
Next to light, temperature is critical as some like it hot and others thrive in a cooler environment. It makes the most sense to select the orchid species that would do well in the temperature range you prefer. Most species, however, are happiest if there is a 5 to 10 degrees drop in night temperatures.
Orchids also tend to do best in more humid environments and our homes are mostly on the dry side. Consider using a humidifier, using pebble filled trays under plants or even growing plants in ornamental glass cases.
Making sure your orchids are receiving the proper amount of watering can be challenging to beginners. Terrestrial orchids are usually grown in an orchid bark & enriched potting soil mix and need to be kept moist but not overly wet. Epiphytic orchids in orchid pots with bark or attached to slabs of tree ferns can be drenched or dunked and then drained. The roots should not sit in water very long. Some experimentation will be needed to determine frequency of waterings.
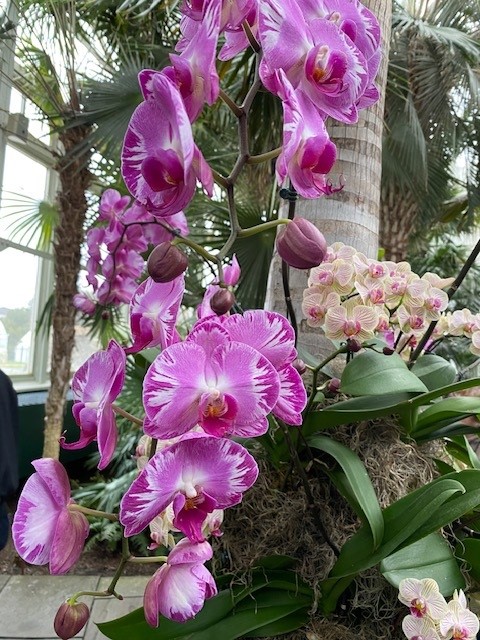
There are so many species of orchids to choose from but beginning orchid enthusiasts might start off with dendrobium species. Dendrobiums are one of the largest and most diverse orchid genera made up of numerous species as well as hybrids. They are even sold at my local grocery store. Dendrobiums are known for their brightly colored flowers that usually bloom in clusters along long stems. They are relatively easy to care for and tolerate typical household conditions.
Phalaenopsis orchids are another large genus that are tolerant of a range of household conditions so are ideal for beginners. Plants can tolerate a little less light than many other species so east windows work well. Nighttime drops in temperature are important to initiate new flower stalks.
Those with cooler growing spaces might want to try Cymbidiums. These plants are just gorgeous in bloom with their long-lasting sprays of colorful flowers. Cool temperatures and bright light are keys to healthy, floriferous plants.
Lady slipper orchids (Paphiopedilum) have distinctive pouch-shaped blooms, similar to our native lady slippers. They are terrestrial orchids preferring a very well-draining potting mix and indirect light.
If orchids are just too alluring, try to attend an orchid show or two, visit local garden centers that sell orchids and can answer your questions about them, or even check out the resources at the American Orchid Society (https://www.aos.org/) to find out information about caring for these beautiful, mysterious and addictive plants. For basic orchid information or if you have any other gardening questions, contact the UConn Home & Garden Education at (877) 486-6271 or homegarden.cahnr.uconn.edu or your local Cooperative Extension Center.
The Do’s and Don’ts of Early Spring Gardening
By Heather Zidack, UConn Home & Garden Education Center
There’s a well-known scene in the movie “Braveheart” where Mel Gibson’s character, commands his men to “Hold!” as the enemy is rushing upon them. It’s a scene that I often reference as an analogy for this part of the year. Daylight savings time has changed our clocks, the sunshine is warm, temperatures are reaching the “light jacket” level of comfortable, and we all feel spring rushing towards us with the promise of seedlings, flower buds, and fresh green leaves. With this, there are certainly plenty of chores that we can do right now to prepare, but there are others that we really should be waiting for a few weeks longer.
Houseplants may enjoy a short afternoon in the outdoor sunlight on these warmer days but resist the urge to put them outside full time until night temperatures consistently reach 50 degrees Fahrenheit. The occasional day trip is an effective way to help them transition from the protection of your indoor environment to full sun outdoors. More importantly, consider giving your houseplants a good spring cleaning. Repot or divide root bound plants, remove the winter dust from leaves with a damp rag, and trim out any dead or unsightly growth. Now they’re ready for their spring debut!
Fertilizing is another task that many gardeners feel may be a chore to check off their lists early. This is a project that should wait a little bit longer. Often, fertilizer will push new growth in your plants. Pushing them too early can leave tender leaves and buds at risk of exposure to frost and freezing temperatures, actively slowing or stunting growth that you intended to give a boost to. In the same vein, grub control, pre-emergent, and many other synthetic materials used in the landscape require specific soil temperatures to be effective and it’s still just too cold. Always read the label of any garden product to learn the best timing of any application. At this point in the year, consider doing a soil test. If you haven’t done so before, it's great to have a baseline for planting and caring for your garden. If you’ve done it a few years ago – check it again! Things change and you may be surprised by what nutrients you need (or don’t) since you last checked in.
It may still be a little early for mulch as well. Adding fresh mulch too early in the season can trap moisture and slow the soil from warming up to optimum growing temperature. Take this time to pull out grass and weeds that may have taken root in mulched beds and put this time into your hardscape. Look for tripping hazards to address like cracked, sinking, or heaved pavers. Check structures like pergolas, sheds, and even raised beds for rotting boards, warping, or structural damage. Repair as needed. Building new garden spaces is always an option! Create your punch list of projects that will need fresh paint or sealant. If the weather is going to be warm and sunny – consider power washing hardscapes and structures now.
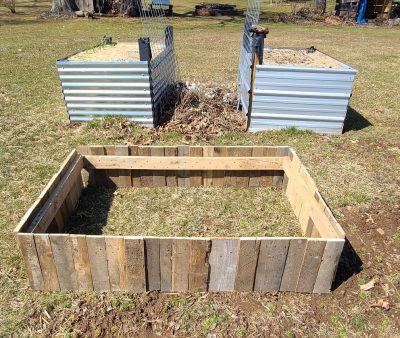
Late winter/early spring is a fantastic time for pruning trees and shrubs in the landscape. It’s ideal because there is great visibility, and the cooler temperatures prevent disease and insects from taking advantage of fresh wounds. You want to make sure you’re pruning correctly, for the species and purpose of the trees and shrubs in your landscape – so do your homework! As a rule of thumb, roses, hydrangeas, and some hardy perennials tend to appreciate a later pruning and can vary between types within the species, so stay aware of what you have on your property to ensure success!
“But when do I get to play in the dirt?” That's next! For our outside plants, think about dividing perennials. Divisions at this point in the year make the plants much easier to handle for the gardener. Moving your plants now gives them a chance to “wake up in place” this spring. You will reduce concerns with transplant shock when you move plants ahead of their spring flush and our summer heat.
Indoors, stepping your seedlings up into larger containers gives them a little more breathing room as we wait for the season to start. Only transplant seeds when they’ve started to show 2-3 sets of true leaves and keep in mind that different species can have different needs. If you excitedly started your tomatoes too early, and now notice leggy stems, try transplanting them in plastic cups and burying them all the way up to their first couple sets of true leaves. They will put out even more roots along that covered stem and be even better prepared when you put them in the garden this season!
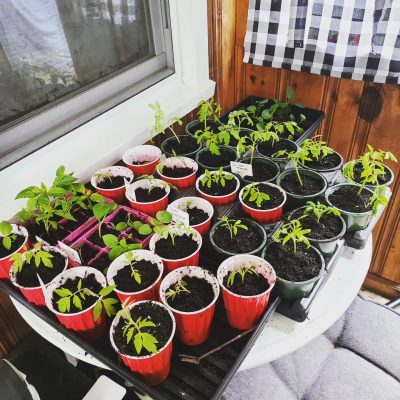
There are still plenty of projects that can be done while we wait for spring to come! If you have questions on spring garden projects or any other gardening topic, feel free to contact us, toll-free at the UConn Home & Garden Education Center at (877) 486-6247, visit our website at www.homegarden.cahnr.uconn.edu or contact your local Cooperative Extension Center.
Celebrate the Year of the Squash – 2024
Celebrate the Year of the Squash – 2024
By Dawn Pettinelli, UConn Home & Garden Education Center
Tomatoes and peppers certainly have a wide and varied selection of species, cultivars and varieties but I think squash beats them both out when it comes to sizes, shapes, colors and uses. Perhaps that’s one reason why the National Gardening Bureau decided to make 2024 the year of the squash.
Squash is an ancient crop possibly grown as long as 10,000 years ago in Central and South America. The name ‘squash’ was derived from a Narragansett word, ‘askutasquash’ meaning eaten uncooked or raw. All squash – summer squash, winter squash, pumpkins and gourds – belong to the Cucurbitaceae family. Vining types were included as one of the three sisters (corn, beans & squash) in indigenous plantings as each provides a benefit for the other two plants.
Not only are squash easy to grow but many types are a great source of vitamins, minerals and carotenes. Three main groups of squash are commonly found in home gardens. Cucurbita pepo includes zucchini, summer squash and spaghetti squash varieties all with a soft, edible shell and seeds. These do not store well and are typically consumed within a few days of picking.
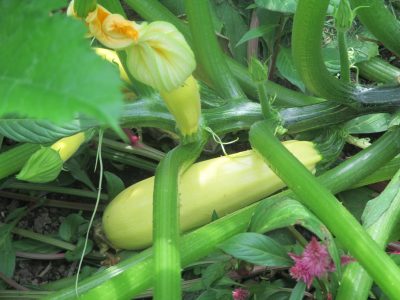
C. maxima is a large group with pumpkins and easily recognized winter squashes like buttercup, Hubbard, and turban varieties. Mature fruits have tough skins that would be peeled, their seeds are hard but could be enjoyed roasted, and they can store for months.
C. moschata includes butternut, a favorite of many, as well as futsu and a tetsukabuto hybrid. A great feature of this species is that they are resistant to squash vine borer, a pesky moth that lays eggs at the base of plants. Larvae that hatch from the eggs burrow into stems usually to the demise of the plant. I’ve been excited about growing ‘Autumn Frost’ as it has that classic butternut taste, but fruits are only 5 to 6 inches wide and high making it perfect for small families or stuffing.
While you can purchase transplants of both summer and winter squash at many places selling seedlings come spring, there are so many fine, exciting varieties to choose from, I suggest starting with seeds. All varieties of squashes are warm season plants so wait until the soil temperature warms up to at least 65 F. Usually this is around Memorial Day but some years, it might be a week or so earlier. Seeds are planted one-half to 1 inch deep.
Like most vegetables, squash prefer a sunny site, well-drained soil fortified with organic matter, a soil pH in the mid 6s and adequate amounts of water during the growing season.
Depending on how large your garden is you may want to plant squash in rows or in hills. A hill is just a planting of 3 to 5 seeds. It does not need to be mounded. Many gardeners prefer the hill approach as some squash plants can get quite large and this saves some room. Personally, I like to plant one seed each of a green, a yellow, and a white cultivar of zucchini in a single hill for good looks and good eats. Another reason for planting in a hill is that the squash varieties that are susceptible to the squash vine borer could be kept under row cover until the borer season is over, usually around July 4th.
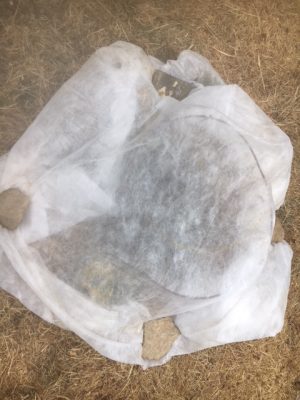
Usually, your zucchini and other summer squash start maturing about 50 days after they have germinated. Winter squash and pumpkins will take 80 to 105 days to mature. How quickly the summer squash grow is one of the wonders of nature. Be sure to check plants every 2 or 3 days and pick fruit when small and less seedy.
Most squash are monoecious which means male and female flowers are produced on the same plant. The male flowers are produced first and held on long stems to attract pollinators. Female flowers are closer to the crown and have mini-fruits at their base. It takes several visits from bees for pollination to occur. Fruits that are incompletely pollinated will shrivel and die. One golden zucchini, ‘Easy Pick Gold II’ is parthenocarpic, which means fruits can develop without fertilization.
Powdery mildew is a very common disease of cucurbits. Look for varieties labeled as resistant or plan on using low toxic control sprays such as neem oil, potassium bicarbonate or Serenade™.
As you’re planning this year’s vegetable garden and purchasing seeds, give a few different squash a try. If you have questions on growing squash or on other gardening topics, feel free to contact us, toll-free, at the UConn Home & Garden Education Center at (877) 486-6271, visit our website at www.homegarden.cahnr.uconn.edu or contact your local Cooperative Extension center.
Prune Now for Beautiful Summer Trees
Prune Now for Beautiful Summer Trees
By Marie Woodward, UConn Home & Garden Education Center
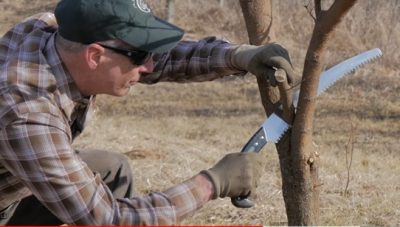
Winter is a great time for gardeners to plan for their next growing season. Many think that planning can only be done inside. Not so. Now is an ideal time to prune deciduous landscape trees. The absence of leaves gives a clear view of the canopy above and allows for a clear assessment of a tree’s structure and any problems that may be present. In addition, there are no pests present in winter, and disease spread will be slowed by the cold weather. But before heading outside with those loppers and pruning saws, there are a few important things to know and consider.
It's important to understand the tree’s anatomy. A typical deciduous landscape tree will consist of three main parts: the leader, the scaffolding branches and the lateral branches. The leader is the dominant vertical branch of the tree. This is easily spotted as the straight, most upward growth from the trunk. The leader is the tree’s most important branch, crucial for the tree’ structure, photosynthesis, and even distribution of nutrients. Scaffolding branches emerge from the trunk and the leader to make up the canopy of the tree. Secondary branches that grow from the scaffold branches are called lateral branches. Once you understand the basic structure of the tree, it’s much easier to successfully prune it.
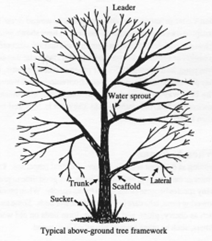
Photo from Virginia Cooperative ExtensionFirst, assess the tree. What species of tree is it? That will reveal its natural structure, something your pruning should ideally strive to support. Note though, that proximity to buildings or human activity nearby is likely to influence your pruning strategy (keeping scaffolding branches clear of buildings, for example, or making sure people can walk under the lowest branch?)
Locate the leader of the tree and look for problem branches. Dead, diseased, damaged, or crossing branches should be pruned first. When pruning dead or diseased branches, make cuts into healthy wood, well below the affected area. It’s also a good idea to disinfect tools between cuts to help prevent the spread of disease. (A 10% solution of bleach to water works well.)
After the tree’s diseased, damaged, or crossing branches are pruned, look for lateral branches that are trying to compete vertically with the leader. They can draw energy away from the leader and sap the tree’s vigor. Usually, there is no need to remove all of a competing branch. Just pruning the vertical portion back to the scaffold branch should be sufficient. This will slow the competitor branch’s rate of growth, allowing the leader to dominate.
When pruning a scaffold branch, it is important to cut outside the branch collar. That is the swollen area at the base of the branch, where it joins the trunk. Make the cut outside the branch collar at a 45-to-60-degree angle to the trunk and leave it alone to heal naturally. There is no need to coat or cover cuts. Doing so could prevent the wound from healing and might seal in pathogens adversely affecting the health of the tree.
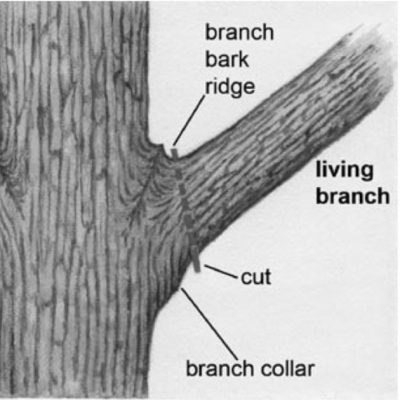
According to Pete Smith, forester and arborist from the Arbor Day Foundation, there are five main factors to consider when pruning trees:
- After pruning, two-thirds of the height of the tree should still have branches and leaves to keep growing in a healthy manner.
- Do not remove more than one third of the total branches in one year.
- Branches attached to the trunk should not be more than one half of the diameter of the main trunk.
- Every pruning cut should be no more than one inch in diameter
- There should be a total of five cuts in a year.
Of course, when pruning a long-neglected tree, it may take a few seasons to be able to apply all five rules, but ultimately, your trees will be healthier and more beautiful if you follow these guidelines.
For questions about pruning or if you have any other gardening questions, contact the UConn Home & Garden Education at (877) 486-6271 or http://www.homegarden.cahnr.uconn.edu/ or your local Cooperative Extension Center.
Tips for the February Gardener
Tips for the February Gardener
By Dawn Pettinelli, UConn Home & Garden Education Center

February is a tough time for gardeners. Days are getting longer but the cold temperatures, and in many cases, snow, are keeping us inside. This is a good month to provide houseplants with a little TLC before the weather warms and the gardens beckon.
If possible, bring your plants one by one to the kitchen sink. Give them a thorough grooming by removing any dead or off color leaves. Trim back wayward or undesirable growth. Then give them a good rinsing under the faucet or use a wet cloth to wipe dust off of their leaves. For plants with hairy leaves, like African violets, a soft brush could be used to clean their leaves. Wash their saucers out before setting plants back.
Plants that have outgrown their pots can be repotted at this time. Usually, plants would be moved up to a pot that is an inch or 2 wider. Loosen or trim roots if they are growing in a circle or very dense. An all-purpose potting mix can be used for most plants but specialized mixes for plants like cacti and African violets are also available.
Your amaryllis has probably finished blooming by now. Cut off any spent flowers. Some people like to leave the stem until it yellows as it can photosynthesize but I generally remove the whole stalk after flowering. If you want plants to rebloom next year, the foliage needs light, water and nutrients to grow. Set your plant in a bright location and fertilize monthly starting in March. Plants can be moved outdoors after the danger of frost has passed either in their pots or set them into the ground in a part shady spot. Bring inside in mid-October and let the bulbs go dormant in a dark, warm area for about 8 weeks and then repot for another season of striking trumpet-shaped blooms. Some cultivars do not require a dormant period.
Check on any tender bulbs that you have in storage. Dahlias and tuberous begonias can shrivel if they dry out too much. They are usually stored in some barely moistened peat moss or wood shavings. Sprinkle with a little water if they are on the dry side. Also, this would be a good time to check on any winter squash, potatoes or other vegetables that you’ve been keeping. Use them up before they spoil.
Time spent perusing garden catalogs, either in print or digital format, is a great way to get through cold, winter days. When making out a seed order, don’t forget to note what seeds you have leftover from last year. Most seeds retain their viability for at least a year. It’s always a good idea to plan out the vegetable garden so you know what’s going to be planted where, and when. Last frost dates for your area can be found at: https://garden.org/apps/frost-dates/. The UConn Master Gardener program is offering a Garden Journal with tips on how to plan and maintain your flower and vegetable gardens and plenty of room for you to make notes. To order go to: https://mastergardener.uconn.edu/2024/01/30/garden-journals-available/.
Most of us recognize the benefits of buying local when it comes to produce and other Connecticut grown products but did you know we have at least 5 seed companies in Connecticut. They include Select Seeds (www.selectseeds.com), the Chas. C. Hart Seed Co. (www.hartseed.com), the Heirloom Market at Comstock Ferre selling Baker’s Creek Heirloom Seeds (www.heirloommkt.com), John Scheppers Kitchen Garden Seeds (www.kitchengardenseeds.com), and New England Seed Company (www.neseeds.com). Be sure to see what they have to offer either online or at various retail locations.
If you need a floral fix to get you through to spring, stop by the CT Flower and Garden Show at the Convention Center in Hartford, Feb 22 -25. Visit the UConn Home & Garden Education Center’s booth for a free pH test (bring a half cup of soil) and answers to your gardening questions. A blooming time can also be had at Elizabeth Park’s Greenhouse Bulb and Plant Show, March 1 – 9. Since spring can’t be here soon enough, you’ll just have to go to where the flowers are blooming!
For your gardening questions, feel free to contact us, toll-free, at the UConn Home & Garden Education Center at (877) 486-6271, visit our website at www.homegarden.cahnr.uconn.edu or contact your local Cooperative Extension center.
Connecticut Barns
Connecticut Barns
By Pamm Cooper, UConn Home & Garden Education Center
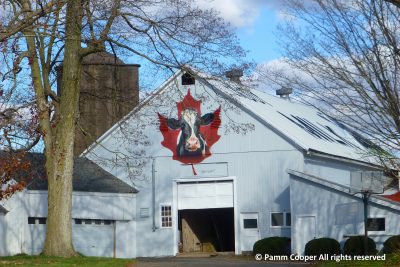
Venturing out in the rural Connecticut landscape, there are reminders of the agricultural age that dominated the landscape. Farms that once used their land for raising livestock and growing crops have either been abandoned or slashed in size to accommodate new homes. Sometimes all that remains of the original farm property is the farmhouse and a barn or two. Those barns remain interesting to me architecturally- because of the quality of materials and workmanship that went into building them, and in a nostalgic way, because I grew up in dairy country in New York state. I used to play in barns, and I wish I had had more of an interest in the structure of the barns when I was so close to them, inside and out.
One of the more familiar barns in Connecticut are the post and beam structures. Nathan Hale Homestead in Coventry features one built in the 1760’s. This barn is on the National Register of Historic Places in Connecticut, and it is built in the English/ New England hybrid style which normally had a gable roof and vertical sheathing. The historic Jacobson barn on the UConn campus also has a post and beam structure.
The English barn is a simple building with a rectangular plan, a pitched roof, and a door or doors located on one or both, of the long sides of the building. English barns featured three distinct bays, the center one being for the threshing of grain, and the side bays used for livestock and hay storage. Footings and foundations were typically made of stone, an abundant resource in Connecticut landscapes, and the stones normally had no mortar. Doors on English barns were hinged and swung open.
New England barns are usually a type of bank barn, built into the side of a hill giving ground level access to one side, but a ramp or rarely a bridge were used to access the doors. Roof and eave overhangs were typically one foot to protect walls from rainwater. Ventilators and cupolas were added to some barns in the 19th century to reduce moisture build-up. Some barns had stairs, but most featured ladder access to the second floor. New England style barns normally had a gable roof and vertical sheathing.
 A picturesque red barn with white trim and a cupola is located on Main Street, South Windsor, and it is an example of an English/ New England hybrid style barn. The New England style barn, built after 1830, could stand alone or be connected to other farm buildings and often had an off-centered end wall entrance for wagons.
The Morse Farm barn in Scotland is listed on the National Register, the State Historic Resource Inventory, and the State Register. This carriage house style barn has one and one half stories and features a gambrel roof design. A gambrel roof has two distinctive two slopes on each side, with the upper slope pitched at a shallow angle and the lower slope at a steeper angle. This allowed for more headroom when working on the upper floor. This barn had a combined use as a stable and carriage storage.
On Valley Falls Road in Vernon, the historic red barn, built between 1875 and 1920 features a gambrel bank style and with a cupola and a timber frame structure. A milking stable was in the basement, featuring the typical cement floor and manure gutters and whitewashed walls. It is listed in the Local Historic District and the State Register.
Gilbert Road in Stafford features an English Bank style of barn. Not too far away, on 425 Old Springfield Road in Stafford there is the Greystone Farm English style barn that features exterior siding of gray fieldstone, and flush board and vertical siding on other sections. The roof is a gable type.
The Sheridan Farmstead (c. 1760) on Hebron Road in Bolton is listed on the State Register of Historic Places and features a gentleman’s barn built in 1900. A gentleman’s barn had a dual purpose as a weekend retreat and a working farm. The white extended English bank barn features a stairway to the upper level, hay chutes, a brick chimney, rolling doors, an earthen ramp and horse stalls on the ground level.
There are many more barns, both old ones and newer ones, that are still interesting and useful. To those familiar with the past, barns offer a glimpse into the past, and maybe the present, as well. Tobacco barns, for example, although dwindling in number, are still very much a part of Connecticut’s past and present.
To locate barns on the Connecticut State Register of Historic Places, visit the website on this link- https://connecticutbarns.org/state-register. For your gardening questions, feel free to contact us, toll-free, at the UConn Home & Garden Education Center at (877) 486-6271, visit our website at www.homegarden.cahnr.uconn.edu or contact your local Cooperative Extension center.
Hearts for Valentine’s Day
Hearts for Valentine’s Day
By Dawn Pettinelli, UConn Home & Garden Education Center
While there’s always the traditional Valentine’s Day gifts of flowers and candy, why not give that special someone a plant with heart-shaped leaves that will likely last much longer than chocolates or bouquets. There are actually a number of plant species to choose from with some being quite easy to grow.
Perhaps the cutest, as well as the easiest is the Sweetheart hoya (Hoya kerrii). Hoyas are a very slow growing, vining plant with stems that may reach 13 feet in length. Typically, it is grown in a wreath form or on a trellis. The pink or white flowers are fragrant but not produced in great abundance.
While this plant has the most adorable heart-shaped leaves, the ones that are sold as a single leaf in a pot will, in most cases, remain as a single leaf. Unless a piece of stem was left attached to the potted leaf, the plant is not able to initiate new leaf or stem formation. This makes for a simple plant to care for, however. Keep your Sweetheart hoya leaf in a bright sunny spot with temperatures in the 60 to 80 degree F range and water when dry.
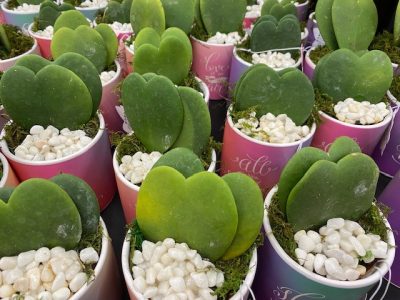
Another plant for small spaces with charming marbled, heart-shaped leaves is the String of Hearts (Ceropegia woodii). While the dainty individual stems can grow 12 feet long, they can be trimmed to keep the plant compact. The grey-green leaves are small, only about ½ inch in diameter. String of Hearts is a succulent best grown in a potting mix labeled for cacti and set in bright, filtered sunlight. Let plants dry out slightly between waterings. Keep away from drafts and note that plants may go dormant if the temperature falls below 60 F.
Philodendrons (P. hederaceum) have been grown for ages and with good reason. These tough, vining plants with heart-shaped leaves tolerate the lower light levels found in many homes. Stems may grow 3 feet or longer and plants are best suited to a hanging basket or trellis. Exciting newer cultivars such as ‘Brasil’, ‘Cream Splash’ and ‘Rio’ offer variegated leaves. Grow plants in bright, indirect light and avoid overwatering. Trim plants if they overgrow their bounds.
More recently, anthuriums with their flashy colored spathes in red, orange, pinks, and purples have been livening up the holiday plant scene. Both the spathes, which are modified leaves, and the true glossy, green leaves are shaped like hearts. Plants grow to about 16 inches high and if content will produce long-lasting colorful spathes several months of the year. Tiny flowers are on the tail-like spike that emerges from each spathe. Anthuriums also appreciate bright but indirect light, a well-draining, acidic soilless potting media and to be kept moderately moist.
Similar in care to anthuriums, syngoniums have heart-shaped leaves and new varieties come in various shades of pink, purplish red and even variegated cultivars. Syngoniums are evergreen climbers but can be maintained as a shrubby houseplant if trailing stems are removed. As the plant ages, leaves become more arrow-shaped. Plants enjoy warmth and humidity and do best in moderately moist potting mixes and in bright diffused light.
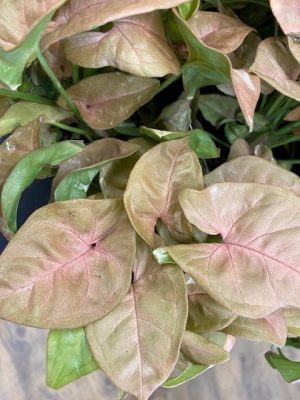
A little harder to find but worth the search is the Heart Fern (Hemionitis arifolia). Like many tropical ferns, it prefers indirect light in a warm, humid location. Plants may reach 10 inches tall and wide. The leaves are dimorphic, with the sterile fronds being heart-shaped and the fertile ones resembling arrowheads. Unlike most ferns, the foliage is thick and leathery. Being an epiphyte, plants should be grown in a light, airy potting mix and kept moist at all times.
Lastly, there are varieties of English ivy (Hedera helix) with heart-shaped leaves. ‘Sweetheart’ and ‘Heart’ are two common cultivars. Blue-green leaves form along stems that can be trimmed to any length. Grow as a hanging basket or in a decorative pot. English ivy enjoys cooler temperatures and bright but diffused light. East or north facing windows are ideal locations.
This year, mix it up a little for Valentine’s Day and give the heart-felt gift of a plant with heart-shaped leaves. Do note that some of the above plants are toxic if consumed so should be kept away from children and pets.
If you have questions about these plants or if you have any other gardening questions, contact the UConn Home & Garden Education at (877) 486-6271 or www.homegarden.cahnr.uconn.edu or your local Cooperative Extension Center.
Watch Out for These Nutrient Deficiency Symptoms
Watch Out for These Nutrient Deficiency Symptoms
By Haiying Tao, Ph.D., UConn Home & Garden Education Center
Plants need at least seventeen essential nutrients to complete their life cycles. Scientists group these essential nutrients into macronutrients (carbon, hydrogen, oxygen, nitrogen, potassium, phosphorus, sulfur, calcium and magnesium), which are required in large quantities and micronutrients (zinc, iron, copper, boron, manganese, chlorine, molybdenum and nickel) which are required in small quantities. Sufficient amounts of these nutrients are required in order for plants to produce well. If there is a deficiency of any essential element, yield and quality can be reduced. Alternatively, too much of a nutrient can be toxic to plants. Diagnosing nutrient deficiencies and toxicities is important for both growers and gardeners to ensure optimum harvests.
When low in an essential nutrient, plants exhibit distinct visual symptoms, which often allows us to distinguish which nutrient is deficient. A first step in diagnosing nutrient deficiencies is to describe what the symptoms look like. Symptoms caused by nutrient deficiencies are generally grouped into five categories: 1) stunted growth; 2) chlorosis or yellowing; 3) leaf spots; 4) purplish-red coloring; and 5) necrosis or death of plant parts.
The next step is to identify whether the deficiency symptoms appear on older (lower) leaves or younger (upper) leaves first. If the deficiency symptoms appear on older leaves first, then the deficiency symptoms are possibly caused by one of the nutrients that are mobile in plants, such as nitrogen, phosphorus, potassium, magnesium, chlorine, or molybdenum. In contrast, deficiency of nutrients that are immobile (calcium, sulfur, boron, copper, iron, zinc, manganese, nickel), the symptoms first appear on younger or upper leaves.
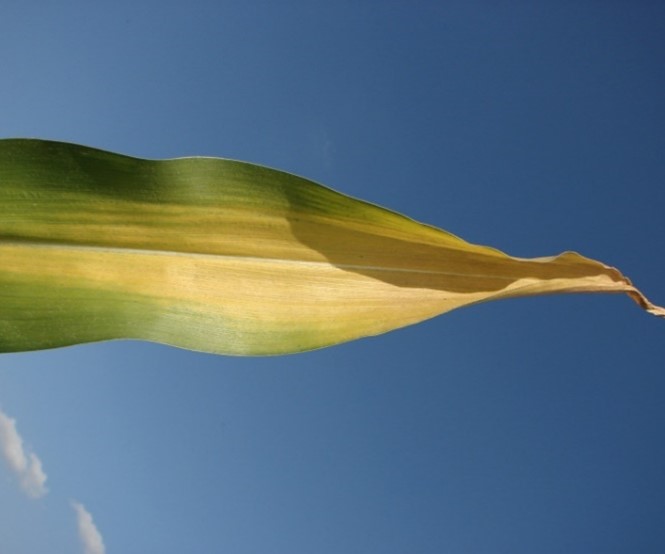
Nitrogen deficiency symptoms include yellowing of the lower leaves (chlorosis), stunted and slow growth, and death of older leaves in severe cases. Nitrogen deficient plants will mature early, and the crop quality and yield are often reduced.
Phosphorus deficiency symptoms occur in the older leaves first and typical deficiency symptoms are purpling of leaves and leaf margins and stunted growth. Plants that are deficient in phosphorus are generally weak and maturity is delayed.
Potassium deficiency symptoms first appear on older leaves. Typical deficiency symptoms are yellowing and necrosis of the leaf margins. When potassium deficiency is severe, older leaves turn yellow with brown dead tissue around the edges, but the upper new leaves may stay green. Sometimes one may confuse potassium and nitrogen deficiency because both show yellowing on older (lower) leaves first. The difference is that the chlorosis starts from the tip and progresses along the ribs of the leaf if nitrogen is deficient, but the chlorosis starts from the tip and progresses along the edge of the leaf if potassium is deficient.

Another nutrient that is commonly found deficient is calcium. Typical calcium deficiency symptoms are poor leaf expansion, curling followed by necrotic patches in the young leaves. Calcium deficiency can cause misshapen fruit and aborted buds. If you find the tip of tomatoes or peppers rotting, cavity spot in carrots, and black heart in peanuts and celery, it’s likely the plants are calcium deficient. However, don’t hurry to apply calcium fertilizers. Check on other stresses such as drought because lack of moisture in the soil can lead to insufficient uptake and transportation of calcium within plants, which leads to symptoms similar to calcium deficiency.
In sandy and low organic matter soils, sulfur deficiency can occur. Typical sulfur deficiency symptoms are reduced growth rate with plants becoming stunted and thin stemmed. In cole crops (such as cabbage, broccoli, etc.), discoloration appears in younger leaves first. Symptoms may include light green or yellow leaves, a reddish coloration on the undersides of leaves as well as leaves that are cupped inward.
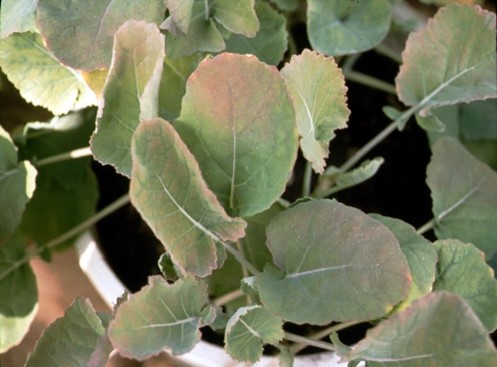
It is not always easy to identify nutrient deficiencies just by looking at a plant because the symptoms of several deficiencies are similar in appearance. Also, more than one nutrient may be deficient. It is not uncommon for other stresses such as disease, drought, excess water, genetic abnormalities, herbicide and pesticide residue injury, insects or salt injury may cause symptoms that are similar to nutrient deficiency. The best way to confirm if you have nutrient deficiency is to test your soil and plant tissue.
For questions on nutrient management in the garden or farm, feel free to contact the UConn Soil Lab at (860) 486-4271. For all your other gardening questions, contact the UConn Home & Garden Education at (877) 486-6271 or homegarden.cahnr.uconn.edu or your local Cooperative Extension Center.
Dr. Tao is an Assistant Professor and Soil Fertility Specialist in the UConn Department of Plant Science & Landscape Architecture.
Alluring African Violets Chosen as 2024 Houseplant of the Year
Alluring African Violets Chosen as 2024 Houseplant of the Year
By Dawn Pettinelli, UConn Home & Garden Education Center
This last decade or so has seen a burgeoning interest in houseplants. While this has led to the introduction of some new and exciting species, classic stalwarts are still in demand as evidenced by the National Garden Bureau naming African violet the 2024 Houseplant of the Year. They are from Africa, as their name implies, but they are not related to the violets we commonly encounter in our gardens. These plants were discovered in the mountainous regions of Tanzania and Kenya where they grew in shady, rocky locations.
The first person to successfully send plant material back to Germany where it eventually reached the Royal Botanic Gardens at Herrenhausen was Captain Baron Walter Saint Paul in 1892. This new species of plant was placed in the Gesneriad family and given the Latin name, Saintpaulia ionantha. A number of additional species were described over the next half century. More recently, after DNA analysis, African violets were put in the genus, Streptocarpus.
Regardless of their classification, African violets are endearing plants showering their caretakers with an almost continuous parade of blossoms if properly taken care of. Maybe the most difficult part of growing African violets is deciding which ones to grow. They can be found as miniature, standard, and trailing varieties and there are thousands of cultivars. In fact, the African Violet Society of America (www.africanvioletsocietyofamerica.org) has a Master Variety List of over 16,000 recorded species and cultivars.
Flower color ranges from white to pink, purple, blue, violet as well as bicolored cultivars. They can be single, double or semi-double, ruffled or picoteed. Leaves can be a handsome green, some with burgundy overtones while others can be variegated or mosaic. Whichever type or cultivar of African violet you choose, care is similar.
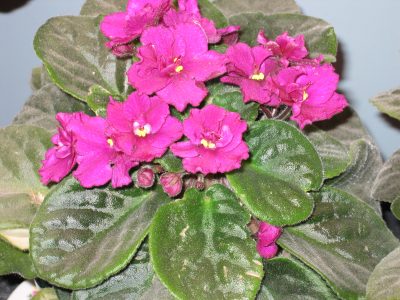
The proper amount of light is key to good flowering. Plants need lots of bright indirect light. East windows are usually ideal as they get morning sun. If only a west or south facing window is available, filter the light with sheers. African violets do exceptionally well under fluorescent or LED lights. Consider artificial lighting if natural light is limited.
Temperature is also important. African violets mostly thrive in the same temperatures we do, around 65 to 70 degrees F. Place them where nighttime temperatures do not drop below 55 F. This is more likely to be a problem during cold winters when plants are left too close to windows. Often exposure to cold results in the plant starting to wilt. Daytime highs ideally should not exceed 75 F.
When watering your African violets, avoid getting water on the hairy leaves as this may cause spotting. Many African violet enthusiasts choose to water from the bottom. Plants can be grown in special ceramic African violet pots where a well is filled with water, and it keeps the root ball just moistened enough. Plants can also be watered using a watering can with a long narrow spout so water can be directed at the potting mix and not land on the leaves. The potting mix should stay moderately moist at all times but should not be saturated. If watering from the top and excess water drains into a saucer, be sure to empty it. Soggy soils promote crown and stem rots.
African violets like a very well-draining potting mix rich in organic matter with an acidic pH. One can purchase specialty mixes for African violets, or a standard soilless commercial potting mix will do. While plants do need to be fertilized during their period of active growth, which is usually spring and summer, note if when repotting the mix you are using already contains fertilizer. If it does, don’t start fertilizing until plants start looking a little light in color. If no fertilizer was added to the potting mix, you can use a half strength liquid fertilizer every 2 weeks or so from mid-March until about mid-October.
Plants bloom best when slightly pot-bound. Often the plant can be lifted once a year and then groomed and reset back into its original pot with some fresh potting media or in a slightly larger one. Remove spent flowers to encourage more flower buds to form.
Sometimes cyclamen mites, spider mites or root rots can be a problem so pay attention to your plants and see that they are receiving the proper care. Always isolate new plants for 30 days before introducing to your collection.
For questions about African violets or if you have any other gardening questions, contact the UConn Home & Garden Education at (877) 486-6271 or www.homegarden.cahnr,uconn.edu or your local Cooperative Extension Center.
How to Identify and Treat Salt Damage on Plants
How to Identify and Treat Salt Damage on Plants
Laurel Humphrey, UConn Home & Garden Education Center
From freezing temperatures to blistering winds, the harsh winter elements can pose a challenge for people and plants alike. One common issue many gardeners face during the wintertime is salt damage on plants. While deicing road salts help to ease our troubles by keeping roads, driveways, and sidewalks clear, they only intensify winter damage on the ecosystems and plants nearby. As a country, the U.S. is estimated to apply about 20 million tons of salt per year for public safety on roadways. The most common form of deicing salt used to keep ice from forming on the roads is sodium chloride, or rock salt, which can be very damaging to vegetation. Deicing salts contribute to the damage and dieback of landscape plants each year, however there are steps one can take to identify salt injury and minimize its effects.
What are Symptoms of Salt Damage in Plants?
When deicing salts inevitably wash off the roads, they threaten plants both directly through contact with the foliage, as well as indirectly by changing the soil chemistry. In what is known as “spray zone” injury, salt water collects on plant foliage and enters the plant cells directly. This type of salt injury results in discoloration beginning at the margins of the plant and may eventually lead to premature leaf or needle drop. Salt spray can also dry out bud scales, exposing the developing leaves and flower buds to reduce growth later in the spring. Spray zone injury often produces a distinct pattern of damage, where symptoms are restricted to foliage facing the roadside and increase in severity as plants are found closer to the road.
Another way plants are affected by road salts is when runoff salt water dissolves in the soil and is taken up by plant roots. Within the soil, sodium chloride breaks down into ions that compete with the other nutrients plants need to survive. As a result, plants take in more of the harmful sodium salts and less of the beneficial nutrients they require. Plants tolerate small amounts of salt naturally, but toxic concentrations can result in symptoms of wilting, scorch, and burn. Overall, deicing salt exposure causes symptoms similar to drought and root damage in plants, such as tip browning, bud death, stem dieback, stunted growth, marginal burn and discoloration, and even tree death. These effects may vary depending on the plant species and degree of exposure, with salt applications in late winter thought to be most damaging to plants and less likely to be leached away from roots.
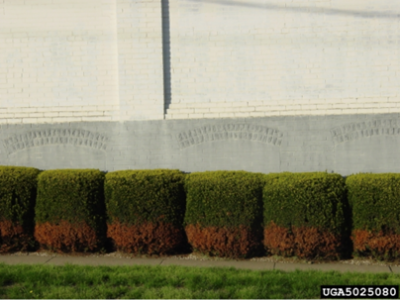
How can Road Salt Injuries be Managed?
In order to minimize the harmful effects of road salts and be sure your plants will make it to see a healthy spring, there are some steps you can take to reduce salt injury. One obvious option is to limit the use of road salts when possible, especially near lawns and landscapes. This can be done by mixing salt with other materials such as sand or sawdust to help maintain road traction, as well as choosing other salt options like calcium chloride that are less harmful to plants, although more expensive. Gardeners can also protect their plants from salt damage by covering them with materials like wood or burlap, and being careful to plant salt tolerant species near roads and sidewalks. Trees such as hedge maple, paper birch, and Northern red oak are more tolerant to salt exposure than sensitive species including red maple, boxwood, and Eastern white pine.
While it is not always possible to prevent salt damage from becoming an issue during the winter months, other management strategies can be used to treat salt injury. If you do identify exposure to salt damage in your landscape, be sure to wash salts off plant foliage as soon as possible. Prevent snow piles, sand, and runoff from building up near sensitive plants, and maintain healthy soil salinity levels through the addition of organic matter. The most effective way to minimize salt damage is by leaching salts away from the plant roots. Apply fresh water often to flush salts down through the soil when the ground is not frozen, and plant roots should be less vulnerable to the toxic effects of road salts.
Laurel Humphrey is a student employee working with the Plant Diagnostic Lab and Home & Garden Education Center. For questions on road salt or if you have any other gardening questions, contact the UConn Home & Garden Education at (877) 486-6271 or homegarden.cahnr.uconn.edu or your local Cooperative Extension Center.
2024 All-American Selections
2024 All American Selection Winners
By Dawn Pettinelli, UConn Home & Garden Education Center
As we usher in the New Year, garden enthusiasts and horticulturists alike eagerly anticipate the unveiling of the All-America Selections (AAS) winners for 2024. The AAS is a prestigious organization that annually recognizes outstanding new varieties of flowers, vegetables, and herbs that have proven their excellence through rigorous trials. Trial gardens were established throughout the United States and even as far north as Canada. New varieties, species or strains of annuals, vegetables and bedding plants are grown and evaluated based on their performance. Two vegetables and 5 flowers were chosen as national winners this year. Those selected as winners are outstanding plants and deserve a trial in your gardens as well.
Broccoli ‘Purple Magic F1’ takes center stage among the vegetable winners. With its striking purple hue and exceptional taste, this broccoli variety is a standout choice for home gardeners. This easy to grow variety is tolerant to heat and stress with tight uniform heads on 30-inch tall plants. Plants should be spaced about 2 feet apart and harvests can begin about 90 days after transplant. Beyond its visual appeal, ‘Purple Magic F1’ offers a nutritious addition to meals, providing both beauty and health benefits to your garden and table.

For those seeking a vibrant addition to their vegetable patch, sweet pepper ‘Red Impact’ is a true gem. ‘Red Impact’ is a Lamuyo type that are typically difficult to grow because of the long time it takes these large peppers to mature to red. The 7-inch long, sweet crispy fruits have thick skins and can be harvested red or green. Plants reach up to 3 feet in height and since there can be 10 to 15 peppers per plant, staking is recommended. The dark red, uniform fruits mature in 90 days from transplant. ‘Red Impact’ is resistant to a number of diseases including tobacco mosaic virus.
In the realm of flowers, ‘Burning Embers’ celosia captures attention with its vibrant pink blooms that contrast well with its striking pink veined bronze foliage. This well-branched, vibrantly colored celosia will add drama and flair to gardens and containers. The very long-lasting flowers hold up well through periods of heat and humidity. The 8 to 9-inch plants can be spaced a foot apart in garden beds and used as edging or massed in groups. No staking or deadheading is necessary. Blooming from late spring through frost, makes ‘Burning Embers’ a standout choice for those looking to infuse outdoor spaces with bold colors and distinctive shapes.
Geranium lovers rejoice. ‘Big EEZE Pink Batik’ is a true show stopper with its large, eye-catching pink blooms that are streaked and spotted with darker pink markings in a batik-like pattern. Upright 18-inch plants are very floriferous with 4 to 5-inch flower clusters. Deadhead to encourage continuous flowering throughout the growing season. Plants do especially well in containers and are vigorous and heat tolerant.
Impatiens ‘Solarscape XL Pink Jewel’ lives up to its name offering an abundance of vibrant pink blooms that will add sparkle to any garden or container. The foot high plants spread out to almost 20 inches so give them room to grow. The single pink blossoms open to almost 3 inches across. Plants do great in containers or in the ground and no staking or deadheading is needed. ‘Solarscape XL Pink Jewel’ will do well in sun to part shade as long as regularly watered. Gardeners will be glad to know plants are resistant to impatiens downy mildew.
With its vibrant, fully double, golden blooms and compact growth habit, marigold ‘Siam Gold F1’ is a reliable choice for borders, edging, or as a cheerful addition to mixed plantings. The 3 to 4-inch blooms are held high and continue throughout until frost if deadheaded. Staking is not needed for the sturdy 20-inch-tall plants that are tolerant of heat, drought and rain. Use the flowers in arrangements to bring a golden glow indoors. Plants are easily started from seed directly sown in the garden after the last frost date or can be started 4 to 6 weeks before the last frost date indoors. Its ability to thrive in diverse conditions makes it a go-to option for gardeners seeking low-maintenance yet stunning floral displays.
The final national winner, Petchoa ‘En Viva Pink’, represents a unique and exciting addition to gardens and containers. This innovative hybrid combines the best qualities of petunias and calibrachoas, resulting in a plant that offers the best of both worlds. Plants are loaded with bright, iridescent pink, 2 to 3-inch, yellow-throated blossoms that stand up to heat, wind and rain. These plants require no staking or dead-heading and at 10 to 16-inches high and wide would be outstanding in hanging baskets, containers or cascading over garden edges.
The 2024 All America Selections national winners represent the pinnacle of horticultural achievement. As we embrace the gardening season ahead, let these national winners inspire and guide your choices for a flourishing and vibrant outdoor space. For your gardening questions, feel free to contact us, toll-free, at the UConn Home & Garden Education Center at (877) 486-6271, visit our website at www.homegarden.cahnr.uconn.edu or contact your local Cooperative Extension center.