Container Gardening

Keep Your Seedlings Going Strong! 

By Heather Zidack, UConn Home Garden Education Office 

So, you started your seeds, have been watching them attentively, and spring is knocking at the door. It’s still a little too early to put some things outside, but overzealous gardeners may find themselves swimming in seedlings that need management. Consider taking these steps to help you and your seedlings find a comfortable compromise as they wait to go outdoors. 

If you haven’t done so already, thinning your seedlings is an important step in ensuring that the plants you put in the ground will be robust and strong. As a fellow gardener, I’m familiar with the pain of disposing of “perfectly good seedlings.” However, this isn’t an entirely true belief. Seedlings that are not thriving in optimum conditions, may be indicating to you that they aren’t strong for planting in the garden.  

Thinning prevents crowding and allows for more air flow between seedlings. When crowded, seedlings compete for water, nutrition, light, and space. By thinning, we ensure that plants have enough resources to grow healthy. Thinning also helps to encourage airflow, which can reduce the risk of fungal development. Fungal pathogens can lead to issues like “damping off,” and other plant diseases that put your seedlings at risk.   

You may decide to thin your plants by snipping out weaker seedlings at the base. If you have the heart, the patience and the amount of valuable bench space to dedicate to extra seedling trays or containers, you may decide to carefully tease apart seedlings and replant them for one last chance. 

Green watering can on a small table surrounded by trays of seedlings on a wooden deck.
Photo by Heather Zidack, UConn Home Garden Education Office

Your strongest seedlings should be potted up into a larger container to encourage them to continue to grow. Putting seedlings into 3- or 4-inch pots (or recycled plastic cups with holes in the bottom) gives them a little bit extra wiggle room while we wait out these temperature fluctuations of a New England spring. Extra space for the root zone will allow the plants to continue to expand. More roots mean more water and nutrient uptake, leading to healthy growth. This practice may also help reduce watering needs on your part, since there is more media to hold moisture in the root zone.  

Are your tomato seedlings getting leggy? You can bury the stems of the tomato seedlings to help promote adventitious root development. Remove the cotyledons and any small leaves that you intend to bury below the soil line. Make sure to leave at least one third of the plant’s total height above the soil line to continue healthy growth. 

To this point, our seedlings have grown in optimum conditions, or as close to optimum as we’ve been able to provide. Not only have these conditions been ideal, they’ve also been consistent. When your plants get out to the garden, the new environment may be shocking. Hardening off is a process of transitioning them from their ideal growing conditions, into a more realistic environment. Any plant, whether it is a new seedling, a beloved houseplant, or a sheltered patio tropical, needs this transition when moving from inside to outside.  

Take your plants on “field trips” during warm spring days by placing them outside in a location with bright, indirect light. Full sun may be too strong for seedlings that have been acclimating with grow lights or through sunny windows so introduce direct light incrementally.  

Using cold frames can help to transition your plants from indoors to outdoors. These small, unheated enclosures use the sun’s energy to store heat like a greenhouse. This helps to reduce the drastic temperature swing of nightfall and insulate plants from frosts during the temperamental spring season. Crack them open during warm days for ventilation and to help start reducing humidity.  

When conditions are right for hardening off and planting your seedlings, continue to monitor weather conditions. Late spring in New England has been known to throw us a cold snap or two. If frost/freeze warnings occur, bring in potted plants and use a frost cover or breathable fabric to cover in-ground plants as frost protection. Garden stakes will help keep fabric from directly touching your plants and help create a warm air pocket around them to survive those incidental cold nights. 

Spring in New England is a season of transition. Warm days may signal planting time, but cool nights and shifting conditions remind us to move forward carefully. By thinning crowded seedlings, giving roots room to grow, and easing plants gradually into outdoor conditions, gardeners can help reduce stress and build resilience. A little patience and flexibility now can pay off with healthier transplants, stronger growth, and a more successful garden as the season continues to unfold. 

The UConn Home Garden Education Office supports UConn Extension’s mission by providing answers you can trust with research-based information and resources. For gardening questions, contact us toll-free at (877) 486-6271, visit our website athomegarden.cahnr.uconn.edu, or reach out to your local UConn Extension Center atextension.uconn.edu/locations.      

This article was published in the Hartford Courant April 26, 2026

Starting Raised Beds

By Dr. Lauren Kurtz, UConn Home Garden Education Office 

There are many styles of raised beds to choose from, depending on your needs. Raised beds exist on a spectrum, ranging from framed boxes above ground to unframed, elevated planting mounds. When planning new raised beds, both types have specific considerations to keep in mind. 

Mounded Raised Beds 

Mounded raised beds are created by mounding existing soil or adding additional material so the planting area sits above ground level. This method works well on compacted sites, in poorly drained areas, or on top of heavy clay soils. 

Most mounded raised beds do not have a barrier between the ground and the mound. However, if you are wish to start a raised bed over lawn, cardboard can be placed underneath the mounded soil to smother the grass. If you use cardboard, it is best to allow it to decompose for a few months before planting. This will allow plant roots to grow freely into the soil below rather than being blocked by the cardboard layer. 

The bed can be built using soil already on site, by mounding soil from the paths or edges into the bed. Alternatively, you can bring in topsoil and compost to create the beds. Any imported soil or compost should be free of pathogens, contaminants, and invasive weeds. Mounded raised beds are not tilled, and walking on the mound will compact the soil, so foot traffic should be avoided. These beds may need to be reshaped or re-mounded annually. Soil tests can be taken every two to three years, then apply amendments added as needed.  

Framed Raised Beds 

Two empty wooden raised garden beds placed on a grassy field, spaced apart and framed with light-colored lumber.
Framed raised beds. Photo by Lauren Kurtz, UConn Home Garden Education Office

Framed raised beds offer many of the same benefits as mounded beds, along with additional structure and accessibility. A framed raised bed is more contained than an in-ground bed and can be made of wood, metal, or pavers. These beds are well suited for compacted or poorly drained sites, locations with contaminated soil, or in gardens designed to improve accessibility for people with limited mobility. 

Raised bed depth can vary depending on the intended use. Some beds are only a few inches deep, while others may be up to 2 feet. Gardeners who use wheelchairs or who have difficulty bending may want to consider an elevated or deeper bed. Most annual vegetables require 12 to 18 inches of soil depth, root vegetables will require greater depth. Length and width can also vary based on site conditions, but a width of about an arm’s length is generally recommended for easy planting, harvesting, and weeding.  

Prefabricated wood or metal beds can be purchased, or you can build your own using lumber. Cedar is often preferred over pine because it lasts longer, although it is more expensive. Use caution when considering repurposed or pressure-treated wood. Before 2004, pressure-treated lumber was treated with copper, chromium, and arsenic, which could leach into the soil. If pressure-treated wood is used, make sure it is labeled for ground contact. Whenever possible, choose untreated or naturally rot-resistant materials. 

A good soil mix for framed raised beds is about one-half to two-thirds topsoil and one-third to one-half aged compost. This can require a large amount of material and may be costly depending on the size of the bed. Buying bulk topsoil by the cubic yard is usually less expensive than purchasing bags of raised bed mix. For smaller beds, bagged raised bed mix may be more practical. Avoid using free fill or topsoil from unfamiliar sources, as these may contain contaminants, invasive weeds, or invasive jumping worms. 

To save money on filling a raised bed, some gardeners use hügelkultur, a method that fills the lower portion of the bed with logs, sticks, leaves, grass clippings, or kitchen scraps before adding topsoil and compost on top. Larger materials are placed in the bottom then followed by smaller organic materials overtop. Over time, the bulky material breaks down and enriches the soil. Because the material settles as it decomposes, additional topsoil and compost may need to be added annually. 

Plant Choice 

Annual plants are generally better suited to raised beds than perennials or shrubs. Extreme temperature fluctuations in raised beds are not ideal for overwintering perennials, and the need to periodically add more soil makes raised beds better suited to annual crops. 

Care and Maintenance of Raised Beds 

Both mounded and framed raised beds dry out faster than in-ground gardens, so supplemental irrigation is usually needed throughout the growing season. Weed pressure may be minimal, but regular weeding will still be necessary. Raised beds should be mulched to help retain moisture and reduce weeds. 

The paths between raised beds can be planted in turf, covered with wood chips, topped with crushed gravel, or left as bare ground. Keep in mind that paths between mounded beds may need to be mowed or weeded regularly. They will also likely become compacted over time due to foot traffic. 

 The UConn Home Garden Education Office supports UConn Extension’s mission by providing answers you can trust with research-based information and resources. For gardening questions, contact us toll-free at (877) 486-6271, visit our website athomegarden.cahnr.uconn.edu, or reach out to your local UConn Extension Center atextension.uconn.edu/locations.  

This article was published in the Hartford Courant April 14, 2026

Hold Off for Healthier Soil: Managing Spring Compaction Risks 

By Nora Doonan, Soil Science Graduate Student, UConn Department of Plant Science & Landscape Architecture 

Bare soil and patchy grass showing deep tire tracks and compacted earth across a lawn area.
Repeated traffic over lawn causing immediate, visible wear and long-term soil compaction. (Nora Doonan)

In the case of soil compaction, the early bird often does not get the worm. As temperatures rise, many Connecticut residents are eager to get back into their gardens and begin lawn care. However, after a winter marked by significant snowfall, the effects of snowmelt are still present in the form of pooling water and high soil moisture. Although the warmer weather may seem like the perfect time to begin spring yard work, it is often best to wait. Working or walking on wet soil can lead to compaction, a soil condition that can negatively impact plant health throughout the growing season. Wet soils are more easily compacted than dry soils, and once compacted, they are much harder to remediate.  

Soil compaction restricts root growth, making it difficult for plants to access water, nutrients, and oxygen. As a result, plants may show reduced growth and lower yields. Compacted soils also limit water infiltration, which can lead to increased runoff during spring precipitation events. This not only reduces water availability for plants but can also contribute to soil erosion and water pollution, particularly in areas located near streams, ponds, and other water bodies.  

Soil microorganisms are impacted by compaction, some of which are responsible for soil nutrient cycling. For example, compaction reduces pore space, which holds oxygen and a lack of oxygen in the soil can increase the rate in which some bacteria perform denitrification, a gaseous loss of nitrogen to the atmosphere. Other soil organisms are impacted as well. Non-burrowing animals, such as mites and springtails, have difficulty penetrating compacted soil, and there is often a decline in burrowing species like earthworms, ants, and beetles.  

Common causes of soil compaction include heavy foot traffic and the use of equipment such as lawn mowers, spreaders, and vehicles. Following the same consistent pathway through your yard and garden, even if it seems insignificant, can lead to substantial compaction overtime, especially in high soil moisture conditions. Homeowners should also be cautious about allowing heavy vehicles, such as mulch delivery trucks or off-street parking, onto lawns when soils are wet. Additionally, tilling wet soil can do more harm than good by creating dense soil layers and deep ruts. It is important to wait until soils have dried sufficiently before working them. 

To assess whether soil is compacted, start with a visual inspection. Areas with poor plant growth, shallow roots, or standing water after rainfall may indicate compaction. Simple field tests can provide further insight. One method is to dig into the soil with a shovel or spade a few days after a rainstorm. Signs of compaction include surface crusting, plate-like soil structure (resembling stacked dinner plates), or large, dense clods. Another method is to perform a soil hardness test. A few days after rain, try pushing a wire flag or similar probing object into the soil. Hold the flag at the top and press the wire into the soil without bending it. This test is most accurate when soils are moist but not saturated, and care should be taken to avoid rocks. If the probe penetrates less than 4 inches, the soil is considered compacted.  

Preventing soil compaction is far easier than correcting it. Avoid walking on garden beds and refrain from working soils when they are wet. Use lighter equipment whenever possible and maintain ground cover to protect the soil surface. If necessary, aerate compacted soils and incorporate compost or organic matter to encourage biological activity from soil organisms that naturally improve soil structure. While organic residues such as compost can help cushion the effects of compaction, excessive traffic will degrade these materials over time. Soils with low organic matter are especially vulnerable to compaction, making regular amendment essential. 

Patience in early spring can pay off throughout the growing season. Waiting until soils are drier before beginning yard work will help protect soil structure, promote healthy plant growth, and support long-term landscape sustainability. 

The UConn Home & Garden Education Center supports UConn Extension’s mission by providing answers you can trust with research-based information and resources. For gardening questions, contact us toll-free at (877) 486-6271, visit our website at homegarden.cahnr.uconn.edu, or reach out to your local UConn Extension center at extension.uconn.edu/locations

This article was published in the Hartford Courant April 4, 2026

I “Heart” Philodendrons

By Dr. Matthew Lisy, UConn Adjunct Faculty


Hanging philodendron plant with trailing green heart-shaped leaves in a black pot suspended by cords against a light-colored wall.
Philodendron hederaceum, the legendary Heartleaf Philodendron in its classic green form (photo by M. Lisy). 

Back in the late1970s when I stumbled upon my mother’s abandoned houseplant book, I had no idea what impact that would have on my life.  It was a treasure-trove of knowledge for me, and came with a gallery of some of the most common houseplants.  One in particular caught my eye – the Heartleaf Philodendron.  I was immediately in love (see what I did there?).  All jokes aside, this was one of the biggest staples of the houseplant world, and it still is.  Characterized by green heart-shaped leaves, they were commonly displayed in macramé plant hangers.   

 These plants, like many of our houseplants, come from humid tropical Central and South American forests.  The word Philodendron comes from the Greek and means “tree lover.”  This name serves as both the scientific and the common name.  As one would expect, plants in this genus grow on trees in some fashion.  Of course there are exceptions, but most will readily grow up moss poles if provided.  A number of the species are perfectly suited to life in a hanging basket, and are commonly referred to as “trailing” to describe their growth habit.  A few of my favorite trailing-types are the ones I will focus on for this article.  Trailing Philodendrons are one of the easiest plants to grow and also the easiest plants to kill.  The secret to their success is to not over water them.  The top inch or two of the soil should dry out before they are watered again.  They are very unforgiving to overwatering, and quickly develop a fungal infection that will fist cause many leaves to drop, and then the vines will wither and die.  Many people see this and assume the plant needs more water, and then accidentally ensure the plant’s death.  If they are put outside for the summer, I recommend hanging them under a covered porch so the watering is controlled.  

The old-school Heartleaf Philodendron was just the beginning.  It is known as Philodendron hederaceum by scientists.  It may be incorrectly labeled as Philodendron cordatum, but this is an older/inaccurate name and beyond the scope of this article.  One modern favorite variety is called Lemon Lime.  As expected, it has some light green to yellow leaves in bright light.  Next to the regular green, this variety really stands out.  Lemon Lime is similar to one I had thirty years ago called Lemon which had only yellow leaves.  There is another new one called Neon that has all yellow leaves as well.  It is hard to know if these are true varieties or repackaged versions of the old Lemon with newer names.  Brazil is another very hardy variety that has green leaves with a large, thick yellow stripe down the center of each leaf.  There is variability in the amount of yellow in each leaf, which adds further interest to the plant.  A similar but more striking variety is called Silver Stripe.  This plant has a thinner stripe down the middle that is mostly cream or silver colored.  This was extremely expensive last year, but is much more common and therefore cheaper now.   

 There are a number of different species with similar appearance and growth habits to our P. hederaceum.  One of the real stand-outs is the Philodendron brandtianum, commonly referred to as the Silver Leaf Philodendron or Philodendron Brandi.  The leaves are a gorgeous true silver color with green stripes following the veins.  These are slower growing than the others mentioned here.  By the end of last year, it was somewhat affordable in four-inch pots.  I have yet to see it offered in a larger hanging basket (probably a few years away from that).  A close look-a-like to this plant is the Philodendron sodiroi, which is also called the Silver Leaf Philodendron.  Though less intensely silver and with paler green coloration, the leaves are larger.  I finally saw one for sale last summer but passed on it as I think it was a mislabeled P. brandtianum.  Nevertheless, I am sure these will be equally popular with collectors. 

Close-up of a single bright green, heart-shaped leaf with smooth edges and subtle veins against a white background.Close-up of a heart-shaped leaf with dark green coloration and irregular lighter green variegation, slightly curled and textured, against a pale background. Close-up of a single heart-shaped green leaf with a lighter yellow-green stripe running down the center against a white background.
Close-up of a single heart-shaped leaf with dark green coloring and silvery mottled patterns against a white background.

From left to right: Philodendron hederaceum ‘Lemon Lime,’ ‘Brazil,’ ‘Silver Stripe,’ and Philodendron brandtianum (photos by M. Lisy). 

All of these plants are easy to propagate by cutting the stem and leaving one leaf per node.  Dip it in rooting hormone and keep it in a moist, clear-bag-covered pot and in a few months, there will be new growth.  Alternatively, they can be rooting in water, but I prefer the soil method as it doesn’t have to adapt from water to soil when transplanted. 

 I am hopeful that this article will rekindle an old flame with the Heartleaf Philodendron or its relatives.  They are all generally available now in many of the big box, online, and brick-and-mortar plant stores.  Why not pick one up to beautify the home for many years to come? 

The UConn Home Garden Education Office supports UConn Extension’s mission by providing answers you can trust with research-based information and resources. For gardening questions, contact us toll-free at (877) 486-6271, visit our website at homegarden.cahnr.uconn.edu, or reach out to your local UConn Extension Center at extension.uconn.edu/locations.     

This article was published in the Hartford Courant March 28, 2026

Potted Bulbs for Color and Scent 

By Dawn Pettinelli, UConn Home Garden Education Office 

Potted hyacinths and freesia plants sit on a windowsill, with purple blooms and green leaves contrasted against a snowy outdoor scene visible through the window.
Photo by Dawn Pettinelli

With snow covered gardens and more wintry weather on the way, many of us can’t resist the temptation to purchase potted hyacinths, daffodils, tulips, primroses and other delightful spring blooming plants to bring some early color and fragrance to our homes. It was especially difficult to leave the Connecticut Flower and Garden Show last week without an armload of plants forced into bloom.  

 To enjoy your plants to the fullest, here are some tips on caring for them. First realize that these plants were ‘forced’ into bloom at an earlier time than they would on their own. Growers manipulate the growing conditions of the plants by regulating temperature, light and moisture. This does stress plants somewhat so depending on the type of bulb, some may or may not bloom again.  

If you have not purchased any pots of forced bulbs yet but are planning to, select ones that are still budded or ones where just a few flowers have opened. This will ensure a longer bloom period for you to enjoy. If temperatures are below 40 F, it is best to bag or wrap the plant in the store to keep the blossoms and foliage from cold injury and get the plants home as soon as possible. Leaving them in an unheated car in frigid temperatures is not a good idea.  

Whether you’ve chosen to bring home spring flowering bulbs, like hyacinths, or a hardy perennial, like primroses, they pretty much all have similar requirements as houseplants. All these plants appreciate being kept in cool temperatures with between 50 and 60 F being optimum and 70 F probably being the upper limit. Warmer temperatures will cause plant growth and flowering to speed up so your blooms won’t last as long.  

Bright indirect light for 6 to 8 hours of the day will keep your plants growing longer. Lately with the cloudy weather and limited sunshine, most of us can keep plants in a south window this time of year as the sun’s light is less intense and also, sparser than we would hope. Usually, the temperatures near windows are much cooler than other areas of the house.  

All of these plants, as well as most other houseplants, grow best when kept moderately moist. Avoid overwatering or having pots sit in water as that can lead to root rots. I’ve noticed growers shying away from peat based potting mixes that were more moisture retentive. So, check plants every other day at first to see when they are in need of watering. While the plastic or foil pot wraps might make your selection look more appealing, they often do not have drainage holes so if pots are overwatered, the excess water stays in the wrap and the roots remain saturated and prone to rot. I like to water these plants by taking them out of the wrap, bringing them to the sink and applying enough water so that it runs out the bottom for a half minute or so and then let them sit in the sink until excess water drains out. Then return to their wrap or better yet, a saucer where excess water can be easily seen and dumped.  

As far as fertilizing goes, it depends on whether you want to keep these plants and set them out in your garden when warmer weather arrives or will they get relegated to the compost or trash heap. If you intend to plant them out, then fertilize them using a half strength houseplant fertilizer every other week. The reason being you want the green foliage to photosynthesize as much as possible before the plants go dormant. The food produced by this process will enable the bulbs to sprout and grow next year. Even if not planted out, perennials like primroses will bloom for a longer period of time inside if regularly fertilized.  

I have found flowering bulbs, like hyacinths and daffodils, to come back pretty successfully when planted in the garden, while having little success with tulips, unless they are species tulips or some of the smaller Greigii varieties. If keeping bulbs for planting out, remove the flower stem after blooms have faded but keep watering foliage until it starts to fade and brown. Remove the dying leaves and then the pot can be moved to a cool, dimly lit spot and just kept barely moist until the soil can be worked in the spring.  

For primroses, remove the flower stalks as blossoms fade. Depending on the species purchased, your plants may or may not be hardy outside. Hopefully the plant tag will mention hardiness zones or at least give you the species so you can look it up. Primroses can be kept as houseplants but they do require cool temperatures, bright indirect lighting and regular fertilizing and watering when forming buds and in bloom. In the garden, primroses sulk in hot weather often dying back until next spring when cooler temperatures prevail.  

With a little care, flowering bulbs and other plants can liven up these dreary winter days. At least they let us know, spring is right around the corner. 

The UConn Home Garden Education Office supports UConn Extension’s mission by providing answers you can trust with research-based information and resources. For gardening questions, contact us toll-free at (877) 486-6271, visit our website at homegarden.cahnr.uconn.edu, or reach out to your local UConn Extension Center at extension.uconn.edu/locations.  


This article was published in the Hartford Courant February 28, 2026

Extend Your Fall Color with More than Mums!

By Heather Zidack, UConn Home & Garden Education Center

A garden bed with mums cabbage and millet
Photo by H. Zidack

By September, many of our ornamental garden beds and containers are ready for a refresh. Fall annuals help us bring color and vibrancy back into the garden while we still can enjoy the outdoors. The classic go-to for many gardens is the traditional chrysanthemum. These rotund, uniform little plants come in many different colors, various flower shapes, and a wide range of blooming periods from the end of August until the end of October. For extended color, it is often recommended to plant a mix of early, mid, and late season mums to ensure that color will last throughout the autumn. Alternatively, gardeners can mix mums with other types of annuals and perennials to extend their season of color and build a textured, multi-dimensional garden display. 

A unique challenge with fall annuals is that they do not grow as vigorously as spring and summer annuals. In terms of size, oftentimes the plant you purchase is the plant you will see in your garden for the remainder of the season. It is important to purchase your plants with this in mind. Fill your space densely and don’t hold as much space for plants to “grow into.” 

Large, full ornamental grasses like Pennisetum ‘Rubrum,’ Pennisetum ‘First Knight,’ or varieties of Millet will take up a lot of space and add height and an airy texture to your annual display.   If working in a container, add these giants to the middle of your planters and work your way outwards with other annuals.  

Yellow flowers with brown centers surrounded by ornamental grasses in a display
Rudbeckia Hirta 'Denver Daisy' in an autumn display. Photo by H. Zidack

Varieties of Rudbeckia hirta, like the ‘Toto’ series can take up a large space and have an open habit and less uniformity when compared to the traditional mum. Echibeckia (Rudbeckia x Echinacea hybrids) also do a great job of filling the space. Autumn is their time to shine and shine they do! Some of them may be hardy to Zone 6 but always check the variety and plant label to know if they have a chance of survival.  

We’re always looking to get more for our money. Don’t let your fall garden spruce up be any different this season!  Garden perennials that are currently in bloom, like RudbeckiaSedum, or Asters can be purchased and planted in containers for fall display. When they start to wind down, re-plant them somewhere in the garden before the ground freezes for a chance of coming back next season. Who doesn’t love a multi-purpose purchase? 

Many of us think of pansies and violets as spring flowers. However, they are gaining more traction in the world of ornamental horticulture as an autumn accent plant. These tiny flowers are already adapted to warm days and cool nights, and come in a wide range of colors for every gardener to enjoy. If you’re lucky, they’ll drop seeds and pop back up again in the springtime!  

Annuals like Nemesia and Snapdragons are well adapted to our autumn temperatures and will produce flowers well into the autumn season, though may need frost protection to keep flowers beautiful.  

One of the risks we take with flowering annuals in the autumn is the risk of frost damaging flowers before their time. When frosts are expected, it is important to cover plants to preserve flowers. If you find this is a lot of work, let me introduce you to ornamental kale and cabbage. A symbol of a bountiful harvest, these plants naturally lend themselves to an autumn display and can last far beyond their flowering counterparts. In fact, the colder they get, the more vibrant their foliage becomes!  

A wheelbarrow full of flowers and pumpkins
Photo by H. Zidack

Again, using perennials in fall displays, lends itself to solving this problem. As hardy plants, they are able to adapt to cooler nights and light frosts. This works well with foliage plants like Heuchera, or hardy ferns, that do not need additional frost protection to survive.  

To add the finishing touches to your display, consider adding pumpkins, hay bales, or even a home-made scarecrow! Your fall garden will be the envy of the neighborhood! 

The UConn Home & Garden Education Center supports UConn Extension’s mission by providing answers you can trust with research-based information and resources. For gardening questions, contact us toll-free at (877) 486-6271, visit our website at homegarden.cahnr.uconn.edu, or reach out to your local UConn Extension center at cahnr.uconn.edu/extension/locations. 

This article was published in the Hartford Courant September 27, 2025

Plants Enjoy Summer Too!

By Dr. Matthew Lisy, UConn Adjunct Faculty 

A monstera adansonii with yellowing, curling and damaged leaves
This Monstera adansonii, that was sunburned. The damage can take weeks to fully appear, first starting as faint yellowing, then brown dead tissue (photo by M. Lisy).

A summer vacation can be beneficial for our houseplants provided that we pay attention to some abiotic (nonliving) factors.  Plants need time to adapt to new growing conditions or they can have deadly consequences.  Try and make the change as gradual as possible.  I usually wait until the end of May, where temperatures are consistently in the 70s for the highs, and no lower than 50s for the lows.   

Our plants cannot go from dim, indoor lighting to super bright full sun outside.  Any leaves subject to this will burn and die.  The best way to acclimate plants to life outdoors is to place them in the shade of a large tree for about a week, and then gradually expose them to some direct sunlight.  At first, start with only an hour or two of sun, and then add a bit more the following week until you transition them to full sun.  This is assuming that the plants in question are ones that need full sun.  Cacti and succulents can generally be transitioned to full sun (one notable exception are the forest cacti).   

Most of our houseplants are actually forest-floor species or epiphytes (these grow and live on the trunks of other trees).  Either way, those two groups of plants grow in the understory shade of a larger tree in nature, and do well there over the summer.  Some plants I saw recently for sale were called neon philodendron.  These have light green leaves (similar color to neon pothos).  The light was so intense that it bleached the leaves to a pale-yellow color, and some were turning brown.  The plants looked miserable, and the grower said she was going to move them to a shadier location.   

 I am not sure why we cannot have normal weather, but it seems we have had either too dry or too wet the last five years.  When it rains consistently, it keeps our plants in a constantly moist state, which leads to root rot.  I lost a few really nice philodendrons due to them being too moist in last summer’s constant rain.  The ideal setting would have the plants exposed to good light while under cover.  This way, the gardener can water them appropriately based on the needs of each plant.  If this is not an option, repotting and adding some extra perlite to the mix will help the pot shed the excess water.  Be sure to remove the saucer from the pots and hanging baskets while the plants are outside.  These will hold excess water and keep the plants in a constantly moist state and favor fungal infections.   

 A pot or hanging basket may only have about a gallon or two of soil at best, and will dry out quickly in the heat.  Depending on your soil type, it may be almost impossible to water enough.  Try to avoid full sun in the hottest part of the day between noon and 2:00 p.m.   

 In an exposed location, wind can rapidly desiccate, windburn, or break plants. A good friend of mine with a large houseplant collection in the Midwest had almost everything he owned blown over and damaged when a tornado swept through his town last summer.  Although he did not experience a direct hit, the winds were so bad it ruined many of his mature plants.  I told him to look at it like an unintentional propagation event.  When vining plants are grown in hanging baskets, they sometimes start to cling to the branches around them and rip in the wind.   

Hopefully this article will help plants enjoy their summer vacation.  It is a great time for plants to grow and be propagated.  Be careful of the extremes of summer, and give the plants a gentle exposure to the outdoors. 

 The UConn Home & Garden Education Center supports UConn Extension’s mission by providing answers you can trust with research-based information and resources. For gardening questions, contact us toll-free at (877) 486-6271, visit our website at homegarden.cahnr.uconn.edu, or reach out to your local UConn Extension center at cahnr.uconn.edu/extension/locations. 

This article was published in the Hartford Courant and The Westerly Sun June 21, 2025

Preparing for Spring on CRIS Radio

CRIS Radio: Focal Point 2/21/2025

Heather Zidack from the UConn Home & Garden Education Center talks to host, Stephen Thal, about climate change in the garden, houseplants, seed starting and more!


Transcript

00:00:01 Stephen Thal 

Hi, welcome to another segment on focal Point. This is Stephen Thal and I'm your host for today's program. 

We're going to be learning a lot about getting ready for the spring when we realize the weather is still not quite ready for spring flowers, but we want to get everybody thinking about it. So when the time comes, they'll have some ammunition and be prepared to get in there and get their hands dirty. 

00:00:31 Stephen Thal 

To help us understand that we have Heather from the plant and science program at the University of Connecticut. Welcome back Heather. 

00:00:41 Heather Zidack 

Hi Stephen. Thanks for having me back! 

00:00:43 Stephen Thal 

Yeah, it's great because you gave everybody some spirits to think about and encouragement. One of the things that we've been reading about lately is about climate control. And we were curious, you know, as we look around the country, different things are happening. People can't seem to explain why the weather has changed so drastically, and we're sure that this will impact the way we think about our flowers and the way we want to put a garden in and do herbs. Can you help us understand what climate control may be doing to this? 

00:01:22 Heather Zidack 

Yeah. So there are some things that we are noticing, especially from people just calling into our office with , um, in relation to climate change and a couple of the big things that have happened in 2023, I believe it was the fall of 2023 they did change the USDA hardiness zones. Which, when you're shopping for plants, your zone is actually going to tell you the coldest temperature that plants can tolerate to survive in your area. And so Connecticut, we're about a Zone 6 at this point, is the safe one. But it did shift and so there are parts of the state that are even seeing some warmer. Especially Shoreline is a little closer to zone 7. 

And you can look that up through the USDA to see the change from the zones. But that's a big change. Part of that happened because they had more data points and they could actually get more weather stations to report on what was going on, so it became a little more accurate in that sense. But we are also seeing some climate change effects happening as well. 

We’ve seen you know a lot of flooding over the past couple years. Remember up in you know, Vermont, New Hampshire, they had some of those floods that led to crop loss and contamination of fields. Storms with heavy winds can damage a lot of crops sometimes. 

And higher heat and humidity can affect your gardens as well.  

So if you're looking for management techniques, the first thing that you can do is make sure that you're providing enough water and nutritional support to your plants to endure any stresses that they might see during the growing season. So get a soil test. 

Have your your soil ready to go. Know what fertilizer you need. 

And make sure you're watering. Not too much, not too little. But you're keeping up with what the plants need. That's going to help them build their defenses, just like when we take vitamin C in the winter to prevent colds. 

If you're going to be seeing some hot weather come around and there's heat management strategies, one of the first things you want to do is remove weeds. It actually helps to increase air flow around the plants and also remove competition for some of those nutrients and water that I talked about a minute ago. 

You can also use shade cloth or something to kind of keep the plants out of the hot hot heat of the sun, especially on those really hot days. If you're able to, If you've got potted plants and you can move them to a a sheltered spot on those hot days it works for them. 

But those are a couple heat management strategies. 

00:03:58 Stephen Thal 

What about bugs? 

00:03:59 Heather Zidack 

For me? Oh. 

00:04:00 Stephen Thal 

What about anima-, little bugs like fleas, ticks, beetles? 

00:04:04 Heather Zidack 

Yeah, well, it's something that we notice in the garden and when we see these different fluctuations in heat and temperature. We see a lot of fluctuations in our insect populations. 

So we do see there have been some instances where you haven't had the ability to really have a good kill off of everything in the environment. And so the next year we see more bugs coming out. Our office deals primarily with the garden insects and the pathogens. So seeing things like-Last year, there was a lot of Japanese beetles. Last year there was a lot of fungal infections. 

Really, the best thing that you can do for that is again making sure any weeds are gone so they don't have anywhere to hide in your garden. You can also space your plants as they're recommended in order to make sure that you're having good airflow and good movement in between them, and again you're removing hiding places and you also want to prune all your woody ornamentals to encourage air flow too. 

So if those are some good strategies for that. 

00:05:09 Stephen Thal 

You mentioned fertilizer and doing soil testing. Is there a phone number that people can call and how do they do that? 

00:05:17 Heather Zidack 

Absolutely, so soil testing can be done anytime that the ground is not frozen, so I think we're in the one time of the year where we can't do it right now, but once the ground thaws, the UConn Soil Nutrient Analysis Lab is available for testing.They do a standard nutrient test and that covers all the basic nutrients that you would need for your home garden as well as pH so their phone number is 860-486-4274. 

Again, that's 860-486-4274. 

00:05:57 Stephen Thal 

Ok, Great. 

00:05:58 Stephen Thal 

So we now got to prepare for maintaining our house plants. As well as taking care of those that we choose to go outside and give them some fresh air and not allow too much heat, how are we going to do this? 

How do we prepare for it? 

00:06:16 Heather Zidack 

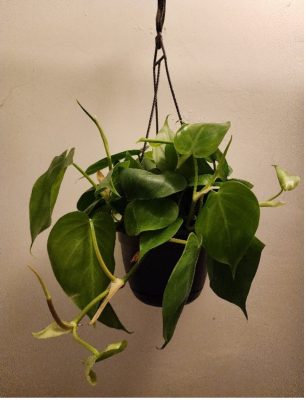
Yeah. So one of the things that you want to make sure that you're doing, it's still a little too cold to put anything outside just yet. You want to remember that our target is 50° at night before you're putting any plants outside. 

What you want to do with your house plans inside is you want to check for water. Make sure that they're accurate adequately-They have enough moisture in the pot. 

You want to check with your fingers, make sure that it's not clumping up too much in your hand. You want to make sure that it's also not like sand texture. You want to make sure there's an even moisture you might not need to water as much right now, especially if your plants are dormant, just like we don't think about hydration much in the winter, because we're not outside and in the heat, plants are the same way. So check before you water every time. 

The other thing that you can do right now is dust the leaves to scout for pests and disease. 

You can also start fertilizing your house plants when you see new and active growth. So like if there's new leaves, if there's new buds, if they're new shoots, those are signs your plant is waking up and you could use a little food at that point. 

And you want to make sure that you're checking any bulbs or plants that you have in winter storage. So if you dug anything up from your yard, like Canna lilies or Gladiolus bulbs or anything like that, check those bulbs in storage. 

Make sure they’re firm. Make sure there's no discoloration or smell to them and they should have some kind of humidity with them, but not too much. So if you had stored them in peat Moss, maybe missed in with the bottle for a second, but they don't need sopping water just yet. So you want to check all of those things. 

00:07:56 Stephen Thal

And what kind of tools do we need to help us with our projects?

00:08:03 Heather Zidack 

So big thing right now is going to be pruning season, so you can use-depends on the the size of the plant. But if you're outside, you want to have some some good hand pruners or some loppers- Depends on the size of your branches, but pruning right now is an advantage because there's low disease and low pest pressure outside, so plants can easily recover without being exposed to any other diseases. 

In general, people use hand pruners or like I said Loppers which are a little bit larger to cut their their trees back. 

And the rule that you follow is the rule of thirds. You don't want to cut off more than 1/3 of the entire plant if you want to leave 2/3 standing. And that ensures that there's enough of a ratio between roots and shoots that there's healthy regrowth.  

With that being said there are some different pruning techniques that can be suggested for different species of plants.  

So always consult with an arborist or landscaper or give our office a call. If you ever have any questions. 

00:09:10 Stephen Thal

And what about choosing the right fertilizer?

I know there are many different kinds. I know I've heard of fertilizer from Maine where they save all of the lobster shells, crab shells and mix them all together. And that's supposed to be good too, for your plants. 

00:09:29 Heather Zidack 

There's all kinds of fertilizers out there and so. There's different products that are organic. You have things like manures and composts and things like that. Also have synthetic materials like regular. You have coast of Maine like you talked about. The important thing when you're looking for fertilizers, we always recommend getting that soil test first. Because you want to know what your baseline is, right? 

You want to know where you're starting before you add anything else. Once you have that, the soil test is going to tell you in general terms you have 3 numbers on a bag. If you look at a bag of fertilizer, there's going to be usually something like the effect of 10-10-10, 5-5-5, 10-15-10 20-20-20, something like that. 

Those 3 numbers there, those 3 numbers represent in this order nitrogen, phosphorus and potassium. So when you're looking at those numbers, you're actually looking at a percentage of how much of that nutrient is in the bag. 

00:10:31 Heather Zidack 

So once you have your soil test for example and it says you are deficient in potassium. So, NPK, your third number there would be the one that you would want to add a little bit more of you would maybe look for something like a 5-5-10. 

00:10:47 Heather Zidack 

It all depends on what your soil test comes out as and what you're actually looking for with a specific crop, so it's hard to give a generalization, but knowing how to read that bag is your first step in knowing what to shop for when you're ready. 

00:11:02 Stephen Thal

If we're going ahead and deciding to plant herbs, is this a good time of the year inside to get those started?

00:11:11 Heather Zidack 

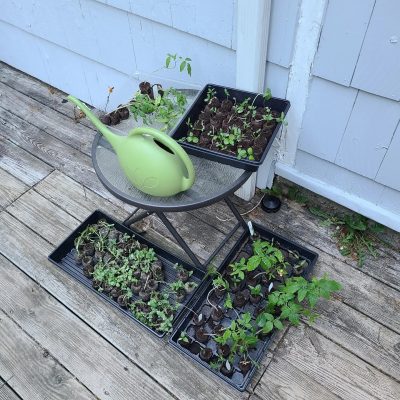
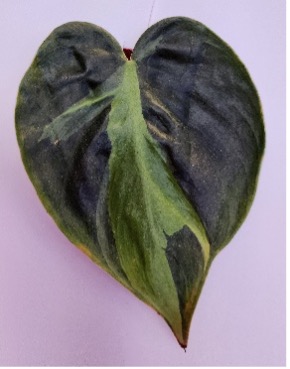
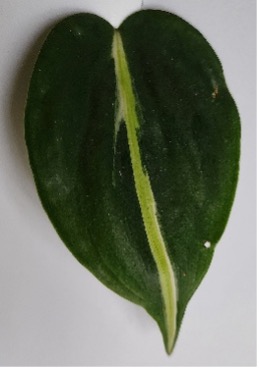
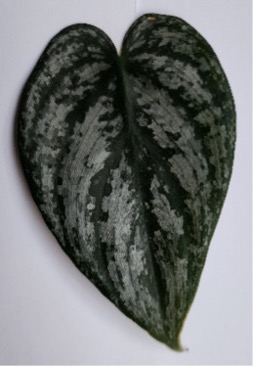
Absolutely. There's a lot of plants that you can start right now. Herbs are going to be great for kitchen gardens. You can pretty much start them any time of year. 

Great for culinary purposes, but they're also loved by pollinators. The Swallow tail Caterpillar in particular loves things like dill and parsley plants, and they're all over them in my yard. So I actually grow a little extra just for them. 

00:11:35 Heather Zidack 

You get a lot of fragrance and texture out of all of the fresh herbs, which is fantastic, and it can be easily done, indoor or outdoor. 

So right now you would want to start everything indoors that you want. The really cool thing with herbs is that there are some of them, like basil is an example. You know how they sell the basil plants in grocery stores, right? 

00:11:56 Stephen Thal 

Right. 

00:11:57 Heather Zidack 

So what you can do is you can actually cut off a stem of that basil, remove the leaves up to like the first leaf, maybe the first 3 or 4 leaves up there, put it in water, and it'll send out its own roots that you could then put in a pot yourself. 

00:12:12 Heather Zidack 

So you don't necessarily even need to do anything with seeds. You can do cuttings to keep your herbs going. 

00:12:17 Heather Zidack 

The only thing I would recommend is to plant if you're going to plant mint. Keep it in containers and keep it away from the ground. Don't put it outside unless you want to grow it for the rest of your life. It does have a pretty aggressive tendency, and once it hits the ground and gets rooted in, it can just grow and grow and grow. And then you have mint in that area forever. 

But other than that, herbs are great to start right now. 

00:12:43 Heather Zidack 

A lot of people are starting, especially if they do cut flowers and small seeded plants right now. Like if you think snapdragons. If you think Cosmos, some of those they need to start now because they need a lot of time to grow. Veggie wise. People are starting things like broccoli and Brussels sprouts at this point. 

Most people have started like onions and shallots by now, but you probably still have time if you were to do it like right now. And so really, there's a lot of different veggies that you could be starting right now. 

00:13:19 Stephen Thal 

Yeah, those are are very critical things that we have to keep keep aware of. 

00:13:26 Heather Zidack 

Yeah, timing is everything with when it comes to starting. 

00:13:30 Stephen Thal 

Right. And this is Stephen Thal with another segment on Focal Point and we're interviewing Heather from the Yukon plant and Science program and they offer a lot of help to citizens in the state. In terms of not only analyzing the soil, but talking to you about the different kinds of plants or herbs that you might want to consider starting and what has to be done to maintain them, and we know that Climate change has strongly impacted the way we have to do our season so that we can take all of our hard labor in to make sure we get some good results and not have it fail for us during the during the coming growing season. 

00:14:20 Stephen Thal 

I think it. 

00:14:20 Heather Zidack 

Yeah. 

00:14:21 Stephen Thal 

I think it forces us to have a have a little more time to work with this. 

00:14:30 Heather Zidack 

Yeah, it's really interesting. You know the frost date is a big thing that's important when you start planting seeds and when you start planting outside, especially with vegetable gardens and a lot of gardeners- 

I remember, even when I was young, used to plant right around Mother's Day, which is in mid-May. In the past couple years, we probably could have done that, but you have to really watch the weather. 

I've seen a few seasons where you're waiting past Memorial Day, which is the end of May at this point, and it's-For me, Memorial Day has become more of that target. Be like-this Is definitely the weekend things are going to go in. 

You can keep an eye on the weather. And as long as the weather is staying above, you know, we're not getting frost. You can put your seedlings out, but you're taking a risk because we can have a frost anytime in that spring, part of May, and if you do you can lose your seedlings, so if you do put anything in the ground a little bit early do so with caution. 

Keep an eye on the weather and be prepared to be able to run out and cover them if you need to. We always recommend like fabric coverings like either a towel or a sheet or a pillow case or something like that to cover your plants if they're in the ground and we have a frost coming. Using anything like plastic is definitely going to exacerbate the problem and cause more damage when it comes to frost and freezes than anything else. 

So I would say. Look at your frost date. 

I know the Farmers Almanac has a target frost date that you can look up, but if you want to play on the super safe side, I plant right around Memorial Day and that's a good time to plant, be outside and make sure that you're keeping an eye on the weather when you're putting things out. 

00:16:21 Stephen Thal 

Are there specific questions you should be asking the local gardeners or when you go in and buy things? To make sure you're getting the things that you want, especially the different plants. 

00:16:35 Heather Zidack 

Yeah, you want to look for quality seed whenever you're purchasing. In general, most garden centres have. Seed that is timely. So you're going to see, just like we have certain products in the grocery store that have like an expiration date. There are seeds that have that date planted on the back. 

They should be packed for this year and I believe they have to sell seeds that are packed for this year, so that's not something that you have to worry about too much, but it is good to know where to look for that information. Look at where It will say “packed for” and then it will have the year on there. 

It'll also show the germination rate, which is how well, the seed will actually sprout. That's advertised on the envelope as well as like a quality control and so you want to make sure that it's got a good germination rate. 

I've seen seed products before that I've purchased where they had a note on the envelope that said last year we had a low germination rate. So this year we're giving you extra seed and in the envelope it was a little heavier pack than what it had been in previous year. 

So you want to make sure you've got a good germination rate. You want to make sure that there's a a date that's packed for this year. Those are both more important than anything like brand. You want to make sure that you're looking for good seed when you're starting. 

Something to keep in mind is that there are- if you are someone who saves seeds from year to year, you want to make sure you're storing them well. Keeping them in a cool, dry area. 

And if you do have seeds that are either seed that you've saved and you have a history of, like plant disease in previous years, or if you've bought untreated seeds and you have a reason to have concern that maybe you had some kind of, you know, plant disease a previous year. You can have your seeds treated with something called hot water seed treatment and our plant diagnostic lab does that. 

00:18:37 Heather Zidack 

To help make sure that there are no pathogens on the feed when you plant them in the ground to give them a healthy start. So that's an option, especially if you have a history of disease in your garden that some gardeners do like to take advantage of. 

00:18:52 Stephen Thal 

Oh, that's good. 

00:18:53 Stephen Thal 

Are there any special plants that some of the gardeners may be putting out this for sale that we need to be aware of, especially for the disease? 

00:19:04 Heather Zidack 

So you want to be careful with-I will say if you're looking at things like plant swaps and you're going to like Garden Club plant swaps and things like that, we did help out a lot of garden clubs last year as they were looking at how to do this while still being aware of the jumping warm issue. And so jumping worms are an invasive worm that are going from property to property and the best way to make sure that they don't transfer between properties is to make sure that your roots of your plants are cleaned off.  

So. A lot of, especially at plant swaps, a lot of these garden clubs were having people dig their plants that they were willing to donate. Rinse the plants off at the roots. Repot them into soilless potting media. 

And then they were willing to trade them and and exchange them at these swaps. 

So you want to make sure if you are going to plant swaps, they are taking some kind of precaution like that and if they are not, you can still take the plant home but you want to make sure that you're doing the rinsing of the roots to make sure that nothing is coming onto your property. 

00:20:18 Heather Zidack 

We had a lot of garden clubs that were able to take some of these procedures and be very successful with their plant swaps and not have to worry about it at all. But education is that first step in knowing how to manage this issue right and so that way they knew that they had to rinse the roots. They had to keep their gardeners educated on how to prevent this from spreading, and they were able to still have plant swaps and stuff, so not encouraging any fear of plant swaps. 

Just kind of giving you that heads up of tou may need to wash the roots if you bring some. 

00:20:50 Stephen Thal 

Yeah, those are very important things. And I think also as a person who may be out with your plants or just sitting in the yard admiring them, I think we need to remind people to wear their sunglasses and to wear a hat and use proper sun protection. 

00:21:07 Heather Zidack 

Very important. I always used to tell my colleagues when I worked at a garden center, I'd say water the plants and water yourself. 

00:21:16 Stephen Thal 

That's good. 

00:21:17 Stephen Thal 

Yeah. Good. 

00:21:20 Stephen Thal 

Any other items you'd like to have us our listeners be aware of and enjoy their spring fling in the garden and in their house plants. 

00:21:32 Heather Zidack 

Yeah. One of the things that I would love to make everyone aware of is that the Connecticut Flower and Garden show is coming up at the end of February. It's going to be February 20th to 23rd at the Hartford Convention Center and the Home and Garden Education Center, Myself and my colleagues will be there answering garden questions. 

So if you have garden questions, please feel free to stop by and say hi to us. We've also got speakers that are going to be there every single day. And it's a nice taste of spring because a lot of local landscapers and garden centres will do full on displays. 

00:22:10 Heather Zidack 

It's very cold. We're starting to see Snow and it's nice to take a break and just have that smell of fresh flowers all around and everything. So it's a great opportunity to get a taste of spring. And get your garden questions answered. If you need to see us. So it's really good coming up. 

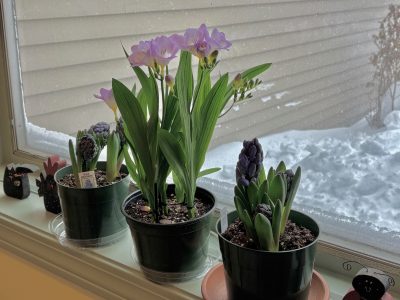
00:22:29 Heather Zidack 

The other thing that I have for advice, if you're looking for spring a little bit early is if you have anything like Dogwood, forsythia, crab apple in your house or in your property, you can take cuttings of them and put the branches in warm water. 

And they could force the flowers to open right now. So you could get a little bit of spring early in your house by doing that. 

00:22:53 Heather Zidack 

The other thing that's really important to keep in mind is that if you are an avid gardener. It's a good time to take any of your tools that are in the shed and make sure they're in proper working order. Make sure that all of the handles are tightened. 

Make sure everything is sharpened if it needs to be sharpened and paint the handles with a bright red or bright orange paint to help you see them when you put them down in the garden. 

00:23:17 Stephen Thal 

Yeah. And I think also lawn mowers or any working tools like that should be taken to a mechanic to make sure everything's working. 

00:23:24 Heather Zidack 

Absolutely anything with an engine. Don't do yourself. 

00:23:30 Stephen Thal 

Yeah. Sounds like you've had some experiences. 

00:23:34 Heather Zidack 

Yeah. 

00:23:35 Stephen Thal 

Now in terms of plants, we have to watch out for some of these poisons that may be used to help plants. Are there any that we should avoid? 

00:23:47 Heather Zidack 

So most of the ones, fortunately, that you want to avoid too much are not allowed for sale to homeowners. That's a really, really good thing. 

What you want to make sure that you're looking at if if anyone is using any chemicals in the garden. Every single product has a label on it, and that label has to match whatever you're trying to to achieve, right? 

So If you're trying to eliminate cabbage worms, for example, in your garden. That label needs to say that that product will take care of cabbage worm. 

Otherwise you should not be using it whatsoever, and so we say this recommendation with any chemical, but also all of those home remedies that you hear about. We don't recommend using them because there's not that science to back it up that says this label identifies the cabbage worms. And cabbage worms are my identified problem so this is going to work. So that's one of the first things. 

00:24:45 Heather Zidack 

The other thing that's really important in making sure that you're monitoring regularly and looking for bugs. Because a lot of times if you can take care of the problem early, you don't necessarily need those chemicals. Or there could be other ways to manage it before you get to that point. So as soon as you see something, get a picture and we could help you or have someone at a garden center help you identify what's what's going on. And what you can do to treat it. 

00:25:14 Heather Zidack 

Reading that label is the most important thing that anybody can do, and it's the safest thing because you want to make sure you're doing targeted approaches to target species when you're using any chemicals in the garden. 

00:25:27 Stephen Thal 

Yeah. And also if you have a bug you're not familiar with, put it in a little container and send it up to you guys. 

00:25:35 Heather Zidack 

Yes, we can do that. We do insect identification-insects found in the garden. If, if they're found inside the home, we usually recommend like either a pest control expert or there's other resources available, but we are definitely able to do any garden pest. 

00:25:53 Stephen Thal 

Yeah. How about the got local garden clubs? Can they be helpful too? 

00:25:58 Heather Zidack 

Sometimes! They actually have some good resources. 

00:26:03 Heather Zidack 

If you're looking for an identification or a diagnosis, it really is good to come to the either the plant diagnostic lab or our office here because we have the connection to the diagnostic lab. But there are garden clubs. There are a lot of people with a lot of knowledge about gardening. The the reason that we we pride ourselves on is because we have a lot of research based information that we’re able to share with our clients. 

00:26:31 Stephen Thal 

Well, we want to thank you for coming in and sharing this vital information for getting your spring things started. 

00:26:40 Heather Zidack 

Thank you so much for having me. 

00:26:40 Stephen Thal 

And you know well, give us a call when the neck was a fall we have to get ready. 

Or. If there's any alerts, we can send them out. 

00:26:50 Heather Zidack 

Yes, I will let you know if there's anything else. 

00:26:55 Stephen Thal 

Well, I thank you very much, Heather, for coming on again. At the program we really enjoyed. 

I'm sure I got a lot out of it and I'm sure people here got a lot out of it. 

Appreciate you and your staff for all you do, why don't you give your number one more time? 

00:27:12 Heather Zidack 

Yes, if anybody has gardening questions for us, they can call and our number is 877-486-6271. Again, that's 877-486-6271. 

00:27:31 Stephen Thal 

OK, very , good. Thank you. Everybody thank you. 

Thank you for all you do to help make us a successful spring season. 

00:27:39 Heather Zidack 

Yes, thank you for having me. Have a good spring! 

00:27:41 Stephen Thal 

Like this is Steven Thal and another segment on focal point and we wanted to thank you the listeners for listening to all of the focal point programs. 

00:27:53 Stephen Thal 

As we mentioned earlier in the program, please wear your sunglasses and a hat because the sun is going to be a lot stronger this year because of climate changes. 

And also practice a family plan. If you don't know anything about it, contact a local fire department or go on the computer regarding emergency fire plans and involve everybody in in the House and doing a piece of it. And if you practice it a few times and also make sure that. Your fire alarm batteries or whatever are up to date cause a lot of them today are lasting 10 years. 

So get involved because life you say may be your own. 

00:28:36 Stephen Thal 

Thank you for allowing us into your homes. Safe and stay healthy. 

Shine a Light – But Which One?

By Emily Leahy, UConn Home & Garden Education Center

Seedlings under LED lights
Seedlings growing under programmable LED lights. Photo by H. Zidack

The dead of winter brings a longing to spend time outside in the garden again. While this may not be possible yet, it is easy to craft your own growing space indoors. The elements of the outdoors that allow plants to thrive – light, warmth, and water – can all be brought indoors with a little creativity and the right resources.

Some steps remain unchanged. Still, refer to the plant’s label for guidance on choosing a proper container, water and nutrient needs, as well as temperature preferences. Guidelines on how much light the plant should receive can also be found on the label – but how can this be applied indoors?

One of the more challenging aspects to simulate, indoors, is an adequate amount of light. When outside, plants rely on the sun for light needed to carry out photosynthesis. This chemical reaction produces sugars which are used as energy in processes essential for the growth and maintenance of a healthy plant. While plants can still receive sunlight indoors through rays shining through windows, this often cannot act as an equitable substitute for unobstructed sunlight outdoors. This is where supplemental light sources in the form of grow lights come into play. Grow lights are specially designed with the purpose of emitting a wider spectrum of light wavelengths to enable photosynthesis. But with so many options available, how can you choose which is the best option?

Generally, there are two types of grow lights – bulbs and fixtures. Bulbs can be placed into existing light fixtures like lamps or overhead lighting. However, this can be unsuitable as it is difficult to control the distance from the plant and angle at which the light shines. Grow light fixtures are separate systems which can provide multiple plants with light simultaneously, offering a more even distribution. With proper setup, they can be positioned at an advantageous angle to provide plants with their preferred amount of light.

Next comes the question of which kind of light is appropriate for your plant – incandescent, fluorescent, or LED? It is important to determine beforehand the level of light which your plant prefers – high, medium, or low. Incandescent lights, while costing the least, are also the least efficient. 90% of their energy is released in the form of heat, while only 10% is light itself. While this makes them good contenders for low-light plants, they also require caution as they can provide plants with an overwhelming amount of heat.

Fluorescent lights are well-suited for plants requiring low to medium light. They emit the full spectrum of light, essential for promoting growth as they mimic natural sunlight. Most often they are seen as strips or tubes of light that can be affixed above plants, but they can also be purchased in bulb form. LED lights emit the full spectrum of light as well, while simultaneously emitting less heat than other bulb types. Yielding a high overall efficiency, LEDs can be customized with different colors/wavelengths of light to provide certain advantages for some plants. For example, blue lights promote vegetative growth, while red lights do the same for flowering and fruit growth.

Grow light setup
Different stages of growth may need different spectrums of light. Photo by H. Zidack

After choosing the most suitable kind of grow light for your plant, there are a variety of other tips helpful to consider. The type of plant not only determines the proper type of light to use, but also how much light should be provided. Supplying light 24 hours a day is not ideal as it can overwhelm the plant – remember the objective is to mimic the light conditions of the outdoors. Therefore, plants will require some hours of darkness each day.

Seedlings generally prefer 14-16 hours of light per day, as they necessitate the most encouragement for growth. 12 hours of light is suitable for herbs and other greens, while houseplants fall between the range of 6-12 hours per day – be sure to refer to the product label for any specifications on light preferences.

In terms of setup, lights should be angled to ensure a direct stream of emittance onto the plant in order to receive its full benefits. It is best to affix lights about 12 inches from the plant, although adjustments can be made as you see fit. Some indoor gardening systems are available that can be customized to fit specifications according to the type of plant being grown. It is also important to purchase lights that are rated to withstand humidity and moisture if they are being kept in a greenhouse-like environment.

Be sure to always refer to your plant’s label for its specific preferences for light and other growing conditions. With the help of grow lights, you can wait out the winter by bringing a little bit of the outdoors, indoors!

The UConn Home & Garden Education Center contributes to the Cooperative Extension mission of the University of Connecticut by connecting the public with research and resources provided by the University. For your gardening questions, feel free to contact us, toll-free, at the UConn Home & Garden Education Center - (877) 486-6271, visit our website at https://homegarden.cahnr.uconn.edu/, or contact your local Cooperative Extension center https://cahnr.uconn.edu/extension/locations/.

This article was published in the Hartford Courant Feb. 15, 2025

Do You Dig Dahlias?

By Dawn Pettinelli, UConn Home & Garden Education Center

Dahlias in a bed at Enders island
Dahlias at Enders Island. Photo by dmp2024

A couple of weeks ago, I was fortunate to visit the spectacular dahlia gardens on Enders Island in Mystic. For those unfamiliar with this retreat, an 11-acre seaside estate was donated to the Society Edmund by Mrs. Alys E. Enders in 1954. This Roman Catholic religious community offers ministry, retreats and respite to many. The grounds are open to all for contemplation or just unbound appreciation of nature and horticultural beauty.

Gardeners will delight in the gorgeous, well laid out garden rooms but especially be entranced by the vast array of dahlias. The gardens at Enders Island are filled with over 300 varieties of prize-winning dahlias in all colors (except blue), shapes and sizes imaginable. A Dahlia Preservation Trust was established to preserve the dahlia collection that is rated as one of the largest in New England.

Any of us growing dahlias while appreciating their cheery, attractive blossoms lasting long into the fall, do realize they are not winter hardy, even with milder winters attributed to climate change.  Dahlias are native to Central America. In fact, they are Mexico’s national flower. Those wishing to save the tuberous roots for replanting next year, must dig them up and store them over the winter.

Ideally, gardeners should wait until a frost blackens the foliage. Then, if possible, wait a week so any carbohydrates left in the above ground tissue can make their way to the roots to enable good sprouting next spring when the tuberous roots are replanted. This has been a particularly confusing fall to both plants and gardeners. Frosts have hit some areas but often not severe enough to affect all plants and dahlias in more protected sites are still blooming their heads off, a trait most appreciated by pollinators such as bees.

On the other hand, it is November. Time to reign in gardening activities and begin preparations for the holidays. What’s a gardener to do?

Since my plants were losing bottom leaves to disease and looking a little ragged, I just decided it was time to dig them and move the tuberous roots into the cellar. Before digging any dahlias, be sure to note their names. If tags were not written out when planting, make them out now if color and flower type are important.

Cut back stems to 2 or 3 inches and carefully dig the tubers starting at least 8 inches away from crowns so tubers do not get sliced or speared. Use a spade or pitchfork but dig in carefully. This year the soil is so dry that it was not necessary to leave the tuberous roots in the sun for a few hours so the soil clinging to them could dry and be shaken off. Every one I dug up was dry enough so that practically no soil clung to the roots. Each was placed in a separate container with repurposed labels.

Dahlia tubers with a white tag
Dahlia tubers tagged for storage. Photo by dmp2024

Perusing through online sources, many suggest washing tubers off with a hose and letting them dry before storing. I have let them dry out in wet falls and shaken dried soil from them before storing but have never hosed them off. Maybe follow the approach that makes most sense to you. If any remaining soil is washed off, the tuberous roots should most likely be stored in lightly moistened peat moss or other slightly damp organic material, so they will not desiccate over the winter. For me, leaving a bit of soil around the roots that are stored in pots in the cellar over winter helps to keep tubers from shriveling with only a sparse sprinkle of water once or twice a month.

When happy, dahlias will multiply but it is probably best to leave the whole clump together and separate it before planting next spring when multiple buds or eyes can be seen. Keep the tuberous roots at 45 to 55 degrees F and check every 2 to 3 weeks for signs of decay or desiccation.

For an early start, the tuberous roots can be set into beds usually by late April unless unseasonably cold weather is predicted. If you have questions about overwintering dahlias or for other gardening questions, contact the UCONN Home & Garden Education Center, toll-free, at (877) 486-6271, visit their web site at www.homegarden.cahnr.uconn.edu or contact your local Cooperative Extension Center.