Annuals

Do You Dig Dahlias?

By Dawn Pettinelli, UConn Home & Garden Education Center

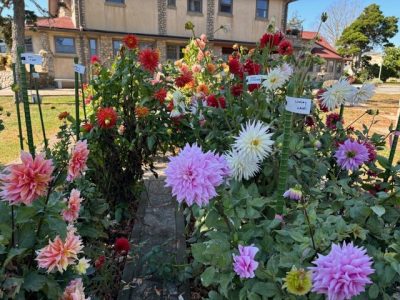
Dahlias in a bed at Enders island
Dahlias at Enders Island. Photo by dmp2024

A couple of weeks ago, I was fortunate to visit the spectacular dahlia gardens on Enders Island in Mystic. For those unfamiliar with this retreat, an 11-acre seaside estate was donated to the Society Edmund by Mrs. Alys E. Enders in 1954. This Roman Catholic religious community offers ministry, retreats and respite to many. The grounds are open to all for contemplation or just unbound appreciation of nature and horticultural beauty.

Gardeners will delight in the gorgeous, well laid out garden rooms but especially be entranced by the vast array of dahlias. The gardens at Enders Island are filled with over 300 varieties of prize-winning dahlias in all colors (except blue), shapes and sizes imaginable. A Dahlia Preservation Trust was established to preserve the dahlia collection that is rated as one of the largest in New England.

Any of us growing dahlias while appreciating their cheery, attractive blossoms lasting long into the fall, do realize they are not winter hardy, even with milder winters attributed to climate change.  Dahlias are native to Central America. In fact, they are Mexico’s national flower. Those wishing to save the tuberous roots for replanting next year, must dig them up and store them over the winter.

Ideally, gardeners should wait until a frost blackens the foliage. Then, if possible, wait a week so any carbohydrates left in the above ground tissue can make their way to the roots to enable good sprouting next spring when the tuberous roots are replanted. This has been a particularly confusing fall to both plants and gardeners. Frosts have hit some areas but often not severe enough to affect all plants and dahlias in more protected sites are still blooming their heads off, a trait most appreciated by pollinators such as bees.

On the other hand, it is November. Time to reign in gardening activities and begin preparations for the holidays. What’s a gardener to do?

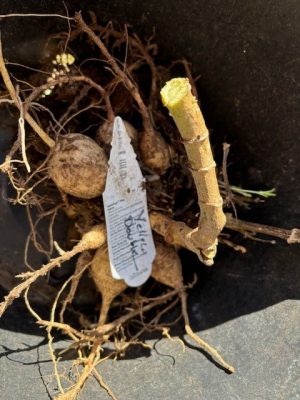
Since my plants were losing bottom leaves to disease and looking a little ragged, I just decided it was time to dig them and move the tuberous roots into the cellar. Before digging any dahlias, be sure to note their names. If tags were not written out when planting, make them out now if color and flower type are important.

Cut back stems to 2 or 3 inches and carefully dig the tubers starting at least 8 inches away from crowns so tubers do not get sliced or speared. Use a spade or pitchfork but dig in carefully. This year the soil is so dry that it was not necessary to leave the tuberous roots in the sun for a few hours so the soil clinging to them could dry and be shaken off. Every one I dug up was dry enough so that practically no soil clung to the roots. Each was placed in a separate container with repurposed labels.

Dahlia tubers with a white tag
Dahlia tubers tagged for storage. Photo by dmp2024

Perusing through online sources, many suggest washing tubers off with a hose and letting them dry before storing. I have let them dry out in wet falls and shaken dried soil from them before storing but have never hosed them off. Maybe follow the approach that makes most sense to you. If any remaining soil is washed off, the tuberous roots should most likely be stored in lightly moistened peat moss or other slightly damp organic material, so they will not desiccate over the winter. For me, leaving a bit of soil around the roots that are stored in pots in the cellar over winter helps to keep tubers from shriveling with only a sparse sprinkle of water once or twice a month.

When happy, dahlias will multiply but it is probably best to leave the whole clump together and separate it before planting next spring when multiple buds or eyes can be seen. Keep the tuberous roots at 45 to 55 degrees F and check every 2 to 3 weeks for signs of decay or desiccation.

For an early start, the tuberous roots can be set into beds usually by late April unless unseasonably cold weather is predicted. If you have questions about overwintering dahlias or for other gardening questions, contact the UCONN Home & Garden Education Center, toll-free, at (877) 486-6271, visit their web site at www.homegarden.cahnr.uconn.edu or contact your local Cooperative Extension Center.

I Want My Mum: A Fall Classic Through the Ages

By Abigayle Ward, UConn Department of Plant Science & Landscape Architecture Graduate Student

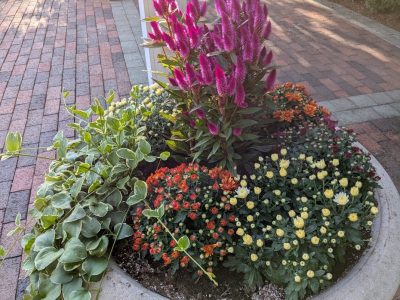
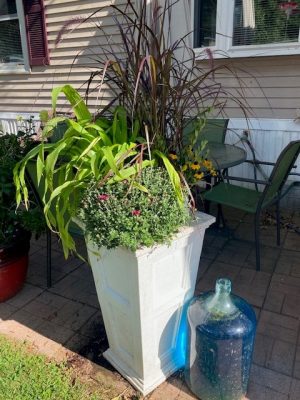
A group of fall flowers mixed with mums in a container.
Orange, purple, and white mums used as “filler” in a potted arrangement at Wickham Park in Manchester, CT. Photo by Abigayle Ward.

With the arrival of fall, one popular bloom brings the brilliant colors of forest foliage to our doorstep: With flower colors coming in purple, red, orange, yellow, and more, chrysanthemums, or more simply, mums, have been a favorite for centuries. First domesticated in China over 3,000 years ago, mum roots, seedlings, and flower pedals were used as herbal remedies in traditional Chinese medicine.

For nearly 2,000 years, mums have been the symbol of fall in Chinese culture: The Double Ninth Festival, celebrated on the ninth day of the ninth lunar month, celebrates harvest, ancestors, and the beauty of autumn, with mums taking center stage as both decorations, accessories, and a floral wine.

First introduced to Europeans in the 1600s, mums quickly became a fall favorite. By the mid-1800s, the Victorians had written extensive literature on the interpretation and meaning of the color of each bloom. While some colors have carried the same meaning for thousands of years – such as white blooms symbolizing mourning – others took on entirely different meanings. While in China, a red mum represents fortune and luck, a Victorian would interpret this as a declaration of love.

Luckily, it seems many home gardeners in the United States nowadays are more concerned with the aesthetic appeal of their blooms than the meanings, so major misunderstandings are avoided. With several thousand cultivars available, mums come in many color combinations and growth habits. The National Chrysanthemum Society of the USA recognizes 13 different flower classes, ranging from 6-inch diameter flower balls with many layers of florets to smaller, 2-inch diameter flowers with only a single layer of a few petals. Some mums bloom early, in August, while others will bloom in October.

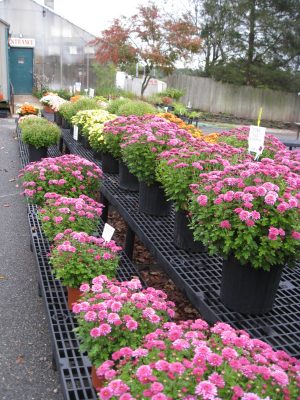
A row of potted mums for sale on a bench
Mums can be found for sale at garden centers starting in late summer. Photo by dmp2024

Further, some mums are annuals regardless of USDA hardiness zone, while others are perennials in zones 5-9. While so-called “florist mums” or “pot mums” are generally grown as annuals and will not survive winter frost, “garden mums” can survive winter frost if planted early enough in the growing season. If you wish to purchase a garden mum, but the mums are unmarked, a good way to tell the difference between florist and garden mums is to check for stolons near the base of the plant. Stolons, also known as “runners”, are shoots that grow out from the base of the mother plant. A daughter plant may have roots growing from the end of a stolon. If you want to purchase a perennial mum, check around the base of the stem for stolons – they will most likely be quite short but are a good sign that the plants may overwinter successfully. Alternatively, if you want to be sure you grow a permanent mum installation that comes back year-after-year, you can start some varieties of hardy garden mums from seed in late winter prior to planting out in spring. Get any mums you want to try overwintering in the ground as soon as possible. You can plant mums next year in spring or summertime to give them plenty of sunny weather to grow hearty root systems prior to the first winter frost of 2025. Mulch around your fall planted mums to help insulate their roots from frost.

Both annual and perennial mums benefit from at least 6 hours of direct sunlight per day. In Connecticut, a sunny spot to the south of your home would be ideal. Water mums thoroughly once the topsoil is dry but try not to wet the leaves or the flowers. Water left on the leaves or flowers can make mums prone to fungal diseases, which can make them unsightly or even kill them in severe cases. Towards the end of the season, especially between October and November, consider leaving the blooms on as long as possible to allow late-season pollinators to collect nectar.

Whether planted in a permanent flower garden or kept in a pot on the porch for fall, mums are an excellent addition of rich fall colors to any home gardener’s flower collection. Consider picking some up this season at your local garden center or plan on purchasing plants or seeds next year.

If you have a question on caring for your mums or for other gardening questions, contact the UCONN Home & Garden Education Center, toll-free, at (877) 486-6271, visit their web site at www.homegarden.cahnr.uconn.edu or contact your local Cooperative Extension Center.

Tips from UConn Floriculture Help Spruce Up Container Plantings

By Dawn Pettinelli, UConn Home & Garden Education Center

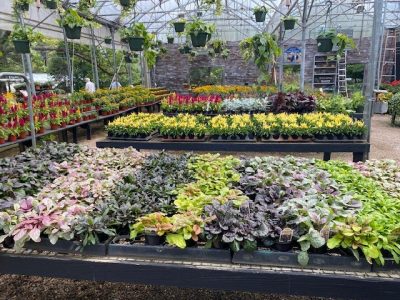
Fall container plant selection at a greenhouse
Photo by dmp2024

As summer wanes and the cool breezes of autumn begin to roll into Connecticut, it’s the perfect time to refresh your container plantings. Shelley Durocher-Nesta, UConn Plant Science Floriculture Grower, says this summer’s rain and high temperatures have many of our container plantings looking a little ragged but fall presents a unique opportunity to infuse your outdoor spaces with rich colors, interesting textures, and seasonal charm that lasts well into the cooler months

By the end of summer, many annuals start to fade. To maintain a lush and lively look, she suggests replacing them with plants that thrive in cooler weather. A top candidate for fall plantings, both containerized and inground are mums, obviously. They offer an explosion of color in shades of yellow, bronze, pink and reds. Asters are runner’s up, flashing their cooler shades of purples and pinks.

Ornamental cabbages and kale are leafy plants bringing texture and interest to plantings, often with their lacy ruffled edges. Hues range from deep purple to violet and from white to green, some being two-toned.

Recently, pansies and violas have been showing up as fall bloomers. These delicate flowers add a pop of color and laugh off light frosts. Pansies, with their cheerful ‘faces’ are particularly popular and come in a wide range of colors. Ornamental peppers in shades of yellow, purple red and orange are also available often in 4-inch pots

Depending on your color scheme and container size, two other great fall accompaniments are heuchera (coral bells) with their stunning foliage in a myriad of colors, and sedums that can be used either for their unique fleshy foliage or pollinator-friendly blooms.

Don’t forget ornamental grasses for their attractive seedheads and whispering foliage. If pinched for room, a few stalks of dried grasses or wheat can give your containers a rustic, harvest-time feel.

Before purchasing new plants, access the plants presently in your containers. Groom, deadhead and cut back leggy annuals like petunias and verbena. If you have summer plants that are still thriving, you can repurpose them by combining them with fall plants in the same container for a mixed-season look. However, often one finds that their summer layout doesn’t work as well with new plants. Don’t hesitate to replace staid offerings. Durocher-Nesta, agrees saying that switching out her summer planters that are getting a little tired by the end of August is a joy.

Container full of fall annuals
Photo by dmp2024

Refresh the soil in containers before planting new fall selections. Summer plants have depleted the nutrients, so replacing the top few inches with fresh potting mix can get fall plants off to a better start. If your container is large and you can’t replace all the soil, mix in some compost or at least a slow-release fertilizer, as directed on the package, to rejuvenate it,

Consider elevating some containers on stands or steps to create varying heights. Grouping containers of different sizes together on your porch or patio can also add depth and visual interest.

One of the joys of fall container gardening is the chance to play with a different color palette. While summer is about bright, vibrant colors, fall offers a more subdued, warm earthy palette. Think deep purples, burnt oranges, and rich reds, balanced with greens and whites.

As the weather cools, plants will need less water but check regularly. Container plants can dry out quickly especially on sunny fall days. Stick a finger in and add water when the top inch of potting media feels dry.

Regularly deadhead spent flowers and remove any yellowing leaves to keep your containers looking tidy and to encourage continued blooming. As frost becomes more likely, be prepared to cover sensitive plants or bring containers indoors on particularly cold nights.

In addition to the plants, fall-themed accents can enhance the seasonal appeal of your containers. Consider adding small pumpkins, gourds, or decorative squash to the mix. For a touch of whimsy, add seasonal decorations like mini scarecrows, wooden sunflowers or decorative berries.

Sprucing up your container plantings for fall in Connecticut can bring a fresh, seasonal look to your outdoor spaces. With the right plant choices, thoughtful arrangement, and a few seasonal accents, your containers can remain a focal point of beauty and interest well into the cooler months. Durocher-Nesta shares thoughts about her favorite fall flower: “Bright and fresh mums bring a smile to my face during a time of year when falling leaves and shorter days mean winter is coming.  They’re one last Hoorah! for the growing season.”

If you have questions on container plantings or on any other home or garden topic, contact the UCONN Home & Garden Education Center, toll-free, at (877) 486-6271, visit their web site at www.homegarden.cahnr.uconn.edu or contact your local Cooperative Extension Center.

Coleus: A Victorian Dream

By Abigayle Ward, UConn Dept. of Plant Science & LA Graduate Student

Red coleus in the middle of a flower garden
A bed of red coleus surrounded by magenta celosias, and baby pink and purple petunias, complete with a walking path dividing the bed in two. This circular bed is located at the end of Mansfield Road within the University of Connecticut Storrs campus.

Seen anywhere from great-grandma’s ornamental garden to your neighbor’s hanging basket, coleus are the colorful, velvet-textured leafy cousins of oregano and deadnettle. Native to tropical regions of Africa, Asia, and Oceania, it is thought that Dutch botanists introduced the fascinating foliage to Victorian England in the mid 1800s. Coleus were readily welcomed into homes as parlor plants and into ornamental gardens. They were especially coveted in so-called “carpet bedding” gardens, where bedding plants of equal height are used to create colorful designs such that they appear like “carpets” when viewed from above. Other than coleus, the Victorians enjoyed using colorful flowers such as petunias, asters, and zinnias as carpet bedding. Carpet bedding is still popular today; we have at least one such garden featuring coleus and petunias on display at the University of Connecticut Storrs campus. To design a carpet bedding garden, try combining simple shapes and lines to make symmetric, harmonious patterns. Use green vegetation, such as sedums, or even a green cultivar of coleus, to contrast with the bright colors of flowers and the mulch or soil below.

For those of us lacking yard space comparable to an English country house, a large carpet bed garden might be impractical. Instead, coleus can be planted alongside other flowers for a splash of color in a flower bed against a house or fence. Coleus are the perfect complement to the colorful clapboard siding characteristic of houses in New England – draw attention to the colors of both by putting reds with greens and yellows with purples. If coleus are planted directly into the ground, slugs are one major pest to look out for. In particularly wet summers, such as those in recent years, slug populations can devour entire coleus plants.

To avoid slugs, container gardens may be a wise option. Sitting above the ground and out of field soil, slugs will have more difficulty reaching the tasty, tender leaves. For those with outdoor space around their apartments, container gardens are also generally a renter-friendly option. Coleus grow well in window boxes and other small containers, and they can help add a warm, friendly atmosphere to the entrance of any home. Most cultivars of coleus available on the market today are tolerant of both shaded and sunny conditions, and thus are well-suited to either covered or open porches. In containers, the main pests to look for are thrips, mealybugs, and aphids. These three pests can cause discoloration in leaves, such as silvery/gold, yellow, or black spots. Outside where predators of these pests thrive, infestations should not progress to the point of killing entire plants, but affected foliage may be unsightly. While systemic insecticides may help keep these types of pests off coleus, they also can kill bees. Avoid applying systemic insecticides to coleus outdoors whenever possible. Try moderately forceful sprays with water instead, insecticidal soap or other least toxic controls.

The Victorians also kept coleus as houseplants, and so can you. In plant hardiness zones 6a-7b in Connecticut, coleus are very tender annuals. They will grow prolifically when temperatures are above 60°F, and will experience cold injury if temperatures fall below 50°F. When temperatures plunge below 40-50°F and overnight frost becomes a possibility, leaves will start to blacken and die. At the end of the growing season before the first frost, consider planting stem cuttings in pots and bringing them indoors for colorful, year-round foliage. Coleus as houseplants will do best in north-facing or east-facing windows. Avoid placing them in windows where they experience too much direct sunlight for too long during the day. If windows are unavailable, coleus also grow decently under grow lights.

No matter where they are grown, the main attraction of coleus is its brilliant foliage. Plants grown in containers may benefit from occasional nitrogen additions to keep them growing all season long. Like others in the mint family, coleus grow flower spikes when stressed or when the plant is near the end of its life cycle. While the flowers on the spikes are not very attractive from an aesthetic standpoint, bees, hummingbirds, and other pollinators flock to them. While the spikes can be pruned off if they appear too early in the growing season to encourage further vegetative growth, consider leaving the late-season spikes on, so that bees can collect nectar to sustain their hives over the winter.

While the selection of coleus cultivars were limited in Victorian England, decades of horticultural breeding efforts have given us access to over 1,000 varieties today, including sun-tolerant cultivars, with endless colors, leaf shapes, sizes, and growth habits. Consider adding this versatile Victorian dream to your home garden for splashes of colorful summer foliage.

If you have questions on coleus or on other gardening topics, feel free to contact us, toll-free, at the UConn Home & Garden Education Center at (877) 486-6271, visit our website at www.homegarden.cahnr.uconn.edu or contact your local Cooperative Extension center.

Firefly Petunias Light Up the Night

By Dr. Matthew Lisy, UConn Adjunct Faculty

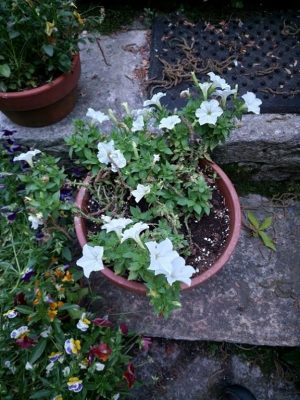
A pot of white flowered firefly petunias
Firefly Petunias by Day. (Photo by M. Lissy)

The world of genetics has really had a tremendous impact on our lives. There is a lot of talk about GMOs, or genetically modified organisms, in the news. Labels even alert us to the presence of these crops in our foods. I wanted to share a new plant called the Firefly Petunia. It was not fireflies, but mushrooms that gave this plant its ability to glow. This is known as bioluminescence in the world of biology.

Through feats of genetic engineering, a gene is taken from one organism and placed into another.  This is where people become worried. Humans, however, have been doing this for hundreds of years. The best looking or most productive organisms were bred together for the next generation.  This is called selective breeding, and it essentially concentrates beneficial versions of genes in the offspring.

Now what is determined to be the most beautiful is truly in the eye of the beholder. Some people, for example, selected for white flowers in a normally purple flowered species, Echinacea purpurea. Some have even taken things a step farther and crossed different species of plants to obtain new colors of flowers. In nature, separate species have evolved isolation mechanisms to maintain their identity. When our plant breeders force a cross of the species boundary, much of the time it was done with closely related species of plants within the same genus.  A great example of this is the crossing of Echinacea purpurea, the purple cone flower, with Echinacea paradoxa, the yellow cone flower. This was done to obtain hybrid offspring that have red or orange flowers. These were back crossed with the parent varieties, so they have the same growth habit and form, but with new colored flowers.

Firefly petunia flowers glowing green in the dark.
Firefly petunias by night. This is no trick, the plants actually glow (photo by M. Lisy)

This hybridizing never really ruffled many feathers though, as the plants were very closely related anyway. More modern GMOs, like our Firefly Petunias, are obtained not through “natural” pollination processes, but through genetic manipulation. Scientists literally take one or more genes from one species and place them in another. These species are not closely related, so it may become an ethical conundrum. Here, one may ask if we should take a gene from a mushroom and place it into a plant. A similar circumstance was seen over twenty years ago in the aquarium industry, where genes from corals and jellyfish were placed into tropical fish to make them fluorescent Glofish.

On the question of ethics, I cannot tell you what to think, or what is right or wrong. We each will need to answer that question for ourselves. It does remind me of a quote from Jurassic Park, where Dr. Ian Malcolm states “…your scientists were so preoccupied with whether or not they could that they didn’t stop to think if they should.” The real question is where do we go from here. For the fish, it was species after species of Glofish, and for me, the novelty started wearing off. After all, how many species will be made fluorescent before it just gets boring? Now for our plants, will we have roads lined with glowing trees to eliminate the need for streetlights? Will we have glowing houseplants that function like night lights? Ultimately, it will be up to you, the consumer.

For me, this is just cool science. We ship and plant petunias all over the world. Are these glowing petunias going to cause any harm? Probably not, as none of the other ones have. When I go outside at night to take the dog out and see the bioluminescent petunias, it puts a smile on my face. It reminds me of the fact that we, as humans, are capable of many things. I can’t help but ponder if this will inspire a sense of awe and wonderment in our children. Maybe some may even study genetics because of these petunias. What if one of them ends up finding a cure for a debilitating human disease, all because of a glowing plant? And while some may say that this daydream of mine is just science fiction, need I remind you that so were glowing plants a few years ago?

For your gardening questions, feel free to contact us, toll-free, at the UConn Home & Garden Education Center at (877) 486-6271, visit our website at www.ladybug.uconn.edu or contact your local Cooperative Extension center.


Keep your Perennials & Annuals Looking Fabulous All Season Long!

By: Heather Zidack, UConn Home & Garden Education Center

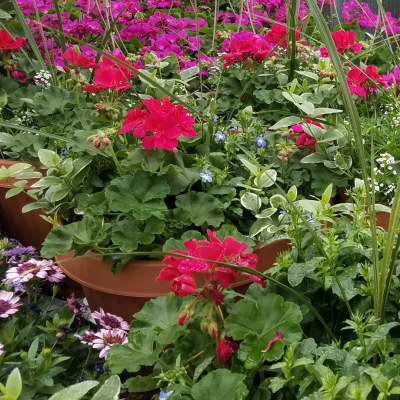
Geraniums and other flowers in a mixed container
Geraniums benefit from regular deadheading. They’re great for beginners because it is easy to tell the difference between new and spent flowers. Photo by H. Zidack

Hanging baskets, planter boxes and perennial gardens that are bursting with color are seldom planted in spring and left untouched until autumn. Deadheading, pruning, trimming and pinching are all techniques that gardeners can use to get that perfect look all season long. While it may be intimidating, this simple task can result in a huge visual impact with only a little effort. Through a series of pruning techniques, we manipulate our perennials and annuals to give us the most beauty we can get out of them in such a short season. It is important to recognize that cutting healthy flowers or shoots can help plants in the long term – no matter how much it may pain us as gardeners to do so.

Deadheading is a widespread practice where gardeners remove flowers that have gone by. One of the first things to become aware of is the difference between a bud and a spent bloom on the plant you are working on. Many gardeners will snip petunia buds, mistaking them for spent flowers. It is important to be vigilant with these cuts. Remember that your plant's goal is to reproduce, and they use flowers to do so. By removing the flowers, you are stopping the plant from producing seed and encouraging it to restart the cycle – meaning more flowers for you!

Some gardeners will select “self-cleaning” varieties of annuals that will shed their flowers without the need to deadhead all summer long. In general, these may not produce seed; therefore can easily restart the process themselves.

The whole practice of deadheading, pinching and trimming herbaceous plants can be boiled down to redirecting the plants energy into different purposes. Where deadheading helps to clean spent flowers, pinching will remove new buds before they bloom. If you want to encourage beautiful single stem cut flowers, for example, you may decide to pinch lateral (side) flower buds to force the plant to put all its energy into a single bloom at the top. Alternatively, pinching the terminal (top) bud will give you many smaller flowers on one stem, creating a fuller appearance.

This same principle applies to pinching shoots of herbaceous plants to make them fill out more. Cutting further down a stem will again remove that terminal bud and cause the plant to focus its energy on new shoots that come from nodes further down the stem. Think of how full your basil plants flush out when you harvest fresh herbs.

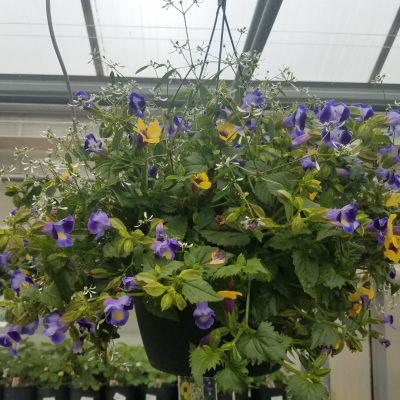
Torenia hanging basket
Torenia is considered a self-cleaning annual that is great for shade and is loved by hummingbirds! Photo by H. Zidack

Often, gardeners will notice that in mid to late summer their hanging baskets will start to look “tired.” They may notice prolific flowering on the ends that hang down, but often see that the center of the basket is not as full or may even be dying out. The first thing to check for is to make sure that you are watering them regularly. Because hanging baskets are suspended in the air and uninsulated, they will dry out faster. When you are trimming herbaceous plants for growth you can take one third of the plant volume away at a time, safely. Think about it as playing hair stylist! Cut back one third of the longest growth at the ends, and watch new growth come from the roots. It may also help your hanging baskets to remove any branches that have been shaded or dried out in the interest of “lightening” the growth that is hanging down.  Again, you may lose flowers for a week or two – but the result down the road will be beautiful!

For perennial gardens, June is a wonderful time to do some pruning as well. Cutting back early flowering perennials can encourage a second flush of flowering in some species. This works exceptionally well for plants like Salvia, Nepeta, and Lavender. Deadheading throughout the season will help plants like roses and Echinacea continuously flower. And pinching can help perennial mums form their shape for the fall.

Summer is a stressful time for plants! Disease, pests, and extreme weather can all contribute to a stressful environment. Our New England summers can promote these pressures with high heat and humidity levels. During these times, pay careful attention to your watering habits and adjust, as necessary. In times of drought or excessive heat, plants will use water faster for hydration and cooling, just like we do. Being aware of this can help you know when to check for water and help you be more diligent with your watering practices. Using a balanced, water-soluble fertilizer can also promote plant health and reduce stress in perennials and annuals. This is why it is great to fertilize after pruning and deadheading. If you need more information on trimming, watering, fertilizing, or any other gardening questions, feel free to contact us, toll-free, at the UConn Home & Garden Education Center at (877) 486-6271, visit our website at www.homegarden.cahnr.uconn.edu

Luscious Lemony Herbs

By Dawn Pettinelli, UConn Home & Garden Education Center

With summer almost around the corner, many of us are setting in vegetables and herbs in hopes of preparing delectable culinary delights as these plants mature. Aromatic herbs bring amazing flavors and zing to all sorts of savory and sweet concoctions. A citrusy taste complements many dishes and some may not be aware of the wealth of lemon-flavored herbs that are widely available and also easy to grow.

Lemon balm plants up close.
Lemon Balm in the garden. Photo by dmp2024

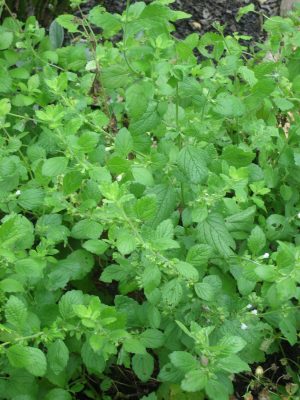
Long-lived lemon balm has been a staple in my herb garden for years. The attractive heart-shaped, scalloped leaves have a delicate scent when rubbed. Lemon balm is a hardy perennial native to Europe and has long been grown for its culinary and medicinal purposes. Fresh or dried leaves can be made into a calming tea that reputedly reduces anxiety. They can also be used in savory chicken dishes, to make pesto and even in baked goods. The lemon balm I grow is the species and it produces flowers that, like many members of the mint family, are loved by bees. A dilemma ensues as to whether to leave the blossoms for the pollinators and deal with the copious seedlings that pop up the following year, or cut the plant back to encourage more leaf production. Also, once lemon balm flowers, the leaves take on an unpleasant ‘soapy’ taste. Cultivars such as ‘Compacta’ are sterile, so no seeds are produced.

As long as it is grown in a well-drained soil, lemon thyme is another long-lived herb. Growing just 4 to 6 inches tall, it’s an attractive plant in the herb garden, as an edging plant or even as a front border plant in perennial gardens. There are green, golden, and variegated leaved cultivars. Sprigs of lemon thyme can be dried but I like to use them fresh in chicken or rice dishes. The pinkish flowers usually open in July and are a big pollinator draw. Like many herbs, the best flavor is obtained collected before flowering. Plants respond well to regular trimmings.

Lemon basil is an annual in our climate but easily grown from seed. Like all basils, it does best in a sunny, fertile site with adequate moisture. Plants also do great in containers. Leaves have a fresh lemony scent and taste with some hints of mint and spices. If growing from seed, one might want to try ‘Sweet Dani’, which was a 1998 All America Selection winner. Named cultivars such as ‘Mrs. Burns’ lemon basil usually have larger leaves than the seed grown types. Pinch out flower stalks as they form for better flavor or for a longer and more abundant harvest, cut off the top third of your plants about once a month. This encourages greater branching and leaf production. Lemon basil rice is my favorite way to use fresh leaves.

Lemon grass in a garden bed.
Lemon grass in the garden. Photo by dmp2024

A tender perennial, lemon verbena, is mostly grown as a container plant and overwintered indoors. Plants have an exceptionally strong lemon scent and if happy, grow quite vigorously. They can easily get 3 or 4 feet tall and will grow into a small tree in warmer climates. Lemon verbena is native to South America, so it enjoys full sun and hot weather. Leaves can be used in potpourris, teas, and sweets.

Another tender perennial best grown in a pot is the lemon scented geranium. There are several named cultivars with some, like ‘Mabel Gray’ and ‘Rober’s Lemon Rose’, having a stronger scent. Either buy plants or start from a friend’s cutting. The lovely scented wavy leaves can be placed in the bottom of a cake or loaf pan and then filled with batter and baked, imparting a lovely pattern and slight lemony flavor. They can be used fresh or dried for a variety of culinary uses and are also good in potpourris.

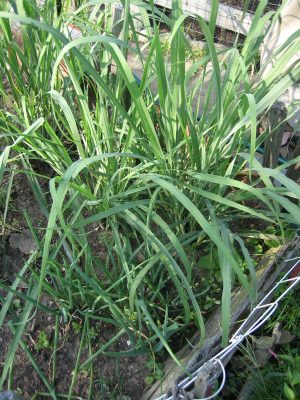
Those enjoying Asian cooking are likely already familiar with the rich flavor of lemon grass. While it is native to India and only hardy to zone 10 to 12, it is a pretty vigorous grower that would do well in either a garden bed or container. Reportedly plants may reach 2 to 3 feet in height by midsummer if kept well-watered. The leaves as well as the bulbous base of

the stem are used in recipes. A few stalks can be removed as needed for cooking. Cut back potted plants to 6 inches before overwintering in a sunny window indoors.

For more information about growing lemon scented herbs or on other gardening topics, feel free to contact us, toll-free, at the UConn Home & Garden Education Center at (877) 486-6271, visit our website at www.homegarden.cahnr.uconn.edu or contact your local Cooperative Extension Center.

DIY – Grow Flowers for Cutting

By Dawn Pettinelli, UConn Home & Garden Education Center

Cut flower arrangment
Fresh cut flowers - Photo by dmp2024

Do you just love fresh flower arrangements for the table or even that single bloom in a vase by your bedside? Wouldn’t it feel great to just stroll out your back door, clip some blossoms, bring them inside and enjoy their beauty? There’s no reason that you can’t. Even a small yard or garden space can yield blossoms for cutting.

While many of us have flowering perennials and even woody plants that make for great arrangements, perhaps a dedicated cut flower planting would provide many more stems for cutting and not create any empty spaces in our garden designs. When planning your cut flower garden, first decide where it should go. The majority of blooming plants need at least 6 to 8 hours of sun each day, a well-drained, fertile soil and adequate water during dry spells. As with all garden plants, a soil test is a great way to find out what is needed to add to soils before planting but without a soil test, follow the directions on fertilizer packages.

There’s still time to prepare new beds for cut flower plantings but another alternative would be to turn over part of the vegetable garden to cut flower production. Probably your vegetable garden already has great soil and is located in a sunny area.

The hardest part of designing a cut flower garden is selecting what plants to grow. There are so many beautiful and exciting flowers to choose from. A good suggestion is to grow easy flowers at first and then progress on to more demanding ones. Another important factor to consider is which flowers need to be purchased as transplants (or started inside earlier under lights) and which can be easily grown by sowing seeds directly in the garden. While there are a number of flowering plants that can be started by direct seeding, you’ll get faster blooms if you purchase or grow your own transplants.

Zinnias planted in a row
Zinnias - Photo by dmp2024

Some that I typically grow each year from seed are zinnias, the tall African marigolds, cosmos, bachelor buttons, calendulas, nasturtiums, and some sunflowers. Cool weather calendulas and bachelor buttons can be sown now but wait until later in the month to plant the rest. A number of cutting annuals will self-seed if blossoms are allowed to mature and the beds are not heavily mulched. Some that spring up for me include ageratums, verbena, ammi, nigella, and wheat celosia. If you have some known self-seeders, wait a bit longer to prepare or till beds to see what sprouts.

Those best purchased as transplants include rudbeckia, snapdragons, cleome, stock, strawflowers, globe amaranth, tithonia, asters and amaranth. Some might have tiny seeds or be slower to germinate or just need a longer time until they produce flowers so starting with transplants may be a good option.

Two annual bulbs that are great for cutting are gladioli and dahlias. A few glad corms can be planted every other week until about mid-June to provide a summer full of spiky, colorful blooms. Dahlia tubers planted mid-May generally start producing blooms by late July but continue until a heavy frost.

There really are quite a few potential cut flower candidates to choose from. Feel free to select whatever colors and flower forms appeal to you most. From a designer’s viewpoint, consider what colors would be most compatible with where you want to place arrangements indoors. Also, whether making more formal arrangements or informal bouquets, flower shape plays a prominent role. Often the most attractive arrangements are filled with an assortment of shapes featuring a focal flower, spiky exclamation points, mounded shapes to hold the arrangement together, greenery for filling spaces and delicate airy springs to lighten the mood. I find mints, artemisia, and ferns make good fillers while grasses, kalimeris, boltonia, and white wood asters provide an airy touch.

The majority of annual flowers do fine at about a 9 by 9 inch spacing so you can pack them in pretty close. Do note that for copious blooms, a fertile soil and adequate water are essential. Maintenance also includes dead-heading, or removal of spent flowers to encourage the production of more blooms. Keep an eye out for plant pests as well.

Even beginning gardeners can set aside some space to grow beautiful flowers for enjoyment indoors. Try out a few this year, make notes on their performance and change up the plant rooster as they gain your approval or not.

For cultural information on growing various species of cut flowers or on other gardening topics, feel free to contact us, toll-free, at the UConn Home & Garden Education Center at (877) 486-6271, visit our website at www.homegarden.cahnr.uconn.edu or contact your local Cooperative Extension center.