00:00:01 Stephen Thal
Hi and welcome to another segment on Focal Point. I'm Stephen Thal, and I'll be your host for today's program. Today we have a former guest who was on in the spring to help us about plants and from the UConn plant and science center out at Storrs. So, welcome back, Heather Zidack. It's glad to have you back.
00:00:25 Heather Zidack
Thank you. I'm excited to be back.
00:00:27 Stephen Thal
Yeah, we can learn more about what's going on because apparently, we have some sort of drought. We've had some fires around the state. And I'm sure people are unloading a lot of questions for you guys up there at Storrs.
00:00:42 Heather Zidack
Yes, we're getting a lot of questions right now about the weather concerns and people are calling because their plants are in distress. Right now it's a really good time to make sure that you are watering especially for new plants that are getting established. Anything that you planted this year, you want to keep watering until the ground freezes. So we still got a little bit of a way to go with that. Other plants that are starting to drop their leaves and showing signs of stress. Some of those we're telling our clients to kind of just wait until next spring and see how they leaf out next year because they might have just decided to shut down a little bit early with the drought. But we really won't know until next spring when they're growing, whether it's a big problem or just a little hiccup on the in the road.
00:01:36 Stephen Thal
OK, so one of the things we'll be talking about is house plants inside. They're being moved inside. They said they had enough of outside. Gotta get in before the cold.
00:01:50 Heather Zidack
Yes! So right now is really good time. Most people have started to bring their house plants in what we're looking for and what we guide is 50° at night or lower is that threshold. So once we hit 50° at night consistently, you wanna start bringing your plants in. There are some that will take a little bit more, you know, a little bit of a higher temperature, they're a little more sensitive to the cold. There are some that will tolerate some lower temperatures, but that 50° mark is really the best guideline.
And so we, we tell people to bring them in and you want to kind of bring them in slow. So you wanna start with bringing them into if you have a mud room or a garage, or a three season room, or even somewhere like that's a little bit more protected than wherever your outdoor plants were in the summer to help them adjust to the temperatures inside. So they adjust to the lower light provided by maybe an overhang or something to that nature. And then they slowly move them in.
You want to put them into a place that's sunny. If they need sun. If you've had these plans for some time, you may have an area established already that they go to. If it's your first time giving this a try, you will probably know if they were in full sun when they were outside. They're going to need a really sunny place when they're inside as well.
And when you bring them in you want to avoid putting them in any locations that have temperature extremes. So near drafts, near heat vents, near entryways anywhere that the temperature we can get, a gust of wind come in, or a gust from when the heat kicks on. Those are all things that the plants are going to not enjoy as much as we would, you know, you go in from the grocery store, you get that big gust of warm air. The plants may not like that as much. So it's the same kind of thought for them.
00:03:57 Stephen Thal
Now, well, many of these plants are coming in, are showing growth again?
00:04:03 Heather Zidack
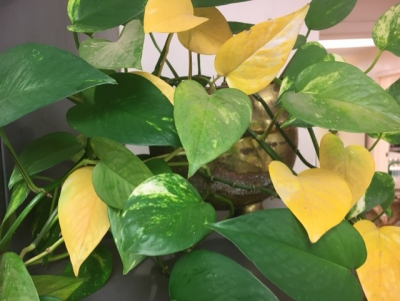
Some of them do. What's really happening, and it's actually interesting, is because we've had these drought conditions, plants bringing them in right now, they may have a little bursting growth. You may notice the opposite where they're going to start having a little bit of a decline. Plant stress is always- They always speak in one way, and that's to either wilt or drop leaves, no matter what's going on. So you will see that they may have a little bit of a temper tantrum as you move them, but that's totally normal and just keep to doing what you've been doing with them, make sure your watering is consistent, make sure that they're in the right spot.
And it really depends on what kind of house plant you have. So some of them will slow growth and they'll kind of just stay the course while they're indoors. They will stay green. They'll stay upright. It'll look like they're almost like an artificial plant where it's like they haven't done anything for a while.
Some will go dormant. So, like I said, they'll drop their leaves. They'll look like sticks and pots. They won't look very good at all.
You'll feel like you don't have a green thumb anymore. That is also natural, and some plants like hibiscus have a cycle where some years they will be in flower, and they will do really well. And then some years they will have that dormant period. So, it can be a very wide range.
If you're ever unsure, go ahead and scratch your thumbnail into the stem of the plant. If you feel very, if it feels very dry and it breaks easy like a stick, that's probably a red flag. You want to feel some kind of fleshy texture. You want it to feel a little bit soft, not mushy, but a little bit so that you feel your nail digging into that tissue you want to. If you're able to get a closer look, you want to look for signs of green and feel some moisture. Those are all signs that even though there's not a leaf on it, it is still alive, and it will come back in the spring.
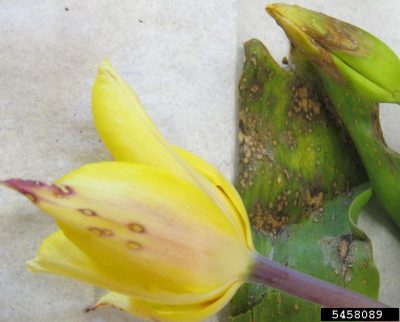
You know, so like I said, if anything is other than that where it's it snaps easy or it's incredibly mushy when you push your finger into it to it those are all signs that there could be something bigger going on and then you really have to take a look and see if there's disease or other things that are causing stress to the plant at that time.
00:06:36 Stephen Thal
And that doesn't mean necessarily throw a lot of water at it?
00:06:41 Heather Zidack
Correct. That's actually something that happens a lot. People will tend to over love their plants and I'm even guilty of it myself. If there's a plant in my home that I haven't watered in a week or two, I will put a little bit extra just to keep it going and that's something that we really want to avoid doing. You want to make sure that you're always consistent when you're watering your plants. Feel the soil with your fingers. If it feels-you want to poke your finger in a couple inches-If it feels moist in that depth, you're good. If it feels like it's dry or sandy or scratchy. It's going to be something that you need to add water to at that time also.
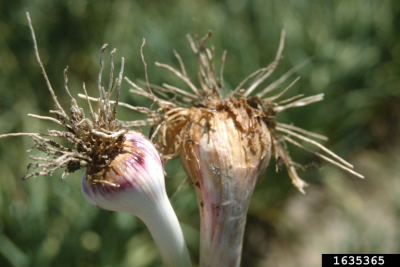
That's the caveat of knowing what kind of plant you have. For example, Cactus can actually survive those drier temperatures, right? So, you want to know what you're taking care of, what it needs and be able to kind of check that. Water regularly. Too much moisture in the soil is going to lead to issues like root rot, pests, those fungus gnats that are everywhere. Those are teeny, teeny, teeny tiny black gnats that sometimes we see in the winter time. Those are actually not even feeding on plants. They're just feeding on the decaying root material. And so that's a sign that there's too much moisture.
You can mist your plants, but it's not always necessary. You need to just know what you have and research the specific needs of the species of plant you have.
00:08:17 Stephen Thal
And where would you go to find that information from a flower shop or?
00:08:23 Heather Zidack
You can. Usually when you purchase the plant, it will come with some kind of tag.
It does depend on where you're looking, but usually they have some kind of tag that at least has a common name on it, so that is the very the colloquial name. So, a common name is like a fiddle leaf fig or a Benjamin fig, whereas the botanical name is going to say Ficus benjamina for a Benjamin Fig and what you're gonna do with that information is then you would, you could call our office at home and garden and we can help you get some information on how to take care of it or you can go ahead and do some of that research yourself to see what those plants are going to need. Really, you need just the name. The common name is good. The botanical name, so it's usually on on those little labels in italics. That's even better. And if you're not sure, we can always take a look at some pictures and try to help you out as well.
00:09:23 Stephen Thal
Why don't you give them your phone number since you mentioned it mentioned that they can call you.
00:09:29 Heather Zidack
Yeah, sure. So, at the UConn Home and Garden Center, you can give us a call. Our number is 860-486-6271. Again, that's 860-486-6271.
00:09:49 Stephen Thal
What about house plants? Do we have a sort of categories of house plants we can review?
00:09:55 Heather Zidack
Yeah. So I actually have a list that I had ready for us today to talk about house plants that are going to be common now that we're going to be moving into the holiday season. We're already getting ready to talk about Thanksgiving and Christmas and seeing the decorations in the stores. So I thought it would be a good idea to bring up some of those plants that people might be seeing at this time of year.
00:10:18 Stephen Thal
OK, which one would you like to start with?
00:10:21 Heather Zidack
So the first one that I have is called an amaryllis, that is given as a bulb as gifts at Christmas I you know, I've gotten those for Christmas gifts before you see them in displays and windows.
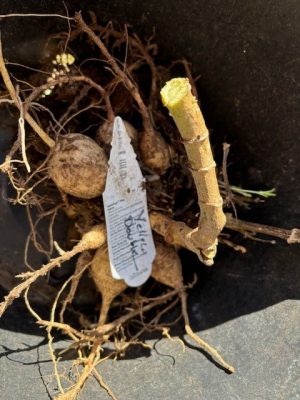
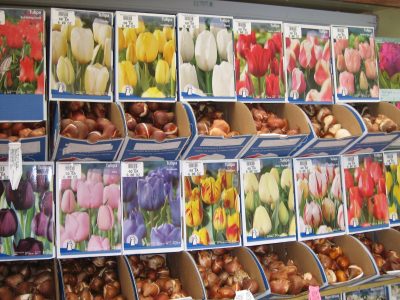
These are the kind that have a very thick large single stem that emerges from a bulb that's probably the size of your fist. The larger the bulb, the more flowers and the more stalks you're going to get, right? Those flowers at the top are very large. Those are probably about the size of your open palm for a lot of these species, they have 6 petals. On those flowers. It's kind of an organization of three and three yo make that cluster. Tou can have two or more flowers in a cluster, they're very, very big, very vibrant. They're very attention catching and you see variants of red, pink, white, all of those colors and solids, stripes and everything in between.
It is something that if you have a green thumb and you wanna start them yourself. You want to start them in early to mid November and you'll make sure that you'll have blooms for the holidays. You just use regular potting soil. You don't use dirt or anything, you use potting soil and you keep the soil moist and you keep it in a sunny window and from there that plant will come out of the bulb. You'll see the green stalk and the green leaves first and then up at the very top, you'll get that flower to bloom right at the holidays. So that one's really, really cool.
00:12:02 Stephen Thal
Do you have a second one that's common?
00:12:06 Heather Zidack
Yeah. The next one, we'll talk about the holiday cactus. There are a bunch of different holiday cactuses and this one I like to talk about because we have a Thanksgiving cactus. We have a Christmas cactus and there's actually an Easter cactus as well. They're all house plants that people have.
The common misconception with these guys is that their bloom time is the only thing that identifies them. So, your Thanksgiving cactus is going to bloom in November. Your Christmas cactus will bloom in December, and your Easter cactus sometime in the spring.
The actual difference between the three is the shape of their flowers is slightly different, and the shape of their leaves is different. When you look close. The Thanksgiving cactus has deeper lobes or indents into the leaf. Right, it looks sharper. It almost looks like it has a pair of cat ears on the top of the leaf that's emerging.
The Christmas cactus is going to be similar to the Thanksgiving cactus, but it's a totally flat or square top to that leaf, so there's no cat ears on it. It's just totally flat.
The Easter cactus is round. So that leaf is rounded at the top and the colors of all three of them will vary. So you'll have your Reds and your whites and your pinks. I've seen some in like salmony orange colors and with all three of them, you can purchase them from the store, or you can start them from cuttings. And what you can do is you can actually take a small branch. Dip it in. They have a product called rooting powder.
And put it in some sandy potting soil and it should be able to produce some roots for you. So they're really easy. If you want to get into plant propagation. If you want to have something that's a low water need to take care of, these guys are really good because they are in the cactus family and they're just very colorful and very seasonal. Depending on what time of year they bloom.
With the three, the time of year, the light can actually affect when they bloom or not too, so that can be a really interesting thing. So always look for the shape of those leaves.
00:14:25 Heather Zidack
Do you want to hear the one I have next?
00:14:27 Stephen Thal
Sure
00:14:28 Heather Zidack
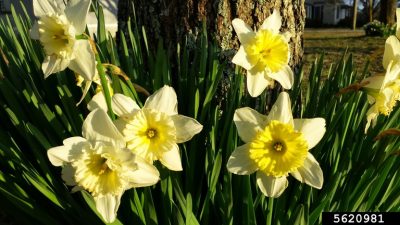
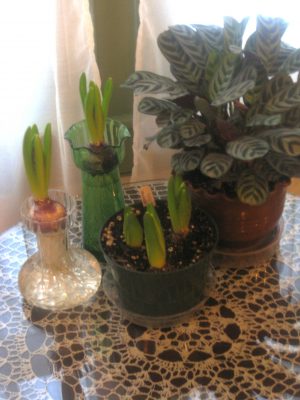
All right. So then I have a plant called paperwhites. These are tiny. They are actually Narcissus bulbs, which is a relative of the daffodil. So if you're familiar with the daffodil shape that has those petals that are kind of like a wide open starburst with that circular set of petals in the middle. That's what it looks like, but it's on a very small star shaped scale, so they have tiny White Star shaped flowers, upright green foliage and stems. They're very delicate. They're very leafy looking.
Many varieties are fragrant and what you can do with them is you can start your bulbs between September and November indoors, and you'll get flowers during the holiday season and winter months.
Cooler temperatures help them root for the first few weeks, so if you're putting them in two pots yourself, you want to keep them at 50 to 60° to help them develop their roots in those first couple of weeks.
And then temperatures above 70 are going to cause them to kind of flop over. They're not going to hold their shape as well. So if they get too warm, they can also throw a little bit of a fit about it. And so they will be much happier if you're able to stake them up if the room is too warm and they start to do that, flopping over, they like the cooler 50 to 60 kind of temperature for them, so that's something to keep in mind.
00:15:57 Stephen Thal
Yeah. What kind of pots do you use? I know some people use clay pots. Some people use plastic ones or other types of.
00:16:04 Heather Zidack
Really, the pot material isn't the important thing. What you really want to make sure that you have is the right size. So for paperwhites, you would probably want maybe a six inch pot or like a geranium pot to put your bulbs into. You want to make sure that whenever you have for house plants-and this is even stuff that you bring in-You want to have your pot be a little bit wider than your root ball. So once the roots start getting too expansive, you're going to have what's called a root bound plant. And so it's kind of going to be outgrowing itself, kind of like when we outgrow our shoes, when we're kids, right. So you want to put a new pot there.
You want it to be just an inch or two bigger than that root ball so that it has enough room to continue growing. That's really what you want to pay attention to more than the material.
00:17:05 Heather Zidack
And then the last one that I have is poinsettias. Do you want me? To go into that one.
00:17:08 Stephen Thal
Sure.
00:17:08 Heather Zidack
All right. So for pointsettia is for the holiday. This is our traditional holiday plant that we have. What's really cool about these guys is that they were discovered in Mexico where it actually grows natively. The native poinsettia doesn't look at like anything that we know from what we've seen in stores. It's actually tall, it's a little bit what we call leggy. So it actually spreads out.
You know, and it's very wild looking and it's more shrub like it. It is a very different plant altogether. It was something from Aztec culture. They had a lot of symbolism behind this plant where it represented purity and new life earned by warriors who had died in battle.
It was used for dyes and other products and then it didn't come to the US until the 18 hundreds and then it started to become a a holiday staple over the years. There's a lot of people that can go out, and purchase them.
The growers start those plants in August or September, sometimes even earlier. We're still all in summer mode thinking about getting those last few days at the beach, and they're already putting these points that is in the pots. So it's something that is it takes a long time to grow. They love heat and they love warmth. So that's something to keep in mind when you have them in your house.
They come in tons of varieties and colors now and they've really done a lot of breeding projects to get them to change from what they originally were with that wild native plant.
And so the new colors have all sorts of different stripes, splashes, solid colors, Reds, whites, pinks and everything in between. There are ones that are blue, and some of those can actually be painted. You have to kind of take a look and see real close if they're painted or if it's a a color that's true from actual breeding but you'll be able to tell if you look close.
00:19:11 Stephen Thal
Hmm. Wow.
00:19:13 Heather Zidack
They're really cool.
00:19:13 Stephen Thal
Yeah. Yeah, I would agree with you. Yeah, yeah.
00:19:18 Heather Zidack
Yeah.
00:19:18 Stephen Thal
What people tell me they are. Yep, you're right.
00:19:22 Heather Zidack
Yep. And they have. They have a really, really nice history from them too. So it's always cool to see what plants start as and what they end up becoming. That's a, that's a really cool field to look at with plant breeding and how plants have changed over time.
00:19:40 Stephen Thal
Yeah. OK. Well, these are exciting. And the one day they get all nice colors and and they also have it used to be used for dyes. That's interesting.
00:19:50 Heather Zidack
Yeah, they used to use the color they they used the petals for dyes and all sorts of different uses when they would use the native plant.
00:20:03 Stephen Thal
And I bet you the fragrance is pretty nice.
00:20:06 Heather Zidack
They actually the ones that we have now don't have too much fragrance. I don't know about the wild or the native ones, how fragrant they were. But the other thing that's really interesting about poinsettias is the fact that they have their flowers and what we know to be their flowers are actually the tiny itty bitty yellow spots in the center of the plant. So if you ever look at a whole Poinsettia plant and you see the little tiny yellow pieces in the middle, those are the actual flowers. What we see is changing colors and different petals and things like that is actually called a bract, which is a modified leaf.
And so, they're all leaves that have changed color. So that's another really cool fun fact about them.
00:20:56 Stephen Thal
Yeah, yeah. No wonder people flock to the poinsettias and they're around the holidays a lot.
00:21:05 Heather Zidack
They're very popular.
00:21:06 Stephen Thal
Yeah, also about. Any what about poison plants? We know sometimes during the holiday season there are some plants that children, adults and animals should be cautious.
00:21:21 Heather Zidack
Yeah. So, one of the things that we tell our clients is that our office and with the home and Garden Center, we can identify a plant for them to tell them what it is. And we can say that is a poinsettia, for example, right?
Other professionals need to be the ones to deem it toxic and give you those warnings. So the best advice that I can give to you is to do your research before purchasing any plant. You want to kind of like I talked about with the house plants before. Know the species of what you're purchasing and that'll help you to determine whether it's toxic for people, for pets, for anything like that. There is a really good resource from the ASPCA. They have a database of plants that are toxic to domestic animals, and they have a 24 emergency hotline, a 24 hour emergency hotline. Now that's for pets. I do have that number. Would you like me to share that with you?
00:22:22 Stephen Thal
Yes, please.
00:22:23 Heather Zidack
OK, so that is 1-888-426-4435 again, that's 1-888-426-4435.
00:22:41 Heather Zidack
Now on the people side of things, when you're looking at plants that could be toxic again, I can give you the identity of what that plant is, but then we would refer people to the Connecticut Poison Control Center for human toxicity. And I have that number as well. Would you like that?
00:23:00 Stephen Thal
Yes, please.
00:23:01 Heather Zidack
Alright, so that number is 1-800-222-1222. Again, that's 1-800-222-1222.
00:23:19 Heather Zidack
And any plants that you have done your research on and found that they could be toxic house plants, anything like that, you want to make sure that they're kept out of reach of children and pets-if you're going to bring them into the home. If you do that background homework and figure out if it's toxic to your pets or children or whatever you, you know, are concerned about the toxicity of. You can also just not bring them into the home. So the best thing to do is to know what the plant is, have those emergency numbers on hand.
And keep anything out of reach or just don't bring it home at all. If you have any concerns.
00:24:01 Stephen Thal
OK, this is Stephen Thal with another segment on focal point and we were speaking with Heather from the UConn plant and Science Center up at stores, Connecticut. We have to remember many years ago, as I remember, as I recall from history is that that was one of the first universities in Connecticut to start as an agricultural college, didn't it?
00:24:27 Heather Zidack
Yes, we have a very deep history here at the university and the College of AG, which is now the College of Agriculture, Health and Natural Resources. We call ourselves CAHNR for short C-A-H-N-R. That college was one of the first ones started here at the University of Connecticut as well.
00:24:48 Stephen Thal
What are some other plants that you'd like to end the program with?
00:24:57 Heather Zidack
I think one thing that we could talk about real quick is growing herbs indoors because that's something that a lot of people can do. You can still grow your herbs right now whether you want to dig up the herbs that you have in your garden and bring them inside.
And get a whole grow light operation and everything else, which is what I do because I am a very, very intense gardener at home. I bring my plants in. Or you can start herbs. Herbs are one of the easiest things that you can grow on your window sill indoors. It's very easy to start and restart and regrow them from time to time.
Whenever you start them, you can start them from seed to anytime and many of them like basil for example, is really good. You can just put a sprig of basil in a jar of water and it will actually send out some roots and you can put that in a a pot of potting soil and grow your basil from that as well.
So you can do that. Most herbs do well by a sunny window. They are used for culinary purposes. It's also a really great fragrance in the wintertime. It's really nice to have fresh herbs all year round and it's easy to rotate them. Like I said, if anything happens-Disease or you get bugs, or you get anything like that-It's really easy to just kind of let them go and start fresh with new herbs. If you're growing herbs.
00:26:29 Stephen Thal
Now, do you-
00:26:31 Heather Zidack
Oh, go ahead.
00:26:32 Stephen Thal
Do you need a lot of light for these herbs? Put them in a lot of light area.
00:26:37 Heather Zidack
They tend to need a sunny window, herbs. The nice thing is that because they aren't producing flowers, they don't need as much sunlight and as much energy as some of the other house plants that we were talking about. So they do need a sunny window, but they can actually adapt pretty well to other conditions as well.
00:27:00 Stephen Thal
UM, that's wonderful. Herbs and anything else you can grow at home.
00:27:08 Heather Zidack
The other, the last thing with the herbs, that's really cool that we're seeing is a trend right now is that Rosemary plants are being used as mini indoor Christmas trees. And so people are purchasing Rosemary plants that are shaped to be like a Christmas tree.
Stephen Thal
Yeah
Heather Zidack
They decorate them for the holiday and then they end up having them throughout the rest of the winter for a-they can use it for the culinary purposes. They're fragrant. They're really pretty. So that's that's something that we're seeing is a new trend right now.
00:27:40 Stephen Thal
Right. And so they don't have to throw the tree out.
00:27:44 Heather Zidack
Right, exactly. They can keep it and they can go from there, yeah.
00:27:45 Stephen Thal
Recycling
00:27:48 Stephen Thal
Very good. OK. Heather, we want to thank you for a great job and a great wealth of information. We hope that people will take notes and if you want to leave your phone number one more time to regarding information or how they can assist you, how they can you can assist them.
00:28:06 Heather Zidack
Yeah. So if anybody has any questions about gardening, plants or anything that we talked about today, we we are here Monday through Friday, 8:00 to 4:00 give us a call. The number here is 860-486-6271. Again, that's 860-486-6271
00:28:28 Stephen Thal
We want to thank you very much for your information and we hope that the people online will find this helpful and also not only ask your question but maybe go online and show you the pictures on your computers, right. You might be able to do that.
00:28:46 Heather Zidack
Yes, that would be fantastic. We can do a lot with pictures, and we can help people with their gardening projects and questions that they have.
00:28:55 Stephen Thal
OK well, wishing you and your family and the school a happy, safe holiday. I know this Thanksgiving’s not too far around the corner.
00:29:06 Heather Zidack
Yes, thank you. You too.
00:29:07 Stephen Thal
Take care and stay well and thanks for coming back and give us a call in the spring so we can get you on again.
00:29:08 Heather Zidack
Thanks for having me back. Yes, I will. Thank you so much.
00:29:15 Stephen Thal
Yeah. Thank you. This is Stephen Thal saying thank you for joining us on Focal point. Two quick reminders. One where a hat and sunglasses while you're outside to protect your delicate eyes and also to develop an emergency plan no matter where you are, whether it's school or ome or traveling. You need to develop an emergency plan, so if an emergency happened, you know what to do. You need help. Call the fire department. Thank you again. Stay safe and stay healthy.
