The Spruce – Heather Zidack discusses why container mixes dry out so fast and how to maintain healthy container gardens.
Consumer Information
Chaos Gardening
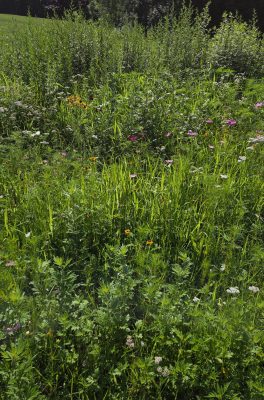
Chaos gardening is a growing social media trend that encourages gardeners to relinquish control, scatter assorted seeds, step back, and see what happens. Instead of carefully spacing plants and planning layouts, chaos gardeners toss seeds and let nature decide what grows where. The results can vary widely, ranging from a surprising assortment of plants to a patch of disappointment.
Unlike traditional gardening, this approach emphasizes spontaneity over structure. For many, the appeal lies in its simplicity. Chaos gardening is easy to start, requires minimal knowledge, and often relies on leftover or inexpensive seed packets. The low-stakes, experimental nature makes it especially attractive to busy people or those new to gardening.
Still, the trend raises valid questions. Without site preparation or ongoing care, how well can seeds establish? And does “letting go” invite weeds into the garden under the guise of wildscaping?
In practice, chaos gardening often produces mixed results. While the concept is appealingly simple, success rates can be low, and plantings may struggle to persist long term. Still, gardeners interested in the trend can improve their chances of success by following a few simple suggestions.
Avoid using this approach in large or prominent spaces. Start small, either in a container or a less visible area of the yard. To maintain a sense of experimentation, while increasing success, consider focusing on a single species at a time or scattering spring bulbs through an existing lawn. Tossing out a packet of “wildflower” seeds may sound charming, but it will not produce an instant, picture-perfect meadow. More often, it results in a steadfast patch of mugwort.
Even with a relaxed approach, a bit of planning goes a long way. Key factors such as sunlight and soil conditions still matter. The principle of “right plant, right place” applies regardless of gardening style. Identifying site conditions, selecting appropriate species, and preparing the planting bed can significantly improve outcomes.
Gardeners should also approach seed mixes labeled “wildflower,” “pollinator-friendly,” or “native” with some caution. While not inherently problematic, these mixes can contain species that are poorly suited to local conditions. A quick review of the species on the list can help inform decisions about whether the plants are suited to the region or growing conditions.
Learning how to recognize seedlings, including common weeds and invasive plants, is another important step. Early identification allows gardeners to remove undesirable species before they establish. Observing which plants succeed can also guide future efforts, gradually transforming a disorderly patch into a more reliable and productive space.
Patience is essential. Many perennials grown from seed take more than one season to flower. Including a mix of annuals and perennials can help maintain visual interest while longer-lived plants establish. As with any gardening method, some trial and error is expected.
Chaos gardening may never replace traditional approaches, but it offers an accessible entry point for beginners and a creative outlet for experienced growers. With a balance of spontaneity and informed decision-making, even an unstructured planting can become a living experiment.
The UConn Home Garden Education Office supports UConn Extension’s mission by providing answers you can trust with research-based information and resources. For gardening questions, contact us toll-free at (877) 486-6271, visit our website at homegarden.cahnr.uconn.edu, or reach out to your local UConn Extension Center at extension.uconn.edu/locations.
What to Know Before You Buy Topsoil
Starting Raised Beds
There are many styles of raised beds to choose from, depending on your needs. Raised beds exist on a spectrum, ranging from framed boxes above ground to unframed, elevated planting mounds. When planning new raised beds, both types have specific considerations to keep in mind.
Mounded Raised Beds
Mounded raised beds are created by mounding existing soil or adding additional material so the planting area sits above ground level. This method works well on compacted sites, in poorly drained areas, or on top of heavy clay soils.
Most mounded raised beds do not have a barrier between the ground and the mound. However, if you are wish to start a raised bed over lawn, cardboard can be placed underneath the mounded soil to smother the grass. If you use cardboard, it is best to allow it to decompose for a few months before planting. This will allow plant roots to grow freely into the soil below rather than being blocked by the cardboard layer.
The bed can be built using soil already on site, by mounding soil from the paths or edges into the bed. Alternatively, you can bring in topsoil and compost to create the beds. Any imported soil or compost should be free of pathogens, contaminants, and invasive weeds. Mounded raised beds are not tilled, and walking on the mound will compact the soil, so foot traffic should be avoided. These beds may need to be reshaped or re-mounded annually. Soil tests can be taken every two to three years, then apply amendments added as needed.
Framed Raised Beds
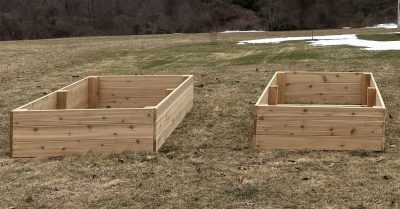
Framed raised beds offer many of the same benefits as mounded beds, along with additional structure and accessibility. A framed raised bed is more contained than an in-ground bed and can be made of wood, metal, or pavers. These beds are well suited for compacted or poorly drained sites, locations with contaminated soil, or in gardens designed to improve accessibility for people with limited mobility.
Raised bed depth can vary depending on the intended use. Some beds are only a few inches deep, while others may be up to 2 feet. Gardeners who use wheelchairs or who have difficulty bending may want to consider an elevated or deeper bed. Most annual vegetables require 12 to 18 inches of soil depth, root vegetables will require greater depth. Length and width can also vary based on site conditions, but a width of about an arm’s length is generally recommended for easy planting, harvesting, and weeding.
Prefabricated wood or metal beds can be purchased, or you can build your own using lumber. Cedar is often preferred over pine because it lasts longer, although it is more expensive. Use caution when considering repurposed or pressure-treated wood. Before 2004, pressure-treated lumber was treated with copper, chromium, and arsenic, which could leach into the soil. If pressure-treated wood is used, make sure it is labeled for ground contact. Whenever possible, choose untreated or naturally rot-resistant materials.
A good soil mix for framed raised beds is about one-half to two-thirds topsoil and one-third to one-half aged compost. This can require a large amount of material and may be costly depending on the size of the bed. Buying bulk topsoil by the cubic yard is usually less expensive than purchasing bags of raised bed mix. For smaller beds, bagged raised bed mix may be more practical. Avoid using free fill or topsoil from unfamiliar sources, as these may contain contaminants, invasive weeds, or invasive jumping worms.
To save money on filling a raised bed, some gardeners use hügelkultur, a method that fills the lower portion of the bed with logs, sticks, leaves, grass clippings, or kitchen scraps before adding topsoil and compost on top. Larger materials are placed in the bottom then followed by smaller organic materials overtop. Over time, the bulky material breaks down and enriches the soil. Because the material settles as it decomposes, additional topsoil and compost may need to be added annually.
Plant Choice
Annual plants are generally better suited to raised beds than perennials or shrubs. Extreme temperature fluctuations in raised beds are not ideal for overwintering perennials, and the need to periodically add more soil makes raised beds better suited to annual crops.
Care and Maintenance of Raised Beds
Both mounded and framed raised beds dry out faster than in-ground gardens, so supplemental irrigation is usually needed throughout the growing season. Weed pressure may be minimal, but regular weeding will still be necessary. Raised beds should be mulched to help retain moisture and reduce weeds.
The paths between raised beds can be planted in turf, covered with wood chips, topped with crushed gravel, or left as bare ground. Keep in mind that paths between mounded beds may need to be mowed or weeded regularly. They will also likely become compacted over time due to foot traffic.
The UConn Home Garden Education Office supports UConn Extension’s mission by providing answers you can trust with research-based information and resources. For gardening questions, contact us toll-free at (877) 486-6271, visit our website at homegarden.cahnr.uconn.edu, or reach out to your local UConn Extension Center at extension.uconn.edu/locations.
Look Before You Leap Before Buying Fruit Trees
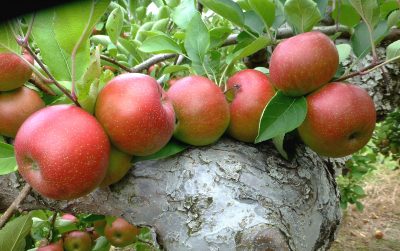
Garden centers and other retail stores have fruit trees for sale now, and in some instances, the price is too good to pass up. But before you run out and buy fruit trees, there are some things you need to consider before purchasing. First and foremost, consider whether you will need more than one tree, or variety of tree, to ensure good cross-pollination.
Peaches, tart cherry, and apricots are self-fruitful and do not need another variety in order to pollinate well. A single tree will produce fruit if all environmental conditions are adequate. But most sweet cherries and pears will not produce much fruit unless the proper cross-pollinator variety is nearby. For example, if you want Bartlett pears, then you will also need another pear variety- d’Anjou, Bosc, or Comice- to ensure proper pollination and good fruit yield.
Providing a cross-pollinator with apples is especially tricky. They are self-unfruitful and require another variety of apple whose flowering period overlaps with it to ensure optimum pollination of the flowers. Pollinator requirements are often not well- understood by novice gardeners who are planning to grow apples for the first time. Many people make the mistake of only buying the apple trees they want for fruit, such as MacIntosh, and they do not realize they will need one more variety of the correct cross-pollinator to get fruit of an acceptable amount.
Apples belong to one of three groups- early, mid, and late-season -blooming. So early and mid-season blooming varieties will provide adequate cross-pollination and fruit set with each other, while mid and late-season varieties will do the same. A late blooming variety then will not provide cross-pollination with an early blooming variety. Conversely, an early blooming variety will not help a late- blooming variety cross-pollinate. The mid-season flowering varieties can be effective cross-pollinators of both the early and late-season varieties.
Note: if there are flowering crabapples nearby that flower at the same time as the apple variety you have, then cross-pollination can be sufficient. Crabapple flowers attract diverse bees and other pollinators. If you already have an ornamental crabapple that flowers when your apple tree does, that will likely be sufficient to ensure good pollination of your apple tree. Apple varieties like Jonathan, Jonagold, Golden Delicious, Gal and several are listed a self-fruitful, but they will set more fruit if cross-pollinated.
To simplify a gardener’s efforts to get the best cross-pollinators for their fruit trees, there are charts available that can be printed and brought to the garden center or nursery that will help in fruit tree selection. If you find a fruit tree variety you really like, do a little research before buying it see whether another variety will be needed for cross-pollination or not. For a good fact sheet that explains the ins and outs of fruit tree pollination there is valuable information on the following link:
https://extension.missouri.edu/publications/g6001
I hope we have a great fruit growing year here in Connecticut. May the pollinators and good weather be with us.
The UConn Home Garden Education Office supports UConn Extension’s mission by providing answers you can trust with research-based information and resources. For gardening questions, contact us toll-free at (877) 486-6271, visit our website at homegarden.cahnr.uconn.edu, or reach out to your local UConn Extension Center at extension.uconn.edu/locations.
Hold Off for Healthier Soil: Managing Spring Compaction Risks
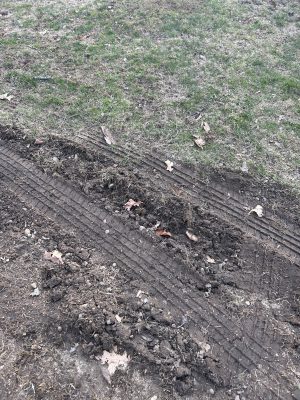
In the case of soil compaction, the early bird often does not get the worm. As temperatures rise, many Connecticut residents are eager to get back into their gardens and begin lawn care. However, after a winter marked by significant snowfall, the effects of snowmelt are still present in the form of pooling water and high soil moisture. Although the warmer weather may seem like the perfect time to begin spring yard work, it is often best to wait. Working or walking on wet soil can lead to compaction, a soil condition that can negatively impact plant health throughout the growing season. Wet soils are more easily compacted than dry soils, and once compacted, they are much harder to remediate.
Soil compaction restricts root growth, making it difficult for plants to access water, nutrients, and oxygen. As a result, plants may show reduced growth and lower yields. Compacted soils also limit water infiltration, which can lead to increased runoff during spring precipitation events. This not only reduces water availability for plants but can also contribute to soil erosion and water pollution, particularly in areas located near streams, ponds, and other water bodies.
Soil microorganisms are impacted by compaction, some of which are responsible for soil nutrient cycling. For example, compaction reduces pore space, which holds oxygen and a lack of oxygen in the soil can increase the rate in which some bacteria perform denitrification, a gaseous loss of nitrogen to the atmosphere. Other soil organisms are impacted as well. Non-burrowing animals, such as mites and springtails, have difficulty penetrating compacted soil, and there is often a decline in burrowing species like earthworms, ants, and beetles.
Common causes of soil compaction include heavy foot traffic and the use of equipment such as lawn mowers, spreaders, and vehicles. Following the same consistent pathway through your yard and garden, even if it seems insignificant, can lead to substantial compaction overtime, especially in high soil moisture conditions. Homeowners should also be cautious about allowing heavy vehicles, such as mulch delivery trucks or off-street parking, onto lawns when soils are wet. Additionally, tilling wet soil can do more harm than good by creating dense soil layers and deep ruts. It is important to wait until soils have dried sufficiently before working them.
To assess whether soil is compacted, start with a visual inspection. Areas with poor plant growth, shallow roots, or standing water after rainfall may indicate compaction. Simple field tests can provide further insight. One method is to dig into the soil with a shovel or spade a few days after a rainstorm. Signs of compaction include surface crusting, plate-like soil structure (resembling stacked dinner plates), or large, dense clods. Another method is to perform a soil hardness test. A few days after rain, try pushing a wire flag or similar probing object into the soil. Hold the flag at the top and press the wire into the soil without bending it. This test is most accurate when soils are moist but not saturated, and care should be taken to avoid rocks. If the probe penetrates less than 4 inches, the soil is considered compacted.
Preventing soil compaction is far easier than correcting it. Avoid walking on garden beds and refrain from working soils when they are wet. Use lighter equipment whenever possible and maintain ground cover to protect the soil surface. If necessary, aerate compacted soils and incorporate compost or organic matter to encourage biological activity from soil organisms that naturally improve soil structure. While organic residues such as compost can help cushion the effects of compaction, excessive traffic will degrade these materials over time. Soils with low organic matter are especially vulnerable to compaction, making regular amendment essential.
Patience in early spring can pay off throughout the growing season. Waiting until soils are drier before beginning yard work will help protect soil structure, promote healthy plant growth, and support long-term landscape sustainability.
The UConn Home & Garden Education Center supports UConn Extension’s mission by providing answers you can trust with research-based information and resources. For gardening questions, contact us toll-free at (877) 486-6271, visit our website at homegarden.cahnr.uconn.edu, or reach out to your local UConn Extension center at extension.uconn.edu/locations.
I “Heart” Philodendrons
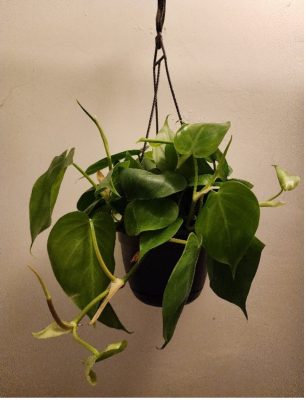
Back in the late1970s when I stumbled upon my mother’s abandoned houseplant book, I had no idea what impact that would have on my life. It was a treasure-trove of knowledge for me, and came with a gallery of some of the most common houseplants. One in particular caught my eye – the Heartleaf Philodendron. I was immediately in love (see what I did there?). All jokes aside, this was one of the biggest staples of the houseplant world, and it still is. Characterized by green heart-shaped leaves, they were commonly displayed in macramé plant hangers.
These plants, like many of our houseplants, come from humid tropical Central and South American forests. The word Philodendron comes from the Greek and means “tree lover.” This name serves as both the scientific and the common name. As one would expect, plants in this genus grow on trees in some fashion. Of course there are exceptions, but most will readily grow up moss poles if provided. A number of the species are perfectly suited to life in a hanging basket, and are commonly referred to as “trailing” to describe their growth habit. A few of my favorite trailing-types are the ones I will focus on for this article. Trailing Philodendrons are one of the easiest plants to grow and also the easiest plants to kill. The secret to their success is to not over water them. The top inch or two of the soil should dry out before they are watered again. They are very unforgiving to overwatering, and quickly develop a fungal infection that will fist cause many leaves to drop, and then the vines will wither and die. Many people see this and assume the plant needs more water, and then accidentally ensure the plant’s death. If they are put outside for the summer, I recommend hanging them under a covered porch so the watering is controlled.
The old-school Heartleaf Philodendron was just the beginning. It is known as Philodendron hederaceum by scientists. It may be incorrectly labeled as Philodendron cordatum, but this is an older/inaccurate name and beyond the scope of this article. One modern favorite variety is called Lemon Lime. As expected, it has some light green to yellow leaves in bright light. Next to the regular green, this variety really stands out. Lemon Lime is similar to one I had thirty years ago called Lemon which had only yellow leaves. There is another new one called Neon that has all yellow leaves as well. It is hard to know if these are true varieties or repackaged versions of the old Lemon with newer names. Brazil is another very hardy variety that has green leaves with a large, thick yellow stripe down the center of each leaf. There is variability in the amount of yellow in each leaf, which adds further interest to the plant. A similar but more striking variety is called Silver Stripe. This plant has a thinner stripe down the middle that is mostly cream or silver colored. This was extremely expensive last year, but is much more common and therefore cheaper now.
There are a number of different species with similar appearance and growth habits to our P. hederaceum. One of the real stand-outs is the Philodendron brandtianum, commonly referred to as the Silver Leaf Philodendron or Philodendron Brandi. The leaves are a gorgeous true silver color with green stripes following the veins. These are slower growing than the others mentioned here. By the end of last year, it was somewhat affordable in four-inch pots. I have yet to see it offered in a larger hanging basket (probably a few years away from that). A close look-a-like to this plant is the Philodendron sodiroi, which is also called the Silver Leaf Philodendron. Though less intensely silver and with paler green coloration, the leaves are larger. I finally saw one for sale last summer but passed on it as I think it was a mislabeled P. brandtianum. Nevertheless, I am sure these will be equally popular with collectors.

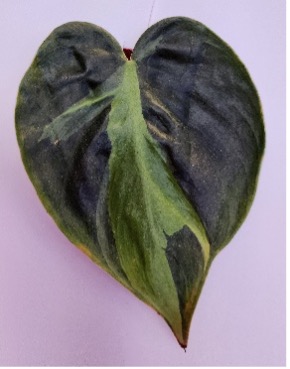
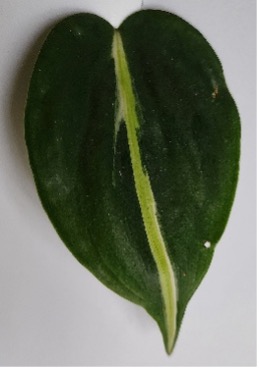
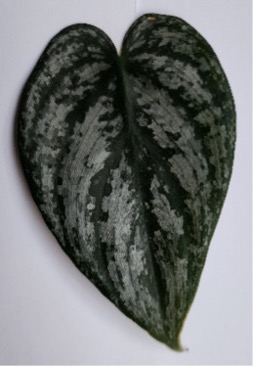
From left to right: Philodendron hederaceum ‘Lemon Lime,’ ‘Brazil,’ ‘Silver Stripe,’ and Philodendron brandtianum (photos by M. Lisy).
All of these plants are easy to propagate by cutting the stem and leaving one leaf per node. Dip it in rooting hormone and keep it in a moist, clear-bag-covered pot and in a few months, there will be new growth. Alternatively, they can be rooting in water, but I prefer the soil method as it doesn’t have to adapt from water to soil when transplanted.
I am hopeful that this article will rekindle an old flame with the Heartleaf Philodendron or its relatives. They are all generally available now in many of the big box, online, and brick-and-mortar plant stores. Why not pick one up to beautify the home for many years to come?
The UConn Home Garden Education Office supports UConn Extension’s mission by providing answers you can trust with research-based information and resources. For gardening questions, contact us toll-free at (877) 486-6271, visit our website at homegarden.cahnr.uconn.edu, or reach out to your local UConn Extension Center at extension.uconn.edu/locations.
Planting Bare Root Trees and Shrubs
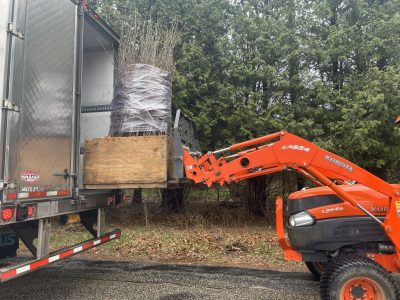
Bare root trees and shrubs, as the name suggests, are not sold in a pot or balled and burlapped. At the nursery bare root plants are grown in the ground, harvested as young plants, and sold without soil surrounding the roots. They are sold while the plant is dormant, usually in late winter or early spring and are best planted while they are still dormant or just before bud break. Historically, they have been used for agriculture or conservation plantings but they are also suitable for the home landscape. Bare root trees and shrubs are a great choice if you need a lot of plant material or are on a tight budget.
Consider using bare root trees and shrubs to provide structure in your garden, to create wildlife habitat, for erosion control, or to start your home orchard or tree farm. Additionally, bare root plants are perfect for planting a hedge because they are similar in size, establish quickly, and don’t require too much digging. They will take longer to fill in the hedge than containerized plants, but they will cost a lot less money. Many popular landscape trees and shrubs are available as bare root plants.
Choose a reputable nursery or grower, preferably one that is growing regionally adapted plants. In New England, choose a grower in the Northeastern United States. When choosing species to purchase, have planting goals in mind. These goals can be those previously mentioned or other goals like revegetating an area with native plants after removing invasive plants. As with any planting project, consider the right plant for the right place. Choose species that are suited to the growing conditions of the planting area. Consider sun exposure, soil characteristics, hardiness zone, plant size at maturity, and location of underground utilities.
Before purchasing bare root plants, have a plan with all the above considerations addressed. Unlike containerized plants, bare root plants have a very specific and narrow timeline for purchasing and planting. They are typically shipped in the early spring, around the time they should be planted.
To keep plants dormant before planting, they can be placed in the fridge or in an unheated garage or basement. They can be stored dormant in the original shipping package for no more than two weeks before planting. Mist the roots every few days so they do not dry out during cold storage.
Planting bare root plants is done in the early spring before buds open or late fall after the plant goes dormant but before the ground freezes. As with all trees and shrubs, they should not be planted too deep. The root flare, or transitional part of the plant between the roots and stem, should be level with the soil. Add a layer of mulch or compost but avoid piling mulch too high up the trunk. Water weekly, or more often under dry conditions, during the first year after planting. Protection from deer and rodents is important when planting young tender trees and shrubs. Use a tree tube or fencing to discourage browsing.
The UConn Home Garden Education Office supports UConn Extension’s mission by providing answers you can trust with research-based information and resources. For gardening questions, contact us toll-free at (877) 486-6271, visit our website at homegarden.cahnr.uconn.edu, or reach out to your local UConn Extension Center at extension.uconn.edu/locations.
Microplastics in Garden Soils: Should Homeowners Worry?

If you spread compost on your garden this year, there is a good chance you added a little plastic, too. Researchers around the world are now finding microplastics – tiny plastic fragments and fibers smaller than a grain of rice – in garden soils and compost products that look perfectly normal to the naked eye. In one recent study of commercial composts, every single one of the 11 products tested contained microplastics, with cleaner, eco-labeled brands still showing lower but measurable levels.
That raises a fair question for Connecticut homeowners: Should you worry about microplastics in your yard? The short answer is don’t panic, but don’t ignore it either. Microplastics are not a crisis that should send you ripping out your raised beds, but they are a good reason to be mindful about how plastic moves through our gardens and to be choosy about what we bring in.
Where are microplastics coming from?
Microplastics in garden soil mostly come from everyday sources. Composts and organic fertilizers made from mixed municipal waste or sewage sludge can carry plastic fragments and fibers, and biosolid-based fertilizers have been identified as a major pathway for microplastics into farm and lawn soils. Plastic-coated, slow-release fertilizers can contribute microplastics as their coatings weather and break down. In yards and gardens, plant tags, synthetic twine, netting, and landscape fabric can also fragment into tiny pieces when mixed into soil or added to the compost pile. On top of that, particles from tire wear, litter, and degraded plastics elsewhere can settle out of the air or arrive with runoff.
What they mean for your yard and produce
Scientists are still figuring out the full story, but some patterns are emerging. Lab and greenhouse studies show that plastic particles can affect earthworms and microbes and, in some cases, reduce seed germination, root growth, and nutrient uptake. What this means for a typical Connecticut backyard is still being studied, and while the highest documented levels of microplastics are in intensively treated farm soils, we don’t yet have enough data to say exactly how home gardens compare. Based on what we know so far, microplastics don’t appear to be an immediate emergency in your yard, but they are a good reason to take soil seriously and to reduce plastic input wherever you can. You can’t control every particle that drifts in on the wind, but you can control much of what you deliberately put on your soil and avoid adding unnecessary plastic to a system you want to keep healthy for decades.
One of the biggest questions for homeowners is whether these particles enter food crops in significant amounts. While lab studies show that tiny plastic particles can interact with roots and potentially enter plant tissues, scientists are still working to understand how often this happens in a typical backyard and what it actually means for human health. For now, most scientists emphasize source control, i.e., reducing inputs, as the most practical step. That is something gardeners are already good at: choosing better materials, building healthy soil, and asking hard questions about what they buy.
Practical steps to reduce plastic in your garden soil
Simple shifts in what you apply to your yards can greatly reduce microplastic inputs. Be choosy about compost and soil amendments. Ask what went into bagged or bulk compost, and favor products made from yard waste, leaves, or clean food scraps over those blended with municipal solid waste or sewage sludge. Avoid fertilizers and composts listing “biosolids,” “sewage sludge,” or “municipal residuals,” which are known sources of microplastics. Rethink plastic-coated fertilizers, as their coatings break down into microplastics. Keep plastic out of your compost stream by removing plant tags, synthetic twine, and landscape fabric scraps whenever you can. Skip thin plastic mulches and cheap fabrics and use shredded leaves, wood chips, cardboard, or durable, reusable barriers. And don’t underestimate your own leaves and grass clippings; they are low in plastic, build organic matter and structure, and improve soil without adding new plastic sources. We may not be able to garden without any plastic in the 21st century, but we can make sure that the soil under our feet isn’t quietly becoming a plastic landfill in slow motion.
How Connecticut is already acting on related concerns
Connecticut has not yet written microplastic standards for garden products, but the state has moved aggressively on a closely related issue. As of October 1, 2024, Connecticut banned the use or sale of any soil amendment made from biosolids or wastewater sludge that contains PFAS (per- and polyfluoroalkyl substances, a group of persistent “forever chemicals”), and on July 1, 2025, extended the ban to PFAS-containing biosolid fertilizers. Those laws are aimed at chemicals, not microplastics, but they target many of the same products. To read more about this law, read our article here.
The UConn Home Garden Education Office supports UConn Extension’s mission by providing answers you can trust with research-based information and resources. For gardening questions, contact us toll-free at (877) 486-6271, visit our website at homegarden.cahnr.uconn.edu, or reach out to your local UConn Extension Center at extension.uconn.edu/locations.
Camellias for Color, Inside and Out

Now that the holidays are over, the decorations are put away and scenes of dreary, wintry weather dance in our heads, one plant with flowers resembling roses that comes into bloom this time of year are camellias. These Asian natives have been cultivated for possibly 5000 years. Most of us are familiar with Camellia sinensis var. sinensis aka, tea! Black tea, white tea, green tea all come from the same plant just processed differently.
Other camellia species were noted and grown for their flowers gracing gardens of temples and nobility. Prized plants were selected and crossed and eventually made their way to England, sometime in the 1730s. These elegant and highly treasured plants soon were spread all over Europe with hybridists and propagators in Italy, France, Belgium, Holland, Portugal, Spain, Germany and the U.K. by the middle of the 19th century. More and more hybrids and cultivars were being developed with the number now well over 3,000. As their popularity grew, camellias were soon being grown in Australia, New Zealand and the U.S. Societies, like the American Camellia Society sprang up and shows were held (and still are) to exhibit various forms and compete for awards.
Options for growing camellias in Connecticut depend on what part of the state you live in. Thanks to breeding efforts of Dr. William Ackerman (retired USDA plant breeder) and Dr Clifford Parks (Univ of NC botanist) varieties of camellias hardy to zone 6 (-10 F) were developed. Depending on the variety and environmental conditions, camellias can bloom from fall to spring. Many of the most popular cold hardy, fall blooming cultivars belong to the Winter Series bred by Ackerman and include plants such as ‘Polar Ice’, Winter Charm’ and ‘Winter Rose’, the latter reaching only 2 to 3 feet high and wide making it a possibility for container culture.
Dr. Parks focused on cold hardy spring bloomers including the April series (C. japonica hybrids). Many grow from 5 to 10 feet tall and can be found at some local nurseries. Look for ‘April Rose’, ‘April Blush’, ‘April Remembered’ and ‘April Tryst’.
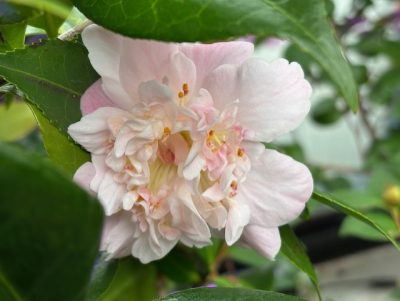
Keep in mind that our weather has been somewhat unpredictable so those in zone 6 might want to locate plants in a semi-shaded, protected location. Camellia flowers are just exquisite, resembling roses in colors ranging from white to pink to red. Some are picoteed, some are double and some are very fragrant. The dark green foliage holds up year-round.
Camellias, being broad-leaved evergreen shrubs, have similar requirements to rhododendrons. They do best in an acidic, well-drained soil amended with organic matter. It is often best to group them for effect and also for some protection from the elements. Plants are slow-growing and need adequate moisture but avoid planting them in poorly drained sites. Semi to full shade is preferable as the leaves may scorch in sunny, dry areas. A fertilizer for acid-loving plants can be applied in early spring as directed on the package. Pruning is rarely needed but could be done right after flowering.
I’ve never been fortunate to live in a warm enough location to plant camellias outdoors, but several cultivars are perfect as house plants if kept in a cool spot indoors. Two available from Logee’s in Danielson are ‘High Fragrance’ with delightfully scented light pink semi-double flowers and ‘Scentuous’ with fragrant, semi-double white blossoms. They have others blooming in their greenhouse.
Growing camellias in containers is a splendid way to get winter color, often along with fragrance. According to Logee’s co-owner and horticulturist, Bryron Martin, plants require an acid soil with a pH around 4.8 to 5.8. They can be grown in a camellia/azalea potting mix. Martin advises that young plants can be pinched back for fuller growth although that will delay flowering a bit. Keep in mind that some cultivars can get up to 6 feet in height so either select those that mature at a smaller size or be sure you have space to accommodate them.
Temperature is key to induce blooms. Ideally Martin recommends nighttime temperatures no higher than 59 F during the winter and preferably 30 – 40 F so an unheated room or sun porch is a great place for camellias. If nighttime temperatures are too high, the buds will drop. An east or west exposure will provide adequate light.
Fertilize camellias in the spring when active growth begins. Use a fertilizer for acid loving plants as directed. Commercial synthetic and organic camellia fertilizers are available. Some growers use a cottonseed meal/bloodmeal homemade blend. To supply adequate magnesium to plants, Martin recommends dissolving 1 tablespoon of Epsom salts in a gallon of water and applying this mixture twice a year.
For late fall through spring blossoms, indoors or out, camellias are attractive, evocative plants that perhaps more folks might consider cultivating. Those looking for a Valentine’s Day activity might consider the Camellia Festival at Planting Fields in Oyster Bay, NY. The Lyman estate in Waltham, MA also has a camellia greenhouse that is open to the public.
The UConn Home Garden Education Office supports UConn Extension’s mission by providing answers you can trust with research-based information and resources. For gardening questions, contact us toll-free at (877) 486-6271, visit our website at homegarden.cahnr.uconn.edu, or reach out to your local UConn Extension Center at extension.uconn.edu/locations.