Roses

Seen any Sawflies?

By Dawn Pettinelli, UConn Home & Garden Education Center

Hibiscus sawfly larvae on hibiscus leaf. Photo by dmp2024

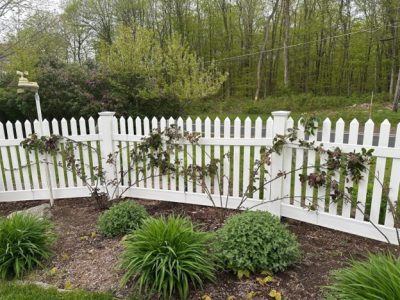
Gardeners know that amidst the promises of each new growing season come its challenges, usually in the form of weather or pests. A common insect pest this time of year are sawfly larvae, which feed on some of our favorite plants including roses, azaleas, perennial hibiscus, dogwoods, and some pines. If populations are high, significant damage can occur.

Sawfly adults are small, short-lived insects slightly resembling wasps to which they are related but their waists are generally thicker. Their ovipositor (egg-laying appendage) is somewhat saw-like in appearance, hence their common name. Eggs may be laid singly or in groups.

Larvae look like small caterpillars but there is a distinctive difference between caterpillars in the Lepidoptera family that transform into butterflies and moths, and sawfly larvae in the Hymenoptera family. Larvae in both families have numerous pairs of legs. From the head, the first three pairs are thoracic legs that correspond to an adult insects’ three pairs of legs. Count the number of fleshy leg pairs (pro-legs) after that. Caterpillars have 5 or less pairs while sawfly larvae have 6 or more.

Rose slug damage on rose leaves
Rose slug damage on rose leaves. Photo by dmp2024

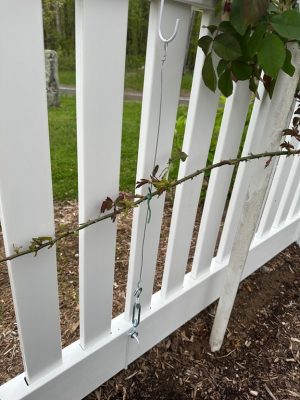
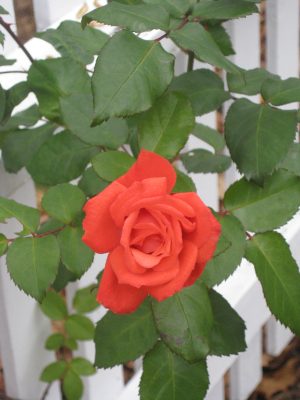
Check your rose bushes for rose slugs, a common name for at least 2 species of sawflies whose larvae may be feeding on your plants. One is thought to be native to the U.S. and the other accidentally introduced from Europe. Both were noticed as pests in the Boston area over 100 years ago and do similar damage to rose foliage.

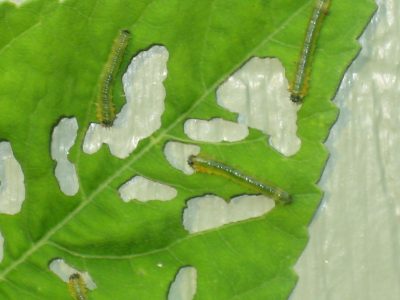
The small green caterpillar-like larvae that may be ½ to ¾ inch long depending on the species skeletonize the leaves and only the veins remain. They can feed for several weeks if not controlled and move to the undersides of the leaves during the day making them hard to spot. One or two generations may be present each season, again depending on species. Mature larvae will pupate in the soil below plants, where they overwinter and will reemerge the following spring.

Hibiscus sawflies feed on members of the mallow family with the most common one in this area being the large-flowering perennial hibiscus. The green larvae are small, and also can be found on the undersides of leaves where they often go undetected until large leaf areas are consumed.

There are at least 3 species of sawflies that feed on azaleas in this area. The small green larvae have tannish heads but are hard to spot at first as they feed on emerging foliage. Keep an eye out for foliar feeding at the edges of the leaves. The larvae are less than ½ inch in length and feed until late June or early July. There is only one generation per year and these larvae will also drop to the ground to pupate and overwinter in the soil below plants.

Pine sawfly species seem to prefer Mugo, Scots and red pines although they can feed on others. Some are inadvertently introduced pests like the European pine sawfly. Since they were first noticed around 1925, they have become widespread pests. The larvae may be up to an inch long and is grayish-green with mostly darker parallel stripes. Red-headed pine sawfly larvae have red heads as the name indicates but has a yellow body with black spots.

Pine sawfly adults typically lay groups of eggs so multiple larvae hatch and feed in groups. They have a very distinctive defense mechanism when disturbed. Most curiously they rear up and ‘wave’ as you wave your hand over them. This does discourage insect, avian and vertebrate predators, at least to some extent.

Dogwood sawfly females can lay more than 100 eggs on the underside of their preferred grey dogwood host plant. Larvae can consume the whole leaf as they mature leaving only the large midvein. Young larvae are translucent and yellowish but develop black spots and become covered with a white powdery coating as they mature. Their appearance can make a gardener think there are two species of insects attacking plants rather than one. When mature, the larvae seek out an overwintering location with rotted wood on the ground being preferred.

Regardless of which species of sawfly is attacking your plants, options for control include hand picking, insecticidal soap, Spinosad or other insecticides labeled for sawflies. While Bacillus thuringiensis (BT) can be used for caterpillars in the Lepidoptera family, like cabbageworms and Eastern tent caterpillars, it does not work on sawflies.

If you have questions on identification or control of sawfly larvae or any other gardening questions, feel free to contact us, toll-free, at the UConn Home & Garden Education Center at (877) 486-6271, visit our website at www.homegarden.cahnr.uconn.edu


Tying Climbing Roses

By Marie Woodward, UConn Home & Garden Education Center

Climbing roses tied to a vinyl fence.
Photo by Marie Woodward

Climbing and rambling roses are a beautiful addition to any garden, adding height and depth to your outdoor space. These types of roses require proper training and tying to ensure that they grow in the desired direction, produce the most blooms and don’t become tangled or unruly.  Follow this guide on how to tie climbing and rambling roses to get the best results. 

Gloves, wire, hooks and pliers laid out on a table.
These tools are needed to train your climbing roses. Photo by Marie Woodward

For materials, one would need some twine or soft plant ties, a sharp pair of pruning shears, sturdy long-sleeved, thorn resistant garden gloves. Also, some wire and tools to secure to a trellis, fence or other structure may be necessary.

Climbing roses have two types of canes. Main canes are stems that originate from the base of the rose giving it its structure and support. They are also referred to as leaders. Lateral canes originate from the main cane. It is the lateral canes that produce the flowers and add volume to the shrub. In general, main canes are not pruned unless they are diseased or dead.

Before you start attaching the plant to a trellis, make sure that your rose is properly pruned. Removing any dead or diseased canes will encourage healthy growth. Cut back any wild or overly long shoots to create a manageable framework for tying. Starting with this step will allow for more control as you move through the process of tying.

Supportive wiring, better known as strain wires, helps to promote flowering. They hold the main canes at a 45–90-degree angle. These angles encourage lateral canes to flush and produce more abundant flowers.  

A rose cane tied to wire supports on a vinyl fence.
Attach your rose canes to strain wires with soft ties. Photo by Marie Woodward

If you're training your roses against a wall or fence, attach the horizontal strain wires to the structure, spacing them about 12-18 inches apart vertically and 5 feet apart horizontally.

 If you have a vinyl fence you can use vinyl safe hooks and secure the wire with a turnbuckle vertically, spacing them about two feet apart to avoid drilling holes in the vinyl material.

Using twine or soft plant ties, attach the rose canes to the support structure at regular intervals, starting about 1.5 feet from the ground. Tie them securely but not too tightly  You want to allow room for the canes to grow and expand. Avoid fishing lines or other rigid materials. Using the wrong ties or tying too tightly could lead to cane injury.

As the roses push new growth, continue to tie the new main canes to the support structure.  Continue to guide them in the desired direction, with those 45–90-degree angles as a guide.

Regularly check your roses and adjust the ties as needed.  Ensure that they remain secure but not too tight. Prune any wild or unruly shoots and remove any dead or diseased wood to keep your roses healthy and under control.

By following these steps and regularly maintaining your climbing rose, you’ll create a stunning vertical display that adds beauty and depth to your garden. While this guide provides good tips on for starting and maintaining younger climbing roses, older roses that have been neglected may need restorative measures. If you need more information on climbing roses or any other gardening questions, feel free to contact us, toll-free, at the UConn Home & Garden Education Center at (877) 486-6271, visit our website at www.homegarden.cahnr.uconn.edu

Start Now For a Rosy Summer

By Dawn Pettinelli, UConn Home & Garden Education Center

A rose shrub in full bloom
Proper care of your roses will give you lots of blooms. Photo by dmp2024

The warmer days of spring will soon be upon us and it is time to think about spring rose care. Any winter protection such as mounded soil, mulch, leaves or rose cones that were placed around grafted bushes should be removed. Release any stems that were tied for winter protection. Fertilize your plants when new growth sprouts with a complete fertilizer such as 5-10-10 or and natural organic equivalent at the rate recommended by a soil test or follow the manufacturer’s instructions on the package. Generally, the fertilizer is sprinkled around the base of the plant and gently worked into the top of the soil.

Repeat blooming roses are heavy feeders and ideally should be fertilized monthly through July. Stop fertilizing at this time as later fertilizations may result in tender new growth late in the season that may not have time to harden off properly. Roses that bloom only once in June are usually only fertilized once in the spring. These include many ramblers and climbers, species roses and antique varieties. Rose books often recommend a dose of Epsom salts for each rose to supply magnesium. If you use a dolomitic limestone to modify the soil pH, however, the plants will most likely have enough magnesium available to them and additional magnesium will not improve growth or branching. Note that according to the American Rose Society, roses prefer slightly acidic soil so strive for a pH between 6.0 and 6.5..

climbing hybrid tea rose ‘Climbing Tangerine.’
This climbing hybrid tea rose is called ‘Climbing Tangerine.’ Photo by dmp2024

Most types of roses benefit from a spring pruning with the exception of climbing roses which are generally pruned immediately following flowering. Roses are pruned to improve their appearance, to remove diseased or dead wood and to increase the quantity and quality of flowers.

Polyanthas, floribundas and shrub roses do not require much pruning. Any canes that are damaged or broken should be removed as well as canes that are rubbing together. If just the tip of the stem is winter killed, cut back to sound wood just above a healthy bud. Rose bushes that are really overgrown can have about one-third of their canes removed from the base.

Hybrid teas and grandifloras usually require more severe pruning. After eliminating all dead and damaged wood, cut back to 18 to 24 inches. Make your pruning cuts at a slant slightly above a bud, preferably one oriented away from the center of the plant.

If your roses are grafted, it is also important to remove any suckers arising from the rootstock.

Spring is a great time to add a few more roses to your garden. Roses are soil either bare-root or as container plants. Those sold in containers can be planted either in partial leaf or full leaf. Mail ordered bare-root stock, however, should be planted when it is still dormant. It is best to plant bare-root roses as soon as you get them. If planting has to be delayed for a day or two, remoisten the packing material and store in a cool, shady location. When it is time to plant bare-root stock, unpack the plant and place the roots in warm water for an hour or two. Cut off any dead or injured parts and plant immediately after soaking.

Roses require a minimum of 6 hours of sun each day for maximum bloom. An area with good air circulation will cut down on disease problems. Soil type is not as important as drainage. Roses will not tolerate wet feet.

When planting grafted plants, set the bud union, which is the point where a rose cultivar is grafted to the root stock, about one inch below the soil level. Roses require about one inch of water per week. If at all possible do not get the leaves wet when watering as this promotes the spread of diseases such as black spot.

Roses benefit from the application of an organic mulch like shredded bark, pine needles or cocoa bean hulls. Mulches not only keep weeds down but help conserve moisture. If you have any questions on roses or other gardening topics, contact the UConn Home & Garden Education at (877) 486-6271 or www.homegarden.cahnr,uconn.edu or your local Cooperative Extension Center.