Gardening

Put an End to Blossom-End Rot: Water and Nutrient Management is Key

By Nora Doonan, UConn Soil Science Graduate Student, Department of Plant Science & Landscape Architecture

5 ripe tomatoes
Photo by Julie-Ann Adorno, Soil Science Graduate Student, UConn Plant Science & Landscape Architecture

It can be frustrating to put time and energy into growing tomatoes, only to find that your tomatoes have developed blossom-end rot. Blossom-end rot is a physiological disorder that commonly affects tomato plants, characterized by a black, sunken spot on the fruit. This disorder is caused by insufficient calcium as a result of nutrient and water management challenges. Blossom-end rot can also affect peppers, eggplants, squash, and watermelons. In tomatoes, it is commonly seen on larger and elongated varieties, which can have a greater demand for calcium. Calcium is an essential plant nutrient that is required for proper growth, especially for the development of cell walls in the tomato fruit. When a fruiting tomato plant experiences calcium deficiency, the cell wall can collapse and show the appearance of blossom-end rot. Soil tests can reveal if your soil has sufficient levels of calcium and can determine if your soil pH is optimal for nutrient availability.  

Oftentimes, the soil is sufficient in calcium levels, but blossom-end rot still occurs. Blossom-end rot can be closely associated with soil moisture that is too wet or too dry. The soil should never dry out completely. It is important to water regularly to ensure that plants receive 1 to 2 inches of water a week. A cycle of dryness followed by overwatering is only promoting calcium deficiency in the plant. If soil is too saturated, there may be insufficient oxygen levels in the soil that can affect the roots’ ability to take up water and nutrients.  

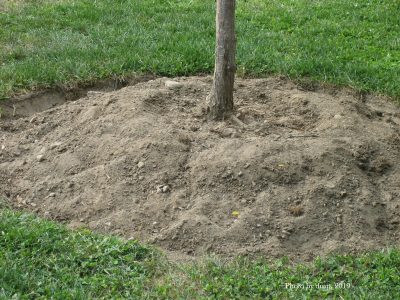
One method of maintaining optimal soil moisture is to mulch tomato plants with an organic mulch, such as wood chips or straw, after the soil has warmed up. This will help to prevent excessive evaporation and drying of the soil. Another method is to plant tomatoes in a mound of soil that is high in organic matter or compost. Organic matter can retain soil moisture and provide adequate drainage.  

There are other factors that can affect calcium uptake by the plant, such as high concentrations of ammonium, potassium, and magnesium in the soil. This can be caused by over fertilization. Specifically, over fertilizing with nitrogen can promote excessive production of leaves in the tomato plant, which can preferentially distribute calcium to the leaves rather than the fruit.  

Calcium movement in the plant is dependent on transpiration, which is the loss of water to the atmosphere from plant leaves, stems, and flowers. Calcium is taken up through the roots and relies on water flow through the xylem for transport through the plant. This movement of water through the xylem is driven by the process of transpiration. Calcium is not redistributed from the leaves to the fruit. In addition, the overfertilization of ammonium, potassium, and magnesium can allow for competition in root uptake of calcium because they are all positive cations. Damages to roots, caused by fertilizer burns or cultivation, can also be a factor in impairing nutrient and water uptake. To prevent blossom-end rot through fertilization practices, apply fertilizer as recommended by a soil test and apply nitrogen fertilizers in the form of nitrate, rather than ammonium.   

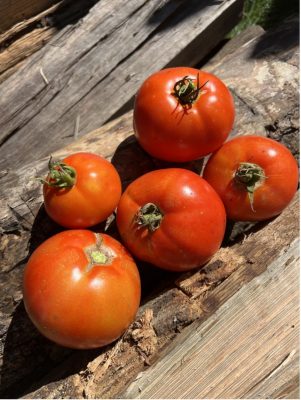
Any affected fruits can be removed from the plant, as they will continue to drain moisture and calcium for development from other fruits. A foliar application of calcium can be made to the leaves when the fruit is young, but it is not the most effective method, since calcium in the leaves is relatively immobile. The goal is to prevent the need for foliar application through water and nutrient management across the tomato plant growth stages. Hopefully these methods will allow you to prevent blossom-end rot starting at beginning stages of growth, so that you can enjoy a bounty of beautiful, red tomatoes.  

The UConn Home & Garden Education Center supports UConn Extension’s mission by providing answers you can trust with research-based information and resources. For gardening questions, contact us toll-free at (877) 486-6271, visit our website at homegarden.cahnr.uconn.edu, or reach out to your local UConn Extension center at cahnr.uconn.edu/extension/locations. 

This article was published in the Hartford Courant June 14, 2025

Put in the Work Now for Lasting Garden Beauty 

By Heather Zidack, UConn Home & Garden Education Center 

If you’re planning to do some landscape renovations this summer, you will often hear the suggestion of doing certain tasks “until the plant is established.” If you’ve heard this phrase and wondered what the pros mean, you’re not alone. It’s crucial to understand that the first year of growth is one of the most critical to ensure the success of trees, shrubs and perennials in the landscape.  

The “establishment period” is when a newly transplanted plant pushes roots beyond the original root ball to anchor itself into the surrounding soil and adapt to its new environment. Establishment happens in as little as 2-4 weeks for your veggie starts and other annuals. However, if you are installing woody ornamentals or perennials, it is recommended to provide support for their first year in the landscape. Some species, especially fruiting plants may need longer attention to ensure establishment and landscape success. 

Keeping the plants properly hydrated is going to be your first line of defense in preventing transplant shock. Using sprinkler systems for supplemental water can be problematic for trees, shrubs and perennials. These systems, especially those designed for lawns, maintain moisture in the top 1-2 inches of soil. Our non-turf plants need much more.  Providing adequate water will help new plants acclimate by providing sufficient hydration, but it will also encourage the root system to expand. Roots pull moisture and nutrients from the soil but also act as an anchor to keep the plants upright. Keeping only the top few inches of soil moist will encourage roots to stay in that shallow layer instead of expanding deeper into the soil, hindering the development of that anchoring system. Additionally, watering demand tends to be more frequent with shallow root systems, as the first few inches of soil are more susceptible to drying out on sunny days. Lastly, the shallow roots need to compete with established turf for resources at a 1-2-inch depth. 

While in this establishment period, the standard watering recommendation is 1-2 inches per week, depending on the species of plant. An inch of water is equivalent to 0.62 gallons per square foot of garden area. Watering the plant at this rate encourages it to stretch its roots downward into the soil.  With deeper roots, plants can find moisture even during times of temporary drought deep below ground. This is a huge contribution to drought tolerance, as opposed to the common belief that the plant will just “live longer without water.”  

If the forecast does not predict an inch of rain within the week, gardeners should be out checking the soil for moisture a few inches down and providing supplemental water if necessary. Always check the soil before watering, especially if you are new to gardening. Squeeze the soil in your hand. If the soil particles stick together easily, it is likely that there is enough moisture. If soil clumps fall apart between your fingers or the texture is dusty, the soil is too dry and more water is needed. If you can squeeze water out of the soil like a sponge, there is too much moisture, and you should come back and check in a day or two. Overwatering can lead to root rot and other diseases and finding the balance is a fine-tuned skill developed over time.  

Monitor your new plantings for the first year and watch for signs of transplant shock, pests and disease so that you can adjust quickly and keep your plants healthy during this time. While transplant shock is a normal response to being planted in a new location, the symptoms can be startling to gardeners.  Remember that the UConn Home & Garden Education Center is here to help you determine if you are looking at transplant shock, disease, or possible pest damage. It’s easier to catch and treat issues earlier than it is to react at the end of the season. If you’re vigilant, we can help you find your way to solutions much more quickly! 

Staking should only be done as a temporary measure for young trees where the environment or the species of tree requires extra support. In most cases, trees should be perfectly capable of supporting themselves. Exposure to the elements, like the occasional strong breeze, can help to strengthen them as they adjust. However, temporary staking can help take some of the stress off the young trees if they are establishing in harsher environments. While there are many situations that may be appropriate, consider staking newly planted trees when they are in open areas, have high wind exposure, or are in an area that risks mechanical or physical damage. Staking may also be appropriate if the root ball is significantly smaller in relation to the tree’s size, or if the tree has a top-heavy canopy. 

Once your plants are well anchored into your landscape, they will be able to find water and nutrients on their own while standing tall in the face of our New England climate. Putting in the attention and care to help plants establish in their first year or two in the landscape will reward you with many years of enjoyment to come.  

The UConn Home & Garden Education Center supports UConn Extension’s mission by providing answers you can trust with research-based information and resources. For gardening questions, contact us toll-free at (877) 486-6271, visit our website at homegarden.cahnr.uconn.edu, or reach out to your local UConn Extension center at cahnr.uconn.edu/extension/locations. 


This article was published in the Hartford Courant June 7, 2025

Spring Showers Bring Flooded Gardens

By Amelia Martin, UConn Plant Science Graduate Student 

Rain gauge showing half an inch of rain on a cloudy day
Photo by H. Zidack, UConn HGEC

You may have noticed the heavy rains and chilly temperatures last week’s nor ’easter brought to Connecticut. Maybe you were one of many who checked their back window to see their gardens had flooded and their plants are looking worse for the wear. If this sounds familiar and you are curious what garden flooding means for your plants and want to know how to protect them- you found the right article! 

A flooded garden is not a unique problem, especially during periods of heavy rainfall, but there are some factors that may contribute to the severity of flooding. Having minimal or poor drainage can amplify the problem, especially if planting in garden boxes with closed bottoms. Soil compaction can contribute to flooding if you are planting directly in the ground. Compacted soil can happen if there has been too much tillage, if wheels or machinery have been over the area, or even from excess foot traffic. Lastly, the layout and landscaping of a yard can contribute to flooding as well. If you placed your garden at the bottom of a hill or there are minimal drainage angles surrounding your garden, water may be pooling up faster than it can drain.  

To prevent flooding, check your gutters and make sure they are free from debris and directed to a drain or storm barrel. Put down gravel and mulch to help prevent surface flooding. Avoid cutting your grass too short to maintain strong roots which help to absorb water. Maintain healthy soil to allow for the best water absorption. Dig out a shallow drainage channel if you have the space for it. Consider switching to raised beds with drainage rather than in-ground gardens in easily flooded areas. Try adding native plants to your garden. Native plants have deep roots which helps them absorb excess water and prevent runoff. While handling these issues would be preventative measures, let’s talk about what to do if your garden has already flooded.  

Assess the drainage situation and take note of where the water is pooling the most. If flooding is unusual in your garden- there may be something blocking the normal drainage route, which may be a quick fix. If not, knowing where water is likely to pool may help in future garden planning, or help you determine where to make improvements.  

Stay off your garden beds.  If you step on your soil while it is saturated, it will compact it, ruining the soil’s tilth. Instead, if you need to access your garden beds consider putting a wooden board down to walk on to distribute your weight better. 

Re-fertilize your plants. Heavy rain can wash away nutrients out of the soil through a process called leaching. Check the forecast to make sure no more extreme weather is immediately approaching before fertilizing- or you may have to do it again. 

Add supports to your plants. The wind and rain may have led to plants falling over. Add in some additional supports to get them upright again and give them a better chance for the next time heavy rain comes.  

While having a flooded garden may be a bummer, there are some gardening activities that are actually easier to do in saturated soil! Once the rain stops and the ground is still wet, use this time to weed. The soft ground will make weeds especially easy to pull up- just try not to step on the garden beds. After a rain or a flood, re-mulching is always a good idea. The rain might wash away some previously placed mulch, use this as an opportunity to locate any spots barren of mulch and in need of a re-fill. After a couple days when the soil is soft but not sodden, the ground will be the perfect consistency to dig and put stakes.  

Lastly, check for any young plants that didn’t survive the water or any seeds that haven’t come up. Take this as an opportunity to plant new seeds, as seeds do better in already moist soil where they have less chance of being displaced when watered.  

At the end of the day, while having a flooded garden may not be the best for your plants, it is not the end of the world. There are a handful of preventative measures that can be taken ranging from backyard renovations to quick fixes- it is about finding what works best for you and your garden.  

The UConn Home & Garden Education Center supports UConn Extension’s mission by providing answers you can trust with research-based information and resources. For gardening questions, contact us toll-free at (877) 486-6271, visit our website at homegarden.cahnr.uconn.edu, or reach out to your local UConn Extension center at cahnr.uconn.edu/extension/locations. 

This article was published in the Hartford Courant May 31, 2025

A Gardener’s Guide to Planting by Hardiness Zones

By Marie Woodward, UConn Home & Garden Education Center

Map of Connecticut USDA Hardiness zones as of 2023. Most zones in the state are either zone 6 or zone 7.
USDA Hardiness Zone Map for Connecticut, 2023

If you are wondering whether that shrub, flower, or tree that you saw in a magazine or catalog will grow well in your garden, using a hardiness zone map is your best bet to ensure success.   

A hardiness zone map is a tool that divides a geographical area into distinct zones based on average annual minimum winter temperatures. These maps are used by gardeners and farmers around the world to determine which plants are most likely to thrive in a particular region. Each country has its own hardiness map that correlates to their climate. In the United States, the USDA publishes a hardiness zone map, which covers all fifty states and includes Puerto Rico, Guam, American Samoa, and the U.S. Virgin Islands. It uses climate data collected over many years from weather stations throughout a specific region. Then the data is analyzed to determine average minimum winter temperatures from different areas.  

The concept of hardiness zones was first introduced in 1927 by Dr. Alfred Rehder. Rehder worked at Harvard's Arnold Arboretum as a botanical taxonomist. He wanted to address the challenges gardeners and growers faced in selecting plants suited to their local climate. Prior to Rehder’s map, there was no standardized system for categorizing plants based on their ability to survive winter temperatures. His hand-drawn map featured eight hardiness zones and was based on the lowest winter temperatures recorded in various regions across the country. Rehder aimed to provide a practical tool for gardeners and growers. His map made it easier for them to choose plants with the best chances of survival in their region, ultimately contributing to more successful gardens and agricultural endeavors. Rehder’s innovative approach recognized the importance of adapting agricultural practices to local climates. In the 1960s, the USDA adopted and adapted Rehder's concept, creating the first official USDA Plant Hardiness Zone Map.  

Since its initial release, the USDA Plant Hardiness Zone Map has been updated several times to reflect changes in climate and the availability of more accurate data. The latest update of the USDA hardiness map was released in November 2023, jointly developed by the USDA's Agricultural Research Service (ARS) and Oregon State University's PRISM Climate Group. This update incorporates data from 1991 to 2020, covering a broader range of weather stations than previous versions. One of the key findings from this update is that the contiguous United States has become approximately 2.5 degrees Fahrenheit warmer on average compared to the previous map. As a result, around half of the country has shifted into the next warmer half zone, while the other half has remained unchanged. The updated map still consists of 13 zones, but now offers more detailed information on temperature ranges within each zone, including 10-degree zones and 5-degree half zones. Connecticut has two hardiness zones each of which is divided into half zones; (6a,6b); (7a,7b), to better reflect the temperatures in the state over the past few decades.   

The importance of hardiness zones lies in their ability to help gardeners and farmers choose plants that will thrive in their specific region. By selecting plants appropriate for their zone, growers can reduce the risk of frost damage and increase their chances of a successful growing season. However, due to unexpected temperatures outside the average range, there is no guarantee that a plant won’t suffer but it does reduce the risk of plant damage. In addition to gardeners, researchers use hardiness zones to study the spread of insects and exotic weeds, while the USDA Risk Management Agency uses the map to help determine crop insurance rates for commercial growers.  

While the USDA Plant Hardiness Zone Map is an invaluable tool, it is important to note that it is not the only factor gardeners and farmers should consider when selecting plants. Other factors, such as soil type, precipitation, and local microclimates, can also impact plant growth and survival. Gardeners should use the map as a starting point and supplement it with local knowledge and research to make the best plant selections for their specific needs. 

The development of the USDA Plant Hardiness Zone Map is a testament to the importance of adapting agricultural practices to local climates. Since its inception nearly a century ago, the map has evolved to reflect changes in climate and incorporate more accurate data. Today, the map remains an essential resource for gardeners and researchers alike, helping them to better understand and navigate the complexities of plant growth in the diverse regions of the United States. Knowing a plant’s hardiness zone when selecting that shrub, tree or flower will help you grow the garden of your dreams. 

 The UConn Home & Garden Education Center supports UConn Extension’s mission by providing answers you can trust with research-based information and resources. For gardening questions, contact us toll-free at (877) 486-6271, visit our website at homegarden.cahnr.uconn.edu, or reach out to your local UConn Extension center at cahnr.uconn.edu/extension/locations. 

USDA Hardiness Zone Map 2023

A map of the united states color coded to display the USDA Hardiness zones across the country as of 2023. Lower numbered zones are colder and each increment is based on 5 degrees Farenheit.

National USDA Hardiness Zone Map, 2023

USDA Hardiness Zone Map 2012

A map of the united states color coded to display the USDA Hardiness zones across the country as of 2012. Lower numbered zones are colder and each increment is based on 5 degrees Farenheit.

National USDA Hardiness Zone Map, 2012

USDA Hardiness Zone Map 1990

A map of the united states color coded to display the USDA Hardiness zones across the country as of 1990. Lower numbered zones are colder and each increment is based on 5 degrees Farenheit.

National USDA Hardiness Zone Map, 1990

This article was published in the Hartford Courant May 3 2025

Celebrate Arbor Day!

By Dawn Pettinelli, UConn Home & Garden Education Center

Redbud tree in flower with tiny pink buds.
Photo by Dawn Pettinelli

Arbor Day is celebrated in Connecticut on April 25th. Since it is a day traditionally set aside for the planting of trees, perhaps you might consider adding one to your home landscape. If you haven’t the need for another arboreal specimen, then plan on giving your existing trees a little TLC.

Trees have a lot to offer. They provide us with cool shade on hot summer days, brighten our spring season with lovely blossoms, add color to the fall landscape and winter interest throughout cold, dreary days. Trees provide food, nesting sites and shelter for many animals, especially birds. They help reduce noise pollution, trap particulate air pollutants, and can alter the microclimate surrounding them.

Most importantly, trees supply plenty of oxygen for us to breathe. Each year, an acre of trees produces enough oxygen to keep 18 people alive. They also sequester carbon dioxide. Trees convert atmospheric carbon dioxide into plant matter as they photosynthesize. This has important consequences worldwide. As more and more of our forested land is being cleared, less carbon dioxide can be stored in trees and more is available to increase the atmospheric carbon dioxide levels which, in turn, can contribute to global warming.

While we can’t stop global deforestation, we can make a difference in our own backyards by planting more trees or making sure that the trees already present receive the conditions they need to thrive.

When selecting a tree for your landscape, do consider factors like its ultimate height and spread, susceptibility to insect and disease problems, flowering, fruiting and fall foliage potential, rate of growth and site requirements. Review gardening books, consult with nurserymen and maybe visit an arboretum to view mature specimens.

Trees are purchased either as dormant stock through mail order sources, containerized, or balled-and-burlapped (B & B). Dormant trees generally arrive in the spring or fall and should be soaked for a couple of hours and planted immediately. If you can’t get them in the ground right away, they can be stored in a cool place for a few days out of direct sunlight. Make sure them are kept moist.

Containerized stock can be planted throughout the growing season although cooler spring or fall is best. Hard to transplant species are best purchased this way as there is less disruption to their root system. If potbound, make several vertical cuts about one-quarter inch deep around the root ball before planting.

Purchasing B & B trees is fine for younger specimens, but often larger trees have a good portion of their roots removed in this process. This can lead to poor survival. For greatest success, choose small to medium sized trees.

A tree planted at the proper depth with the crown slightly exposed. The hole is dug twice the width as the original root ball.
Photo by Dawn Pettinelli

Holes for planting only need be as deep as the root system. The key is to make them at least 2 feet wider than the root ball. Especially in heavy or compacted soils, be sure to

loosen as much soil around the planting area as possible so roots can grow freely. The majority of roots are found in the upper 3 feet of soil.

Amendments such as peat moss or fertilizer are not necessary to add to the backfill. However, if the soil pH or phosphorus levels are low, ground limestone and bonemeal can be mixed into the backfill.

Add water to the hole before planting and let it drain. Next, position the root ball. Remove plastic mesh and cords. Burlap can be cut away as much as possible. Fill in the hole about half way. Gently firm the soil around the root ball. Don’t stomp on it or you will compact the soil. Water thoroughly and when the water drains, finish filling the hole. Make a well around the tree with soil and water once more. Apply a 2 to 3 inch layer of mulch keeping it away from the trunk. Newly planted trees need a thorough soaking each week throughout the first growing season either from natural precipitation or from you.

If you have questions about trees or any other gardening topic, call the UCONN Home & Garden Education Center (toll-free) at (877) 486-6271 or email us at ladybug@uconn.edu or visit our website, www.homegarden.cahnr.uconn.edu.

This article was published in the Hartford Courant Apr. 26 2025

Unbeanlievable: Here’s a Vegetable That Produces All Season Long 

Abigayle Ward, Soil Science Graduate Student 

Beans of the 'Dragon Tongue' variety are. yellow with purple streaks.
Beans like this Dragon Tongue variety can add interest to your vegetable garden! Photo by H. Zidack

Full of fiber, packed with protein, and great to grow, beans have been a staple in the diet of humans for thousands of years. Native edible beans can be found on every continent but Antarctica, although many of the beans we eat today are domesticated varieties that originated in South America, Europe, and Asia. Fabaceae, the bean family, is one of the largest families of plants in the world, with over 20,000 species described. As legumes, beans can convert nitrogen in the atmosphere into nitrogen useable by other plants, making them very useful to integrate into crop rotation for savvy home gardeners who want to save a little money on nitrogen fertilizer. In fact, excessive nitrogen fertilization of legumes can inhibit the natural nitrogen-fixation process, so use only a low-strength nitrogen fertilizer if absolutely necessary. Legumes can even be used as cover crops in the winter to prevent soil erosion and provide a boost to your soil health all winter long. You can direct-seed beans and still get production all season, meaning Connecticut gardeners can get beans in the ground now. 

Fava beans (Vicia faba) are grown all around the world, very adaptable to many climates, and are generally very easy to grow. They are cold-tolerant and can be grown all the way down to USDA Hardiness Zone 3. In Connecticut, for the best results, you should plant fava bean seeds in the early spring in a place that gets full sun and doesn’t stay too moist. They will take about three months to begin producing beans but will continue producing throughout the season and into the fall. Some frost-resistant varieties will even survive temperatures below freezing, and since they self-pollinate, bees are not necessary for the production of pods. Fava beans do not require trellises, but some larger varieties may benefit from cages or trellises for additional support. In the summer, pollinators love the flowers, and understandably so – bean flowers not only signal the coming produce but are also eye-catching. Many varieties have white and dark red flowers. Some varieties have pink flowers. Bean pods can be harvested and eaten whole if they are young and tender. It is important to note that some people may have an adverse reaction to consuming fava beans, a metabolic disorder called favism. Favism causes anemia in response to the inhalation of the plant’s pollen or consumption of the beans. Be sure to check with your doctor before trying these beans for the first time.  

For “summery” beans that are native to central and south America, you can try planting kidney, cranberry, appaloosa, or navy beans, all in the genus Phaseolus. Perhaps the delight of beans in the Phaseolus genera is their diversity in appearance. Appaloosa beans are especially whimsical, with white, brown, and reddish mottling. They strongly resemble the horse for which they are named. Some of these species behave like pole beans, meaning they will need to be trellised, while others behave like bushes, meaning they should not need to be trellised. The seed packet should indicate whether they will need to be trellised. As with fava beans, be sure to water Phaseolus when the soil seems dry, taking care to avoid watering the leaves. Excessive leaf wetness may increase the likelihood for fungi to grow and cause disease. 

No matter what bean you try growing, pests and disease are ever-present. Aphids, bean beetles, and European corn borer are all possible bean pests. Beans are susceptible to diseases like powdery mildew, Fusarium wilt, and bean rust. Selecting disease and pest-resistant varieties will reduce the risk of yield loss. Like most legumes, the ideal soil pH for growing beans is 6-7. Since native Connecticut soil typically has a pH closer to 5.5, be sure to send a soil sample to the UConn Soil and Nutrient Analysis Lab to test the pH (and nutrients!) of your soil before planting to ensure you get accurate recommendations for any amendments your garden may need to allow beans to thrive!  

The UConn Home & Garden Education Center supports UConn Extension’s mission by providing answers you can trust with research-based information and resources. For gardening questions, contact us toll-free at (877) 486-6271, visit our website at homegarden.cahnr.uconn.edu, or reach out to your local UConn Extension center at cahnr.uconn.edu/extension/locations. 


This article was published in the Hartford Courant Apr. 19 2025

Rocky Start for Rhododendron’s This Spring

By Heather Zidack, UConn Home & Garden Education Center

Two Rhododendron shrubs. Shrub in the foreground showing leaf curl while shrub behind it looks healthy and is not displaying any signs of stress.
Rhododendrons are showing a varying degree of stress responses to winter conditions in the landscape. Photo by Heather Zidack

Rhododendrons are looking rough this spring. You’ve probably seen it in your yard or in your neighborhood. The UConn Home & Garden Education Center has been seeing an increase in the number of calls regarding injury or damage to rhododendrons.  In most cases, we are finding these reports to be winter injury. This is an environmental type of damage, caused by a perfect storm of conditions that we have seen throughout the state. So, let’s take a closer look into why this is happening.

Plants lose water through their leaves. During active growth, that water is constantly replenished from the roots. When the temperatures drop and the ground freezes in the winter, available water becomes limited. Plants have adapted to this in many ways. Dormancy is triggered by multiple factors, but water conservation is certainly one of those. Deciduous trees shed their leaves completely. Evergreens have developed various leaf adaptations to help with survival, too.

As broadleaf evergreens, rhododendrons have developed a waxy coat on their leaves to help prevent water loss. They also have a physiological mechanism to help defend themselves further. Just as you’d clasp your hands together on a cold winter day to shield them from the elements, rhododendron leaves curl themselves into cigar-shaped cylinders. The leading theory is that this happens to protect the leaves from further water loss. This natural defense mechanism has grabbed our attention this spring, since our weather patterns have lent a hand in amplifying a natural phenomenon.

At the end of last summer, CT started to see a moderate drought in much of the state. These conditions have persisted through this spring. Water availability was limited as plants went into the winter and remained limited throughout the season. Add in frozen soil and harsh winter winds and the environmental stress increased even more. When water is unavailable to the roots – through either freezing or drought conditions, plants lose their ability to return water to the living tissues. This drying out, referred to as desiccation, leads to winter injury or winter kill depending on the severity of damage. While we are finally seeing rain, these plants need time to recover and may not be ready to unfurl just yet.

Many have noted that some plants are faring better than others even within the same bed. This is also normal to some extent. It can be easy to forget that plants are living things in our landscapes. There is going to be variance in their ability to withstand environmental pressures and their recovery rates.

If you are seeing this in your rhododendrons, be patient this spring and monitor over the next month or so. With an increase of rain in the forecast, the extra hydration should help plants recover - or at least push out new growth. These shrubs will shed any leaves that are damaged beyond repair on their own. Do not prune or fertilize shrubs until the end of May to avoid further injury.  If we go a week without rain, consider watering your shrubs to help speed up recovery – but only water if the soil feels dry to the touch! If by mid-late May you are seeing absolutely no improvement, we start to consider other factors that may contribute to the plant’s health. For now, they just need a little more time.

The UConn Home & Garden Education Center supports UConn Extension’s mission by providing answers you can trust with research-based information and resources. For gardening questions, contact us toll-free at (877) 486-6271, visit our website at homegarden.cahnr.uconn.edu, or reach out to your local UConn Extension center at cahnr.uconn.edu/extension/locations.

This article was published in the Hartford Courant Apr. 12 2025

Ready! Get Set! Spring Into Action!

By Dawn Pettinelli, UConn Home & Garden Education Center 

Climbing temperatures and longer days signal springtime! Time to pull out the rakes and wheelbarrow from the shed and get out in the yard. Take a stroll through the lawn areas and gardens and note what tidying up needs to be done. Pick up fallen twigs and rake up areas where leaves accumulated over the winter.  

Lawn torn up by snow plow damage.
Lawns can be damaged Photo by Dawn Pettinelli

 While we did not have a severe winter, there was some necessary snow and ice removal around driveways and walks. Often the lawn next to these areas has gotten ripped up or compacted and is in need of repair. Rake up the damaged sections and add topsoil if needed to level out the area. Then scratch up the surface and put down some grass seed. Usually at this time of year, little irrigation is necessary but be prepared to lightly water if dry, sunny conditions prevail. Another option is to line your driveway with tough groundcovers or pollinator friendly flowers although this can be challenging if drivers routinely miscalculate their parking abilities.  

 Speaking of lawns, check to see that your lawnmower and weedwhacker are in working order. Wait until closer to the beginning of April when lawns actually start to green up before applying limestone or fertilizer. They can be purchased now, however, so you’re ready to go when grass starts growing and the ground is dry enough to walk on. Crabgrass controls can be put down about the time the forsythia is in full bloom.  

Next take a good look at your woody plants – your trees and shrubs. Some of us experienced pretty icy conditions over the winter that caused a fair amount of breakage. Remove any cracked or damage branches. Cut back to a bud, stem or the ground depending on where the damage occurred. Now before the plants leaf out is a great time to prune. After removing dead and damaged stems, cut out any crossing or rubbing ones, those that are too crowded, and then prune for desired height and shape. Keep in mind the plant’s mature size as you prune. Better to select a plant that fits its space than to continue hacking it to the size you desire. This is also a perfect time to prune fruit trees such as apples and pears, and also blueberry bushes.  

By now your vegetable garden should be all planned out and seeds purchased, or at least ordered, as well as onion sets or plants, seed potatoes and sweet potato slips. Tomato and pepper seeds can be started in soilless media indoors. I prefer to plant 2 seeds of tomatoes in each cell of a 4 pack and 2 seeds of peppers in each cell of a 6 pack, because the peppers take longer to germinate and grow slower than tomatoes. Seeds are set about a quarter inch deep in the moistened media and kept about 70 degrees F under fluorescent lights. After the seeds germinate and the seedlings grow their first set of true leaves, the weaker of the two plants, if both seeds germinate, is removed.  

Purple Morpo pansies with large purple flower heads in a pot.
Photo by Dawn Pettinelli

Cool season vegetable seeds should be collected or purchased for early plantings. These include peas, radishes, lettuce, spring turnips, spinach, chard and many Asian greens. A few warm days might have us chomping at the bit but wait until the soil temperature reaches 45 degrees F. How would you determine soil temperature? Using a soil thermometer, insert it into the soil where you want to plant your seeds about 1 to 2 inches deep and take a reading in the morning and then again around 2 pm. Shade the thermometer if in direct sun. Average the two readings and plant when there are a few days of at least 45 degrees F and the weather forecast is favorable.  

Many of us are not cleaning up perennial gardens in the fall so that beneficial insects can overwinter in debris. You can start going in now and cutting down stems and tidying up. Fall bloomers like asters and mums can be divided. Limestone can be added if necessary but wait to fertilize when new growth appears.  

 The warmer weather puts a smile on our faces and we can share the joy of spring by planting pansies with their abundant blossoms and cheery faces. One can never have enough pansies, or at least, I feel that way. Get out and welcome spring, spruce up your lawn and gardens and be thankful that winter is over! 

 For questions on these or other garden chores or on other gardening topics, feel free to contact us, toll-free, at the UConn Home & Garden Education Center at (877) 486-6271, visit our website at www.homegarden.cahnr.uconn.edu or contact your local Cooperative Extension Center. 

This article was published in the Hartford Courant Mar. 22 2025

Garden centers prepare for nice weather as spring fever spreads

These warmer days have been calling us into the garden, but it's still a bit too early to be planting many of our spring favorites. Still, local garden centers and our team at the UConn Home & Garden Education Center are ready to help you prepare for the growing season ahead! (Spring 2025)

The Challenges of Boxwood: Pests, Diseases, and Alternatives

By Marie Woodward, UConn Home & Garden Education Center

Boxwood, a classic choice for formal gardens and hedges, has faced increasing threats in recent years. As gardeners grapple with these challenges, it is crucial to understand the issues at hand and explore alternative plants for our landscapes.

Boxwood Blight is an aggressive fungal disease that affects various Boxwood species and causes rapid defoliation and potential plant death. First identified in the United Kingdom in the mid-1990s, this disease has since spread across North America. Early symptoms include stem cankers, sunken lesions, and eventual dieback. To mitigate the risk of Boxwood Blight, choose resistant cultivars, practice good garden hygiene, and monitor your plants for early signs of infection.

The Box Tree Moth is an invasive pest native to Asia that feeds on Boxwood plants. Since its arrival in North America, this moth has wreaked havoc on Boxwood populations, leading to defoliation and plant stress. Symptoms of infestation include see-through plants, "stick shrubs," and stem cankers. Regular monitoring and integrated pest management strategies are essential for controlling this destructive insect.

As Boxwood plants continue to face challenges from pests and diseases, it is wise to consider alternative options for our gardens. Ilex crenata (Japanese Holly) is a versatile, broadleaf evergreen that can be shaped into hedges or topiaries. Its small, glossy leaves provide a neat appearance, and its adaptability to various soil types and sun exposure makes it a low-maintenance choice.

Row of Gem Box Ilex shrubs for sale
Gem Box Ilex is one of many fantastic substitutes for Boxwood shrubs. Photo by H. Zidack

Euonymus japonicus (Japanese Euonymus), an evergreen shrub with small, glossy leaves and tolerance for a range of growing conditions is another possible substitution. Its compact growth habit and easy maintenance make it an excellent choice for hedges or screens.

Ilex glabra (Inkberry), is a slow-growing evergreen native to North America, featuring dark green leaves and red berries in the fall. Its low, spreading habit makes it ideal for low hedges or mass plantings.

Privets (Ligustrum), are fast-growing, low-maintenance evergreen shrubs with small, glossy leaves. They can be used for hedges, screens, or as stand-alone specimens. However, keep in mind that three cultivars, border privet, (Ligustrum obtusifolium Sieb. & Zucc), California privet, (Ligustrum ovalifolium Hassk.) and European privet (Ligustrum vulgare L.) are listed on UConn’s invasive plant databaseIf you decide to plant privets, look for seedless cultivars such as Golden Ticket privet (Ligustrum x vicaryi "KCLX1") at your local nursery.  

The Boxwood Blight and Box Tree Moth present ongoing challenges for gardeners and landscapers. By understanding these threats and adopting appropriate management strategies, we can mitigate the damage they cause. Additionally, exploring alternative plants can help create more resilient and sustainable gardens in the face of these challenges. With careful planning and thoughtful plant selection, our landscapes can continue to thrive in the face of adversity.

The UConn Home & Garden Education Center supports UConn Extension’s mission by providing answers you can trust with research-based information and resources. For questions about your boxwoods or other gardening questions, contact us toll-free at (877) 486-6271, visit our website at homegarden.cahnr.uconn.edu, or reach out to your local UConn Extension center at cahnr.uconn.edu/extension/locations.

This article was published in the Hartford Courant Feb. 22, 2025
It was been updated from its original publishing on Feb. 27, 2025