With the lazy, hazy days of summer in full swing, your vegetable garden is likely in full production mode. Tomatoes should be producing lots of blossoms by now with the earlier varieties offering ripening fruit. While it is true that tomatoes can be challenging to grow in New England, being susceptible to several diseases as well as some abiotic disorders, there are few summer pleasures greater than taking that bite of the first, ripe, sun-kissed tomato. That’s most likely the reason that 86% of food gardeners, according to the National Gardening Association, chose to grow them.
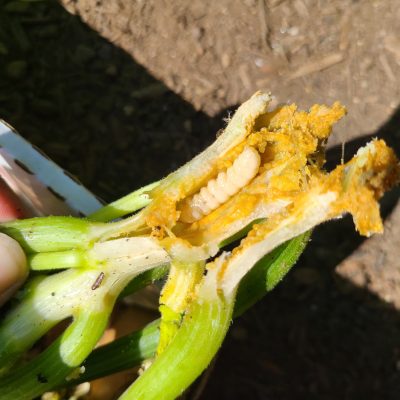
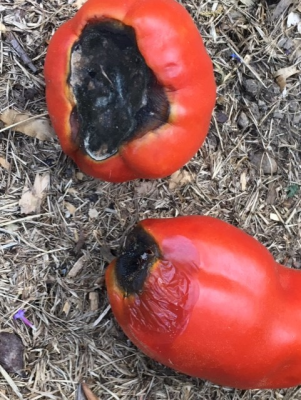 Between summer heat, sporadic rainfall, vacations and inconsistent watering, some of us are noticing black sunken patches on the blossom end (bottoms) of our ripening fruit. This is an abiotic or physiological disorder known as blossom end rot. It starts out with a small water-soaked area that enlarges and darkens as the tomato tries to ripen. The affected tissue has a dark, leathery appearance and may be colonized by a bacteria giving it a black color.
The cause of this disorder is lack of calcium. Most of us know that people require calcium for strong bones and healthy teeth. Plants also have calcium requirements that must be met for good growth and establishment. It is needed for the proper growth and functioning of shoot and root tips and is an integral part of cell walls. As your tomatoes grow in size, more cells with more cell walls are needed.
Plants take up the calcium they need through their roots. Nutrients like calcium, potassium and others are dissolved in the water that is in the soil. When a plant loses moisture on a hot day through the process of transpiration, the roots take up water to replace that loss and keep the plant turgid. The soil water contains nutrients the plants need. Anything that restricts the plant roots’ ability to take up water also reduces the amount of nutrients a plant receives.
Blossom end rot is usually caused by one of two factors. Either there is not enough calcium in the soil or there is not enough water in the soil for the calcium to be able to move into the plant. Sometimes, because of the high humidity, factor number three comes into play. Plants are not transpiring that much because of the high humidity. Since little water is being lost through the leaves, little water (containing calcium and other nutrients as well) is being absorbed by the roots. So even if your soil is loaded with calcium, and your garden is irrigated, plants may not able to transport enough calcium from the soil water into their internal structures.
If blossom end rot is noticed, first take a soil sample and send it to a soil testing laboratory (s.uconn.edu/soil-lab) to determine the soil pH and calcium levels. Often if calcium levels in the soil are too low, plants would also be exhibiting signs of deficiency including stunted growth, curling of leaves and perhaps spotting or scorching on leaves. Follow any recommendations for limestone additions if the pH or calcium levels are too low.
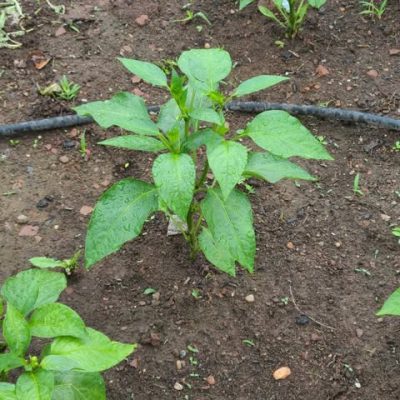
Next, evaluate your watering techniques. Often this disorder occurs when succulent, vigorously growing plants are subjected to drought conditions. It is best to water deeply and less often than to water lightly on a daily basis. After watering, dig a small hole to check if the top 6 inches or so of soil are moistened. Adjust your watering schedule accordingly and if at all possible, just apply water to the base of the plant and avoid getting the foliage wet to discourage diseases. There isn’t much one can do to lower the humidity and increase plant transpiration rates except hope for a bout of dry weather.
To thwart blossom end rot, some gardeners are purchasing blossom set sprays containing calcium to apply to their plants’ foliage. Others are fertilizing and spraying the plant’s foliage with calcium chloride, as directed on the package or making up a calcium solution by mixing gypsum or limestone with water and letting it sit overnight. After 24 hours or so, it can be used to drench the plants and soil. Gypsum can also be applied around the plants at a rate of about 5 pounds per 100 square feet and carefully scratched into the soil. Take care not to injure your tomato plant’s roots and water afterwards. Another option is to search out water soluble fertilizers that contain calcium and can also be used as a foliar spray and apply them to the plant’s leaves.
The UConn Home Garden Education Office supports UConn Extension’s mission by providing answers you can trust with research-based information and resources. For gardening questions, contact us toll-free at (877) 486-6271, visit our website at homegarden.cahnr.uconn.edu, or reach out to your local UConn Extension office at extension.uconn.edu/locations.
 What plants really need