Episode 166: Managing Invasive Plants
UConn 360– Lauren Kurtz discusses invasive plant management and the new Invasive Species Certificate Program.
Episode 166: Managing Invasive Plants
UConn 360– Lauren Kurtz discusses invasive plant management and the new Invasive Species Certificate Program.
Do Eggshells Actually Help Your Roses Grow? Here’s What a Gardener Says
The Spruce – Heather Zidack discusses how Egg Shells are best used in the garden, and things to consider before adding them!
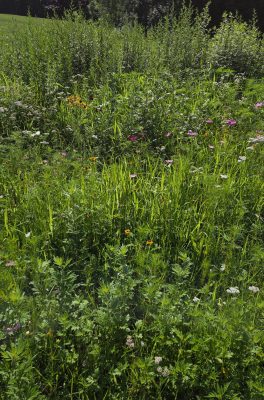
Chaos gardening is a growing social media trend that encourages gardeners to relinquish control, scatter assorted seeds, step back, and see what happens. Instead of carefully spacing plants and planning layouts, chaos gardeners toss seeds and let nature decide what grows where. The results can vary widely, ranging from a surprising assortment of plants to a patch of disappointment.
Unlike traditional gardening, this approach emphasizes spontaneity over structure. For many, the appeal lies in its simplicity. Chaos gardening is easy to start, requires minimal knowledge, and often relies on leftover or inexpensive seed packets. The low-stakes, experimental nature makes it especially attractive to busy people or those new to gardening.
Still, the trend raises valid questions. Without site preparation or ongoing care, how well can seeds establish? And does “letting go” invite weeds into the garden under the guise of wildscaping?
In practice, chaos gardening often produces mixed results. While the concept is appealingly simple, success rates can be low, and plantings may struggle to persist long term. Still, gardeners interested in the trend can improve their chances of success by following a few simple suggestions.
Avoid using this approach in large or prominent spaces. Start small, either in a container or a less visible area of the yard. To maintain a sense of experimentation, while increasing success, consider focusing on a single species at a time or scattering spring bulbs through an existing lawn. Tossing out a packet of “wildflower” seeds may sound charming, but it will not produce an instant, picture-perfect meadow. More often, it results in a steadfast patch of mugwort.
Even with a relaxed approach, a bit of planning goes a long way. Key factors such as sunlight and soil conditions still matter. The principle of “right plant, right place” applies regardless of gardening style. Identifying site conditions, selecting appropriate species, and preparing the planting bed can significantly improve outcomes.
Gardeners should also approach seed mixes labeled “wildflower,” “pollinator-friendly,” or “native” with some caution. While not inherently problematic, these mixes can contain species that are poorly suited to local conditions. A quick review of the species on the list can help inform decisions about whether the plants are suited to the region or growing conditions.
Learning how to recognize seedlings, including common weeds and invasive plants, is another important step. Early identification allows gardeners to remove undesirable species before they establish. Observing which plants succeed can also guide future efforts, gradually transforming a disorderly patch into a more reliable and productive space.
Patience is essential. Many perennials grown from seed take more than one season to flower. Including a mix of annuals and perennials can help maintain visual interest while longer-lived plants establish. As with any gardening method, some trial and error is expected.
Chaos gardening may never replace traditional approaches, but it offers an accessible entry point for beginners and a creative outlet for experienced growers. With a balance of spontaneity and informed decision-making, even an unstructured planting can become a living experiment.
The UConn Home Garden Education Office supports UConn Extension’s mission by providing answers you can trust with research-based information and resources. For gardening questions, contact us toll-free at (877) 486-6271, visit our website at homegarden.cahnr.uconn.edu, or reach out to your local UConn Extension Center at extension.uconn.edu/locations.
Valentine’s Day is one of the biggest holidays, next to Mother’s Day, in the floral industry. Whether you’re buying fresh cut flowers, or a potted plant for someone special, helping them keep those flowers looking their best can be part of the gift you give this year.
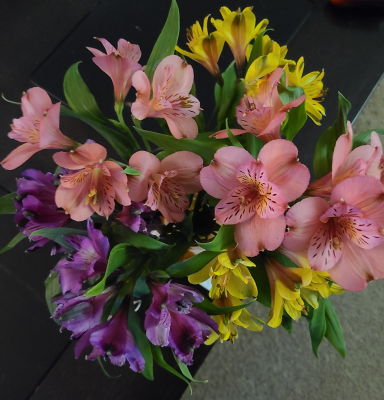
Start by selecting flowers that look healthy and vibrant. You want flowers with firm petals, with buds just starting to open or have just recently opened. Avoid flowers that are releasing pollen, are discolored, or have drooping foliage. Check the stems for rigidity and make sure that plant material is clean with no indications of mold or decay. When you purchase your flowers, many florists will give you packaging to help reduce their exposure to the extreme cold as you carry them to your car. This is an important step, so don’t skip it if you can! Avoiding large temperature fluctuations will keep your flowers fresh for longer.
When you get home with your flowers find a vase that is clean and free of debris. Always wash vases with warm, soapy water in between uses to prevent the transmission of bacteria and disease from one bouquet to the next. Add fresh, tepid water. Remove all plastic, rubber bands, and other packaging from your bouquet. Cut each flower stem at a 45-degree angle using hand pruners or snips. Using scissors, or knives that aren’t sharp may crush the vascular tissue and prevent the flowers from taking up water, leading to faster decline. Remove any leaves that would sit below the water line before placing stems into the vase.
If you have a bouquet of roses, take special care when you are preparing their stems. These flowers will live longer if you cut their stems under water, using the same 45-degree angle, and place them in your vase of water as quickly as possible. This extra step ensures that air bubbles don’t work their way into the vascular tissue and will keep your roses fresh for longer. When we see roses develop a “floppy neck,” this is most often the cause. While it is possible to revive your roses from this issue, it is best to try to avoid it altogether.
There are many anecdotes out there regarding additives to provide food and antimicrobial agents to the water to help your flowers last longer. Many of these anecdotes aren’t based in research. If your bouquet comes with a flower food packet, mix it as instructed and use it in your vase. However, if you don’t have one, don’t worry about adding anything. Instead, focus on ensuring that you are giving your flowers fresh, clean water.
Decay and microbial growth are two of the biggest reasons our cut flowers pass quickly. Many of the strategies mentioned above help to mitigate this concern, but it is important to keep a watchful eye. Besides washing your vase in between use, sanitize your flower snips or pruners in between uses as well and watch the water quality in your vase, replacing it every couple of days with fresh, cool, water. Always change the water if it appears murky or cloudy in the vase.
When changing your water, make a fresh cut 1-2 inches up the stem to ensure that the vascular system is staying open and clean of any debris or bacteria. If stems are starting to get mushy, cut high enough above the decay, or consider removing the stem entirely from the arrangement. Keep your flowers in a location that is bright but avoid direct sunlight, and keep them away from drafts, or entryways where large temperature fluctuations are likely. Lastly, know when to say goodbye and dispose of any flowers that are past bloom, or showing signs of decay. You may notice that you’ll need a smaller vase as you cut your stems shorter or remove flowers as they pass. A mason jar makes for a great display for those longest lasting flowers!
There’s no doubt that fresh flowers bring vibrancy and life into our homes during these blustery, winter months. Whether you’re buying a bouquet for yourself, or for someone special this Valentine’s day, keep a close eye on them and you’ll be sure to have long lasting blooms to enjoy!
The UConn Home Garden Education Office supports UConn Extension’s mission by providing answers you can trust with research-based information and resources. For gardening questions, contact us toll-free at (877) 486-6271, visit our website at homegarden.cahnr.uconn.edu, or reach out to your local UConn Extension Center at extension.uconn.edu/locations.

Soil testing begins with the homeowner, gardener, and farmer. The most critical step in soil testing is soil sample collection. Soil testing can help growers make informed decisions about fertilizer application, soil amendments, and soil health. A standard nutrient analysis can chemically extract calcium, magnesium, phosphorus, potassium, sulfur, iron, manganese, copper, zinc, aluminum, and boron from the soil. Other tests can also determine the pH and organic matter content of the soil. Poor sample collection can cause errors in the testing results, potentially leading to inaccurate nutrient recommendations and lowered crop productivity. Consistent and proper sampling procedures allow you to make future comparisons of the same sampling area. They also allow you to limit unnecessary nutrient applications that could lead to environmental contamination through the loss of nutrients. In addition, soil testing costs money and can influence the total cost of fertilizer and amendments needed for application. Following proper sample collection procedures can help you avoid unnecessary expenses.
The first step in collecting a soil sample is to determine an area in which the sample will be collected. You will want to select an area that has similar physical appearance, slope, drainage, limestone or fertilizer treatments, and intended plant usage. For example, if your front lawn has a steep slope compared to a flat side yard, you will want to collect a separate sample from both of those areas, rather than grouping them together as one sample.
The second step is to have a clean bucket and tool for collecting soil. This can be done more easily with a spade, auger, or probe. You will want to collect 10 or more random subsamples from across the selected area, that way the sample submission is representative. Flowers, vegetables, and small fruits soil samples should be collected to a depth of 6-8 inches. A depth of 6 inches is widely accepted since it represents the zone in which there is highest root density and nutrient uptake for many plant species. Soil samples collected for turf should be collected to a depth of 3-4 inches, since most turfgrass roots are concentrated in the top 4 inches of soil. Tree and shrub samples should be collected to a depth of 8 to 10 inches. These are the recommended sampling depths from the UConn Soil Nutrient Analysis Laboratory. It is also important to make sure that the sample is collected vertically, rather than at an angle. Sampling at an angle can affect the sampling depth and lead to inaccurate lab results.
Next, you will want to mix the subsamples together to break up the clumps while removing stones and debris. Once mixed, scoop out at least 1 cup of soil into a zipper lock bag and label the bag with a sample identification. Fill out the submission form with the same sample identification and label a crop code. Crop codes are key for making recommendations. Different crops have different needs. For example, blueberry plants prefer acidic soils that have a pH between 4.5 and 5.0 while turf prefers a pH between 6.0 and 7.2.
Soil samples can be collected at any time of the year, as long as the ground is not frozen, but should not be collected when the soil is very wet or within six to eight weeks of a fertilizer or lime application. Many samples are submitted in the spring to prepare for the growing season, but a fall soil sample submission can be very beneficial for soil pH and some fertility corrections. Limestone and sulfur can be added to the soil in the fall to allow plenty of time for the lime to neutralize soil acidity and bring pH to target levels by the spring. Sandy textured soils should be sampled every 2 to 3 years and clay soils should be sampled every 3 to 4 years. If a soil test reveals that a large correction in pH or fertility is necessary, it may be a good idea to have your soil tested again in 1 year to evaluate the correction. More information on soil testing services and soil sampling procedures can be found at the UConn Soil Nutrient Analysis Laboratory.
The UConn Home & Garden Education Center supports UConn Extension’s mission by providing answers you can trust with research-based information and resources. For gardening questions, contact us toll-free at (877) 486-6271, visit our website at homegarden.cahnr.uconn.edu, or reach out to your local UConn Extension center at cahnr.uconn.edu/extension/locations.
By Dawn Pettinelli, UConn Home & Garden Education Center
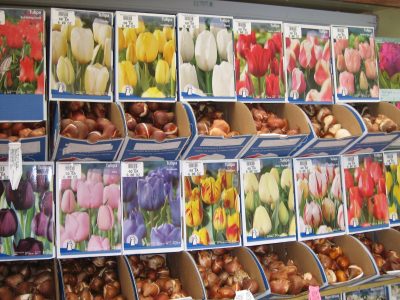
Autumn adorns us with vibrant leaves, whispering grasses, warm colorful mums, colorful cucurbits and sun-bleached cornstalks. Time spent cleaning up the gardens and yard now will be appreciated come spring. A favorite fall task is selecting and planting bulbs for spring color, accent and scent. When doing so, purchase a few extras to force into bloom.
The word, forcing, is rather harsh. I’d like to think of it more as coaxing or gentle persuasion. What we’re really doing is subjecting the potted bulbs to a shorter simulated winter so they will burst forth into bloom weeks earlier than if planted in our gardens.
Many species of bulbs can be forced. Hyacinths, tulips and daffodils are most popular. When visiting your local garden center to purchase bulbs, look for varieties that say ‘Good for Forcing’. Most hyacinths force well. Tulips and daffodils range greatly in size and bloom time. Usually the smaller, earlier, shorter varieties can be brought into early bloom most successfully.
Minor bulbs such as crocuses, snowdrops, scilla, Siberian squills, chionodoxa, netted iris and wood hyacinths are also great choices for forcing. As a general rule of thumb, these smaller bulbs need a minimum of 8 to 10 weeks of chilling versus the 12 to 14 weeks the larger bulbs may require.
Select pots with adequate drainage. Typically, 6-to-8-inch bulb pans or azalea pots are used. This type of pot is wider than deep. Look at the size of your bulbs first as one generally wants pots twice as deep as the height of the bulbs. Realistically any size pot could be used as long as it has adequate drainage.
Use a soilless, commercial potting media and moisten it with warm water so that it is damp but not saturated before potting up your bulbs. For a 6-inch bulb pan, plan on fitting in 3 hyacinths, 3 to 5 daffodils or 5 to 7 tulips, depending on the size of the bulb, or 10 to 12 minor bulbs. Yes they will be a bit crowded but it’s only temporary and they will give you a better show.
Fill the pot about halfway or so with the potting mix and set in the bulbs so that the minor bulbs will be slightly below the soil line but the larger bulbs have their noses sticking out of it. Give the pots a good watering but let them drain so no water is running out.
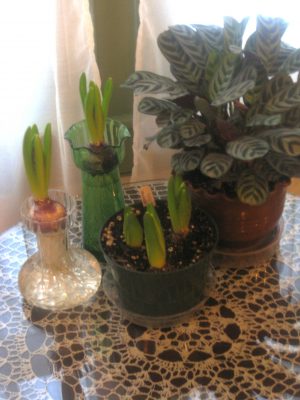
Then place them in a dark place with temperatures ranging from 33 to about 34 degrees F. Often a shed or unheated garage works well. Some folks may have a cold section of cellar, perhaps in the bulkhead. I find that placing them in an old aluminum trash can in the garden shed works well as mice can’t get in the can to nibble on them. Others have dug trenches in the garden in which the pots are placed and covered with leaves. Apartment dwellers could place the pots in a plastic bag in the refrigerator if room permits.
Pots should be checked every 2 to 3 weeks to see if watering is necessary and to check for root growth. Bulbs will be ready to move inside once white roots are evidenced through drainage holes and shoots begin to emerge from the bulbs. When these two growth signs are noticed, pots can be brought into bright, indirect light when the temperatures stay from 50 to 60 degrees F. It usually takes 3 to 4 weeks from when bulbs are brought inside until when they bloom.
At this time, they would appreciate a light fertilizer application. A typical houseplant fertilizer at rates listed on the package would suffice. Turn the pots regularly so the plants do not lean towards the light. Once you see the flower stalks form, the bulbs can be brought into warmer temperatures where their blossoms can be enjoyed. Keep in mind that the higher the temperature, the quicker blossoms will both open and fade. If possible, keep them cool or at least move the pots into cooler areas at night.
In some cases, the bulbs fail to bloom and this may be due to storing bulbs before or after purchasing at too high a temperature, not long enough chilling temperatures, lack of adequate moisture, or bringing the forced bulbs into high temperatures too quickly. Most of the time success is achieved and enjoying the sights and scents of spring flowering bulbs inside our homes in late winter is quite a reward for not a great deal of effort.
If you have questions about forcing bulbs or any other gardening questions, feel free to contact us, toll-free, at the UConn Home & Garden Education Center at (877) 486-6271, visit our website at www.homegarden.cahnr.uconn.edu
By Marie Woodward, UConn Home & Garden Education Center
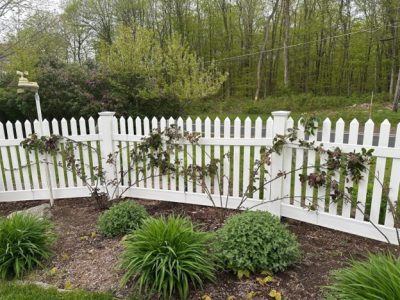
Climbing and rambling roses are a beautiful addition to any garden, adding height and depth to your outdoor space. These types of roses require proper training and tying to ensure that they grow in the desired direction, produce the most blooms and don’t become tangled or unruly. Follow this guide on how to tie climbing and rambling roses to get the best results.
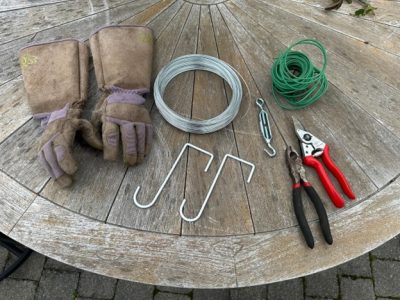
For materials, one would need some twine or soft plant ties, a sharp pair of pruning shears, sturdy long-sleeved, thorn resistant garden gloves. Also, some wire and tools to secure to a trellis, fence or other structure may be necessary.
Climbing roses have two types of canes. Main canes are stems that originate from the base of the rose giving it its structure and support. They are also referred to as leaders. Lateral canes originate from the main cane. It is the lateral canes that produce the flowers and add volume to the shrub. In general, main canes are not pruned unless they are diseased or dead.
Before you start attaching the plant to a trellis, make sure that your rose is properly pruned. Removing any dead or diseased canes will encourage healthy growth. Cut back any wild or overly long shoots to create a manageable framework for tying. Starting with this step will allow for more control as you move through the process of tying.
Supportive wiring, better known as strain wires, helps to promote flowering. They hold the main canes at a 45–90-degree angle. These angles encourage lateral canes to flush and produce more abundant flowers.
If you're training your roses against a wall or fence, attach the horizontal strain wires to the structure, spacing them about 12-18 inches apart vertically and 5 feet apart horizontally.
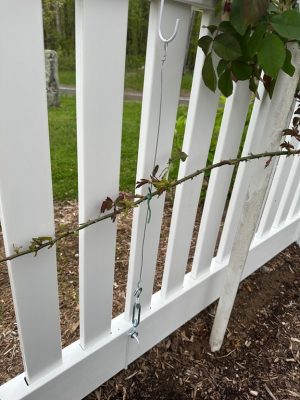
If you have a vinyl fence you can use vinyl safe hooks and secure the wire with a turnbuckle vertically, spacing them about two feet apart to avoid drilling holes in the vinyl material.
Using twine or soft plant ties, attach the rose canes to the support structure at regular intervals, starting about 1.5 feet from the ground. Tie them securely but not too tightly You want to allow room for the canes to grow and expand. Avoid fishing lines or other rigid materials. Using the wrong ties or tying too tightly could lead to cane injury.
As the roses push new growth, continue to tie the new main canes to the support structure. Continue to guide them in the desired direction, with those 45–90-degree angles as a guide.
Regularly check your roses and adjust the ties as needed. Ensure that they remain secure but not too tight. Prune any wild or unruly shoots and remove any dead or diseased wood to keep your roses healthy and under control.
By following these steps and regularly maintaining your climbing rose, you’ll create a stunning vertical display that adds beauty and depth to your garden. While this guide provides good tips on for starting and maintaining younger climbing roses, older roses that have been neglected may need restorative measures. If you need more information on climbing roses or any other gardening questions, feel free to contact us, toll-free, at the UConn Home & Garden Education Center at (877) 486-6271, visit our website at www.homegarden.cahnr.uconn.edu
By Dawn Pettinelli, UConn Home & Garden Education Center
Do you just love fresh flower arrangements for the table or even that single bloom in a vase by your bedside? Wouldn’t it feel great to just stroll out your back door, clip some blossoms, bring them inside and enjoy their beauty? There’s no reason that you can’t. Even a small yard or garden space can yield blossoms for cutting.
While many of us have flowering perennials and even woody plants that make for great arrangements, perhaps a dedicated cut flower planting would provide many more stems for cutting and not create any empty spaces in our garden designs. When planning your cut flower garden, first decide where it should go. The majority of blooming plants need at least 6 to 8 hours of sun each day, a well-drained, fertile soil and adequate water during dry spells. As with all garden plants, a soil test is a great way to find out what is needed to add to soils before planting but without a soil test, follow the directions on fertilizer packages.
There’s still time to prepare new beds for cut flower plantings but another alternative would be to turn over part of the vegetable garden to cut flower production. Probably your vegetable garden already has great soil and is located in a sunny area.
The hardest part of designing a cut flower garden is selecting what plants to grow. There are so many beautiful and exciting flowers to choose from. A good suggestion is to grow easy flowers at first and then progress on to more demanding ones. Another important factor to consider is which flowers need to be purchased as transplants (or started inside earlier under lights) and which can be easily grown by sowing seeds directly in the garden. While there are a number of flowering plants that can be started by direct seeding, you’ll get faster blooms if you purchase or grow your own transplants.
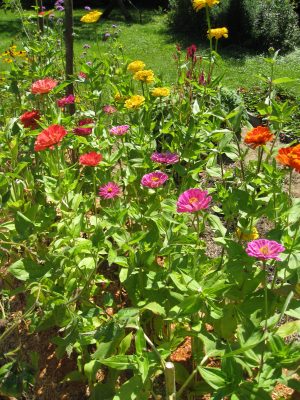
Some that I typically grow each year from seed are zinnias, the tall African marigolds, cosmos, bachelor buttons, calendulas, nasturtiums, and some sunflowers. Cool weather calendulas and bachelor buttons can be sown now but wait until later in the month to plant the rest. A number of cutting annuals will self-seed if blossoms are allowed to mature and the beds are not heavily mulched. Some that spring up for me include ageratums, verbena, ammi, nigella, and wheat celosia. If you have some known self-seeders, wait a bit longer to prepare or till beds to see what sprouts.
Those best purchased as transplants include rudbeckia, snapdragons, cleome, stock, strawflowers, globe amaranth, tithonia, asters and amaranth. Some might have tiny seeds or be slower to germinate or just need a longer time until they produce flowers so starting with transplants may be a good option.
Two annual bulbs that are great for cutting are gladioli and dahlias. A few glad corms can be planted every other week until about mid-June to provide a summer full of spiky, colorful blooms. Dahlia tubers planted mid-May generally start producing blooms by late July but continue until a heavy frost.
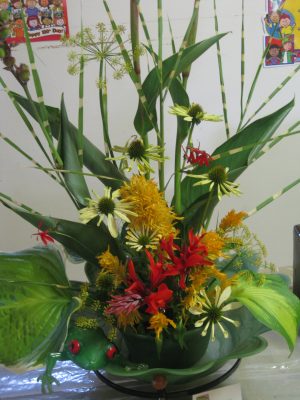
There really are quite a few potential cut flower candidates to choose from. Feel free to select whatever colors and flower forms appeal to you most. From a designer’s viewpoint, consider what colors would be most compatible with where you want to place arrangements indoors. Also, whether making more formal arrangements or informal bouquets, flower shape plays a prominent role. Often the most attractive arrangements are filled with an assortment of shapes featuring a focal flower, spiky exclamation points, mounded shapes to hold the arrangement together, greenery for filling spaces and delicate airy springs to lighten the mood. I find mints, artemisia, and ferns make good fillers while grasses, kalimeris, boltonia, and white wood asters provide an airy touch.
The majority of annual flowers do fine at about a 9 by 9 inch spacing so you can pack them in pretty close. Do note that for copious blooms, a fertile soil and adequate water are essential. Maintenance also includes dead-heading, or removal of spent flowers to encourage the production of more blooms. Keep an eye out for plant pests as well.
Even beginning gardeners can set aside some space to grow beautiful flowers for enjoyment indoors. Try out a few this year, make notes on their performance and change up the plant rooster as they gain your approval or not.
For cultural information on growing various species of cut flowers or on other gardening topics, feel free to contact us, toll-free, at the UConn Home & Garden Education Center at (877) 486-6271, visit our website at www.homegarden.cahnr.uconn.edu or contact your local Cooperative Extension center.