00:00:01 Stephen Thal
Hi, welcome to another segment on focal Point. This is Stephen Thal and I'm your host for today's program.
We're going to be learning a lot about getting ready for the spring when we realize the weather is still not quite ready for spring flowers, but we want to get everybody thinking about it. So when the time comes, they'll have some ammunition and be prepared to get in there and get their hands dirty.
00:00:31 Stephen Thal
To help us understand that we have Heather from the plant and science program at the University of Connecticut. Welcome back Heather.
00:00:41 Heather Zidack
Hi Stephen. Thanks for having me back!
00:00:43 Stephen Thal
Yeah, it's great because you gave everybody some spirits to think about and encouragement. One of the things that we've been reading about lately is about climate control. And we were curious, you know, as we look around the country, different things are happening. People can't seem to explain why the weather has changed so drastically, and we're sure that this will impact the way we think about our flowers and the way we want to put a garden in and do herbs. Can you help us understand what climate control may be doing to this?
00:01:22 Heather Zidack
Yeah. So there are some things that we are noticing, especially from people just calling into our office with , um, in relation to climate change and a couple of the big things that have happened in 2023, I believe it was the fall of 2023 they did change the USDA hardiness zones. Which, when you're shopping for plants, your zone is actually going to tell you the coldest temperature that plants can tolerate to survive in your area. And so Connecticut, we're about a Zone 6 at this point, is the safe one. But it did shift and so there are parts of the state that are even seeing some warmer. Especially Shoreline is a little closer to zone 7.
And you can look that up through the USDA to see the change from the zones. But that's a big change. Part of that happened because they had more data points and they could actually get more weather stations to report on what was going on, so it became a little more accurate in that sense. But we are also seeing some climate change effects happening as well.
We’ve seen you know a lot of flooding over the past couple years. Remember up in you know, Vermont, New Hampshire, they had some of those floods that led to crop loss and contamination of fields. Storms with heavy winds can damage a lot of crops sometimes.
And higher heat and humidity can affect your gardens as well.
So if you're looking for management techniques, the first thing that you can do is make sure that you're providing enough water and nutritional support to your plants to endure any stresses that they might see during the growing season. So get a soil test.
Have your your soil ready to go. Know what fertilizer you need.
And make sure you're watering. Not too much, not too little. But you're keeping up with what the plants need. That's going to help them build their defenses, just like when we take vitamin C in the winter to prevent colds.
If you're going to be seeing some hot weather come around and there's heat management strategies, one of the first things you want to do is remove weeds. It actually helps to increase air flow around the plants and also remove competition for some of those nutrients and water that I talked about a minute ago.
You can also use shade cloth or something to kind of keep the plants out of the hot hot heat of the sun, especially on those really hot days. If you're able to, If you've got potted plants and you can move them to a a sheltered spot on those hot days it works for them.
But those are a couple heat management strategies.
00:03:58 Stephen Thal
What about bugs?
00:03:59 Heather Zidack
For me? Oh.
00:04:00 Stephen Thal
What about anima-, little bugs like fleas, ticks, beetles?
00:04:04 Heather Zidack
Yeah, well, it's something that we notice in the garden and when we see these different fluctuations in heat and temperature. We see a lot of fluctuations in our insect populations.
So we do see there have been some instances where you haven't had the ability to really have a good kill off of everything in the environment. And so the next year we see more bugs coming out. Our office deals primarily with the garden insects and the pathogens. So seeing things like-Last year, there was a lot of Japanese beetles. Last year there was a lot of fungal infections.
Really, the best thing that you can do for that is again making sure any weeds are gone so they don't have anywhere to hide in your garden. You can also space your plants as they're recommended in order to make sure that you're having good airflow and good movement in between them, and again you're removing hiding places and you also want to prune all your woody ornamentals to encourage air flow too.
So if those are some good strategies for that.
00:05:09 Stephen Thal
You mentioned fertilizer and doing soil testing. Is there a phone number that people can call and how do they do that?
00:05:17 Heather Zidack
Absolutely, so soil testing can be done anytime that the ground is not frozen, so I think we're in the one time of the year where we can't do it right now, but once the ground thaws, the UConn Soil Nutrient Analysis Lab is available for testing.They do a standard nutrient test and that covers all the basic nutrients that you would need for your home garden as well as pH so their phone number is 860-486-4274.
Again, that's 860-486-4274.
00:05:57 Stephen Thal
Ok, Great.
00:05:58 Stephen Thal
So we now got to prepare for maintaining our house plants. As well as taking care of those that we choose to go outside and give them some fresh air and not allow too much heat, how are we going to do this?
How do we prepare for it?
00:06:16 Heather Zidack
Yeah. So one of the things that you want to make sure that you're doing, it's still a little too cold to put anything outside just yet. You want to remember that our target is 50° at night before you're putting any plants outside.
What you want to do with your house plans inside is you want to check for water. Make sure that they're accurate adequately-They have enough moisture in the pot.
You want to check with your fingers, make sure that it's not clumping up too much in your hand. You want to make sure that it's also not like sand texture. You want to make sure there's an even moisture you might not need to water as much right now, especially if your plants are dormant, just like we don't think about hydration much in the winter, because we're not outside and in the heat, plants are the same way. So check before you water every time.
The other thing that you can do right now is dust the leaves to scout for pests and disease.
You can also start fertilizing your house plants when you see new and active growth. So like if there's new leaves, if there's new buds, if they're new shoots, those are signs your plant is waking up and you could use a little food at that point.
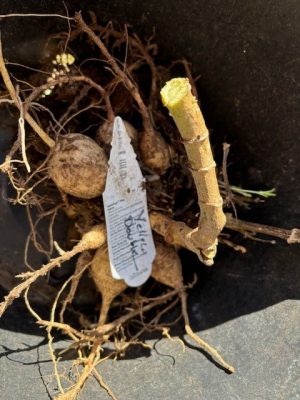
And you want to make sure that you're checking any bulbs or plants that you have in winter storage. So if you dug anything up from your yard, like Canna lilies or Gladiolus bulbs or anything like that, check those bulbs in storage.
Make sure they’re firm. Make sure there's no discoloration or smell to them and they should have some kind of humidity with them, but not too much. So if you had stored them in peat Moss, maybe missed in with the bottle for a second, but they don't need sopping water just yet. So you want to check all of those things.
00:07:56 Stephen Thal
And what kind of tools do we need to help us with our projects?
00:08:03 Heather Zidack
So big thing right now is going to be pruning season, so you can use-depends on the the size of the plant. But if you're outside, you want to have some some good hand pruners or some loppers- Depends on the size of your branches, but pruning right now is an advantage because there's low disease and low pest pressure outside, so plants can easily recover without being exposed to any other diseases.
In general, people use hand pruners or like I said Loppers which are a little bit larger to cut their their trees back.
And the rule that you follow is the rule of thirds. You don't want to cut off more than 1/3 of the entire plant if you want to leave 2/3 standing. And that ensures that there's enough of a ratio between roots and shoots that there's healthy regrowth.
With that being said there are some different pruning techniques that can be suggested for different species of plants.
So always consult with an arborist or landscaper or give our office a call. If you ever have any questions.
00:09:10 Stephen Thal
And what about choosing the right fertilizer?
I know there are many different kinds. I know I've heard of fertilizer from Maine where they save all of the lobster shells, crab shells and mix them all together. And that's supposed to be good too, for your plants.
00:09:29 Heather Zidack
There's all kinds of fertilizers out there and so. There's different products that are organic. You have things like manures and composts and things like that. Also have synthetic materials like regular. You have coast of Maine like you talked about. The important thing when you're looking for fertilizers, we always recommend getting that soil test first. Because you want to know what your baseline is, right?
You want to know where you're starting before you add anything else. Once you have that, the soil test is going to tell you in general terms you have 3 numbers on a bag. If you look at a bag of fertilizer, there's going to be usually something like the effect of 10-10-10, 5-5-5, 10-15-10 20-20-20, something like that.
Those 3 numbers there, those 3 numbers represent in this order nitrogen, phosphorus and potassium. So when you're looking at those numbers, you're actually looking at a percentage of how much of that nutrient is in the bag.
00:10:31 Heather Zidack
So once you have your soil test for example and it says you are deficient in potassium. So, NPK, your third number there would be the one that you would want to add a little bit more of you would maybe look for something like a 5-5-10.
00:10:47 Heather Zidack
It all depends on what your soil test comes out as and what you're actually looking for with a specific crop, so it's hard to give a generalization, but knowing how to read that bag is your first step in knowing what to shop for when you're ready.
00:11:02 Stephen Thal
If we're going ahead and deciding to plant herbs, is this a good time of the year inside to get those started?
00:11:11 Heather Zidack
Absolutely. There's a lot of plants that you can start right now. Herbs are going to be great for kitchen gardens. You can pretty much start them any time of year.
Great for culinary purposes, but they're also loved by pollinators. The Swallow tail Caterpillar in particular loves things like dill and parsley plants, and they're all over them in my yard. So I actually grow a little extra just for them.
00:11:35 Heather Zidack
You get a lot of fragrance and texture out of all of the fresh herbs, which is fantastic, and it can be easily done, indoor or outdoor.
So right now you would want to start everything indoors that you want. The really cool thing with herbs is that there are some of them, like basil is an example. You know how they sell the basil plants in grocery stores, right?
00:11:56 Stephen Thal
Right.
00:11:57 Heather Zidack
So what you can do is you can actually cut off a stem of that basil, remove the leaves up to like the first leaf, maybe the first 3 or 4 leaves up there, put it in water, and it'll send out its own roots that you could then put in a pot yourself.
00:12:12 Heather Zidack
So you don't necessarily even need to do anything with seeds. You can do cuttings to keep your herbs going.
00:12:17 Heather Zidack
The only thing I would recommend is to plant if you're going to plant mint. Keep it in containers and keep it away from the ground. Don't put it outside unless you want to grow it for the rest of your life. It does have a pretty aggressive tendency, and once it hits the ground and gets rooted in, it can just grow and grow and grow. And then you have mint in that area forever.
But other than that, herbs are great to start right now.
00:12:43 Heather Zidack
A lot of people are starting, especially if they do cut flowers and small seeded plants right now. Like if you think snapdragons. If you think Cosmos, some of those they need to start now because they need a lot of time to grow. Veggie wise. People are starting things like broccoli and Brussels sprouts at this point.
Most people have started like onions and shallots by now, but you probably still have time if you were to do it like right now. And so really, there's a lot of different veggies that you could be starting right now.
00:13:19 Stephen Thal
Yeah, those are are very critical things that we have to keep keep aware of.
00:13:26 Heather Zidack
Yeah, timing is everything with when it comes to starting.
00:13:30 Stephen Thal
Right. And this is Stephen Thal with another segment on Focal Point and we're interviewing Heather from the Yukon plant and Science program and they offer a lot of help to citizens in the state. In terms of not only analyzing the soil, but talking to you about the different kinds of plants or herbs that you might want to consider starting and what has to be done to maintain them, and we know that Climate change has strongly impacted the way we have to do our season so that we can take all of our hard labor in to make sure we get some good results and not have it fail for us during the during the coming growing season.
00:14:20 Stephen Thal
I think it.
00:14:20 Heather Zidack
Yeah.
00:14:21 Stephen Thal
I think it forces us to have a have a little more time to work with this.
00:14:30 Heather Zidack
Yeah, it's really interesting. You know the frost date is a big thing that's important when you start planting seeds and when you start planting outside, especially with vegetable gardens and a lot of gardeners-
I remember, even when I was young, used to plant right around Mother's Day, which is in mid-May. In the past couple years, we probably could have done that, but you have to really watch the weather.
I've seen a few seasons where you're waiting past Memorial Day, which is the end of May at this point, and it's-For me, Memorial Day has become more of that target. Be like-this Is definitely the weekend things are going to go in.
You can keep an eye on the weather. And as long as the weather is staying above, you know, we're not getting frost. You can put your seedlings out, but you're taking a risk because we can have a frost anytime in that spring, part of May, and if you do you can lose your seedlings, so if you do put anything in the ground a little bit early do so with caution.
Keep an eye on the weather and be prepared to be able to run out and cover them if you need to. We always recommend like fabric coverings like either a towel or a sheet or a pillow case or something like that to cover your plants if they're in the ground and we have a frost coming. Using anything like plastic is definitely going to exacerbate the problem and cause more damage when it comes to frost and freezes than anything else.
So I would say. Look at your frost date.
I know the Farmers Almanac has a target frost date that you can look up, but if you want to play on the super safe side, I plant right around Memorial Day and that's a good time to plant, be outside and make sure that you're keeping an eye on the weather when you're putting things out.
00:16:21 Stephen Thal
Are there specific questions you should be asking the local gardeners or when you go in and buy things? To make sure you're getting the things that you want, especially the different plants.
00:16:35 Heather Zidack
Yeah, you want to look for quality seed whenever you're purchasing. In general, most garden centres have. Seed that is timely. So you're going to see, just like we have certain products in the grocery store that have like an expiration date. There are seeds that have that date planted on the back.
They should be packed for this year and I believe they have to sell seeds that are packed for this year, so that's not something that you have to worry about too much, but it is good to know where to look for that information. Look at where It will say “packed for” and then it will have the year on there.
It'll also show the germination rate, which is how well, the seed will actually sprout. That's advertised on the envelope as well as like a quality control and so you want to make sure that it's got a good germination rate.
I've seen seed products before that I've purchased where they had a note on the envelope that said last year we had a low germination rate. So this year we're giving you extra seed and in the envelope it was a little heavier pack than what it had been in previous year.
So you want to make sure you've got a good germination rate. You want to make sure that there's a a date that's packed for this year. Those are both more important than anything like brand. You want to make sure that you're looking for good seed when you're starting.
Something to keep in mind is that there are- if you are someone who saves seeds from year to year, you want to make sure you're storing them well. Keeping them in a cool, dry area.
And if you do have seeds that are either seed that you've saved and you have a history of, like plant disease in previous years, or if you've bought untreated seeds and you have a reason to have concern that maybe you had some kind of, you know, plant disease a previous year. You can have your seeds treated with something called hot water seed treatment and our plant diagnostic lab does that.
00:18:37 Heather Zidack
To help make sure that there are no pathogens on the feed when you plant them in the ground to give them a healthy start. So that's an option, especially if you have a history of disease in your garden that some gardeners do like to take advantage of.
00:18:52 Stephen Thal
Oh, that's good.
00:18:53 Stephen Thal
Are there any special plants that some of the gardeners may be putting out this for sale that we need to be aware of, especially for the disease?
00:19:04 Heather Zidack
So you want to be careful with-I will say if you're looking at things like plant swaps and you're going to like Garden Club plant swaps and things like that, we did help out a lot of garden clubs last year as they were looking at how to do this while still being aware of the jumping warm issue. And so jumping worms are an invasive worm that are going from property to property and the best way to make sure that they don't transfer between properties is to make sure that your roots of your plants are cleaned off.
So. A lot of, especially at plant swaps, a lot of these garden clubs were having people dig their plants that they were willing to donate. Rinse the plants off at the roots. Repot them into soilless potting media.
And then they were willing to trade them and and exchange them at these swaps.
So you want to make sure if you are going to plant swaps, they are taking some kind of precaution like that and if they are not, you can still take the plant home but you want to make sure that you're doing the rinsing of the roots to make sure that nothing is coming onto your property.
00:20:18 Heather Zidack
We had a lot of garden clubs that were able to take some of these procedures and be very successful with their plant swaps and not have to worry about it at all. But education is that first step in knowing how to manage this issue right and so that way they knew that they had to rinse the roots. They had to keep their gardeners educated on how to prevent this from spreading, and they were able to still have plant swaps and stuff, so not encouraging any fear of plant swaps.
Just kind of giving you that heads up of tou may need to wash the roots if you bring some.
00:20:50 Stephen Thal
Yeah, those are very important things. And I think also as a person who may be out with your plants or just sitting in the yard admiring them, I think we need to remind people to wear their sunglasses and to wear a hat and use proper sun protection.
00:21:07 Heather Zidack
Very important. I always used to tell my colleagues when I worked at a garden center, I'd say water the plants and water yourself.
00:21:16 Stephen Thal
That's good.
00:21:17 Stephen Thal
Yeah. Good.
00:21:20 Stephen Thal
Any other items you'd like to have us our listeners be aware of and enjoy their spring fling in the garden and in their house plants.
00:21:32 Heather Zidack
Yeah. One of the things that I would love to make everyone aware of is that the Connecticut Flower and Garden show is coming up at the end of February. It's going to be February 20th to 23rd at the Hartford Convention Center and the Home and Garden Education Center, Myself and my colleagues will be there answering garden questions.
So if you have garden questions, please feel free to stop by and say hi to us. We've also got speakers that are going to be there every single day. And it's a nice taste of spring because a lot of local landscapers and garden centres will do full on displays.
00:22:10 Heather Zidack
It's very cold. We're starting to see Snow and it's nice to take a break and just have that smell of fresh flowers all around and everything. So it's a great opportunity to get a taste of spring. And get your garden questions answered. If you need to see us. So it's really good coming up.
00:22:29 Heather Zidack
The other thing that I have for advice, if you're looking for spring a little bit early is if you have anything like Dogwood, forsythia, crab apple in your house or in your property, you can take cuttings of them and put the branches in warm water.
And they could force the flowers to open right now. So you could get a little bit of spring early in your house by doing that.
00:22:53 Heather Zidack
The other thing that's really important to keep in mind is that if you are an avid gardener. It's a good time to take any of your tools that are in the shed and make sure they're in proper working order. Make sure that all of the handles are tightened.
Make sure everything is sharpened if it needs to be sharpened and paint the handles with a bright red or bright orange paint to help you see them when you put them down in the garden.
00:23:17 Stephen Thal
Yeah. And I think also lawn mowers or any working tools like that should be taken to a mechanic to make sure everything's working.
00:23:24 Heather Zidack
Absolutely anything with an engine. Don't do yourself.
00:23:30 Stephen Thal
Yeah. Sounds like you've had some experiences.
00:23:34 Heather Zidack
Yeah.
00:23:35 Stephen Thal
Now in terms of plants, we have to watch out for some of these poisons that may be used to help plants. Are there any that we should avoid?
00:23:47 Heather Zidack
So most of the ones, fortunately, that you want to avoid too much are not allowed for sale to homeowners. That's a really, really good thing.
What you want to make sure that you're looking at if if anyone is using any chemicals in the garden. Every single product has a label on it, and that label has to match whatever you're trying to to achieve, right?
So If you're trying to eliminate cabbage worms, for example, in your garden. That label needs to say that that product will take care of cabbage worm.
Otherwise you should not be using it whatsoever, and so we say this recommendation with any chemical, but also all of those home remedies that you hear about. We don't recommend using them because there's not that science to back it up that says this label identifies the cabbage worms. And cabbage worms are my identified problem so this is going to work. So that's one of the first things.
00:24:45 Heather Zidack
The other thing that's really important in making sure that you're monitoring regularly and looking for bugs. Because a lot of times if you can take care of the problem early, you don't necessarily need those chemicals. Or there could be other ways to manage it before you get to that point. So as soon as you see something, get a picture and we could help you or have someone at a garden center help you identify what's what's going on. And what you can do to treat it.
00:25:14 Heather Zidack
Reading that label is the most important thing that anybody can do, and it's the safest thing because you want to make sure you're doing targeted approaches to target species when you're using any chemicals in the garden.
00:25:27 Stephen Thal
Yeah. And also if you have a bug you're not familiar with, put it in a little container and send it up to you guys.
00:25:35 Heather Zidack
Yes, we can do that. We do insect identification-insects found in the garden. If, if they're found inside the home, we usually recommend like either a pest control expert or there's other resources available, but we are definitely able to do any garden pest.
00:25:53 Stephen Thal
Yeah. How about the got local garden clubs? Can they be helpful too?
00:25:58 Heather Zidack
Sometimes! They actually have some good resources.
00:26:03 Heather Zidack
If you're looking for an identification or a diagnosis, it really is good to come to the either the plant diagnostic lab or our office here because we have the connection to the diagnostic lab. But there are garden clubs. There are a lot of people with a lot of knowledge about gardening. The the reason that we we pride ourselves on is because we have a lot of research based information that we’re able to share with our clients.
00:26:31 Stephen Thal
Well, we want to thank you for coming in and sharing this vital information for getting your spring things started.
00:26:40 Heather Zidack
Thank you so much for having me.
00:26:40 Stephen Thal
And you know well, give us a call when the neck was a fall we have to get ready.
Or. If there's any alerts, we can send them out.
00:26:50 Heather Zidack
Yes, I will let you know if there's anything else.
00:26:55 Stephen Thal
Well, I thank you very much, Heather, for coming on again. At the program we really enjoyed.
I'm sure I got a lot out of it and I'm sure people here got a lot out of it.
Appreciate you and your staff for all you do, why don't you give your number one more time?
00:27:12 Heather Zidack
Yes, if anybody has gardening questions for us, they can call and our number is 877-486-6271. Again, that's 877-486-6271.
00:27:31 Stephen Thal
OK, very , good. Thank you. Everybody thank you.
Thank you for all you do to help make us a successful spring season.
00:27:39 Heather Zidack
Yes, thank you for having me. Have a good spring!
00:27:41 Stephen Thal
Like this is Steven Thal and another segment on focal point and we wanted to thank you the listeners for listening to all of the focal point programs.
00:27:53 Stephen Thal
As we mentioned earlier in the program, please wear your sunglasses and a hat because the sun is going to be a lot stronger this year because of climate changes.
And also practice a family plan. If you don't know anything about it, contact a local fire department or go on the computer regarding emergency fire plans and involve everybody in in the House and doing a piece of it. And if you practice it a few times and also make sure that. Your fire alarm batteries or whatever are up to date cause a lot of them today are lasting 10 years.
So get involved because life you say may be your own.
00:28:36 Stephen Thal
Thank you for allowing us into your homes. Safe and stay healthy.
