By Nick Goltz, DPM, UConn Home & Garden Education Center, Plant Diagnostic Lab
The autumnal equinox, one of two times of the year at which day and night are equal in length, just passed on Sunday the 22nd. While this point marks the astrological start of fall, many of the trees lining the roads on my drive to work (and in many of our clients’ yards) seem to want to get a head start on the season. Since late August, we’ve been getting calls from folks across Connecticut asking why the leaves on their trees are changing color and falling early. You may even be thinking, “Hey, a few of my trees are dropping their leaves early too. Is that something that can indicate how healthy they are?” In a word, maybe!
First, let me share the good news that, for most trees, premature color change and leaf drop doesn’t mean that they are in any immediate danger. Plants, much like humans and other animals, respond to stress differently depending on their environment and the kind of year they’ve been having. Just like we might see a little hair loss after a particularly stressful few months, trees may drop their leaves early as a response to stress. Identifying what is causing the stress however, is important when deciding if concern is warranted.
What type of stressors might be causing this early color change and leaf drop? For most trees, the answer is water. Connecticut and several other states in New England had a series of heavy rain events and flash flooding throughout the summer. While we’ve had hardly any rain in the land of steady habits for several weeks now, for many trees, the damage has already been done and symptoms are just appearing now. Saturated soils deprived plant roots of oxygen, damaging them and making them more susceptible to disease. Plants in especially low-lying areas, caught in floodwaters, or grown in poorly-draining clay soils likely experienced the most damage and earliest leaf drop. Some plants may have even perished outright from the damage. Besides water, excessive heat and the increased prevalence of fungal and bacterial diseases, as well as some insect pests, may have also contributed to the stress our plants are letting us know about now.
So, how can you know if the early color change or leaf drop is an issue for your favorite tree or just its way of complaining about a stressful summer? When and where the leaf change and drop is occurring can help you determine if the damage is likely a normal stress response or due to something more sinister.
Consider when the color change and leaf drop first began. In this instance, seeing some leaves begin to change in the last week of August is less concerning than seeing them change at the end of June. Plants that have their leaves change color and drop in midsummer or earlier are most likely dealing with a disease or pest issue, rather than a stress response. I recommend you get advice for these plants by contacting the UConn Home & Garden Education Center and remove them from your garden if they are unlikely to recover.
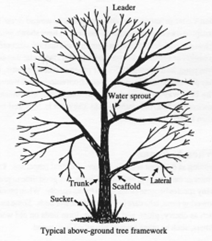
Also, consider what part(s) of the canopy was affected. Conifers such as white pine drop their leaves (we usually call them needles) in response to stress too, but you will typically see this take place on the interior of the plant – the older needles that aren’t capturing much sun anymore. Branches on deciduous trees, such as oak, that are in shady spots tend to drop their leaves early too, and this is normal.
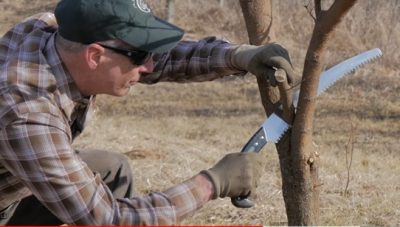
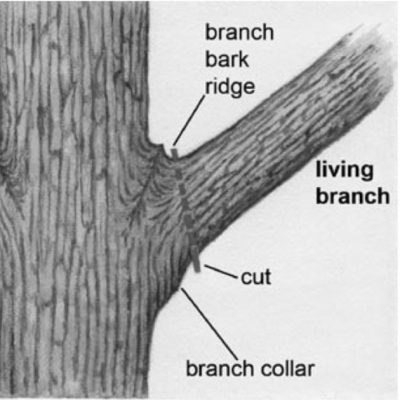
Branches in full sun that lose their leaves very early, while others on the tree remain fine, are a bit suspicious. Mark these branches with tape or string and monitor them carefully as the plant produces its first leaves or flowers in the spring. If these marked branches do not produce leaves or flowers with the rest of the tree, get advice (again, by contacting the folks at the UConn HGEC)! The best option is usually to cut them close to the main trunk, then disinfect your pruning tools.
If you’re concerned about the health of your tree, including as a result of a potential disease or pest issue, practice good fall habits to give your trees the best foot forward next spring! Clean as much leaf litter as possible and remove it from the base of trees that dropped their leaves early. If you suspect the plant is diseased or has pests, throw away these leaves or burn them before composting. For example, many plant pathogenic fungi can survive the winter on fallen leaves and reinfect healthy plant tissue the following spring. It’s also a good idea to minimize added stress for your plants. Try not to expose them to herbicides, deicing salts, fertilizers, or other chemicals until they’re looking strong again.
If you aren’t sure how to proceed with your fall cleanup or if you’d simply like a second opinion on your favorite tree, get free horticultural consultation from the UConn Home & Garden Education Center by emailing ladybug@uconn.edu or by calling (877) 486-6271.